3D projects, Tutorials

SKINNY MINI TREAT BAG HOLDERS!

A few weeks ago I shared the Easter Baskets I made for the upcoming Easter markets.  I made a few cute treat holders for the markets too.  I have been wanting to show you the project for a couple of weeks but with Easter and Sale-A-Bration there were so many other projects to show you. 🙂

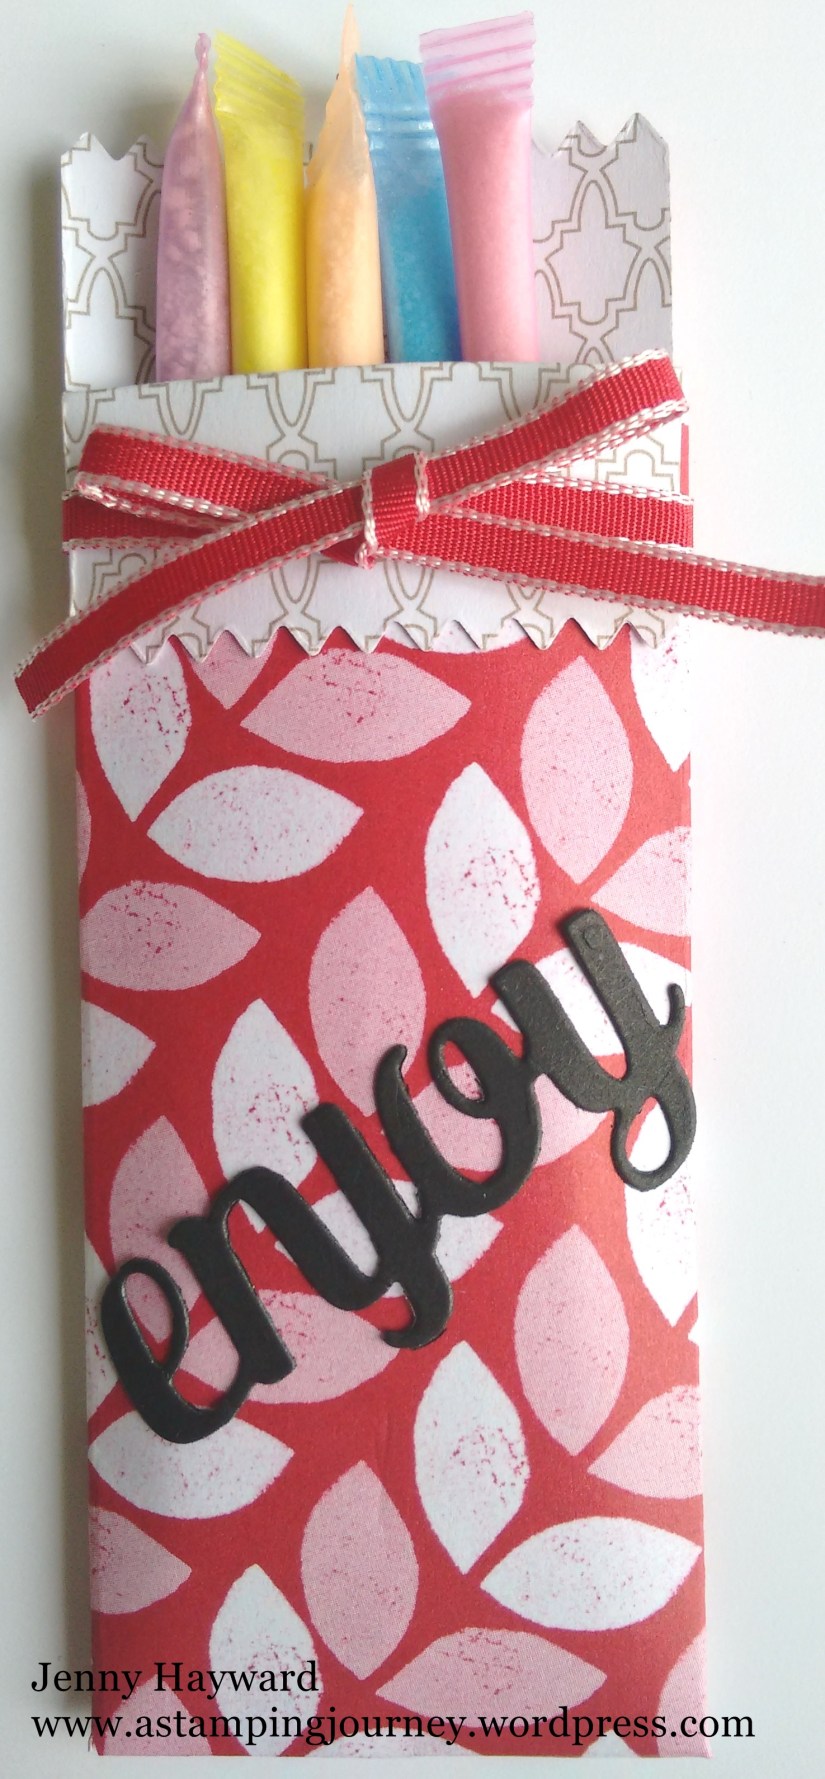
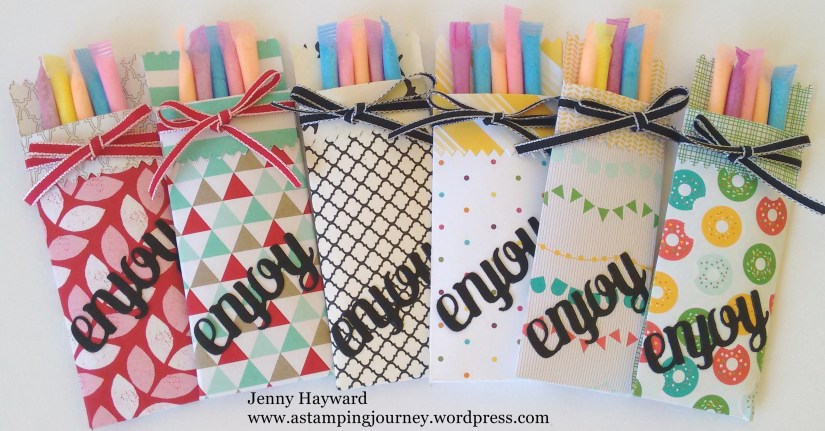
These are really quick to make and you can use them for any small treats.  Here I have some little sherbet straws for the kiddies but you could add a chocolate treat or coffee sachet.  I have used some retired Designer Series Paper.

448

447

Aren’t they fun and colourful?? I have simply decorated them with some ribbon (retired) and cut the “enjoy” (which is in the Mini Treat Bag Thinlits set), from black card to add to the front.  Really they probably took all of one hour to make.  I didn’t have a lot of time but wanted something cute but inexpensive to add to my stall.

Do you want to know how to make them?

SKINNY MINI TREAT BAGS

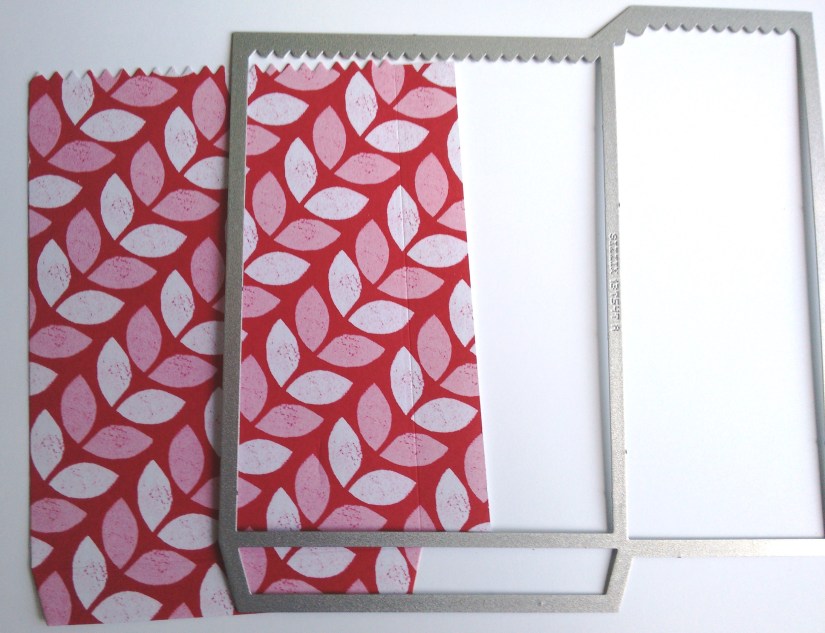
1. Cut a piece of Designer Series Paper (DSP) a little larger than the large section of your ‘Mini Treat Bag Thinlits’= 10.5cm x 15cm (4″ x 6″).  Cut the piece out on your Big Shot.

442

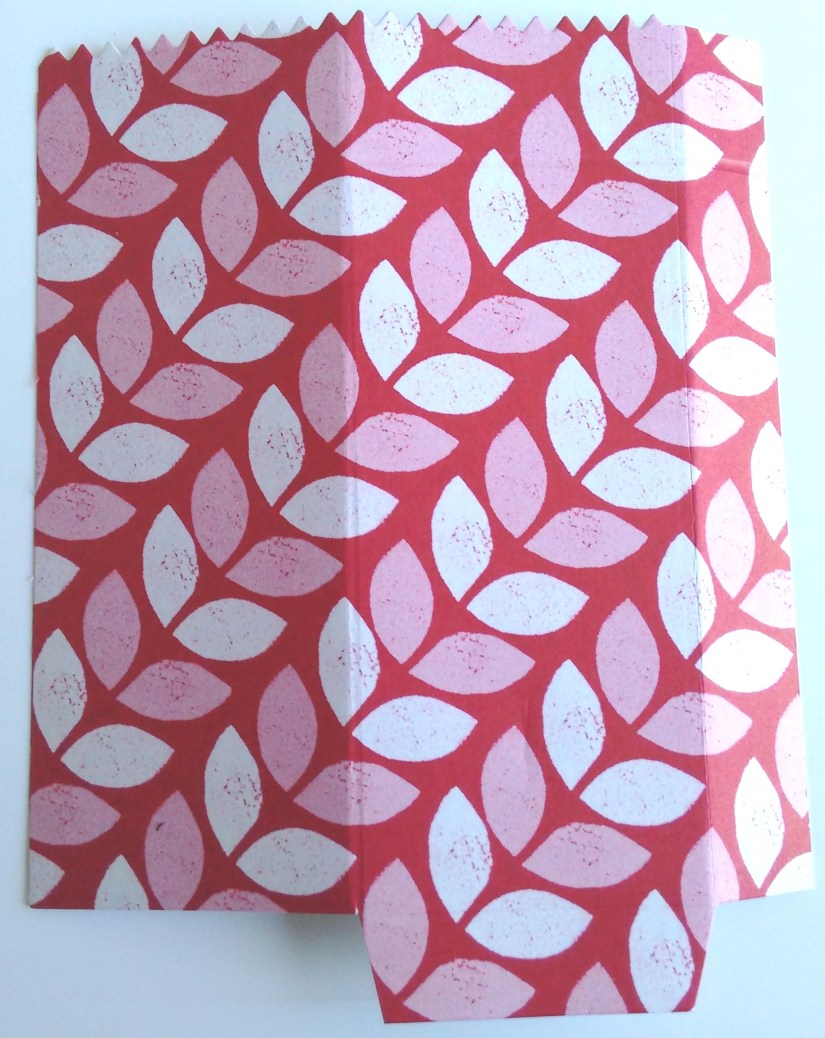
2. Score the large section in half vertically so at approximately 4.6cm (1 7/8″).  The photo below shows the DSP piece with the right side facing up. Cut off the left hand side on the bottom tab section.

Place your piece on your Paper Trimmer with the narrow side tab at the top.  Line up your zig zag edge at 2cm (3/4″) and score a line from the top edge and just to the score line in the middle.

444

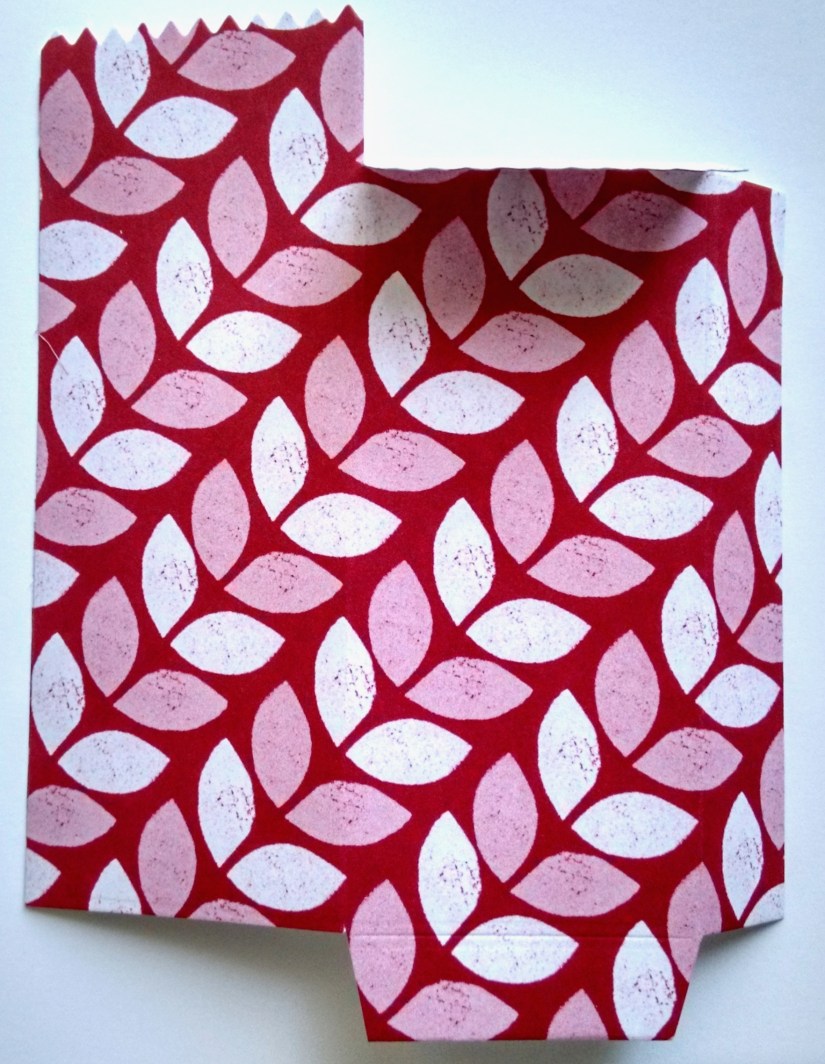
Cut off the small tab on the top left with your scissors. (Which I hadn’t done yet in the photo). I like to taper the end of the long side tab to give a neater finish when you fold.

3. Fold on all the score lines and open out again. At the top cut down on the middle score line to where it meets the 2cm (3/4″) score line running across.

445

4. Fold again on the score lines so the folded flap piece is at the front and the taller section is at the back. Place adhesive on the right side (the outside) of the long tab and fold to adhere to the back of the bag with the tab section on the inside.  (It doesn’t matter too much if it is adhered to the outside. Just for a neater finish I like it on the inside).

Place adhesive at the back of the small bottom tab and fold over to the back to adhere down. (I wasn’t worried that this was on the outside at the back). Place adhesive under the front flap to adhere down.

Decorate as you like and fill it with treats you would like to give.

446

I hope this is easy to follow for you. Please let me know if you any questions.

Enjoy 🙂

cards, Stampin' Up!

CREATIVE PLAY DAY WITH BOTANICAL BUILDER FRAMELITS!

I had some creative time yesterday just to play.  It was so good.  I don’t have a lot of occasions to do this for a whole day.  Good for the soul 🙂

After I made some customer Thank You cards (which I will show you next post) I could play with the Botanical Builder Framelits.  I only got the framelits recently.  I was NOT going to get these.  Nup,  I don’t need them, BUT I saw so many gorgeous things created that one day they slipped in to my order on Hostess rewards.  Just one of the many perks being a demonstrator. 😉

So I thought I would show you what I made.  I think I only touched the tip of the iceberg here.  So much to make with them.

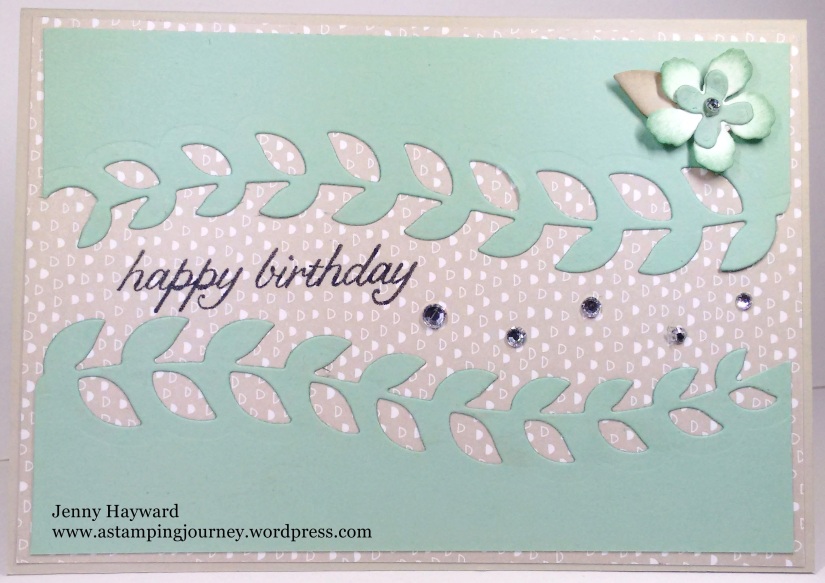
I saw this idea on a Facebook group I am on to use the leaf border as the centre border on a card.  I thought that was clever. Have to say though it was harder to work out than it looked – and maybe cut the right side of the card!  Here is the first card.  I am still not too sure of it. I thought I would show you anyway.

image-6229

The base in Sahara Sand and the Designer Series Paper piece is from the ‘It’s my Party’ Paper Stack. I think the colour of the DSP leaves it looking a little flat. I cut a piece of Mint Macaron card slightly smaller and then cut the leaf edge from the centre.  Just check which way you need to cut it first!!!

The sentiment is from ‘Birthday Blossoms’ set stamped in Black. I added some Rhinestones but still thought it was missing something.  After I cut some flowers for another card I added a flower to the top right.  The flower is in white and I sponged the edges. I don’t know, what do you think?  Missing something?

Well after making this card I tried another one this time in Island Indigo.

image-6228

I do like this version better.  Maybe it’s a bit brighter? I added some Adhesive Pearls to this one.  The sentiment is from ‘A Dozen Thoughts’.  This might work for a wedding card?

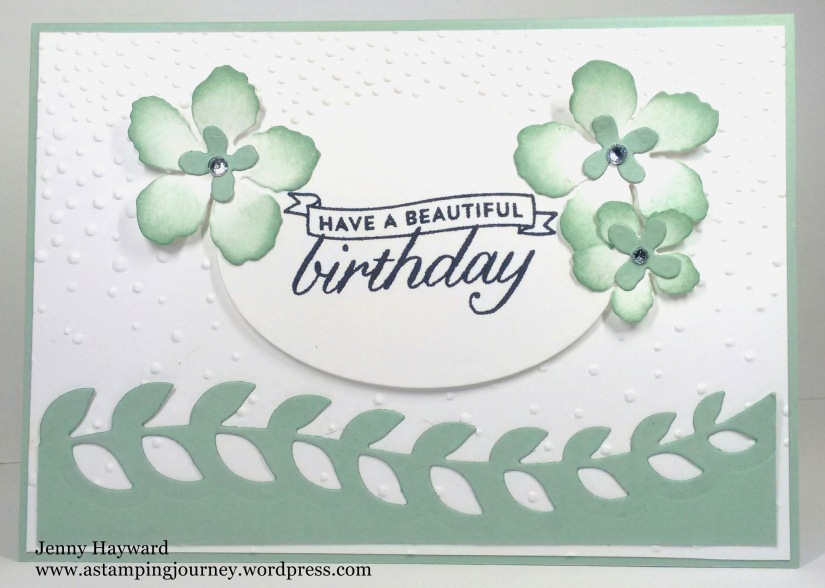
When I made the Mint Macaron version above I first cut it wrong.  Rather than waste the piece I thought I would make another card.

image-6231

I added the strip along the bottom of a Whisper White mat which I had embossed with the ‘Softly Falling’ Embossing Folder.  The card base is Mint Macaron.  This sentiment is also from ‘Birthday Blossoms’ which I cut with an Oval Framelit.  The flowers were cut in White and then sponged with some smaller Mint Macaron ones in the centre.

I can’t wait to get back to playing with these some more to see what else I can make.  Lots of versions layering and sponging!!

Thanks for visiting.

Jenny

cards, Classes

WATERCOLOUR FUN CLASS!

Watercoluring  is all the rage in the crafting world, have you noticed? We are focusing on 2 fun watercolouring techniques in our class this Saturday.  I hope you can join us.

Here are the details.

SATURDAY 9TH APRIL 2PM

We will make 2 fun cards with different watercolouring techniques.  Here is a sneak peek for you.

Please RSVP by Thursday 7th.

COST:   $15

BYO: Scissors and Adhesives.

I hope you can come. 🙂

3D projects, cards, Sale-A-Bration, Stampin' Up!

CARD IN A BOX FOR A 2 YEAR OLD!

I can finally share this card with you.  I was so excited to finish this card but it had to wait. It’s kinda cute.  🙂

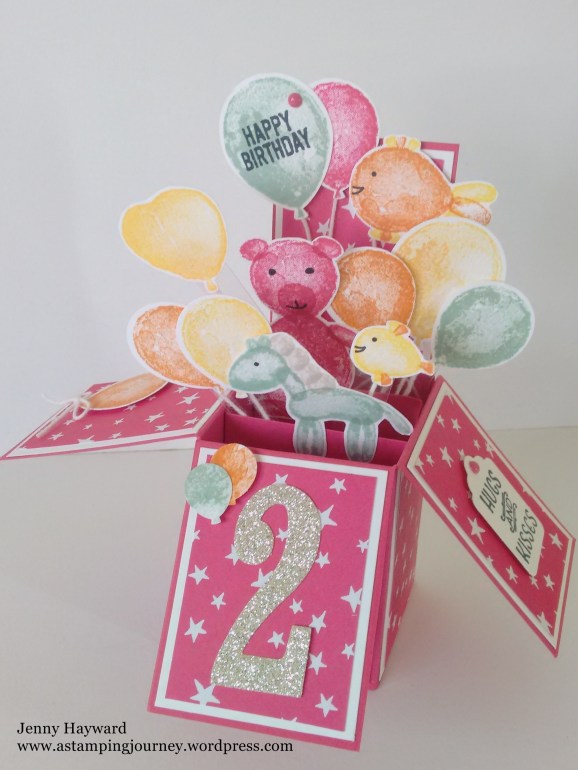
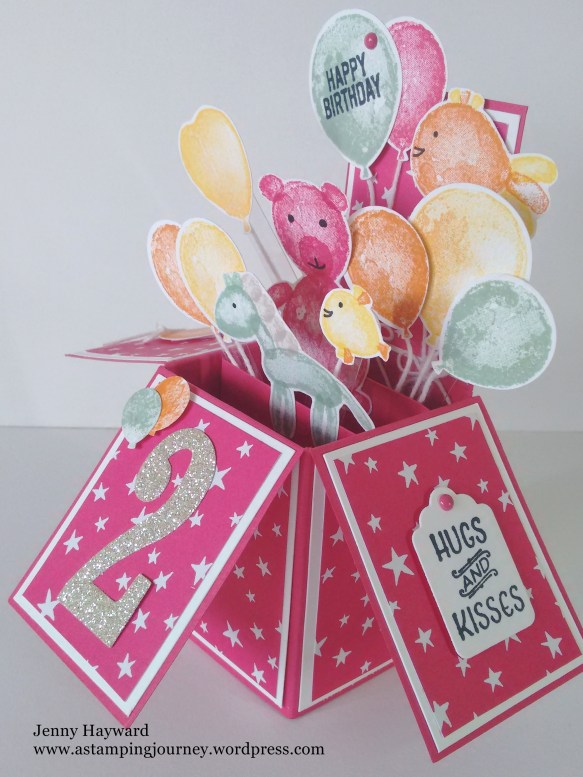
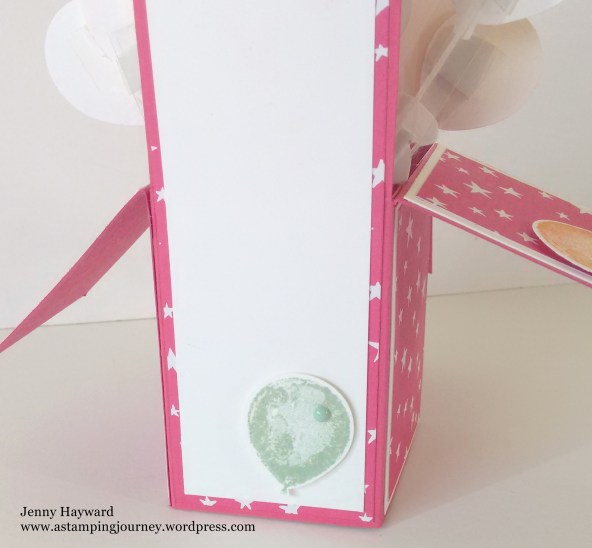
I was asked by a friend to make a special card for her 2 year old.  Things she liked was pink, purple and orange – and fish! How to incorporate all that??  I decided to go with the ‘Balloon Builders’ stamp set.

So, here it is for you. I have a few different angles for you.

image-6111

image-6113

The “Hugs and Kisses” sentiment is from the ‘Party Pants’ Sale-A-Bration set.  The ideas for the different balloon animals were from Pinterest. I had to incorporate a couple of fish in there somewhere. 😉  The Designer Series Paper is from ‘It’s My Party’ paper stack.

image-6110

And the back gives a place to write on.

image-6108

What do you think?  This was a labour of love and I had so much fun creating and it was very well received.

Thanks for visiting me.

Jenny

Sale-A-Bration, Stampin' Up!

SPARKLY BOTANICALS FOR YOU!

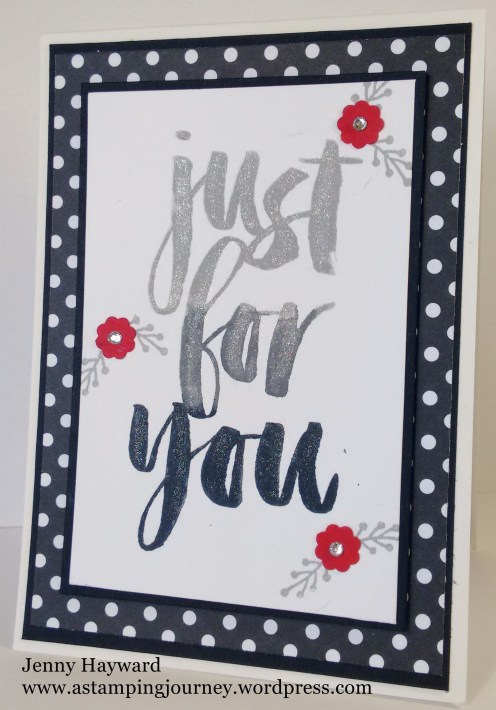
LAST DAY OF SALE-A-BRATION FOR 2016! Are you sad?  I can’t believe it.  Today I have my last card to share with you for Sale-A-Bration using the ‘Botanicals For You’ set. This one I made a few weeks ago at a stamping day at my friend Leonie’s.  She CASED it from Pinterest and I CASED it from her.  That’s what friends are for right. 🙂

image-5377

To get the 3 colours on the image I inked up the top 1/3 in Smoky Slate, then inked the bottom 1/3 in Black.  Then with the Basic Gray marker I coloured in the centre.   The stems are stamped in Smoky Slate.  Then I added some little red flowers for some ‘POP’ of colour.  These flowers are punched from a retired punch.  I can’t remember what that is. It is all layered on some Neutrals Colour Collections Stack with black mats and the base is the Thick Whisper White.  The card is cut lengthways on the card sheet and scored half way so the opening is at the top.

You might not see too well but I stella-d the words.  (Yes, that is a new stamping term didn’t you know!).

just for you

I went over the words with the Clear Wink of Stella Brush for some sparkle.

I did decorate the inside but forgot a photo.  I just added a strip of the DSP and then added another red punched flower.

OK, so I hope you have all your Sale-A-Bration orders in? Tomorrow is too late.

Thanks for visiting me today.  I will see you again,

Jenny 🙂


cards, Sale-A-Bration

HONEYCOMB HAPPINESS CHICK!

Tomorrow is the last day of Sale-A-Bration for the year! Do you think this time has flown by too?  Crazy! I am squeezing in a couple of last minute Sale-A-Bration cards with you.

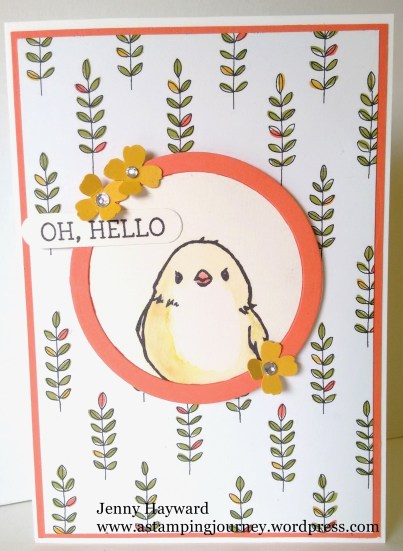
I have loved colouring this little chick from ‘Honeycomb Happiness’.  Isn’t his (or her) face sweet? This card I made a few weeks ago to send out to a few customers I haven’t heard from in a while.  The idea came from Pinterest.  I changed the size to make it a standard size card.

hello

I have coloured the chick with the Hello Honey inkpad and aquapainter. I love how he is peeking out from the circle.  I cut 2 circles in Calypso Coral card and created a window frame for him. I have layered it on the Sale-A-Bration paper ‘Wildfower Fields’ and layered this to a Calypso Coral card mat and then a Thick Whisper White cared base. The card was finished off with some punched flowers using the Itty Bitty Accents Punch Pack and some Rhinestone bling.

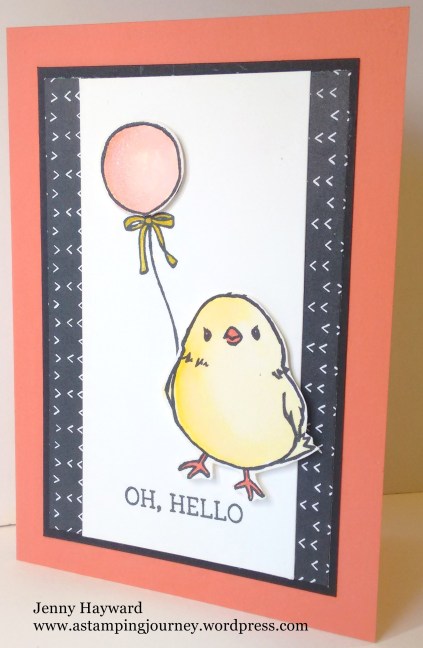
This next card was made for a friend’s daughter who is not well.  I just thought I would cheer her up.  This card was also cased from Pinterest.

Kate's card

The chick is once again painted with the Inkpad (Daffodil Delight) and aquapainter.  I cut it out and raised it up off the card with dimensionals.  I stamped the balloon on the card and then stamped it again separately and raised it up.  The Designer Series Paper is from the ‘It’s My Party’ paper stack and matted on Black and then on the card base of Calypso Coral.  You can’t see it but I did add some Wink of Stella  sparkle on the balloon.

Don’t forget to get your last minute Sale-A-Bration orders in.  I am taking orders until 8pm tomorrow night or you can order online at my store HERE.

Thanks for visiting,

Jenny

Sale-A-Bration, Stampin' Up!

TICK, TOCK. TIME IS TICKING AWAY!

tick tock

Sale-A-Bration ends THIS THURSDAY!  Not long left.

Have you been sitting on the fence about joining?  Still can’t decide whether you want $126 of free products? What is there to think about!

If you think once you sign up you are there for life.  Believe me, you can leave Stampin’ Up! anytime.  You receive free products of your choice when you join Plus discounts every time you put an order in. Plus you can meet some pretty awesome people like myself at regular Stampin’ Up! events. LOL! Now if that is not an enticer I don’t know what is. 🙂

Still not convinced? Read this post HERE.

You can join my fast growing team if you are anywhere in Australia.  I help you on your way to a fun journey with Stampin’ Up! You can join directly HERE on my website.

Still not for you?  Why not shop.  For every $90 order you can pick your free products from the Sale-A-Bration catalogue.

Shop HERE at my website.  I can ship anywhere in Australia.  Receive a special gift to say thanks. So please make sure you tick the box to leave your details. 🙂

Please use the HOST CODE: UHQJKWDT

SAB reminder card

Please don’t forget your order. Friday is too late. 🙂

Thanks for shopping with me.

Jenny

3D projects, Classes, Stampin' Up!

MORE EASTER BAGS AND TREATS!

Happy Easter

Happy Easter to you all.  I hope that the weekend will be a great one with those you love and that you remember the greatest act of Love we have been given as we celebrate this time.

Last post I shared some cute Easter baskets.  I thought I would share another Easter bag as well as some Easter tags.  It’s not too late to whip these up right! This bag and the basket from last post plus these 2 tags are ones we made at my Easter class last week.

image-6134

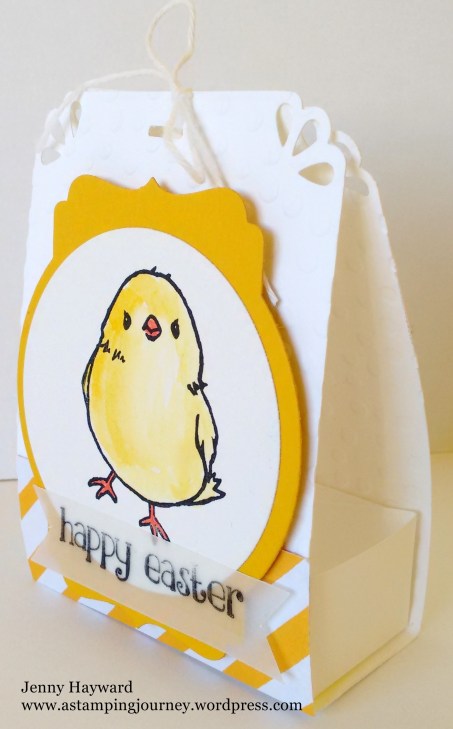
This little treat bag was inspired by a project I found on Pinterest but you can find the tutorial HERE. It’s very easy to make.  For mine I decorated it with the chick from ‘Honeycomb Happiness’.  This is such a great image for Easter don’t you think?  I stamped it on Shimmery White and coloured it with the Crushed Curry inkpad and the aquapainter. I cut the image with the Circles Framelits and layered it on a Crushed Curry card cut with the ‘Deco Labels’ Framelits.  The strip of DSP is from the ‘It’s My Party’ Paper Stack. I decided to stamp the greeting on Vellum in Black Stazon so it didn’t cover the chick too much. The greeting is from the ‘Easter Lamb’ stamp.  On the bag I punched the corners of the card with the Curvy Corner Trio Punch and added a slit with the punch too. I embossed the card with the Decorative Dots Embossing Folder too. Cute!

Inside there is a separate little box that you adhere to the inside.  It is so easy.

image-6135

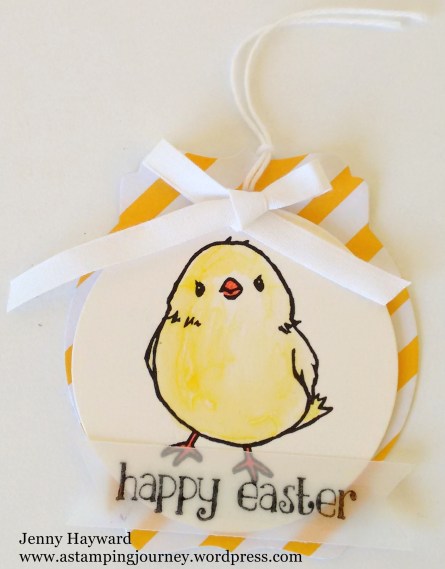
We made a similar tag.  This time I cut some of the DSP with the Deco Labels Framelits and I cut one with Whisper White as well to adhere together for added strength and also to have white card to write on the back.

I added a White Cotton Ribbon bow and some White Baker’s Twine to hang from it.

image-6138

This next tag we made was using the Easter Lamb stamp.  So cute.  The lamb was stamped on Sahara Sand and coloured with the White Gel Pen after it was  cut with the Circles Framelits. I cut some DSP from the Bohemian DSP with the ‘Lots of Labels’ Framelits and also a larger one from Bermuda Bay.  I tied through some Bermuda Bay Baker’s Twine. A little flower was added punched in Crushed Curry with the ‘Itty Bitty Accents’ Punch Pack. The greeting is from ‘Teeny Tiny Sentiments’ and I cut this one with the Bitty Banners Framelits.

image-6136

Now you can whip these up in no time – or file them away for next year 😉

Have a lovely Easter time.  Visit again soon,

Jenny


3D projects, Stampin' Up!

EASTER TREAT BASKETS!

Can you believe it is Easter in a few days?  I have been busy making some Easter Treat Baskets.  Some were for my Easter class last week but I also have an Easter Night Markets tomorrow so I have been getting ready for them too.  I thought I would show you some of the projects.

Here are some of the baskets I have made.

image-5308

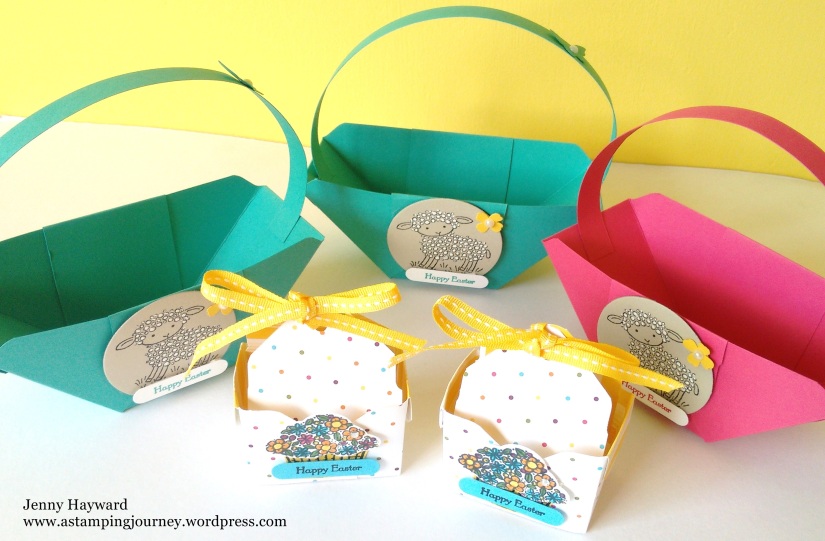
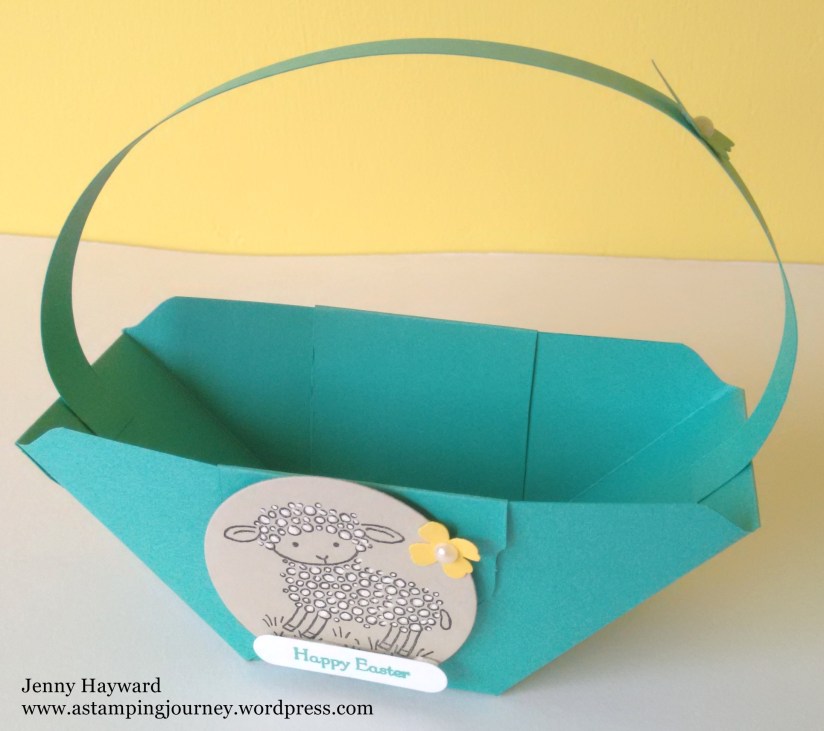
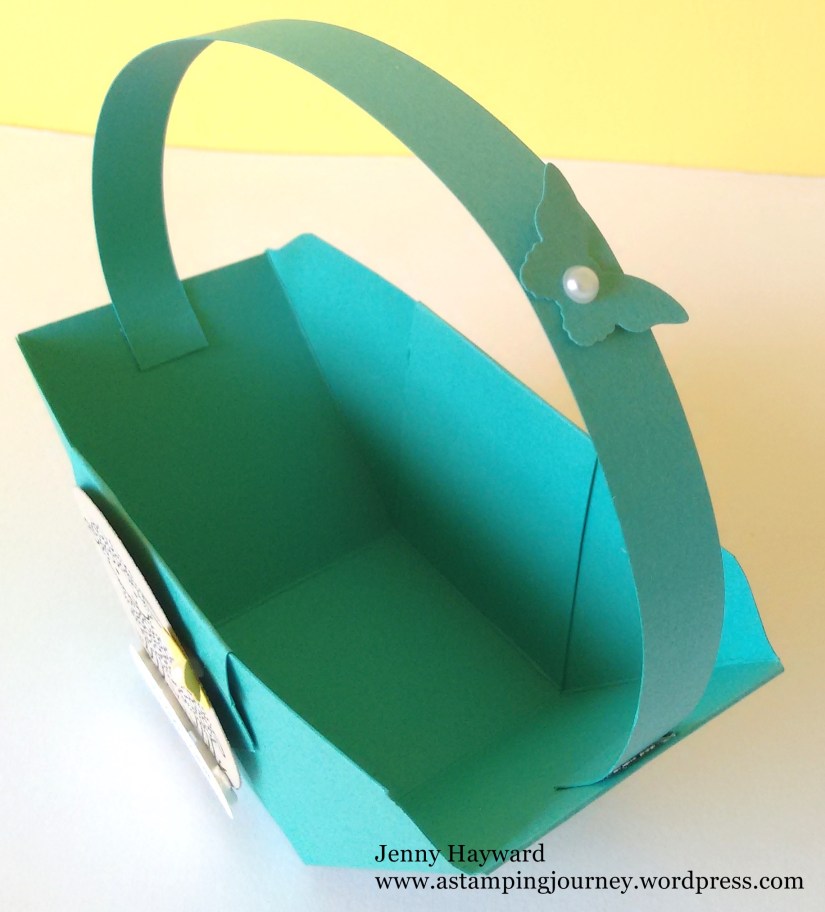
The Bermuda Bay and Melon Mambo baskets wereone we did at my Easter Class last week.We made them in the Bermuda Bay. This is made with the Envelope Punch Board.  There are a number of similar tutorials on the internet but the one I used for this basket was by Deb Valder and you can find that HERE.

image-5313

I stamped the ‘Easter Lamb’ on Sahara Sand and cut it with a Circle Framelit.  Then I coloured the fleece with the white Gel Pen.  I saw this idea on Pinterest which I thought was very clever. The greeting is from ‘Teeny Tiny Sentiments’ and I added a flower punched in Daffodil Delight using the ‘Itty Bitty Accents’ Punch pack.

image-5315

I added a mini butterfly punched with the ‘Bitty Butterfly’ Punch too to finish it off.

Now these cute little bags are made with the Envelope Punch Board too. (Have you got one of these punch boards yet? They do more than just envelopes!.  Add one to your next order.)

image-5316

These little bags are called Bag in a Box baskets by Sam on Pootles.  You can find the Youtube video to make these HERE.  I used some retired Designer Series Paper.
The little flower basket image is from the set ‘Sprinkles of Life‘ which is the Ronald McDonald House Charities stamp set.  I stamped the basket on Daffodil Delight and hand cut that out.  I stamped the flowers and punched this out with the punch. Then they were coloured with the Stampin’ Write Markers. The sentiment was stamped on Tempting Turquoise and punched with the Word Window Punch.  I tied it up with some Retired Daffodil Delight ribbon.

I have some more Easter ideas that I will share tomorrow so come back again. 🙂

Jenny