cards

PETITE PETALS MEETS FLOWER SHOP!!

One of the great features with the Stampin’ Up! products that I think many people love is how great they co-ordinate together.  Card, ink, ribbons co-ordinate.  Stamp sets co-ordinate with punches and dies.  What about stamp sets co-ordinating with other stamp sets??? Well, this new little stamp set available in the upcoming Occasions Catalogue looks great when used on it’s own but how great is it when you combine it with one of the other stamp sets!
P1110174

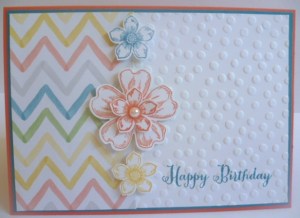
The small flowers are from the new stamp set ‘Petite Petals’.  There are 6 little flower stamps in the set plus there is a matching punch.  They are very cute on their own BUT why not layer them! Here I have added them with a flower from the ‘Flower Shop’ set.  For this card I have used some of the new DSP ‘Watercolor Wonder’. Absolutely gorgeous paper. You must grab some of this.  The colours and images are just beautiful.  The problem is though that each side is so beautiful it seems a shame to cover up one side to use on a card!  On the card I have also used the new Embossing Folder – Decorative Dots.  You can grab one of these for Free during Sale-A-Bration with a $90 order.  You will need that Embossing Folder too.  The greeting on this card is from ‘Remembering Your Birthday’. This card was inspired by a card I saw on Pinterest.

Hope you like what you see!!!

Would you like your own copy of the upcoming Occasions Catalogue and the Sale-A-Bration Brochure?? Let me know and I can send one directly to you. I am mailing them out now. (Australian Residents only).  You will be able to check out these products I have used on this card PLUS so many more great products. Don’t forget the freebies you can get during Sale-A-Bration with your $90 order!

Thanks for stopping by,

Jenny
cards, Classes

EASY WATERCOLOUR!!!

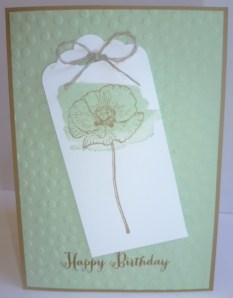
I have been playing with some new goodies.  You are going to love some of these new products coming out in the new Occasions catalogue.  The dilemma was what to play with first!  I did play around with some of the other stamps but thought I would show you this card first.  This stamp is from the stamp set ‘Happy Watercolor’ that will be out soon.  It has some great images.  You know the great thing about this set is that if you find watercolouring difficult this makes it so easy.  In the set are a couple of “splodges” if you like to call them that and you can just stamp over the image to create a watercolour wash.  No need for detailed watercolouring although you can still do that if you choose.  Too easy!!!

P1110171

Doesn’t this make you think of Ice-Cream???  LOL  Maybe it’s just the heat getting to me!

I have also used the new Scalloped Tag Topper Punch.  You can create tags any length you like.  Plus check out the Embossed Background.  This is using the Decorative Dots Embossing Folder that you will be able to choose for Free during Sale-A-Bration! How cool is it!!  Colours used are Pistachio Pudding and Baked Brown Sugar. I have just added a Linen Thread bow to finish it off and the greeting is from ‘Remembering Your Birthday’.

This is one of the cards you will be able to make at my ‘Upcoming Birthday Card Buffet’.  All the details you can find in this post here.  It is on February 8th.  Places are booking out fast so if you want to join us you better book in quickly.

Thanks for visiting.  Hope you are surviving the extreme weather conditions wherever you are.  In Australia we are having heatwaves but I have heard of all the extreme storms and cold in the UK and the US.  Stay safe!

Jenny x

cards

A DAY FOR WEDDINGS!!

What a beautiful day for weddings on Saturday.  Firstly, my nephew and his beautiful partner were married in the most gorgeous rock canyon setting surrounded by 200 family and friends.  Before I show you the card I made for them I have to show you a photo. Aren’t they beautiful????

P1110142

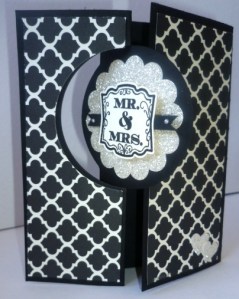
Now onto the card.  I used the circle Thinlets to create the card based on a similar design I made for another wedding recently.  You can see that card here.  For this card I have used the Modern Medley DSP and silver glimmer paper.  The “Mr and Mrs” from ‘Label Love’ was clear embossed after I stamped in versamark although you can’t see that too well.  I made the card base longer than the thinlet die so it could create a flap to fold over.

P1110118

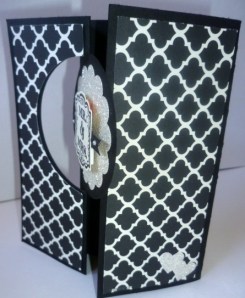
Here is a photo of the side.  This card is really hard to take photos of so sorry for the odd angles.  I added some hearts punched from the silver glimmer card too.  I forgot to take a photo of the inside of the card.

P1110120

Now for the second wedding card.  This was for my lovely friend Andrea’s daughters wedding. Unfortunately we couldn’t make it but Josh and Carlie went along.  I am sure you will see more details of the wedding on Andrea’s blog here when she can catch her breath a bit! Here is the card I made for Skye and Mitch.  It is the same design.  Why change it, although you would think I would have had this done in record time but I think it took me longer than the other 2 put together!!! I just couldn’t get the colours happening together.

For this card I used the ‘Venetian Romance’ DSP and Pistachio Pudding card base.

P1110122

Another odd angle!!  I wanted to show you the other side of the circle.  I cut a scallop circle from silver glimmer paper and stamped one of the labels in Pistachio Pudding.  The greeting is from ‘Fabulous Phrases’ and punched out with the 1″ circle punch to layer over it.  Not sure that I should have stamped the greeting in Island Indigo though???

P1110125

There you go.  Hope you like???  Thanks for stopping by.  See you again soon,

Jenny x

cards

I STAMPED!!!

Yes, I stamped! Not an amazing revelation really BUT it has been 2 weeks since I had touched a stamp.  That’s a long time for me.  It has been a good break though.  I opened up one of the new Sale-A-Bration sets I received last week and created not ONE but TWO cards!! Whoo Hoo!!  Here they are.  OK, they are both the same BUT….

P1110114

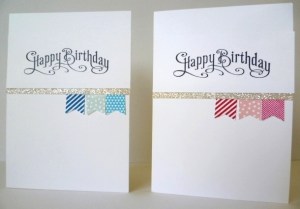
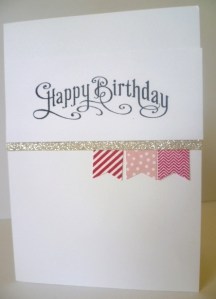
This card was inspired by a card I saw on Pinterest (sorry not sure who by though).  I changed the card to a standard size card.  I think the other one was a 10cmx10cm one.  I used the stamp set ‘Perfectly Penned’ and stamped this on a small strip of Whisper White in Black StazOn.  I added a strip of Silver Glimmer Paper underneath and added the small banners.  The Banners are from the Sale-A-Bration set ‘Banner Blast’ which is one of the Free choices you can get during Sale-A-Bration starting on the 28th January.  You can get a little Banner punch to punch them out too.  No hand-cutting here!! The Whisper White strip was then adhered to a Whisper White Card base.  The colours I used for the Banners on the card on the left were Pacific Point, Soft Sky and Tempting Turquoise.  The banners on the right hand card were Real Red, Blushing Bride and Melon Mambo. I was going to make some other colour combinations but I stopped there.  I wasn’t sure whether they were a bit plain.  What do you think????  Here they are individually to get a closer look.

P1110116

P1110117

I have just received my preorder of some of the goodies coming up in the new Occasions Catalogue.  This starts on January 28th.  I can’t wait to get creating with these goodies and share the projects with you.  There is so much to love.  I am having a little trouble deciding what to start with first!!  If you would like your very own copy of the new Occasions Catalogue and the Sale-A-Bration brochure then drop me a message and I will get one to you as soon as I can.

Happy Stamping,

Jenny

Stampin' Up!

HAPPY 2014 TO YOU!!

1.Sydney-Fireworks-Merry-Christmas-2014--620x330

Happy New Year to you!  I hope that 2014 brings you good health and happiness and that all your dreams come true.   I just hope it doesn’t fly by so quickly as this past year has.  I am excited what the New Year will bring especially for the new people that I can share stamping with.  I have just received my report in from WORDPRESS for my blog activities for 2013.  It is always interesting reading. I thought I would share a few facts.

Thank You to you if you are one of the 10,000 viewers to my blog in 2013.  Most visitors were from Australia followed closely by the US with visitors from many other countries.  I am excited that you stop by.  Thank You. I do hope you will continue to visit me as I share more projects in 2014.  Out of interest most of the viewers have come from Pinterest with Facebook a close second.   Would you like to know what my top posts have been this year??

The Most viewed post of this year was in fact just a recent post on November 2nd with the release of the Thinlets and the Envelope Punch Board.  The Envelope Punch Board has been one HOT item. You can check out the full post here if you missed it.  This is the project I shared for that post using the new Thinlets Framelits.

P1100508

The 2nd highest views was for my Large Tote Bag Tutorial which received a high number of views in 2012 too.  You can find the post which has the tutorial here.

Here is the photo of the Tote Bag.

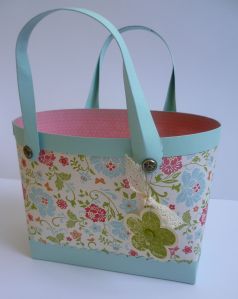
P1020995-1

I was intending to make a new one for Christmas with some of the great ‘Season of Style’ DSP but it didn’t happen.  I think when I get some of the gorgeous new paper from the Occasions Catalogue then I will make one up, so stay tuned for that one!

So, Thank You all once again for being with me in my blogging journey in 2013. I don’t really blog my projects for my benefit but I hope that I inspire you????!!!!  So stop by and visit.  Do leave me a comment.  It’s nice that you visit and I would love to know where you are from.

To more creating in 2014!

Jenny xx

cards

CHRISTMAS CARDS FOR US!

I hope you all had a wonderful Christmas Day.  Hard to believe after all the craziness leading up to it, it is now all done for another year.  Why does it get so crazy!!! We had a lovely Christmas Day though.  Church Christmas Eve and time with the family for Christmas Lunch.  It was nice and relaxing.

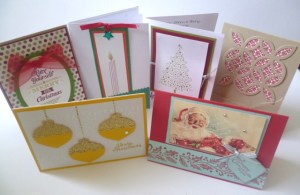
Today I thought I would share some special hand-made cards we received for Christmas.  They are all so gorgeous and it is always great to see new ideas.  I won’t go in to too much details of the cards.  If you want to know more about them or a closer look just let me know.

This first group is from my close Demonstrator friends.  How lucky am I!

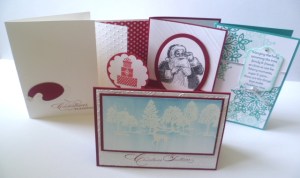
P1100878

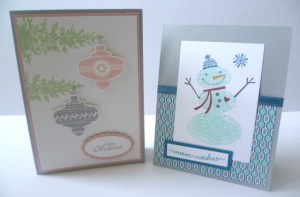
These 2 are from some special blog readers who have now become good friends.  The one on the left is from Lynda.  Thanks Lynda for your continued loyalty and encouraging comments.  Isn’t this a clever way of using ‘Lovely as a Tree’.  That set is so versatile.  The one on the right is from my lovely Blog friend Patti from the the US.  How cute is that snowman???  It has been lovely to get to know Patti over this past year.  Thanks for always stopping by Patti and encouraging me along the way. 🙂

P1100882

This next group is from some of my friends.  Some of them are from customers that I can now call lovely friends.  Aren’t they all so gorgeous??

P1100883

I hope you might feel inspired by this lovely mix.  I love looking at them and touching them.  They bring a smile to my face.

Thanks for stopping by.  Come and visit again soon,

Jenny x

cards, Punch Art

PUNCH KOALA CHRISTMAS!

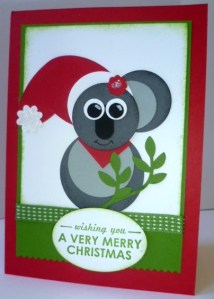
I made this special Christmas card for my blog pal Patti in the US.  I thought she might like a little Australian Christmas.  I know I can share it now because she has received it. The idea was CASED from a sample on a Convention board a couple of years ago so sorry I don’t know who to give credit too.  If you know then let me know.

P1100723

A number of punches were used to create my little Koala.  I had fun playing around getting his shape right.

1 3/4″ circle, 1 3/8″ circle, 1 1/4″ circle, 1″ circle, Extra-Large Oval, Large Oval, 2 step Bird Punch, 2 step Owl Punch, Boho Blossoms, Itty Bitty Shapes pack, Word Window Punch. His kerchief was made with a 2cmx2cm square of red card.  I also added some sponging and a little Dazzling Diamonds with 2 way glue pen and used white gel pen for his eyes and black marker for his mouth.  I think that about covers it.  He is very cute.

For the rest of the card, the greeting is from ‘Wishing You’ and I cut the edge of the Gumball Green card with the zig-zag edge from the Finishing Touches Edgelits.  Just a little strip of Gumball Green Satin Stitched Ribbon finishes it off.

Happy Christmas Patti.  Happy Christmas to all my blog readers.  I appreciate all of you who stop by and visit me.  I hope to share lots more in 2014 so keep visiting. 🙂

Jenny x

cards, Masculine

TAG-IT CONGRATULATIONS!!

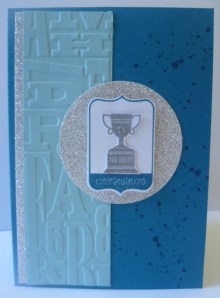
I know that we are in the Christmas season but I had to show you this card.   Yesterday Josh received his HSC marks.   For my overseas readers this is the mark achieved from the final exams at High School.  The mark determines the University courses they can apply for.  Josh achieved an awesome result and we are very proud of him.  He worked really hard.  So I wanted to let him know.  This is the card I made for him yesterday.

P1100874

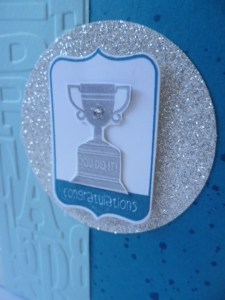
I have used the stamp set ‘Tag-it”.  Did you know that Stampin’ Up! will donate $3 from the sale of this stamp set to Ronald McDonald House Charities.  Isn’t that great!  I stamped it first in Island Indigo and then with Versamark and embossed it in silver.  Then cut the trophy out and adhered it on to the stamped image.  I added a small Rhinestone in the middle.  I think it is still OK to have bling on a boys card, don’t you think??

Once this was done it was all  layered on a Silver Glimmer circle punched with the 2 1/2″ circle punch.  I embossed a strip of Pool Party card with the ‘Alphabet Press’ Embossing Folder and layered a strip of silver glimmer paper underneath. I stamped the base card with ‘Gorgeous Grunge’ before assembling it all together.

Here is a close-up.

P1100876

OK, back to Christmas preparations.  We have only just got the tree up, there is still shopping to be done and presents to wrap.  Better get back to it!

Jenny

3D projects

IT’S A CRACKER!!

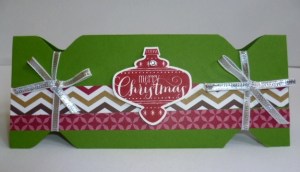
I have been wanting to share this with you for a while. Finally I can! Giving Gift cards are popular at Christmas so why not dress them up in a novelty gift holder.  Here is a Cracker Gift Holder made with the Envelope Punch Board.

P1100630

So how can you make it??  Check out the tutorial below.

1. METRIC: Cut card 14.8cmx14.8cm. Score your card at 6cm and 12cm. Fold on the score lines.

    IMPERIAL: Cut card to 6″x6″.  Score your card at 2 3/8″ and 4 6/8″.  (I hope those sound right as I am not too sure of the correct way to represent it!!).  Fold on the score lines.

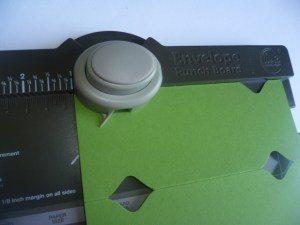
2..On the folded edge, line the left hand side of the card on the Envelope Punch Board at 2.5cm (1″). Punch.  It is a bit hard to punch through so press firmly.

P1100785

Flip your card over to the other end. Line up at 2.5cm (1″) and Punch.

 P1100786

3.  Now punch on the front bottom edge of the holder.  It is easier to open it out. Line up at 2.5cm (1″) and punch.  Then flip and punch at 2.5cm (1″) on the other end.

P1100788

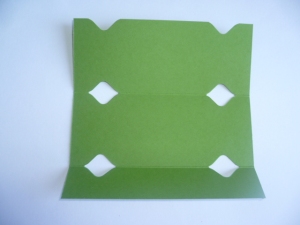
4. Fold up where the narrow scored line is. Does this make sense?? The part that forms the pocket.  Turn it over.  Line up at 2.5cm (1″) and punch, flip the holder over and punch again at 2.5cm (1″) on the other end.

This is how it should look when you fold it out.

P1100791

There you have it.  I hope this makes sense.  Please comment/email me if you are unsure.  Sometimes it is hard getting all the details in writing.

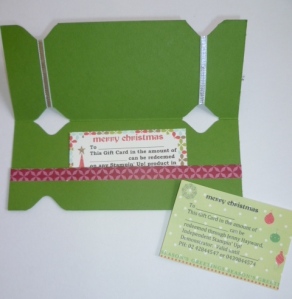
To assemble this, add Sticky Strip inside on the narrow edge on both ends.  Adhere together to form a pocket. Now decorate it as you like and then add your Gift Card.

Why not make it a Stampin’ Up! Gift card to give this Christmas??  These ones are available especially from me (Australian residents only).

P1100632

Now go and enjoy making your own Christmas Cracker Gift Card Holder.

Until next time,

Jenny