Uncategorized

INDIGO NATIVITY!

Is life busy for you at the moment?  I think we are all starting to feel a little time-pressured with Christmas preparations and shopping and the end of year activities.  Well, if you are feeling that way then you will understand my absence of late.  I am starting to tick off some really huge projects on my ‘To Do’ list so I think things are getting a little clearer – although I haven’t done a lot of Christmas shopping yet so I won’t speak too soon!

Anyway, enough of my rambling.  You are here to see what fantastic, exciting creations I have been doing.  I can’t guarantee all that but here is a card I created a couple of weeks and I hadn’t shown you yet.

P1100695

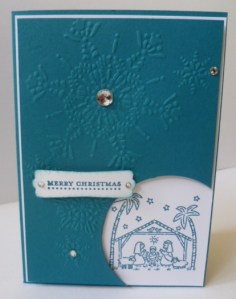
The layout is from a card I had filed away for a few years but thought it would work here.  The little nativity scene is from the ‘Best of Christmas’ set. (This is a great little set for $25.95 with some great images in the set).  It is stamped on Whisper White and then I cut a circle on the Island Indigo card with the Circles Framelits.  I embossed the card with the Snow Flurry Embossing Folder and added a few Rhinestones.  The greeting is from Teeny Tiny Sentiments.

Thanks for stopping by.  I do appreciate your visits to my little corner of blogland.  I really don’t need to talk to myself here!

Stop by again soon,

Jenny

Stampin' Up!

LOVE IS IN THE AIR – AT STAMPIN’ UP! ANYWAY!!!

This month is hotting up for the month of LOOOOVE, but you don’t have to wait until February to let someone you know that you think of them.  Check out these specials from Stampin’ Up! this month.

Our ‘Best of..’ continues with the ‘Best of Love’. This is available for $25.95 in clear-mount.

SP_25Year_best_of_love_TH

AND, it’s ‘A Whole Lot of Love’ promotion, even with monsters!!

flyerTH_wholelotoflove_demo_12.1-1.27.2014_SP

These little monster dudes are cute.  Check them out.  Add a chocolate treat and give it to someone for any occasion.  This is a great kid’s party favour or kid’s craft idea too.  They are a bargain at $9.95 for 18 little monsters.

Love _ monsters

Here are the details:

 Item  Description  Price
 131850  Love You More Stamp Set (Wood)  $37.95
 131853  Love You More Stamp Set (Clear)  $29.95
 134611  Follow My Heart Stamp Set (Wood)  $27.95
 134614  Follow My Heart Stamp Set (Clear)  $21.95
 134617  Flowerfull Heart Stamp (Wood)  $16.95
 Item  Description  Price  Includes
 134610  Sweetheart Treat Bags  $8.95  12 heart sacks, 12 die-cut labels, 12 pre-cut pieces of  Pool Party Baker’s Twine
 132162  Monster Hugs Boy  $9.95  18 boy monsters, 18 googly eyes, 18 adhesive hearts
 132163  Monster Hugs Girl  $9.95  18 girl monsters, 18 googly eyes, 18 adhesive hearts
 134609  Sweet Sayings Cards and Envelopes  $9.95  12 printed card bases, 12 envelopes (four Real Red, four Pool Party, four Crisp Cantaloupe)

Check out the stamps.

flyerTH_wholelotofloveSTAMPS_demo_US_SP

Ok, so if you are feeling the love for any of these then contact me to place your order.

Jenny

cards, Workshops

FESTIVE FLURRY WORKSHOP CARD!

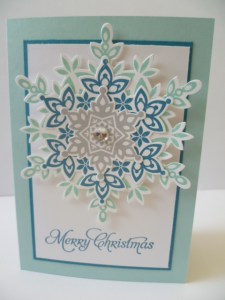
It’s been a bit quiet here don’t you think?? Well don’t you worry I haven’t been sitting around doing nothing.  Life is at a super crazy pace.  With the end of year activities, Christmas preparations and family stuff there hasn’t been a lot of time to stop.  I have hardly been on the computer at all! It’s late but I thought I should share something this week.  This is a card we have been doing at my parties over the last month or so using the very popular ‘Festive Flurry’ set and the popular Christmas colours this year of Island Indigo and Pool Party.  It is simply stamping and layering the different sized snowflakes.

P1100169

For the bling factor I added a large Rhinestone to the centre. The greeting is from ‘More Merry Messages’ which is on the Carry-over list.

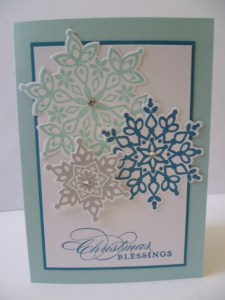
One time when I made this card I stamped the wrong size snowflakes. Ooops!! Not to worry.  No point wasting them.  I just created another card layering them in a different way.

P1100172

I will be back soon.  I have some fun projects that I can’t wait to share with you.  I think after this weekend things might be a little clearer – maybe – hopefully!!

Come and visit soon and check it all out.  Have a great weekend everyone. 🙂

For my US visitors, I hope you have had a wonderful Thanksgiving spent with your lovely family and friends.

xx

cards

A SPECIAL WEDDING CARD!

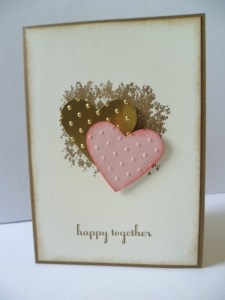
A little while ago I shared a Wedding acceptance card.  You can see it in this post here but here is the card if you missed it.  For that card I used the colours from the Wedding invite.

P1100463

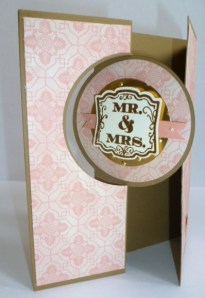
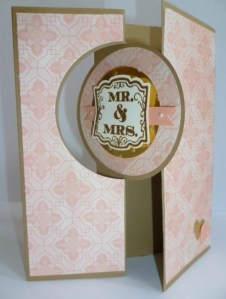
Well the big day arrived yesterday.  I thought I would show you the Wedding card now.  Once again I used similar colours for the Wedding card and I have also used the new circle Thinlets. Unfortunately the lighting wasn’t great to take photos as we have had lots of rain lately. It was so nice to see the sun shining for the wedding day yesterday. 🙂

P1100617

P1100623

I have used Baked Brown Sugar and Crisp Canteloupe.  The gold circle behind the label and on the heart is using the Gold Foil Sheets and I ran them through the Big Shot with the Perfect Polka Dots Embossing Folder.  The “Mr and Mrs” is from ‘Label Love’ and was embossed.  It has a nice shine to it.  It’s just a shame that  you can’t see that to well even in the close up!  I have used the ‘Venetian Romance’ DSP.

P1100618-1

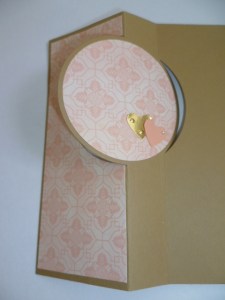
Here is the inside. I just decorated on the back of the circle. The space to write on was under the extended flap.

P1100624

I hope they like the card.  It was a lovely day to celebrate with all the family.

Ok, just a quick wedding snap.  It was a bit emotional! But such a lovely setting.

P1100642

The thunder rolled in and it looked like rain but it passed us by!

P1100671

Here is my Great Niece Jakayla,  Carlie and my Niece Megan.

P1100649

Thanks for visiting. The sun is out again today so I guess one must catch up on some washing!  See you soon.

Jenny

cards

MERRY MINIS CHRISTMAS

Happy Thursday to you.  I made this card a couple of weeks ago.  This was CASED off Pinterest and was originally done by Tamara from tamaraspapertrail.blogspot.ca.  I thought it was a bright, fun card to make. Something different to what I have been creating lately.   I used the Artisan Label punch though where she used the scallop square punch.  The little punches are from the Merry Minis Punch set.  Aren’t they cute!!  Lots of ways to use these little punches.  The base card is Whisper White and then a layer of Real Red and then Whisper White.  The greeting is from ‘Wishing You’.

P1100526


Thanks for stopping by.  I have lots more that I have been creating.  Just to find the time to take photos and I can share them with you.

Come and visit again soon.  Don’t forget to say Hi though and tell me where you are from.  I would love to hear from you.

Jenny


cards, Stampin' Up!

‘SANTA’S LIST’

I have had this card in Draft form for weeks – and then I got a little excited with the Envelope Punch Board.  So I thought I would take a break from the Punch Board for today and show you this.  Don’t worry there will still be more projects to come soon with that.  I can’t believe how many visits from Pinterest I have had over the last week with my Punch Board projects.  It is nice to have you all stop by.  Visit anytime 🙂

This was another card I made at our last Stamping day together (a few weeks ago now. OK a couple of months ago!).  I borrowed Leonie N. stamp set of ‘Santa’s List.  This card was CASED from her.  How good am I, not only borrow her stamps but CASE her cards as well! Oh well! When you are on to a good thing ……………….

Here is the card.

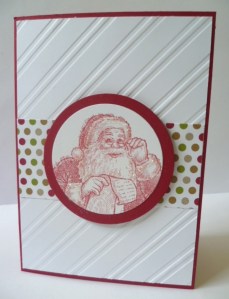
P1100179

I embossed the card with the Stylish Stripes Embossing Folder.  The Santa is from ‘Santa’s List’  He is simply stamped in Cherry Cobbler and I used 2 way Glue pen to apply the Dazzling Diamonds around his beard, cuffs and hat.  It does sparkle so nicely in real life.  The circles were cut with the Circles Framelits.  I used a little strip of ‘Season of Style’ DSP.  There really is not much more you need to do.

 I hope you enjoyed this little distraction.  Thanks for stopping by.  Hope you can visit again soon,

Jenny

3D projects, Stampin' Up!

CHRISTMAS BON-BON WITH THE ENVELOPE PUNCH BOARD!

The Envelope Punch Board is one HOT item at the moment.  I have been having so much fun with mine.  Last week I made this Christmas Bon-Bon.  I shared it on my Facebook Business page and realised I hadn’t shown you all yet.  (If you haven’t LIKED me on Facebook yet, make sure you look me up so you don’t miss out on some of the projects I post).

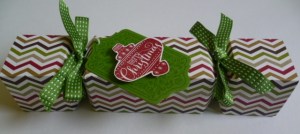
P1100497-1

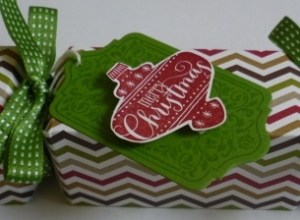
These are so easy to make.   You can whip up a few of these at a time.  They will be great filled with some treats to give out at Christmas.  You can find the video on how to make these here.  I have used the lovely ‘Season of Style’ DSP.  For the tag I have used ‘Chalk Talk’ stamped in Gumball Green and the Christmas Bauble is from the ‘Best of Christmas’ set.  Here is a close-up of the tag if you want to see it.

P1100497-2

So have you got your Envelope Punch Board yet??? If not, why not???  You do have to have one you know! Don’t just think they are for envelopes!

We have a wet Monday here but that is good.  The ground is so dry.  We so need the rain.

Thanks for stopping by,

Jenny

cards, Classes

ENVELOPE PUNCH BOARD CLASS!

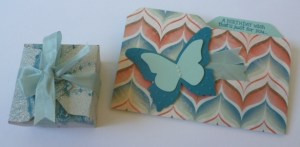
With the release of the Envelope Punch Board this month I just have to show you how much fun this new product is.  Come and see and try it out.  I will show you how to make one of 66 different sized envelopes PLUS we will make this cute gift box and card.

P1100543

*Thursday Nov 14th – 10am   RSVP Tuesday Nov. 12th

OR

Friday Nov 15th – 7.30pm.  RSVP Wednesday Nov 13th.

COST: Choose your cost: 

A) Envelope Punch Board plus Class and materials to make the projects.  Cost: $35.  (The Envelope Punch Board will arrive after class date now but you will be able to create lots more projects with it when receive it).

OR

B) Class only $15.  

Includes Class and materials to make the projects.

The class will be held in my studio in East Corrimal.  If you are local I would love to have you join me.  Email or phone me to RSVP.  I hope you can come.  I love the Envelope Punch Board and I am really excited to share some of the wonderful things it can create.  Don’t just think it is for envelopes!!

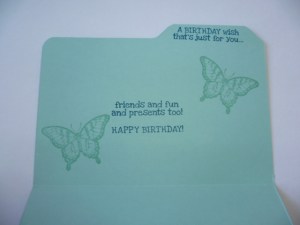
While I am here I just thought I would show you the inside of the card we will be making.

P1100546

The greeting is from ‘Remembering your Birthday’ and the butterflies from ‘Papillion Potpourri’.  The paper on the front of the card is from ‘Venetian Romance’.

Thanks for stopping by,

Jenny

3D projects

SO MUCH FUN WITH THE ENVELOPE PUNCH BOARD!

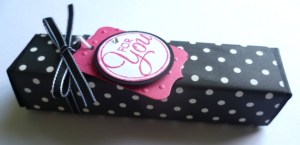
Two posts in one day but I can’t help it.  I am having so much fun with the Envelope Punch Board that I JUST HAVE to show you what I just made with it.  There are lots of fun little treat holders in the blogosphere if you look around.   I came across this cute little one yesterday and had to make it today.  Check it out!
P1100541

For my box I used black cardstock and wrapped around some ‘Modern Medley’ DSP.  The “For You” tag was stamped from ‘Chalk Talk’.  I die cut a Melon Mambo label from the Chalk Talk Framelits and then ran it through the Big Shot with the Perfect Polka Dots Embossing Folder. The box measures 12.5cm x 3cm.

I found this cute box on Pinterest and went to the blog.  You can find the tutorial for it here on Jen’s blog.  This was for a chocolate treat holder.  I am not sure if our size chocolate bars fit in this.  I will have to investigate that one.  After I finished this box I searched out some ideas around the house for some little gifts that will fit in it.  It does fit the ‘Summer Roll’ bar and fits 6 mini Hershey Chocolate bars.  For the young girls it will fit 2 little eye liner or lip gloss sticks.  I think you could find some other low-fat ideas for this little box.

So have you got your Envelope Punch Board yet??? You have to have one you know.  Contact me if you need to order one and haven’t yet got yourself a Local Stampin’ Up! Demonstrator.

Maybe I should try and make some envelopes with it now!!! LOL

Jenny 

3D projects, cards

ENVELOPE PUNCH BOARD CARD BOX!

I am loving playing with the new Envelope Punch Board.  It is so easy to use and makes such great little boxes and treat holders.  This was one of the first projects I made using the Punch Board. Forget the envelopes (although it is fantastic for that) I thought I would make a box.
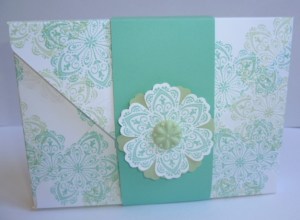
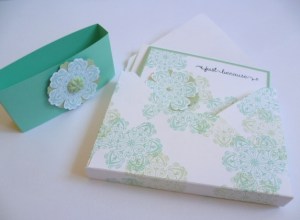
P1100479

P1100482

I had seen a few card boxes using the Envelope Punch Board but being US sites they don’t fit the Australian and New Zealand card sizes,  SO  I played around with the measurements to make them fit our cards.  For all my Australian and NZ friends I thought I would share them with you.  Here goes.

CARD BOX USING THE ENVELOPE PUNCH BOARD

(FITS THE STANDARD AUS/NZ CARD SIZE)

Cut card 25.4cm x 25.4cm.  On the Envelope Punch Board line the left hand edge of the card to the 12.7cm mark.  Punch and then score.  Move card along to the 9.5cm mark and punch and then score.
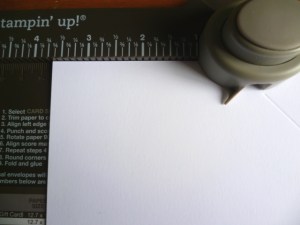
P1100530

Turn card 90’.  Line the score line up with the score line notch on the punch.  Punch card and then score.  (See the photo). Move along and line up the next score line, punch and then score.
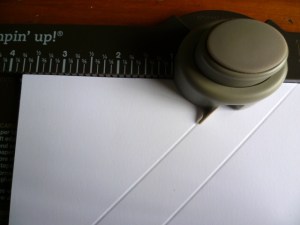
P1100532

Turn card 90’.  Line up score lines and punch and score as before.  Turn 90’ again, line up score line, punch and then score.

Round corners using the corner rounder of the punch.   Place the card so a flap is at the top.  Cut off the small tabs at the top.  At the bottom, cut up on the small score line on the small tabs.  Trim off the bottom flap to straighten the edge.  This gives a neater appearance when you fold it up.  Add Sticky Strip to the tabs and under the sides on the bottom flap.
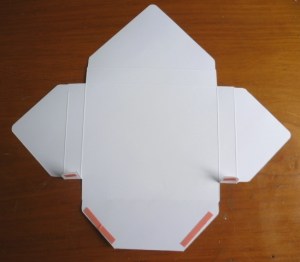
P1100536

Stamp the card box before assembling if you wish.  The Belly Band around the box to hold it closed is 5.5cm wide by 29.8cm.  You could use a magnet to hold the box flap closed if you wish.

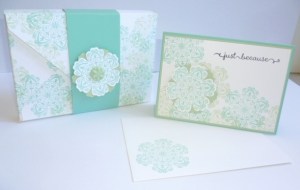
For this box I used the set Mixed Bunch and stamped it in Pistachio Pudding and Coastal Cabana.  It is hard to see but I also stamped over it with Illuminate too.
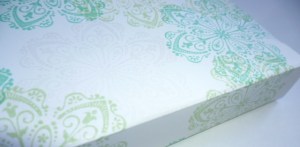
P1100484

P1100481

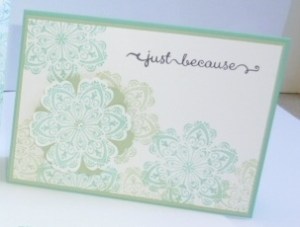
Here is a close-up of the card too for you to see.  It is a little blurry as I just cropped the photo from above.  Sorry,  I realised I hadn’t taken a photo of the card by itself.
P1100481-1

I stamped the Whisper White card with the Pistachio Pudding and Coastal Cabana.  I stamped a flower in Coastal Cabana on scrap white card and punched it out and also punched out a flower from Pistachio Pudding Card.  These were raised up off the Whisper White card which had been layered onto a Pistachio Pudding mat with a Coastal Cabana card base.  The greeting is from ‘A Dozen Thoughts’.

I hope you can make up a card box yourself.  With Christmas fast approaching it might be a nice gift idea.

Thanks for visiting me today,

Jenny