I am married to Glenn and we have 2 adult children: Josh and Carlie. I live in the Northern Suburbs of Wollongong; just south of Sydney, NSW Australia.
I joined Stampin' Up! in August 2008. I'm having a great time playing with ink and paper and sharing my creations with you.
Thank you for visiting me in my corner of the blogosphere. I hope I inspire you along the way. I hold regular classes and workshops in my studio in East Corrimal and offer classes and tutorials by mail. I hope I can share stamping with you and your friends soon.
Take a look around. If I can help you with any of the gorgeous Stampin' Up! products please don't hesitate to ask me.
Happy creating,
Jenny
Firstly, I want to thank everyone who has stopped by my blog in the last few days with the ESAD Autumn Mini Catalogue Blog Hop. Thank you for all your encouraging comments. I can see everyone will be getting their Circle Scissors out now!!! LOL I hope you were inspired by all the lovely creations on the Hop!
On Sunday I took some time out from preparing for upcoming classes and workshops to do some stamping for ME!! That is a very rare thing for me to do. It was so nice to stamp something just for the fun of it!
I inked up my new clear mounted set “A Little Treat”. I have seen on different blogs creating a sky by sponging and I have been wanting to try it for some time. I thought it would work well with this set. If you want to see how to do it just pop over to my good friend Andrea and see. I just used 3 scallop circles for my clouds. I really like the effect the sponging creates. I love sponging it is so relaxing!!! I sponged the sky on 2 different Whisper White card pieces.
I stamped the tree from “Thoughts and Prayers” in Old Olive ink to the bottom of the smaller White pieces. I stamped the basket firstly on Ruby Red card in Ruby Red ink and then on Chocolate Chip card with Chocolate Chip ink. I cut the different parts out to create the coloured basket. I adhered this to the smaller Whisper White card. I layered them onto the larger whisper White and then to the Ruby Red base. I stamped the greeting from “Sincere Salutations” on Baja Breeze Patterns DSP and punched a circle with the 1 3/4″ circle punch. I sponged the edge of the circle with Chocolate Chip ink and adhered this over the basket to create the balloon.
A fun project!! I hope to get to use this set again very soon. It works so well with the Treat Cups too.
The next leg of the ESAD Blog Hop will continue tomorrow (7th). I will put details up tomorrow for you to join in. There is more blog candy up for grabs, so don’t miss out.
Welcome! If you have just come from Jane’s blog on the ESAD Autumn blog Hop, then thanks for stopping by. If you have just joined in then enjoy!!
You better go and grab yourself a cuppa as you’ll be hopping for a while!
What is ESAD you say?
ESAD stands for Extra Special Australian (and New Zealand) Demonstrators and it is an online group just for Australian and New Zealand demonstrators for Stampin’ Up!
We so love what we do and not only do we love to share it with our customers, friends and wonderful blog visitors but we share our love for what we do with each other as Demonstrators. We run swaps, challenges, tutorials, product know how and cyberstamps and we are always there to help and support each other when its needed.
So if you are a Stampin’ Up! Demonstrator located in Australia or New Zealand then please feel free to click here to join our wonderful group.
Here are my projects to show you today. I am using the beautiful Cottage Garden DSP and Stamp Set and the Circle Scissors.
Firstly, I want to show you this cute Circle pocket. This was one of the projects we made at my Autumn Mini Launch last weekend. I found this idea some time back and stored it in the back of the vault to use sometime. I can’t remember where I first saw it.
With the Circle Scissors it makes life so much easier. I cut a 14cm circle with the circle scissors from Old Olive cardstock. Score it across at 4cm, this is your bottom score line.
Turn the circle 1/4 turn and score it at 2.5cm and 11.5cm. When scoring these lines, check the bottom score line is horizontal or you will have a crooked pocket!!!
Scoring the circle at 4cm.
1/4 turn, score at 2.5cm and then along at 11.5cm.
Turn the circle over and stamp the side sections as desired. Turn back over and fold up on the score lines. Place snail adhesive or sticky strip on the bottom flap before folding up.
Decorate as desired. I added a belly band using the Rich Razzleberry cardstock and Cottage Garden DSP. I stamped the flowers from the Cottage Garden set. This is a great 2-step stamp set. First I stamped the solid image in Orchid Opulence and then the outline in Rich Razzleberry. I did this twice, cut them out and layered them up. I added some Dazzling Diamonds with the 2-way glue and mounted it with Dimensionals.
I made up a quick Love Note size card to fit. I used the other gorgeous images from the Cottage Garden set, and the text from ‘Short and Sweet’.
My next project is a circle bag. I first came across these here on Kim’s blog. I was so amazed how small they were though when I made one up. They are about 11cm or 4 1/4″ high. They are so cute!!
Cut 2 x 14cm circles with your Circle Scissors. I used the gorgeous Cottage Garden DSP. Cut off 2cm from the bottom of each circle. Before any assembling, punch a circle from the top of the circles to create your handles. (Believe me it is sooooo much easier to do this first. I learnt the first time!). I used the 1 1/4″ circle punch. I also punched out 2 circles with the 1 1/4″ circle punch from Old Olive cardstock and punched around these with the scallop circle punch.
Here is what you should have.
Kim used a lunch sack inside her bag, but I didn’t have any so I created a box.
Cut cardstock 17cmx12cm. On the 17cm side scored at 4cm and 13cm. On the 12cm side score at 4cm and 8cm. On opposite sides cut up to the score line. This is how it should look.
Add adhesive to the flaps and fold up. To adhere your circle pieces on, place Sticky Strip to the long sides of the box. Do one side at a time. Place the circle down with right side down and line up the bottom edge of the box with the bottom edge of the circle, and adhere. It is so much easier doing it this way than lining up the circle onto the box. Turn over the box and repeat on the other side. Add your handles and tie up with a bow. I used some 5/8″ Old Olive Grosgrain.I added a tag using the Big Shot ‘Lots of Tags’ Die. I sponged around the edge with Rich Razzleberry and stamped the greeting and flower from ‘Short and ‘Sweet’.
PS. In my rush to get this out I forgot to show you the finished bag. DOH!!!
Here you go!
The cute little circle bag, with the Big Shot Tag from 'Lots of Tags'
Side view of the bag!
There you go! I hope you enjoyed these creations. It might be time to stock up on the drink and chocolate before you move on with your Blog Hop journey. You could be a while! You will now move on to Juliette’s blog. Don’t forget as you visit each blog to leave a comment. Then email Sharlene at stampwithsharlene@hotmail.com to be in the draw for some blog candy.
In the last post I showed you the projects we did for my recent Easter Gift Packaging class. I have put together a tutorial to create the little Treat Cup box. Measurements are in Metric.
1) Cut card 29.5cmx18.5cm. On the 29.5cm side score at 7cm, 14cm, 21cm and 28cm. On the 18.5cm side score at 5cm, 10cm and 17cm.
2) Cut top 3 squares and 3 rectangles from the right. Cut the small square and 1.5cm rectangle at the top left and 1 at the bottom left. Cut at each 7cm score lines on the bottom up to the 1st 5cm score line in the opposite direction. This is how it should look now.
3) Stamp or use a roller wheel on the middle section to decorate. Fold all score lines to form firm creases. Don’t assemble the box yet.
4) Punch 1 3/4” circle on the top square. This is your flap. TIP: To centre the circle, punch out a circle on scrap card and place it on the centre of flap. Trace around with a pencil. Turn the punch upside down and line up the punch over the circle and punch it out. See the photo below on tracing the circle on the DSP piece.
5) Place adhesive on narrow strip on the sides of the box and bottom flaps and fold it up. Adhere side pieces together and bottom flaps. This forms your box. Use a corner rounder punch on the flap to neaten corners if desired. Remove adhesive strip on the treat cup and adhere treat cup to the top of the box.
6) Cut DSP square piece 6.2cmx6.2cm and adhere to contrasting card piece 6.6cmx6.6cm. Punch circle out with 1 3/4” circle punch. To ensure the circle is centred trace a circle using scrap card piece before punching. See in the photo below.
7) Adhere this piece to the top flap over the treat cup. Decorate box as desired. On this box I had stamped the small retro star from ‘Hello Again’ then I punched out ovals using the large oval punch from various pieces from the Kaleidoscope DSP. I sponged the edges of these and layered them onto the front of the box. The greeting is from the Sale-A-Bration set ‘Happy Moments’. This was punched out using the Word Window Punch and mounted with mounting tape.
Here is the finished box!!
I hope these make sense if you have any questions, just ask me!!!
I’m sure you could whip several of these up in time for Easter or for any occasion. Enjoy!
Two weeks ago I held my Easter Gift Packaging Classes. These were the projects they all got to make.
There were 2 Easter cards, a Chocolate Treat Slider and a Treat Cup Box. I used the Kaleidoscope DSP in the Summer Mini (which by the way, there is only just over 1 week left so you better stock up on this paper and any of the other goodies in the Mini Catalogue!). I picked out the colours in the papers so it is not the usual pastel colours you might normally use for Easter. I think they are bright and funky! I didn’t have any Easter stamps so I had to think outside the square – or oval as the case may be! LOL
For the first card and the Treat Pull, I used the Sale-A-Bration set ‘Vintage Labels’.
For the card I stamped and heat embossed the oval frame in Gold Embossing Powder onto Tempting Turquoise and then punched it out with the Wide Oval Punch. I tied a bow with Tempting Turquoise Grosgrain ribbon. This was mounted on Whisper White and the edges sponged with Certainly Celery Ink. It was then matted on Certainly Celery card. Before adhering it to the base Turquoise card I stamped the bottom edge with the small flowers from ‘Short and Sweet’. I scalloped the edge of the Pink Passion card strip with the eyelet border punch. I stamped and embossed in Gold EP the words “Best Wishes” from the ‘Vintage Labels’ set. Added a strip of Certainly Celery card behind it and adhered it to the base card.
You might have seen these chocolate treat sliders/pulls around on other blogs. I found when I made one up it was so tiny you could only fit a chocolate in about the size of the credit card. Now that is not good enough!!!! So, as usual I adjusted all the measurements to fit a larger size chocolate bar. If you want the metric measurements for this then email me.
I stamped the cardstock for the treat pull before assembling. It is so much easier let me tell you!!!!! I wrapped around a strip of the Kaleidoscope DSP that I had punched the edges with the eyelet border punch. I stamped the circle label from ‘Vintage Labels’ in Turquoise on Turquoise card and punched it out using the scallop circle punch. I stamped it again in Glorious Green onto Gable Green and punched it out with the 1″ circle punch. These were layered with mounting tape. I punched out a slot with the horizontal slot punch and threaded the Tempting Turquoise grosgrain ribbon through. This is such a great gift for someone – and so simple!!!
Here is the second card and the treat box.
The second card I punched out 3 ovals with the large oval punch from various pieces of the Kaleidoscope DSP. I sponged the edges with matching inks and adhered them to the Whisper White card. The edges were sponged in Regal Rose ink. This was mounted on Regal Rose cardstock. I created the fringe to resemble grass from Certainly Celery cardstock and then stamped the “For You” on the strip. I added a strip of the Kaleidoscope DSP onto the base Tempting Turquoise card and paper pierced along the top. It is hard to see that, I know!!! This card is just like an Easter Egg Hunt card!
The box I created myself. I wanted to used the Treat Cups in someway for Easter. It is a very simple box and I added the treat Cup to the top so you can see the yummy Easter eggs inside. OK, so it is empty. Believe me they were yummy!!! Stamp the cardstock before assembling and you can decorate it as you like.
I am planning to put together a tutorial for this box so stop by in the next day or so. In the meantime, Happy Stamping!!
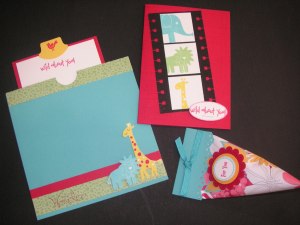
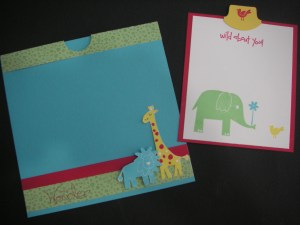
I thought I would show you these projects from a workshop last week. As many of the guests had young children, or grandchildren I wanted to show some projects they can make for or with their kids. I have to say, the young ones that were there enjoyed it!! It is using the fun set ‘Wild About You’.
The box on the bottom right is a Sunny Boy/Sour Cream container. You may have seen these on your blog travels before. They are so simple to make even for young ones. They can be filled with a small gift or some choccies or lollies. I have used the eyelet border punch along the top of the Tempting Turquoise topper and tied some Turquoise ribbon around it. I used the free Sale-A-Bration set ‘Vintage Labels’. I stamped the round label several times on different coloured card and punched them out with the scallop circle punch and smaller circle punches. This is such a great set to create labels on your projects and cards. It comes with 4 labels and 3 greetings. You still have time to get one for Free when you place a $100 order.
Back to the projects!! The scrap page on the left is a 6″x6″ page. I actually started with double the length ie 12″x6″ and scored that at 6″x6″. Or a full size A4 card cut on the short side at 14.8cm and then scored on the long side at 14.8cm. I folded it in half and adhered them together placing adhesive along the sides only. This creates a pocket. Sometimes on a 6″x6″ page there is not much room for journalling so I created a small pull-out tag that can slip into the pocket. This provides more room for journalling or additional photos. Here is a close-up of it. I can’t claim credit for this idea. I got the idea from the Stampin’ Up! Demonstrator website!!!
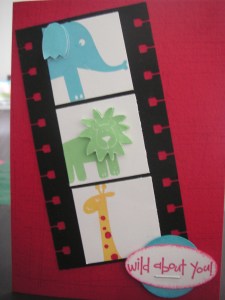
The card they made was a fun card to look like a film strip. I used the spiral punch to punch down the both sides of a strip of black cardstock. Three of the animals were stamped on small squares of whisper white card and adhered to the black strip. The red base card was stamped with the sanded background stamp in Real Red ink. Then the black strip was added to the red base card. Stamp the ‘wild about You’ text in real red and punch that out using the large oval punch. Sponge the edges in real red ink and add a staple. Use mounting tape to raise the oval off the card for dimension. I had made another card showing a stepped-up version. This time I stamped the animals twice. Once on the squares and once on scrap white card. I cut these ones out and raised them using mounting tape. I coloured in some spots on the giraffe with a real red marker. I punched out a circle using the 1 1/4″ circle punch from Turquoise cardstock. I like this version, it is very cute!!!
What do you think???
You still have a couple of weeks left to get your free Sale-a-bration set so contact me to place your $100 order. Don’t forget if you join Stampin’ Up! during Sale-A-Bration, not only will you get a great value starter kit but you receive a stamp set free to the value of $79.95. So come and join my team. I have been able to totally fund my addiction hobby through Stampin’ Up! and I have met so many lovely people, so contact me for more information.
I have some more scrap pages to show you. These are some other pages I have done at recent workshops (Well, before Christmas!!)
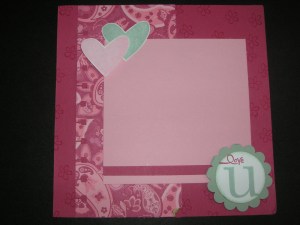
This is a very simple 6″x6″ page.
I have used the spiral punch down the left hand side of the Raspberry Tart DSP. I used the marker to ink up just the love from the ‘Short and Sweet’ set and then inked up the U from ‘Schoolbook Serif’ alphabet. I did stamp the background page with the small flower from ‘Simply Said’, but it is a bit hard to see. A bit of bling on the hearts and some ribbon would add to the page now I look at it again.
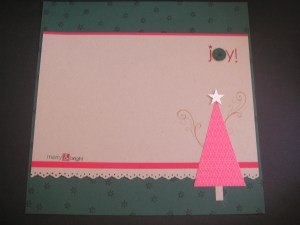
This is a Christmas page. I know it is March, but that is how far behind I am!!! This is a 12×12 page with ‘Season of Joy’. What a versatile set that one is. I borrowed it for these workshops but may have to buy one for next Christmas!
It is a bit hard to see. I have used Handsome Hunter, Kraft and Real Red. I like those colours together. I used the markers to highlight the words ‘Merry & Bright’. The ‘joy” word was stamped directly on the Kraft card in Real Red and then I stamped it again on the Handsome Hunter. I punched the ‘o’ out and raised it using the mounting tape. Here is a close-up.
For the tree I cut a triangle from Ski Slope DSP. I used the Word Window punch and cut the end off to form the base. You might not see the star very clearly, but I stamped the swirly image from ‘Trendy Trees’ in creamy caramel on Whisper White and then punched a small star shape out. I added some Dazzling Diamonds with the 2-way glue pen.
There you have it! Maybe a few pages to inspire you! LOL
I realised I had a few scrap pages that I hadn’t shown you. So in between projects I thought I would pop some of these on. These pages are ones I have done at workshops over the last few months (or more!). I am not a scrapper and I have a lot to learn. So, they are very simple pages but show how Stampin’ Up! products can be used on your pages. I won’t go into detail with all these pages.
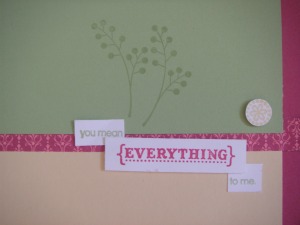
This one is going back a while ago. This is a 12×12 page using ‘Always’.
It is a bit hard to see so here is a close up.
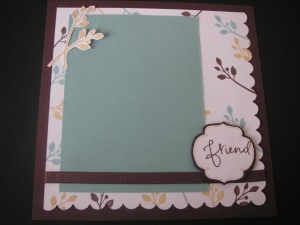
This is another old one using ‘Great Friend’. (Had to throw that one in Lynda! – It’s been a while since I have used this set).
This is a 6″x6″ page. It’s a bit hard to see but the base is Chocolate Chip. I just realised this has lost it’s butterfly. Mmmm, do I dust that set off to stamp another one?????
I have a few more pages to show you but that will be for another day. I must run now. I have new toys to play with!!!!! Oh, What fun!
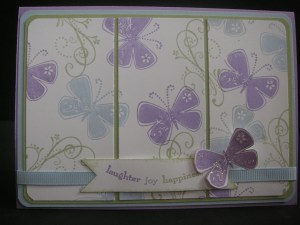
I’ve been a bad blogger this week! Sorry about that. I have been very busy creating, but they are for upcoming classes so I can’t show you them yet. I just realised though that I hadn’t shown you this card. On our team forum we had a challenge last month. To make a card with purple, blue and green AND to have butterflies and bling! How to combine all that on a card????
I wasn’t sure where to start. I had borrowed the “Priceless” set and wanted to use that, and I have been wanting to try a triple panel card too. So, I played around with that.
Here is a close up of the BLING!!
I used Bashful Blue, Lavender Lace and Certainly Celery. I don’t usually use the Soft Subtles colours but I liked these together.
Ink: Bashful Blue, Certainly Celery, Lavender Lace. (Ink pad and markers).
Other: Corner Rounder Punch, 1 1/4″ square punch (notches on the end of the text), 2 way Glue Pen, Dazzling Diamonds, Sponge, mounting tape, Bashful Blue Grosgrain Ribbon.
Here are the dimensions for the panels so you can make one up yourself. I apologise in advance for the “exactness” of the measurements. I like to have a 2mm border around my card edges, so working down from the base card it can get a bit “precise”. You change it to how you like.
Base Card: 29.6cmx10.5cm (Australian standard card size), scored at 14.8cm. (Lavender Lace)
Mat: 14.4cmx10.1cm (Bashful Blue)
2nd Mat: 14cmx9.7cm (Certainly Celery)
Panel Card: 13.2cmx9.3cm (Whisper White). Stamp image first before cutting. Cut card at 4.4cm and 8.8cm.
Got all that!!! Why don’t you try one yourself! I’m off to do more creating.
Don’t forget to get your FREE stamps for Sale-A-Bration. You have until the end of March to place an order for $100 and then choose your Sale-A-Bration set. Easy as that! Now is the good time to stock up on your inkpads and cardstock. If you don’t have your own Stampin’ Up! Demonstrator then you can email me your order and I can have it sent directly to you anywhere in Australia. You can click on the link in the right hand side bar to check out the catalogues.
Last week we had our first team meeting for the year with Ness’ Inkyfingers. I love these meetings. I come away with such inspiration and encouragement. Each month we have a team swap and although not everyone gets involved, it is always a great way of getting ideas.
Here are our team swaps. This month was Sale-A-Bration.
The ribbon loop on the left is a bookmark by Jennifer. Leonie has a gorgeous card with the Vintage Labels. It has the French Script background stamp (Sorry, you can’t see that too well!). The little cello bag with jelly snakes and the Good Neighbours topper was by Sarah. I love how Sarah hung the tag from a hole in the eyelet punch border. My card is on the right. I have more details on that below. Andrea’s gorgeous card is at the bottom. You can check that one out further on her blog. Don’t you love the sparkles! One day I will get a new camera that will take clearer photos!!!
My swap card was inpired by a card I saw on Splitcoast by stampingwithamy.com. It is so simple but really lovely. She had white ribbon along the bottom, but since I didn’t have any I went for the card strip and crimped card strip overlay. That worked OK I think!!!
The sponged square was using the reverse masking technique. I cut the shape from scrap card stock. I used Dotto, a removal adhesive, to hold this piece while I sponged onto the card. The scrap card can be easily removed to show the “neat” area!! I then stamped the image with a darker tone of colour and added the greeting. It was then simply a matter of adhering this to the base card and adding the same colour as the base card for the bottom strip and a crimped piece in the lighter shade on top.
I had made these cards for my Stamp-A-Stack this month and had several colour combinations.
On the left is Brocade Blue and Night of Navy, The middle Regal Rose and Rose Red, and the right, Tempting Turquoise and Taken with Teal. Each one was using one of the images from the Sale-A-Bration set ‘Happy Moments’. This is such a lovely set and is so versatile. There are 4 images and 3 greetings you can use for any occasion.
Have you got your free set yet. You have until the end of March to place an order of $100 and you can choose 1 of 4 great sets for FREE. So, stock up on your cardstock and ink and grab a stamp set or a punch. These are great sets and won’t be available after March. I can have
I have had a blog overhaul recently – if you hadn’t noticed 🙂 I have updated my classes. Check out my classes page for details of all my upcoming classes. If you live locally why not come along. They are all nice ladies (and they don’t bite!!)
Have you checked out my Stampin’ Up Business Website yet. Click on the link and it will send you over there.
Did you know that you can now subscribe to my blog???? Click on the subscribe button on the right hand side bar. You can add your email address and each time I update it will be sent directly to your inbox. Saves you checking up on me and I haven’t updated, hey!!
Don’t forget you still have time to book a Sale-A-Bration workshop with me. It is always a fun time. During Sale-A-Bration you can receive a FREE stampset with your order of $100. SO, don’t miss out. Who doesn’t like FREE rubber???? I can send your orders to anywhere in Australia too so just drop me an email with your order.
We have just over a week left to raise money for Haiti $2 from every set of “I {Heart} Hearts” stamp set in the Summer Mini is being donated to the victims of the Haiti Earthquake. In just 2 weeks of this appeal, Stampin’ Up! have sold over 7,500 sets. Isn’t that fabulous!!