cards, Challenges

VINTAGE ELEMENTS!

I thought I would show you a card I created with some of the ‘remains’ from my last marathon card making effort.  I went for another vintage style card.  I came across a new challenge blog and thought I would give it a go.  The site is here at Jac-inks Papercraft challenges.  They have just started up so why not give them a go.  Their first challenge is a colour challenge with Neutrals plus 1 other colour.
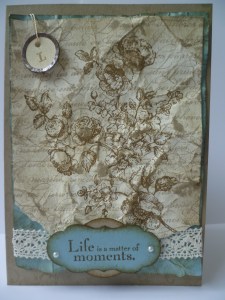
 

 I salvaged one of the Crumb Cake bases I had discarded.  This had the swirl from ‘Elements of Style’ stamped in Crumb Cake.  On the Very Vanilla Card I stamped the ‘French Script’ in Crumb Cake and stamped the flowers in Soft Suede.  I scrunched up the card tightly and reopened it, then scrunched it again.  After I opened it out again and flattened it slightly, I swiped some Crumb cake ink over it to pick up the ink in the creases.  I sponged Crumb cake around the edges.  I scrunched up some Baja Breeze card and inked the edges with Soft Suede.  I debated so long “To tear or not to Tear”????  I kept tearing a bit off the Vanilla card and a bit off the Baja Breeze and a bit more on the Vanilla.  In the end I had to stop or I wouldn’t have anything left!!

 I wrapped some Victoria Lace around the card and cut out a tag with the ‘Lots of Tags’ Die in Baja Breeze and stamped on the text from “Elements of Style”.  I punched a circle with the 1 3/8″ in Crumb Cake.  These were then both sponged with Soft Suede.  I raised these up with dimensionals.  I added some pearls and a Vintage Tag with ‘L’ (for Life) in Soft Suede.  This one certainly didn’t take as long as the last one!

I hope you like it???  I think I will go with some simple cards for a bit.  These vintage style cards are hard work – on the brain!!!

Thanks for looking and I hope you visit again soon.  I have some more Sale-A-Bration cards to show you.

Jenny xx
cards, Techniques

THE CARD THAT NEARLY DIDN’T HAPPEN!!

Do you have days when a card just doesn’t come together??? When anything you do, doesn’t go right and you have to redo it??? Do you look at the card and think “I just don’t know what is wrong”???  This was one of those cards.  It has just taken me 2 days to complete it.  I think I have redone every part at least once!  Maybe the heat was getting to me.  Well, I finished it!  I could have tossed it so many times but I was determined to see this through.

It started out as a card for this week’s sketch challenge at Inkspirations.  I had been wanting to try the faux tile technique and thought this would be good with this sketch.  After stamping and colouring (twice!), I cut the card up to 1″ squares and realised they were too small for the challenge.  I tried to make it work and it  just wasn’t happening.  So, I gave up on the idea of it for the challenge but wanted to complete the card – eventually getting there!!  Enough of the sorry saga you just want to see the card.

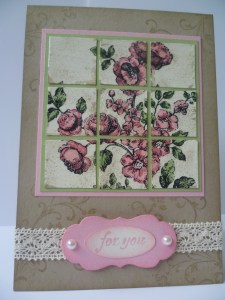
The flowers from ‘Elements of Style’ were stamped in Stazon on Very Vanilla  card measuring 3″x3″ (7.5cmx7.5cm).   They were then coloured using the Pretty in Pink, Regal Rose, Certainly Celery and Always Artichoke Markers.  I spritzed the card with the Crumb Cake marker, then cut it in 1″ (2.5cm) squares.  I then covered the squares in Crystal Effects to give it a glaze.  It is a bit hard to see in the photo.  You need to leave it overnight to dry properly.  It was after I covered it in Crystal Effects I realised I should have sponged the edges.  I just touched them up a bit with the Crumb Cake ink.  I then adhered the squares to a Certainly Celery mat and then Pretty in Pink. 

For the card base I stamped the swirl from the stamp set in Crumb Cake and sponged the edges.  I redid this 3 times.  The first time it didn’t come out right.  The second time I realised I cut the card wrong.  (That’s ok, I have used that on another card!)  This card opens upwards, so I wrapped around some Victoria Lace around the bottom edge.  The label is cut with the Big Shot in Pretty in Pink and the edges sponged.  I  had to do that a second time too!  The greeting is from “Fresh Cuts”.  (Thats a set I haven’t used for a while).   I stamped it in Pretty in Pink onto Very Vanilla and punched it out with the small oval punch.  The edges were sponged in Pretty in Pink too.  I adhered them with mounting tape and stuck some Adhesive pearls on it.  Phew!! I WAS DONE!!!!!!!!!!!!!  I couldn’t even think about doing the inside of the card then. 

Sorry about the ramble.  I hope you kept up with all that!  That was a marathon card.  I have another card that I made later while I had all the stamps and ink out.  I will show you that tomorrow.  I’m done.  It’s exhausting just reliving it!!!!!

Take some time to stamp today – you deserve it!

Jenny xx

cards, Challenges, Uncategorized

WHAT WOULD YOU DO WITH THIS PICTURE??

This picture was one of the INKSPIRATIONS4U Challenges that was set a few weeks ago.  Use this picture as an inspiration for a card. 

It was a tricky one and I know it had me stumped for a bit.  What would you do?  Would you base it on the colours??  Use the shapes such as the swirls or circles or perhaps the stripes??  In the end I picked out some of the colours and I wanted to use circles in there somehow.  Here is my end result.

I went with Crumb Cake, Chocolate Chip, Baja Breeze and Old Olive.  I thought these colours would suit a masculine type card.  I ran some Old Olive card through the Big Shot using the Square Lattice Embossing Folder and layered it on Chocolate Chip.  I wrapped around some twine and adhered that to a Crumb Cake base.  I punched out various circles with the  1″, 1 1/4″, 1 3/8″ circle punch.  I added some eyelets to 3 of the circles.  I adhered the circles in a formation with Snail or raising some with mounting tape.  The greeting is stamped with Chocolate Chip and is from “Party This Way”.  This was quite a fun card to do in the end.

Thanks for stopping by.  Pop back again over the weekend and I will show you a card that nearly didn’t happen!

Jenny xx

3D projects, cards, Classes

BLISS BOX AND CARD!

On Saturday I held my Sale-A-Bration Kick-Off event to start the new year of stamping.  It was a great day with some lovely ladies.  I think they enjoyed their stamping????  This is the project I put together for them.

I have used the Sale-A-Bration set ‘Bliss’.  I love that set, it is so versatile.  I used the lovely rich Cherry Cobbler and Regal Rose.  This is the box.

This is just a little narrow box as you can see in the photo below.  Just the size to put some small love note size cards or something simlar.

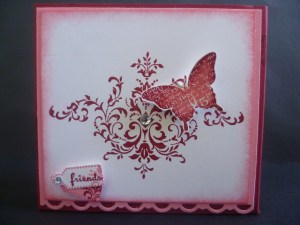
The original box came from a USTAMP project a few years ago.  I modified it a little to fit our card size so I could get 2 per sheet.  On the front of the box we scalloped the edge of the Regal Rose card with the scallop trim punch.  On the Whisper White card, I sponged the edges of the card with the Regal Rose ink.  The flourish from the set was stamped in Cherry Cobbler.  The butterflies for the box and the card were stamped in scrap card in Regal Rose and then rock and rolled in Cherry Cobbler.  These were cut and raised up with dimensionals.  The little tags were made with the Tiny Tags set.  The flourish from that set was stamped in Regal Rose on the white and Cherry Cobbler on the Regal Rose.  The greeting was stamped on the white.  They were punched out and layered and raised up with the dimensionals.  Phew!  That’s a mouthful!  Does that all make sense???  Here is a close up to see that clearer.

To add the bling I added a Rhinestone to the centre of the flourish and the edge of the tags.

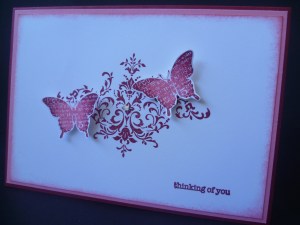
The card was similar to the box with the flourish and 2 butterflies.  The greeting is from Teeny Tiny Sentiments.  Here is a close up of the card.

I had made up a similar box in different colours for the lucky Door Prize.

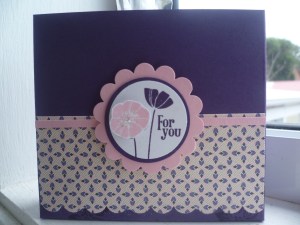
I used Elegant Eggplant cardstock and Lap of Luxury DSP.  The tag was made using the “For You” Flower from the Sale-A-Bration set “Punch Bunch.  It was first stamped in Elegant Eggplant and then stamped again in Pretty in Pink.  I cut the one flower out and raised it up with dimensionals.  This was punched out with the 1 1/4″ circle then matted with a 1 3/8” circle in Elegant Eggplant and I then punched out a scallop circle in Pretty in Pink.  I added some Dazzling Diamonds for a bit of bling.

Ok, I hope I didn’t bore you too much with all those details.  It was a fun day and I’m looking forward to more stamping with my friends soon.  Right now, I’m getting off here.  It is such a hot day here today.  The summer weather has arrived just when all the kids go back to school today. 

See you soon,

Jenny xx

cards, Catalogues

IT’S SALE-A-BRATION TIME!

Sale-A-Bration 2011 begins TODAY!  This is one of the most exciting times in the Stampin’ Up! year because YOU get FREE stamps!!!  How can you get the FREE stamps????

– For every $100 order between today and March 31st you can select an exclusive Sale-A-Bration stamp set with your order.  I think the big problem will be which one to choose!!  

– Hold a workshop or a private stamping class with you and your friends.  When the orders from this exceeds $600 then you can select a SAB stamp set for yourself.  If you live nearby, I would love to get together with you and your friends and show you some great projects that you can create with these stamps. 

– Join Stampin’ Up! during Sale-A-Bration and you can select a stamp set up to the value of $79.95 from the current Catalogue for FREE!  This is a great time to join!

 There are some great stamp sets this year.  If you would like to see the Sale-A-Bration brochure then click on the link in the right hand column under Catalogues.  OR, I can mail one to you.  Just email me at jghayward@yahoo.com

The last few weeks I have been playing around with some of the stamp sets (another little perk with being a demonstrator!).  This is one of the cards I created.  Using the stamp set ‘Bliss’, I went for a vintage feel.  Still trying to get a grasp of this style, but I enjoyed creating it.

This set has so many great images to create a Vintage effect.  On Very Vanilla card I stamped in Soft Suede and Crumb Cake.   The edges were sponged in crumb cake.  I think I should have done some spritzing too when I look at it again.  I adhered the piece to a  Soft Suede mat and distressed the edges.  On the Crumb Cake base, I stamped the flower randomly over it.  The butterflies were stamped in Baja Breeze onto scrap Very Vanilla card and cut out.  I stamped a greeting from ‘Teeny Tiny Sentiments’ and created a flag notch with the square punch.  The rosette is created with the Victoria lace from the Summer Mini.  I just ran a straight stitch with a needle and thread and gathered it up and then shaped it into a circle.  I finished it off with a couple of stitches to secure it.  I added a Vintage brad to the centre before adhering it to the card with mounting tape. 

I will show you some of the other cards  I have been creating shortly, so pop back again soon.   Until next time, Happy Stamping!

Jenny xx


cards

A BABY DRESS!

I have so many friends at the moment having babies.  There must be something in the water!  LOL.  I wanted to show you this card I made recently for a customer who has become a good friend.  She recently had a baby girl.  I wanted to make something special.

Sometime ago I made a baby Onesie (jumpsuit)  card.  You can see that post here.  As in that post I doubled the length to make a larger card.  The original design I used was by Lauren and I changed it to create a baby dress.

I traced the outline of the dress onto vellum and cut it out.  Then ran it through with the Perfect Polka Dots Impressions Folder.  I scalloped the edge with the Scallop Border Punch.  I punched a circle with the 1 3/8″ circle punch and then punched over it with the scallop circle punch to create a collar.  I cut a strip of vellum and scalloped this with the scallop border punch too.  These were ran through the Big Shot with the Polka Dots folder as well.  Just a note:  If you find it difficult to punch through the vellum just add a piece of scrap paper underneath so it will punch cleanly.  I wrapped some Pretty in Pink Satin ribbon around the card and created a bow to adhere to the middle.  A few small Adhesive Pearls finished it off.  I was really pleased with how it turned out!

I hope she likes it.  I am just going to deliver it now.  I have to get going and create a few more baby cards.  Some of these babies have arrived already, so I better get to work.  I will show you those when they are done.

Enjoy the rest of your day,

Jenny x

cards, Challenges

AN AVIARY CHALLENGE!

This past week I have been doing some challenges and projects at INKSPIRATIONS4U.  There are some great projects.  There is still time to join in if you would like to, just pop on over to Madeline’s blog and find out all about it there. 

This is a card I made for the first colour challenge.  The colours to use were Pretty in Pink, Basic Gray and Rich Razzleberry.  I have to say I really struggled putting the Gray with the Razzleberry.  I felt they were too dark together so it took me a while to work on it. 

I wanted to use the ‘Aviary’ set which I am really having a lot of fun with.  The card was inspired from a couple of different cards from Splitcoaststampers.  I used the Lattice Embossing folder on the Pretty in Pink. I punched out the Basic Gray piece with the Eyelet Border punch and that went down the left hand side.  I punched out a small oval from scrap card and sponged some Pretty in Pink at the bottom of the bird stand.  I liked how this turned out.  I stamped the cage on separate Whisper White piece and cut that out and mounted it with dimensionals.  I added some Adhesive Pearls to give it some class!!!  The greeting is from ‘Upsy Daisy’.  Now that’s a set I haven’t used for a while!

I will show you some of the other projects next time so pop back again soon.

Thanks for visiting,

Jenny xx

cards

AN AVIARY 21ST!

The Summer Holidays are slipping by very quickly.  I’m just not sure where the Summer weather is yet though!  It will probably arrive after all the kids have gone back to school.  I have been busy stamping away and spent a lovely day with my stamping buddies yesterday.  I will show you those projects soon.  I wanted to show you a card I made a few weeks ago now for a lovely customer of mine whom I have got to know well (Hi Alison!).  It was her 21st and as she loves animals and music I wanted to create one that included these.

Stamps: Aviary, Calendar Alphabet and Numbers.

Card: Rich Razzleberry, Very Vanilla, Newsprint DSP.

Ink: Rich Razzleberry, Old Olive.

Other: Very Vanilla Satin Ribbon, Mounting Tape, Self- Adhesive Pearls.

Here is the inside:

For the inside I have used the Hostess Level 1 set “Afterthoughts” and “Teeny Tiny Sentiments” and the cute birds from “Aviary”. I was really happy with the final result and I think Alison liked it too.

I am getting some time to create but trying to get access to the computer during the holidays is a bit of challenge.  So, when I can get back here, I will show you some more creations.  Pop by again soon. 

Jenny xx

cards

IT’S TIME FOR SOME CHRISTMAS CARDS!

I have been so busy showing you all my fun boxes and bags I have done for Christmas, I haven’t shown you many Christmas Cards yet.  I have to say I haven’t done as many cards as I should have done.  But here are a few quick ones.

A Gatefold Tree Trimmings Card. (Not the clearest photo, sorry!) Can you see the bling???

I really liked this one.  It is so effective with the brayered, embossed background.

A ‘Dasher’ Christmas.   This one and the one above we did at my Christmas Stamp-A-Stack.  This card was inspired by one by Andrea Walford.  The card above was inspired by a card by my lovely friend Leonie N. (Thanks Leonie!)

Some really quick cards with ‘Season Of Joy’ stamp set.  Not very clear but I added a Self-adhesive pearl to the centre of the word ‘Joy’.

Sorry, no time for details on the cards today.  I am in a hurry, but I thought I would stop by and show you these all together or it would be New Year before you saw them!  We are off now to look at the Christmas lights.  That is a tradition we do every year.  There are some spectacular displays that some people put up on their houses. I can even manage to drag out my teenage son to see them.  I don’t know how long that is going to last though!

 Catch you very soon. xx

cards, Workshops

A DASHER MAKE AND TAKE!

Just stopping by with a quick Christmas card.  I have a few Christmas projects to show you that I have done recently.  Thought I would start off by showing you this card I have been doing at some Christmas workshops over the last month or so.  This is using the lovely Dasher Stamp. 

 I sponged some  Champagne shimmer mist on him before stamping on Very Vanilla card.   It is a bit hard to see his real sparkle.  I embossed the Cherry Cobbler with the Very Vintage Embossing folder.  (I’m loving that folder!)  I added a strip of the Jolly Holiday DSP.  The greeting is from ‘Teeny Tiny Sentiments’ and punched out with the large oval and scallop oval and raised up with Dimensionals.  It was all adhered to the Old Olive Base.  You can’t beat these for Christmas colours!

I’m off now.  It is getting late.  We have just got home from my son’s school music concert.  He has been studying World Music this semester and being a teen doesn’t tell me anything he does at school.  I was amazed!  They performed some Irish pieces and a Brazilian samba.  It was very impressive.  I asked for an encore performance at home but I’m still waiting on that one!!

Be back in the next few days with some more Christmas projects so stop by again really soon.