cards, Catalogues, Stampin' Up!, Videos

WEDNESDAY’S WOW! #52 – LOVELY LATTICE 3 WAYS!

Wednesday’s WOW! #52.  Today I thought we would take a look at this gorgeous stamp, the Lovely Lattice.  This is a Sale-A-Bration choice.  It’s such a beautiful image and so nice to colour but also as I show, you can leave it white.  I know I am not great at colouring in so I like that idea.

Isn’t this pretty?  I have a video below so you can have a closer look.  And had you noticed the little scallop type line image.  I had completely missed this stamp and it would really add extra detail to your cards.  Don’t forget the little single flower image too.  See the video below.


Let’s have a closer look at the cards.

This one above is so pretty coloured with the Stampin’ Blends.  You don’t need too much more with it.  The sentiment is from Healing Hugs from the Annual Catalogue. And,look at the white card – Stitched Rectangle Dies. 🙂

You know what I like about this card above?  I like that it isn’t coloured and looks so striking in white against the green.  On this one the flowers are fussy cut.  The diecut background and sentiment shape are from the Rose Trellis Thinlits Dies in the Occasions Catalogue.

This card above is so pretty coloured in Grapefruit Grove. See, the Scallop line stamp makes a nice background.  The sentiment is from the Well Written Framelits Dies and the Well Said stamp set.

The Lovely Lattice is a free choice for Sale-A-Bration with orders over $90.  This set could be yours. 🙂

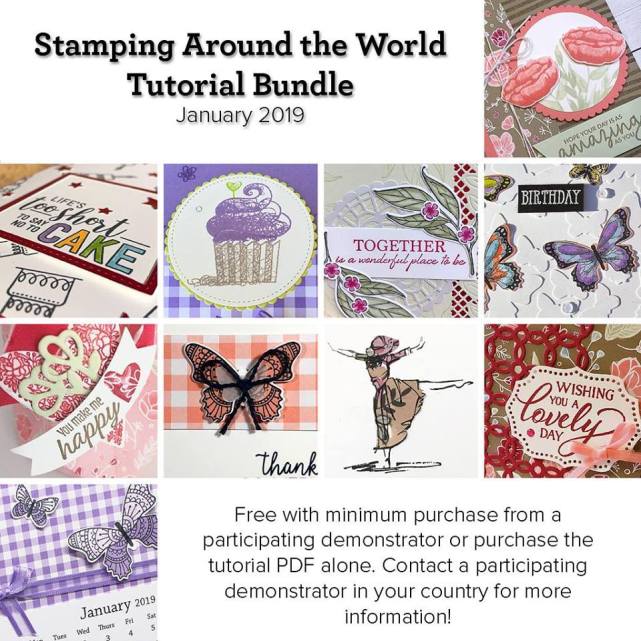
Shop in my store now -> HERE.  It’s shipped directly to you anywhere in Australia. Once you have done your order select your Sale-A-Bration set.  These orders will also receive a Tutorial Bundle for 10 different projects FREE!

Please use the Host Code: FYQHM4CK

Thank you for your order.  Please be sure not to mark it anonymous as I can’t send your Thank You card to you.

Jenny


cards, Stampin' Up!, Uncategorized

SIMPLE BEAUTY ABOUNDS PAIR!

Stampin’ Up! is all about simple stamping at the moment.  I find that a bit hard but I needed to make some quick cards the other day so I went with some simple stamping.

This Beauty Abounds set is a lovely one.  I love the Bokeh style dots.  You can create some fun, whimsical cards with this.

Colours are Flirty Flamingo, Granny Apple Green and Memento Black.  I stamped a butterfly on scrap white and coloured it with the Flirty Flamingo Stampin’ Blends then fussy cut it out.

You could do a lot with this set.  I have seen some lovely samples online so I need a little more play with it I think. 🙂

It is available as a Bundle with the gorgeous Butterfly Beauty Thinlits for $97.  You can buy the stamps alone for $40.

Available in my store now -> HERE.

Jenny


cards, Stampin' Up!, Tutorials

MANGO HELLO CUPCAKE!

I have another Hello Cupcake card to share with you today. Do you like cupcakes?  I have to say I don’t have them too often and I take the frosting off.  It is way too sweet.  I do like these cupcakes though. 🙂

I made a banner a little while ago with the Brights Designer Series Paper Stack.  I had lots of angle pieces left over from cutting the triangles.  So rather than waste them I will try and use them on some projects.

This card is in Mango Melody which I haven’t used too much of. On some white card I stamped the cupcake base in Early Espresso, the “cake” part in Daffodil Delight and the frosting in Mango Melody.  This piece was then cut with one of the ovals from the Stitched Shapes Framelits. A white card mat was first stamped with some “sprinkles” and then it was run through the Big Shot with the Subtle Embossing Folder.

I was brave.  I stamped the sentiment on the Mango Melody angle piece. I was really nervous to do this in case it didn’t stamp well but phew! it worked.  To finish, adhere all the pieces together.  I raised up the Oval piece with dimesionals and added a Rhinestone for bling.

Maybe I could make a few more different coloured versions with these angle pieces I have.  I will see how that one goes for time. 🙂

The Hello Cupcake set is a free choice for Sale-A-Bration with your orders over $90. Have you checked it out yet? See all the choices and to order in my store -> HERE.  

Please use the Host Code: FYQHM4CK     Thanks for your orders. 

Don’t forget too.  Receive your free card Tutorials with your qualifying order.

Have a great day,

Jenny

cards, Catalogues, Stampin' Up!, Uncategorized

HELLO CUPCAKE CASE!

I have been having a little fun with cupcakes lately.  Hello Cupcake from the Sale-A-Bration Catalogue actually.  So I thought I would start to share some projects for you.

If you are not sure where to start with a stamp set, why not CASE (Copy And Share Everything).  The Stampin’ Up! Catalogues are great for inspiration.

This card is a CASE from p6 of the Sale-A-Bration catalogue.

Base card is Mint Macaron stamped with some sprinkles in Mint Macaron. The Blushing Bride strip is 9cm x 3cm (approximately 3 1/2″x 1 1/4″). On the white card (which is 7.5cm x 12.8cm – Approximately 3″ x 5″), I stamped the cupcake base in Early Espresso.

I positioned the Blushing Bride card strip temporarily above the cupcake base before stamping the Cupcake top.  Then I could stamp the cupcake top in the right place.  I just slid the strip away slightly to stamp. The Cupcake top is stamped in Blushing Bride and the Sprinkles in Berry Burst.  Some Linen Thread was wrapped twice around the strip.  I find it helpful to add a little Snail Adhesive on the back of the strip to hold the Thread in place to wrap it around.

Some more Cupcakes are on their way.

You can pick up your free Hello Cupcake set with your orders over $90 AUS during Sale-A-Bration.  If you are in Australia, Stop by my store to order -> HERE.  Please use the HOST CODE: FYQHM4CK

Thanks for visiting,

Jenny


cards, Stampin' Up!

ON MY MIND FROGGY!

There are some great free sets for your Sale-A-Bration choices this year but none more cooler than the So Hoppy Together set.  I have played around with this set recently.  This is just one of the cards to share with you.

Isn’t he a cute fellow?  I stamped him first over the Coastal Cabana base card in Coastal Cabana Ink.  I stamped him also in Stazon on white card and coloured him in with the Watercolor Pencils.  Then lightly washed over him with the Aquapainter.   The white card was then cut with the Stitched Shapes Framelits.  A strip of Granny Apple card was embossed with the Sparkle Embossing Folder.

I like making Thinking of You or Hello type cards to send out to people.  I love this sentiment from the new Butterfly Gala set.  I think I will be using this sentiment a bit.  I stamped it on to a strip of white card and cut it with the Rectangle Stitched Framelits and cut a strip of Granny Apple Green card too and offset it under the sentiment piece.  Of course, bling to finish with an adhesive Rhinestone.

I have more froggy cards to come.  You can see the So Hoppy Together set and all the other free Sale-A-Bration choices in my store -> HERE.  Remember to grab your free choice with your $90 or $180 AUS order. Thank you for your order too.  

Thanks for visiting me,

Jenny

cards, Classes, Stampin' Up!, Tutorials

10 PROJECT TUTORIALS FREE WITH YOUR ORDER!

Happy New Year to you!  2019 is here and I am excited with lots of new things coming.

To kick off today I can now announce to you that I have collaborated with some Demonstrators from around the world to bring to you each month Stamping Around the World Tutorial Bundles.

You can receive 10 Free project tutorials when you order with me with a qualifying order OR you can purchase the Tutorials. 

Here are the Details.

  • The Tutorial Bundle includes 10 projects.
  • Orders over $78 AUS will receive the Tutorials Free. Order either in store or by contacting me directly. The PDF will be sent out to you after the order is received.  Australian residents only.
  • Purchase the Tutorials for $28 AUS.  The Tutorials can be purchased by direct deposit or through PAYPAL by anyone globally.  That’s exciting! 🙂

I am sure you will love the tutorials.  They are all fantastic.

In addition, Sale-A-Bration starts on the 3rd so for orders over $90 or $180 you can choose select Sale-A-Bration product for Free.

DO YOU WANT MORE??

Join the Sale-A-Bration club.  Commit to ordering $90 per month for the next 3 months (Jan, Feb, Mar) and receive your choice of Sale-A-Bration products PLUS one month you receive the Host rewards of a minimum $27.

Email me or comment that you want to take part.

TO ORDER

Contact me or Order products in my store -> HERE  Please use the Host Code FYQHM4CK

Thanks for choosing me to be your Stampin’ Up! Demonstrator.  I do appreciate it.

Jenny


cards, Christmas, Stampin' Up!

A YEAR OF STAMPING!

It’s the last day of 2018.  It has been an exciting year with Stampin’ Up!.   I have loved sharing my creations with you.  Lots of new things have happened on my blog with the introduction of Wednesday’s WOW! which has been hugely popular and the start of my Youtube channel.  (Baby steps there!!).  Thank you for joining me in this ride.

Today I am going to share a few of my favourites from this past year. If you click on the heading it will take you to the original post.

Peekaboo Panda 

Looking through the Cave  (this was totally out of the box but has been very popular).

Baby Wipe with Petal Palette

Baby Spinner Card

Delightful Gorgeous Grape

Sparkly Rainbow  (this was probably up there with one of my most favourites of the year.  I love the colour and sparkle)

Envelope Satchel (this was a popular gift bag tutorial.

Double Emboss your card (this continues to be a very popular Pinterest post)

Copper Shimmer Paint (another popular post)

Postcard Pals (I love these guys)

Pyramid Christmas (only recent but it has been popular)

It certainly has been a busy year.  2019 already is shaping up to be a busy and exciting one with the start of Sale-A-Bration and the Occasions Catalogue starting on the 3rd January.  So watch for new projects VERY SOON.

Before I leave you today I will take a minute for a little “commercial Plug”. I am sorry for the shameless advertising. I just want you to be sure that you are up to speed in all that is happening on my blog and with Stampin’ Up! so you don’t miss out on anything.

  • Firstly, if you receive these blog updates by email then be sure to visit my blog.  It has undergone an overhaul and I have freshened the site up.  Check it out. If  you haven’t already, subscribe to my blog click on the tab in the right hand column to subscribe.
  • Have you signed up for my newsletter yet?  You can click on the tab in the right hand column.
  • Follow me on Facebook or Instagram or subscribe to my Youtube channel. Links are in the right hand column.
  • Join my Private Facebook group.  Head -> HERE to request to join.  We share our projects and I share tips and occasionally have giveaways. Lots of fun!


OK.  Thanks for the indulgence of reflecting on the past year of creating – and a little advertising. 🙂

Happy New Year to you.  Thanks for sharing with me on this journey. Onwards to a creative 2019!

Jenny

cards, Catalogues, Christmas, Classes, Personal Ramblings, Stampin' Up!

FROM OUR HOME TO YOURS – MERRY CHRISTMAS!


Christmas is almost here!  I wanted to take a moment to wish you a Very Merry Christmas from our home to yours. 

Thank you for joining with me in this fun stamping journey.  I have loved sharing all my projects with you and I look forward to more sharing in the New Year.

However you spend the day be safe and while under the tree might be full of gifts and treasures I hope you take time to think on the greatest treasure given to us in the gift of Jesus.

Happy Christmas.

——

FARMHOUSE CHRISTMAS CARD

The card above was made for my 12 Weeks of Christmas series but, well… I ran out of weeks to share it. It’s a great opportunity to share it with you now for my Christmas wishes to you.  Made with the Farmhouse Christmas Bundle which is sadly not being carried over, I wanted to show that you can use this set without having to colour it all the time.  I stamped the house a number of times over the Crumb Cake card base.  The paper is from Under The Mistletoe DSP.  You can stamp directly on to the silver Foil but remember to use Stazon.

While this card is very simple I deliberated on it for so long in how to work the sentiment.  Maybe an hour just on that. How many different ways could I work it. Seriously why can’t I just go with it!  It worked out in the end with just a strip of Real Red Satin Ribbon to finish. Which I should have just stuck with in the beginning.  Do you have days like that?? 🙂

Thanks for visiting,

Happy Christmas.

Jenny

cards, Catalogues, Christmas, Classes

HUNG WITH CARE STOCKING CARDS – AND A WINNER!

I think this stamp set hasn’t had much airing around the blogosphere.  That’s a bit sad.  It is a cute one. Hung With Care is a Host set found in the Holiday Catalogue.  I must say I haven’t used it near enough.  Today I thought it should have it’s turn in the limelight.

This first one uses the lovely All is Bright Designer Series Paper. You don’t need too much on the card when you use this paper.  The stocking is stamped in Garden Green.  For the sentiment I heat embossed that in white on black card and then punched it out with the Classic Label Punch.

This card was one from one of my Christmas Stamp A Stack Classes recently. The stocking was stamped in Garden Green and the white oval card was layered on to Silver Glimmer Paper. The Garden Green card mat was embossed with the Tin Tile Embossing Folder.  The Real Red Twine is retired.  I don’t usually use retired products in classes but I ran out of the thin Red Ribbon.  Adding a small strip of Under The Mistletoe DSP adds a little contrast to it.  Everyone did like making this card I think.  It’s nice when you can make up 3 of these cards in class in a hurry and they are ready to go.

BLING WINNER

A few posts ago I posted a little giveaway for reaching 50 Wednesday’s WOW!  Today I can announce the winner of the Bling Pack.

Congratulations Joy Stewart.  I will drop you an email shortly to arrange them to be sent to you.

Thanks for stopping by,

Jenny

3D projects, cards, Catalogues, Christmas, Stampin' Up!, Tutorials, Videos

WEDNESDAY’S WOW! #50 – CREATING A PYRAMID CARD (AND MAYBE A GIVEAWAY!)

Here we are Wednesday’s WOW! #50.  I really didn’t even consider I would get to that number when I first started just this year.  How fun it has been sharing fun projects and videos with you.  Have you enjoyed them??  Today for #50 I have a special project that I have been sitting on for a few weeks waiting to share with you – and Today is the day! And since it is such a big milestone I thought I would have a little giveaway on my blog.  It’s been a while since I have done that so be sure to read all the details below.

So today’s project is … A Pyramid Card.  Have you made one of these before.  I thought it would be fun to make one and share it with you.

This is the front view.

This is the back view.

I have put together a video for you and have some photos too below.

Apologies in advance for the video quality.  I am working on that. 😉

CREATE YOUR OWN PYRAMID CARD

The Pyramid card can be made to any size.  The principles to make them are the same.  Work out the approximate height you would like and the size of the card squares will be approximately three-quarters of that height.

Tutorial and measurements for the Pyramid card above.

Cut 3 squares of card to 10.5 cm (Just over 4”).

Cut 2 squares of Designer Series Paper (DSP) slightly smaller than is 4mm or 1/8”.  Squares for this one would be 10.1cm or 4”).

1) Score each card piece diagonally once.  Fold on the scored line.

2) Cut both squares of DSP in half diagonally.  Flip one triangle over to use the opposite pattern.  You may choose to use a completely different piece of DSP for a different pattern choice.  You may choose to have each piece the same. Adhere the DSP triangles onto one panel of each card

3) (NB: In these photos I didn’t adhere the Designer Series Paper before assembling). Position one of the squares behind another square underneath the other square.  Before applying adhesive, check the position so you only apply adhesive to where it is needed.  Repeat this for each card piece.

Be careful where you place the adhesive as you won’t want to place it all over your card.

4) You can choose to adhere the third square to the first square to assemble it permanently or you can add a Velcro dot to the edge piece, or add ribbon to tie it together so it can come apart to lay flat for posting.

– Decorate your Pyramid card as you like.

BLOG GIVEAWAY

OK, now for the prize.  Since it’s the 50th Wednesday’s WOW! I have a Blog Giveaway of … some BLING! We all love bling and let’s face it we can use it to cover up a multitude of mistakes.  Who does that?? 🙂

WHAT YOU NEED TO DO

I will pick a winner at random.   To enter please leave a comment on where you are from and what you love seeing when you come to visit my blog.  I will close the entries on Friday midday. AEST  The bling giveaway is only for Australian residents only sorry.  BUT if you are an international visitor please leave a comment and I will send a handmade card off to you.  I am allowed to do that. 🙂

So enter away.  And thanks for visiting me.

Jenny