cards, Christmas, Stampin' Up!

A YEAR OF STAMPING!

It’s the last day of 2018.  It has been an exciting year with Stampin’ Up!.   I have loved sharing my creations with you.  Lots of new things have happened on my blog with the introduction of Wednesday’s WOW! which has been hugely popular and the start of my Youtube channel.  (Baby steps there!!).  Thank you for joining me in this ride.

Today I am going to share a few of my favourites from this past year. If you click on the heading it will take you to the original post.

Peekaboo Panda 

Looking through the Cave  (this was totally out of the box but has been very popular).

Baby Wipe with Petal Palette

Baby Spinner Card

Delightful Gorgeous Grape

Sparkly Rainbow  (this was probably up there with one of my most favourites of the year.  I love the colour and sparkle)

Envelope Satchel (this was a popular gift bag tutorial.

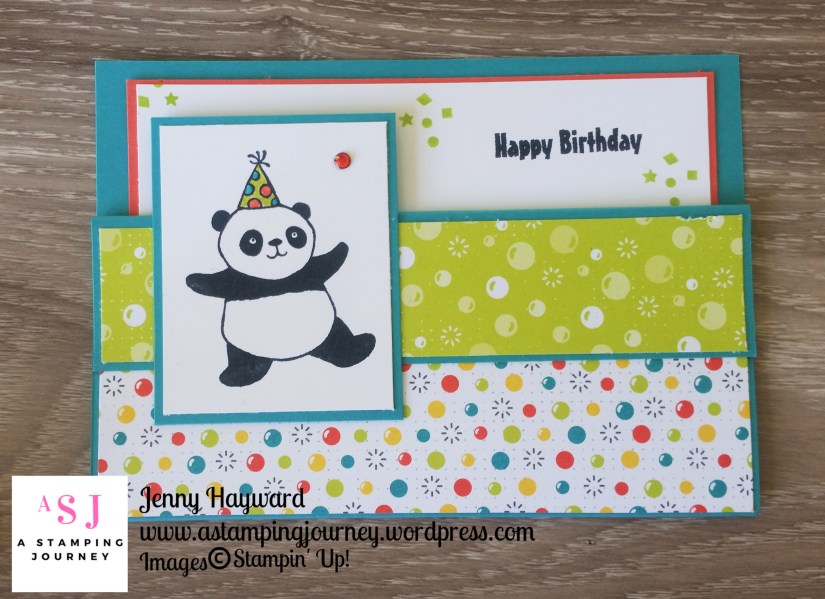
Double Emboss your card (this continues to be a very popular Pinterest post)

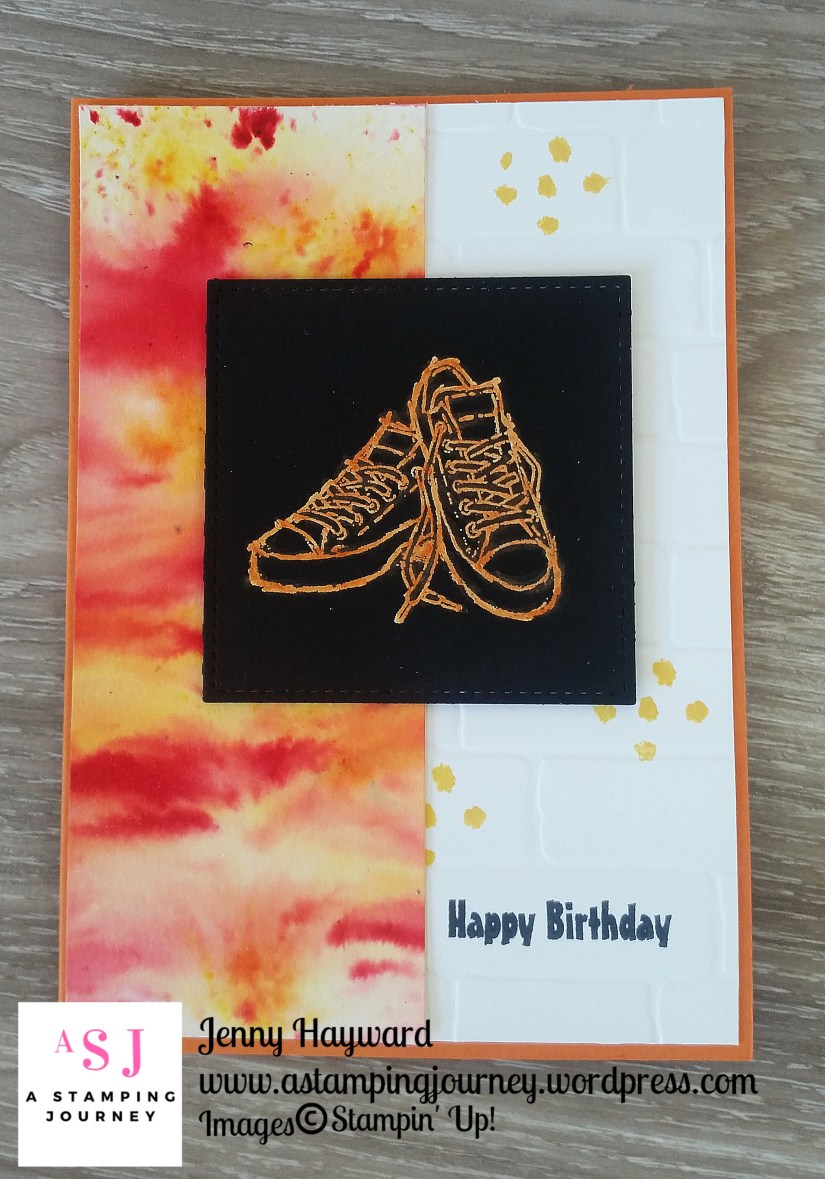
Copper Shimmer Paint (another popular post)

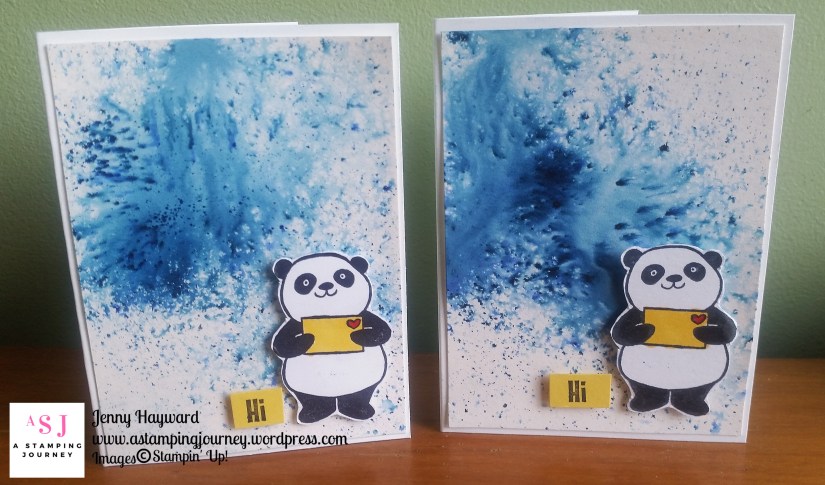
Postcard Pals (I love these guys)

Pyramid Christmas (only recent but it has been popular)

It certainly has been a busy year.  2019 already is shaping up to be a busy and exciting one with the start of Sale-A-Bration and the Occasions Catalogue starting on the 3rd January.  So watch for new projects VERY SOON.

Before I leave you today I will take a minute for a little “commercial Plug”. I am sorry for the shameless advertising. I just want you to be sure that you are up to speed in all that is happening on my blog and with Stampin’ Up! so you don’t miss out on anything.

  • Firstly, if you receive these blog updates by email then be sure to visit my blog.  It has undergone an overhaul and I have freshened the site up.  Check it out. If  you haven’t already, subscribe to my blog click on the tab in the right hand column to subscribe.
  • Have you signed up for my newsletter yet?  You can click on the tab in the right hand column.
  • Follow me on Facebook or Instagram or subscribe to my Youtube channel. Links are in the right hand column.
  • Join my Private Facebook group.  Head -> HERE to request to join.  We share our projects and I share tips and occasionally have giveaways. Lots of fun!


OK.  Thanks for the indulgence of reflecting on the past year of creating – and a little advertising. 🙂

Happy New Year to you.  Thanks for sharing with me on this journey. Onwards to a creative 2019!

Jenny

cards, Catalogues, Sale-A-Bration, Tutorials

PARTY PANDA POCKET CARD!

I am going to miss these Party Pandas.  Seriously, aren’t they so cute??  I had to use them again for one last blast.  I saw THIS POCKET CARD by Barbstamps the other week and thought the Pandas would be great for it.

Here is my version.

MEASUREMENTS FOR POCKET CARD

If you head to Barb’s link at the top you can see the video with the instructions to make the card.  Below is a general idea.

Card Base:    21cm x 14.8cm     (8 1/2″x 5 1/2″)    Score at 3.5 cm and 10.5cm.          (Score at 1 1/2″ and 4 1/4″)

Fold in at the half way score line and fold back on the small scored line.  Staple or adhere the front of the card to the back.  Underneath the flap so you don’t see the staples.

Designer Series Paper: Top piece – 14.4cm x 3.1cm     (approximately 5 1/4″x 1 1/4″)        Bottom piece:  14.4cm 3.6cm   (aprroximatly 5 1/4″ x 1 1/2″)

Cut the stamped piece for the image according to the size of your image.  This piece for the Panda was card mat: 6.9cm x 5.5cm    Whisper White 6.5cm x 5.1cm.

Pocket Insert: 13.2cm x 10cm   (5 1/8″x4″)   Whisper White 12.8cm x 9.6cm   (5″x 3 3/4″)

——

On the Panda stamped piece I coloured a Rhinestone with the Pumpkin Pie Stampin’ Blends.

The Designer Series Paper is from the Bubbles and Fizz pack that is a Free choice with Sale-A-Bration.

Hope you like it,

Jenny


cards, Classes, Techniques

BRUSHO + EPIC CELEBRATIONS!

Just over one week left of Sale-A-Bration now.  I still have a number of cards to share with you using these fun, free Sale-A-Bration items.  So this next week we are cramming them all in.

This Epic Celebrations set is so cool and such a good set for the “teens”.

The stamped and coloured sneaker piece was made a few weeks ago now when I made the coloured set.  You can see that post -> HERE.  This piece was left over when I was testing the results.  I thought it would be worth keeping and using.  To make that I stamped the sneaker in Versamark and then heat embossed in White powder.  After it cooled a little I went over it with the Dark Pumpkin Pie Stampin’  Blends.  The black card piece was then cut with the Stitched Shapes Framelits.

I have shown you some Brusho Crystals backgrounds in the last couple of posts too.  Since I had a piece of the inked Brusho samples lying around still I thought I would add that to the card.  They seemed to match in well.  To create this piece I sprinkled over some Shimmery White card with the Yellow Crystals and the Gamboge colour.  Then the piece was misted with water with the Spritzer.

To finish the card, I embossed a piece of white card with the Brick Wall Embossing Folder.  Then the piece was stamped with the sentiment from Party Pandas and the “spots” from Epic Celebrations.  The card base is Pumpkin Pie.

———-

***URGENT NOTE ON THE STAMPIN’ BLENDS: 

Due to a huge demand for the Stampin’  Blends over the past few months the supply of these are very low.  New supplies won’t be in stock for some time so Stampin’  Up! have made the decision to make these unavailable to order until late May.  SO, if you want any (or all) and you can’t wait until late May then ORDER NOW – TONIGHT BY 8PM AEST.  I will be finalising an order tonight so contact me OR order online -> HERE.  Please use the Host Code: UUDCYQDV

cards

BRUSHO THANKS WITH THE PARTY PANDAS!

A few weeks back now I had a big Brusho Weekend on the blog here.  You might remember it.  If not then head back some posts and you will see lots of fun projects with these great Brusho Crystals. Recently I made up some mini Thank You cards for people who bought the Brusho Crystals over the weekend.  I thought it was time I showed you some of them.

Gotta love those Party Pandas.  I will miss these little fellows.

The base card measures 10.5cm x 15cm (approximately 4 1/8″ x 6 1/8″).  They are scored half way on the long side.  The card piece  that I created the background with was slightly smaller and I used Shimmery White for this.

To create the background I sprinkled over some Prussian Blue Brusho Crystals and then used the Spritzer with water and sprayed lightly over the card.  You can watch the Crystals change before your eyes.  It’s quite magical to watch.  The more water you add the more “dilute” or “whispery” it becomes.  Each card piece you do will end up different.  Just amazing really!

I let the card pieces dry and then stamped the little Panda in Memento Black and coloured the envelope he has with the Stampin’  Blends.  The heart was coloured with the Stampin’  Write Markers.  Just a simple sentiment is all that is required I think.  That was stamped on a small piece of Daffodil Delight and snipped down to size.  The sentiment and Panda were raised up with Dimensionals on the coloured card piece which had been adhered to the White card base.

Thanks for looking.

Jenny

PS: Not much time left to get your Party Panda set or other Sale-A-Bration choice Free with your qualifying order.  Don’t leave it too late.

3D projects, Tutorials

LOTS TO LOVE VALENTINE FLIP TOP BOX!

So it is Valentine’s Day here tomorrow apparently.  We don’t celebrate Valentine’s Day in a big way in Australia.  You might give your “significant other” a little chocolate treat and I do give my 2 kiddies (well they are mostly adults now), a little chocolate treat.

I thought that this year I should do SOMETHING! I have had the Lots to Love Box Framelits for a couple of weeks and not used them.  I had this in mind for about that long too.  So I just managed to create it in time.

I call it a Flip Top Treat Box. I am sure you could use the idea for a Gift Card not just chocolates.

This is with the Flip Top open. Mmm! Chocolate Hearts!

It has a little card insert in it to add the Chocolates. I added a Glue Dot under each one to stick them them to the card. I added a loop of ribbon which was adhered to the end of the card and then I added a small red punched circle to cover it.

CREATE YOUR OWN FLIP TOP TREAT BOX

1. Cut 2 of the box shapes from the Lots To Love Box Framelits from your card.

On one piece which will be your top score it at half way along the long side of the box. This will be at 6cm (2 3/8″) which is from the scored line measurement not from the start of the curved edge.

2. Place adhesive on the underside along the long tabs ONLY to the half way point that will be adhered to the box.  You don’t want to adhere the whole section or it won’t open. I added the adhesive on the curved end half.

3. Adhere the top piece to the bottom piece of the die-cut box.  Your bottom piece will have the curved end to the opening end as shown in the photo below.

4. Decorate the box as you like.  I used the Party Pandas set.  The hearts were cut from the Lots of Love Box Framelits set. The sentiment was cut with the Layering Square Framelits.

So cute enough for Valentine’s do you think?  Maybe it is a little late now to whip some up but file it away for another special Occasion.

Below I have a collage image ready to PIN.

Have a great day,

Jenny


cards, Catalogues, Sale-A-Bration, Stampin' Up!

PARTY PANDAS PAIR!

OK, I promise this will be the last Party Pandas card for a little while.  I’m sorry.  I really love these guys.  I wanted to show you this card and then I will move on.

The stamped pandas were left overs with trying to get my Peekaboo Panda card right.  You can see that card if you head back 2 posts.  Not wanting to waste them I cut the white stamped card down.  Layered it on a Silver Glimmer Paper scalloped Square mat.  This was cut with the Layering Square Framelits.  The Old Olive card was embossed with the Brick Wall Embossing Folder.  The paper strip is from the Sweet Soiree Specialty Designer Series Paper pack.  The sentiment is punched with the Duet Banner Punch.  I wasn’t completely happy with how the sentiment looked but hey! I am trying not to dwell on things too much.  What do you think about it?

I hope you can get some Panda Action.  Don’t forget they are a free choice during Sale-A-Bration.

Have an awesome weekend.  I hope you get in some creating time for you.

Jenny

Sale-A-Bration, Stampin' Up!

SALE-A-BRATION AND THOSE PANDAS!

Sale-A-Bration is well under way now.  Have you seen all the gorgeous projects around?  I thought I would give you a few updates – and show you some more Pandas. Make sure you read further below. 🙂

Sale-A-Bration runs until March 31st and it is all about you getting Free products.  Who doesn’t want free Stampin’ Up! products.  

How does it all work then?  Whether you Shop, Host or Join – You can get some Free products.

TO SHOP: Every $90 order select a Free product from the Sale-A-Bration choices. (also available this year special choices for $180 orders).  There are some lovely choices.  It will be a hard decision I tell  you.

TO PARTY: Who loves to party??  Especially a stamping party.

Receive an additional $40 for parties over $400. Get some friends together now for your own private stamping event.  Contact me before January 16th to book your exclusive event and receive a special gift to say THANKS an additional $10 to spend.

TO JOIN: This is for those of you who love it all and have a long wish list.  Is that you??  For $169 you will receive $235 of products PLUS an additional TWO Free stamp sets up to the value of $174.  Plus you don’t pay shipping.  AWESOME VALUE!! That’s $240 of free products.  Crazy!!!   AND any orders you add later you will get a minimum 20% off.  More savings!

Do you feel it is a bit scary to commit though? 

Just a couple of notes that might put your mind at ease.  

– No, you don’t have to join up forever.  You can leave at anytime. 

– No, you don’t have to do parties/classes/sell.  Enjoy all the discount for yourself.  But it’s crazy not to share what you love.  That’s OK though. 

– No, if you leave you are not penalized and you don’t have to give everything back.

– No, you are not on your own.  I am here to help you discover your creativity and encourage you in any way you like.  Plus, Stampin’ Up! provide lots of resources to help you along the way. 

Ask me for more information.

NOW FOR MORE PARTY PANDAS!

I showed the Peekaboo Pandas in last post.  Let me say first, they have had a huge response over on Pinterest.  Lots seems to love those cute guys.  As I was making that card I was lining up the inside pandas in the wrong place.  I didn’t want to waste them as they were still OK.  Just not for the projects I was making.  So I have made up a couple more cards.  I will show you this one and then stop by again next post and I will show you the other one.

I coloured the balloon and the envelope with the Stampin’ Blends and the hat was coloured with the Stampin’ Write markers.  

I added some Calypso Coral Sheer Ribbon and the sentiment was stamped on Daffodil Delight and punched with the Classic Label Punch and also punched in Calypso Coral and Basic Black card and layered together.  Haha! I think it is the cute expressions on these guys that melt the heart do you think?

Enough from me today.  Thanks for the visit.  Enjoy the rest of your day.

Jenny


cards, Catalogues, Sale-A-Bration, Stampin' Up!

PEEKABOO PANDA WITH PARTY PANDAS!

So have you checked out the new Occasions Catalogue yet?  What do you think??  What is your favourite?

What about Sale-A-Bration?? I couldn’t go past the adorable Party Pandas set.  So cute!!  I think it is going to be a very popular choice this year.  Of course, I had to use this set first.  This is one card I made.  I just have to show you it.

I call this my Peekaboo Panda card.

This is a Panel card.  I will explain how to make it further below.

This is the inside of the card.  Not just one Panda! Too cute. 🙂

To create the Panel Card:

1. On the front of the card base: The US standard Card base would measure 5.5″ x 8.5″ folded in half. The Metric size card base is 14.8cm and 21cm folded in half. Cut off at 3cm (approximately 1 1/4″) from the bottom edge.  Put that strip aside for later.

2. Again on the card base measure down 3cm (1 1/4″) from the score line. Cut off at the 3cm mark. Put that section away.

3. Cut 2 strips of Designer Series Paper (this one is the Sweet Soiree Specialty Designer Series Paper), just slightly smaller 2.6cm (approximately 1″) wide and 14.4cm long (In imperial make it slightly smaller the the width of your card base).  Adhere these one to the top section of the front of the card base and then one on the small strip that was cut off.

4. The panel for the stamped section is cut to your desired width you like. My piece measures 10.5cm by 6cm (or about 5.5″ x 3″). Stamp your image you like. This is then matted on a slightly larger card piece 6.4cm x 10.5cm (5.5″ x 3 1/4″). I used Daffodil Delight for this. Then I matted this on to another card piece slightly larger again 6.8cm x 10.5cm (5.5″ x 3 1/2). I used Marina Mist for this piece.

5. The first strip you cut off from the base that you set aside lie that down on your card base so the bottom of the strip aligns with the bottom of the back of the card base. You won’t glue this down. Position your stamped piece that you have completed which has been adhered to the coloured card mats. This will be positioned to the left of the card base so the bottom edge lines up with the bottom edge of the card base and the top edge lines up with the top edge of the card base. To adhere this piece you will put adhesive on the back of this stamped panel ONLY at the top and on the bottom.

6.  To stamp the Panda in the right position on the inside, lay your Whisper White card mat in place inside.  Then mark where the right hand side edge of the panel is in either pencil or just by noting the placement, then open the card base and stamp your Panda in the right place.  I will be honest it did take a couple of attempts to get it right as I wanted the Panda to be peeking in the right place.  Don’t worry I used those “duds” for other cards which I will share at a later date.

7.  Colour your images with markers and add additional stamping where required.  For the balloon, I stamped it separately on Daffodil Delight scrap card.  Then I cut the balloon and raised it up off the card with Dimensionals.

This is the stamp set Party Pandas if you hadn’t seen it.  Isn’t it just the cutest?? AND you can get it for Free with a qualifying order – which is a minimum order of $90.


If you are in Australia and don’t have a current Demonstrator you can order in my store now -> HERE.  Please use the Host Code: 3CH4MBHU   

Thanks for stopping by.  I still have more Panda cards to come.

Have a great weekend,

Jenny