cards, Catalogues, Christmas, Stampin' Up!

12 WEEKS OF CHRISTMAS – WEEK 11 – ALL IS BRIGHT!

I know I have featured the All is Bright Designer Series Paper a lot recently for my 12 Weeks of Christmas.  But hey! it’s a fun, festive paper and so easy to make cards with and that is what 12 Weeks of Christmas is all about.

Here we have Week 11 of our 12 Week of Christmas series.

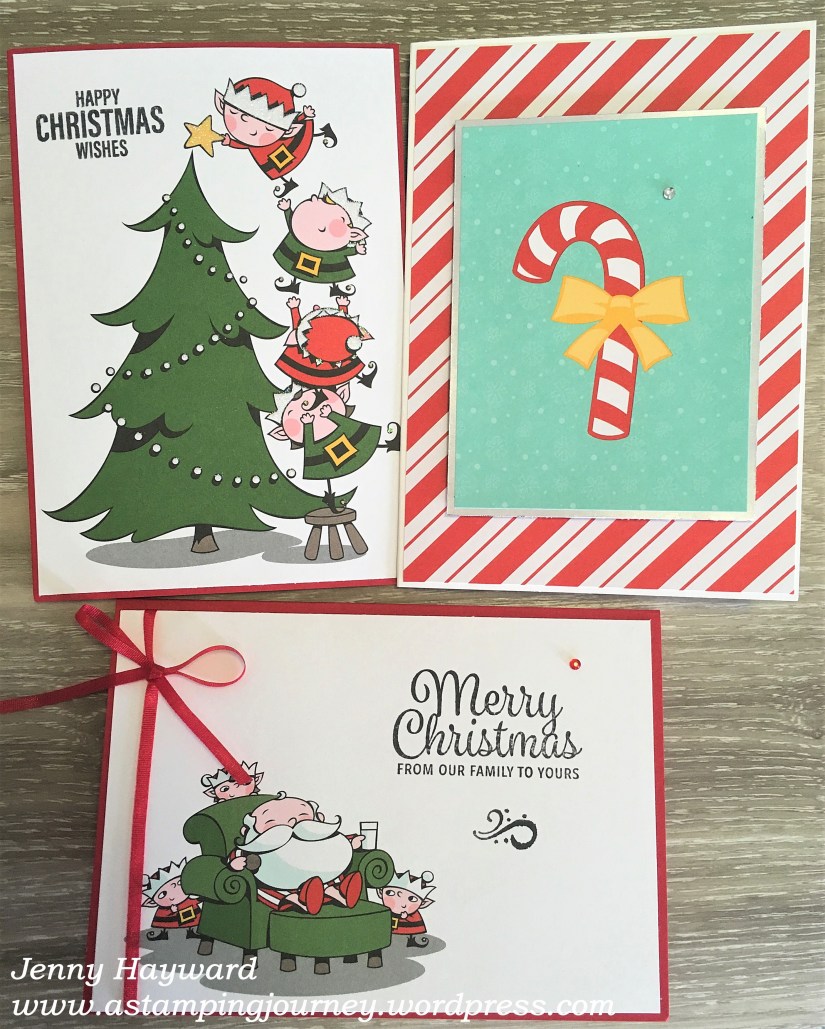
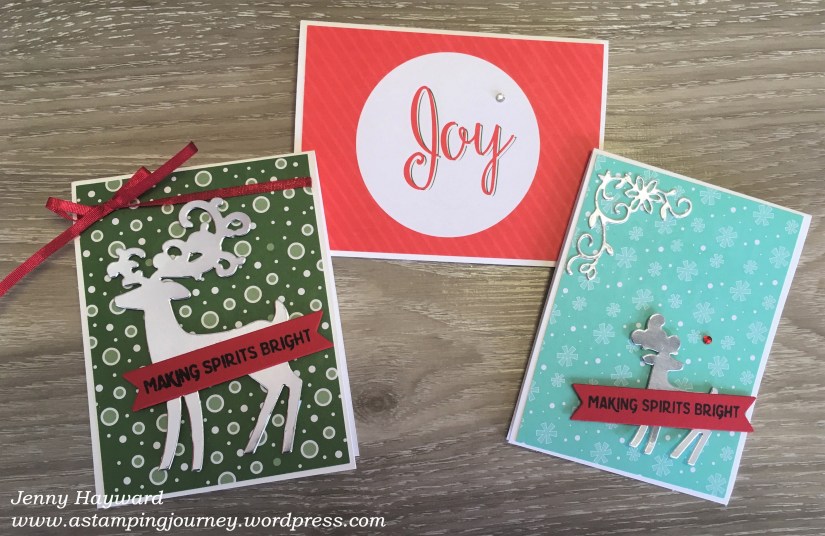
The card base is Garden Green. The red card mat was embossed with the Softly Falling Embossing Folder. The piece of All is Bright Designer Series paper which is about 7.5cm wide (3″) was cut to a banner ends with scissors.  The circle wreath from the Making Christmas Bright was stamped in Garden Green.  The sentiment was stamped in black and the Bright was stamped in Real Red.  I added some Red Rhinestones for dress up the wreath.  This circle wreath was adhered on to a scallop circle in Gold Foil cut with the Layering Circles Framelits.  Before adhering this piece to the card I added some Red Satin Ribbon hanging from behind it.  

I love the brightness of this card and the festive feel to it.  Very traditionally red and green Christmas don’t you think?

So next Friday is our last project for our 12 Weeks of Christmas.  That’s crazy! That means it’s almost Christmas.  I don’t know about you but I am totally not ready.  How about you?

Just a note on this stamp set too the Making Christmas Bright.  This stamp set is carrying over BUT not as a bundle.  If you like this stamp set then grab it now and get it at 10% off for the Bundle.  It is too late for this year’s projects but then you are all ready for next year.

You can grab it in my store now -> HERE at $61 for the bundle which includes the Making Christmas Bright stamp set and the Bulb Builder Punch.  Please use the Host Code: BZ6KB7SU or you can contact me directly.  

Thanks for visiting me,

Jenny

cards, Catalogues, Christmas

STAR BORDER WITH MAKING CHRISTMAS BRIGHT!

Another card for you with the Making Christmas Bright Bundle.  This one I wanted to use the star strip that is in the set.

I stamped the star strip several times and across the card and stamped 3 rows of the star strip.  It took some time lining them up.  I did try using the Stamparatus but it wasn’t lining up properly so I just stamped it by “eye”. I held my breath and just stamped.  That’s how it is done didn’t you know. 😉 I coloured the stars with the markers using Real Red, Old Olive and Daffodil Delight.  The colours are really bright.  It is actually Real Red.  Something happened in the editing. 🙂

The string was stamped across the corner for the 3 bulbs to run along it.  The bulbs were punched out with the Bulb Builder Punch. and raised up with Dimensionals.

This card was inspired by Sara’s card -> HERE.

Are you liking this bundle yet?  Lots you can do with it.  Are you liking that you can get it as a bundle now and save 10%? From January it will be individual prices so I would get it now if I was  you. 🙂 Grab it in store -> HERE. It is $61 AUS for the bundle now.

Thanks for stopping by with me.  I have another card with this Bundle to share with you tomorrow for our 11th Week of 12 Weeks of Christmas series so be sure to stop on by.

Jenny

cards, Catalogues, Christmas

ALL IS BRIGHT LIGHTS!

This card today is using the Making Christmas Bright bundle.  This one is CASED from Erika Rodriguez on Mary Fish’s blog I found the card on Pinterest but it just went to her blog and not the actual post so sorry about that.  This is the original card on Pinterest -> HERE.

This is my version.

For my card I added extra lights and greenery. The lights are punched from card using the Bulb Builder Punch. That makes it so much easier.  It takes a few minutes to adhered the tops on to the Bulbs but that’s ok. The sentiment on mine is from the Star of Light stamp set.  I thought it worked well with the card.

I used the Pretty Pines Thinlits for the branches.  It’s all finished with a Real Red Satin bow.

Some more to come with this bundle.  Never fear. 🙂

Thanks for visiting me today,

Jenny


cards, Catalogues, Christmas

MAKING CHRISTMAS BRIGHT CATALOGUE INSPIRED!

I have a few cards to share with you using the Making Christmas Bright Bundle in the Holiday Catalogue.  You can see this bundle on page 6 and 7 of the Holiday Catalogue.

For this card I was inspired by the card on page 7.

For my sentiment I stamped it on Whisper White card and then cut it with a square from the Stitched Shapes Framelits.  I cut a red one from one of the squares from the Layering Squares Framelits.

The base is Call Me Clover and I stamped the light string and the bulbs a number of times over the card.  An individual “bulb” was stamped on scrap white and punched with the Christmas Bulb Builder Punch.  The “top” part of the bulb was punched out in Pineapple Punch card.

It’s a fun set and great to have a punch to cut those little bulbs.

Here is the bundle.

This Bundle is being carried over but if you buy it now you will get it at 10% off.  After this month it will be available individually and who wants to pay more then!

Grab it in store now -> HERE.  Please use the HOST CODE: BZ6KB7SU

I have some more cards with this set so stop on by again soon.

Jenny

cards, Catalogues, Stampin' Up!

QUICK CHRISTMAS CARDS WITH SANTA’S WORKSHOP MEMORIES AND MORE CARDS!

You might have seen the Santa’s Workshop Memories and More Card Pack in the Holiday Catalogue (p 21). Don’t just think of them as cards for Pocket Scrapbooking.  That’s what I did at first to be honest. They are really cute to make quick cards up.  Here are a few I had made up recently.

You can simply adhere them to a base card or layer 2 of the cards together (like I have done with the Candy Cane card).  I stamped on the sentiments in black on these larger cards.  Alternatively you can add a few extra embellishments (like I have done with the smaller reindeer ones).  The cards come in a couple of different sizes.  The larger ones are 10.2 x 15.2cm, the smaller ones are 7.6 x 10.2cm.

I must dig out some of the rest of these cards and make up some more.  They come together so quickly. So great when we all starting to feel a little time poor at the moment. Unfortunately you can’t buy these anymore which is sad.  You could get the Santa’s Workshop Specialty Designer Series Paper which is Twelve 12″x12″ sheets of paper which have very cute images.  That could work similar.  But you better get on to those if you want them as they are low inventory stock.

Here they are for you. Aren’t they cute?

You can order them in store -> HERE for $24.25.  Get on it. Please use the Host Code: BZ6KB7SU  

And remember don’t mark your order “anonymous” because then I can’t send you out your Thank You card and gift.

Have a great day,

Jenny

cards, Catalogues, Christmas, Stampin' Up!

12 WEEKS OF CHRISTMAS – WEEK 10 – STYLISH CHRISTMAS BRIDGE FOLD!

Week 10 for our 12 Weeks of Christmas series.  Can you believe it?  Have you been following along over the weeks?  I hope so.  It’s been fun but I can’t believe it’s coming to the end.

Today I have a Bridge Fold card for you.

I have used the set Stylish Christmas for this which can be found in the Annual Catalogue.  Don’t forget about those great Christmas sets that are in the Annual Catalogue.

The original design for the card was from Lyssa’s blog ->HERE.

I redesigned the card to make it larger and also converted it to Metric measurements.  I will add them below.

BRIDGE FOLD CARD

** These are for the metric measurements.  For Imperial measurements, head to Lyssa’s blog post in the link above. NB:  My version is taller at 14.8cm.  You would cut your card at 5 7/8″ instead of 4 1/4″ if you want that to be the same.  Each of your strips would be longer too at about 5 3/4″. Hope that makes sense.

Base card – 14.8cm x 20.3 cm.  Score at 3.2cm, 6.3cm, 14cm and 17.2cm

Front Strips – either card or co-ordinating paper. 2 pieces measuring 2.8cm x 14.4cm.

Centre Mat – 7.3cm x 14.4cm.

Centre piece – 6.9cm x 14cm.  Whisper White.

Front Strip – 3.2cm x 14cm.

Fold the Base card.  Adhere the strips to the front.  Stamp the centre piece as you like.  Adhere on to Centre mat and adhere to the Base card in the centre.

To adhere the Front strip: Fold the left hand edge to create a z-fold.  Adhere the strip in position on the left hand piece by lining it up to the left hand edge.  Leave the Right hand folds open, adhere the right hand edge of the strip on to the right hand edge.

Decorate the card as you would like.  Have fun with it.

Thanks for stopping by,

Jenny

cards, Catalogues, Stampin' Up!

ONE FOR ALL MINI THANKS!

I hadn’t got around to sharing this little card with you.  This card is just a small love note size, so 7.5cm x 7.5cm (3″x3″).  I made quite a few of these mini cards recently for Customer Thank You cards.  This is using the lovely One For All set.

I made 2 different versions. One in a Mint Macaron card base with the flower and stamping in Mint Macaron too and a Calypso Coral banner.  Then one in a Calypso Coral base card, stamping and flower with a Mint Macaron banner.  I cut the banner free hand by cutting in to the ends of the strip.  I added a Vellum circle cut from the Stitched Labels Framelits.  The flower is cut from the Seasonal Layers Thinlits.

I sent these out as a little Thanks for customers who ordered the last month or two.  With a little token gift too of course.

If you are in Australia you can purchase your Stampin’ Up! supplies from my store -> HERE and they will be sent directly to you.  Ask me for the current Host Code. Alternatively, drop me a comment or message and I can arrange your order.  I appreciate each and every order. 

Thanks for visiting,

Jenny


3D projects, cards, Christmas, Classes

FOR OUR LAST CLASS LET’S MAKE CHRISTMAS TAGS!

It’s our last class for the year this weekend. I know life is busy at this time but if you come along you will make a set of 6 Gift Tags and a Gift Box.  That will help you out for tagging your gifts this Christmas.

I think you will like these.  Here is a peek.

Here are the details.

WHEN: Friday 7th at 10am and Saturday 8th at 2pm.

WHERE: My studio in East Corrimal.  If you are a Wollongong local come and join in.  We don’t bite. 😉

COST: $15 (extra $5 to use my adhesives).

PLEASE RSVP:  By Thursday 6th.  Book early though to reserve your seat.  Email me at jghayward@yahoo.com or comment below.

I look forward to seeing you.

———

While our classes might be finishing for the year the creating isn’t so be sure to stop by as I share my creations with you.

Thanks for stopping by,

Jenny

cards, Christmas

12 WEEKS OF CHRISTMAS – WEEK 9 – EMBOSSED VELLUM SNOWFLAKES!

For Week 9 of our 12 Weeks of Christmas series I am giving the Snowflake Showcase one last hoorah!  It is such a nice suite.  So sad that it is going.  So for today’s project I wanted to give embossing the snowflake dies a whirl.  I have seen a few cards with this idea recently.

On this card I thought I would emboss the snowflakes on Vellum cardstock.

I like how this turned out.  How great is it that you can emboss with your dies.  It gives the cards a whole different effect.

Have you tried embossing with your dies yet?  I did do it some weeks back and shared how to do it.  You can see that post -> HERE.

Just to remind you the layers when embossing I have added a graphic here for you to PIN.  I know I always forget and I have to look it up.

With vellum you need to be careful it doesn’t tear.  If you have a problem with that you can add a piece of scrap paper in between the card and the die.

The paper on the card above is from Under The Mistletoe Designer Series Paper.

I love that you can stamp the snowflakes from the Snow is Glistening stamp set and cut them with the Framelit dies from the Snowfall Thinlits or you can diecut the very detailed snowflakes straight from card or the Foil Sheets.  It’s very versatile.

I hope that you have got hold of this suite now as it ends today.  If you need to still grab it you have just a few hours left to grab it in my store -> HERE.

Please use the Host Code: BZ6KB7SU    Thank You.

Thanks for visiting me,

Jenny


cards, Catalogues, Stampin' Up!

LAST DAY FOR SNOWFLAKE SHOWCASE PRODUCTS!

I have used the Snowflake Showcase products so much these past few weeks.  I am sad that they are ending TOMORROW.  Friday is the last day to grab any – or all of them.  I have had a few people do that.  They are all so lovely together.  See all the details and the special bonuses for getting the whole bundle.

But first one more card.

This card was created by one of the Stampin’ Up! Artists.  I love the background.  I think that it has been created with the Brusho Crystals.  Then a large snowflake was diecut from White Velvet Paper.  Have you got that paper yet?  The sentiment has been stamped and heat embossed in white on Gray Granite card.  A snowflake was stamped and added to the centre.  The card was finished off with some of the gorgeous Polka Dot Tulle Ribbon.  This is such a soft, delicate card.

Now please don’t regret not buying these products.  You do need them.  I know in Australia we don’t have snowflakes at Christmas but they aren’t just for snowy Christmas cards.  If you have seen some of the cards I have created there has been some all-occasion cards.  If you missed them then do head back a few posts or click on the tag ‘Snowflake Showcase’.

Here are the details for you again.

LAST CHANCE:

ORDER ANY OF THE SNOWFLAKE SHOWCASE PRODUCTS NOW AND RECEIVE A FREE GIFT.

Grab the Tutorial AND card kit to create 2 gorgeous projects when you order these items with me PLUS receive 1 sheet 6″x12″ velvet paper FREE.

  • Order the Snow Is Falling Stamp set and the Snowfall Thinlits.

COST:      $98 plus shipping.

  • Add the Happiness Surrounds stamp set for an additional $30 and you will also receive the Snowflake Trinkets for free

You can view the products closer and order in my store now -> HERE. 

Please use the Host Code:  BZ6KB7SU    Australian residents only sorry.

OR

You can contact me directly to order them for you.

——-

Your Free items with a Thank You card will be sent out to you separately so be sure to not mark your order anonymous.  Thanks for shopping with me.

Jenny