cards, Catalogues, Christmas, Stampin' Up!

CAROLS OF CHRISTMAS WEEK – DAY 1!


DAY 1

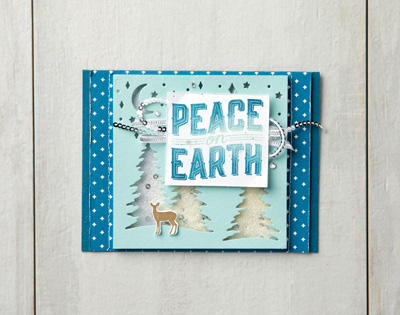
My first card for you uses the new Incolor Fresh Fig.  When I first started creating this card I felt the Fresh Fig was a big heavy but adding it to a Thick Whisper White base it lightened it slightly.

The sentiment is layered on to a Copper Foil Sheet mat cut with one of the large Scallop Square Dies from the Layering Square Framelits.  Before I adhered it to the Fresh Fig mat I wrapped around some Copper Thread around the card.  It is just a soft touch. 🙂  I also added some Copper Foil behind the Fresh Fig card at the top to see the Copper through the little cut outs of the moon and stars. 

A tree was cut from the Copper Foil too and raised up with Dimensionals.

CAROLS OF CHRISTMAS

Order the Carols of Christmas this week and receive double Loyalty points.  Always a great thing – and receive a small gift to say Thanks. 🙂

ORDER ONLINE HERE. (Australian residents only)  Please use the HOST CODE:  KDEM49NG

See you tomorrow,

Jenny


cards, Catalogues, Christmas, Classes, Stampin' Up!

CAROLS OF CHRISTMAS WEEK!


I am away all next week but you won’t miss me.  I have a special week planned for you all next week sharing some fun creations that I have been working on using the newly released Carols of Christmas bundle.  I can’t wait to share them with you all.

CAROLS OF CHRISTMAS WEEK

It will run Monday 7th to Friday 11th August.  

Be sure to click on the right column to receive my blog updates by email or to follow it in your reader.

“See” you Monday,

Jenny

cards, Catalogues, Christmas, Stampin' Up!

GET CAROLS OF CHRISTMAS – EARLY!

The Holiday Catalogue will be out on September 1st (Woo! And I just got to order from it today. But that’s another story!!).  To get you in the Christmas mode, Stampin’ Up! have released a Christmas bundle early and you can order it from today.

This bundle is the Carols Of Christmas.  You can buy the stamp set alone or just the Thinlits but why wouldn’t you get the Bundle  including stamps AND Thinlits and save 10%!

I have been having fun playing with these recently.  Next week on my blog will be a WEEK OF CAROLS OF CHRISTMAS.  So watch out next week. 🙂

Check the Stampin’ Up! video below showing this great bundle.  So many great ways to use this bundle.

Here are just a few card ideas by Stampin’ Up!


If you can’t wait to get your own set then stop by my store HERE.  It is available in Wood Mount Bundle ($90.75)  or Clear Mount Bundle ($78.25).  

If shopping online then please use the HOST CODE: KDEM49NG   

Thanks for stopping by.

Jenny

NB: Don’t forget: If you received a redemption voucher in July you can now redeem it during August.


cards, Catalogues, Classes, Stampin' Up!, Techniques, Tutorials, Videos

STARLIGHT EMBOSS RESIST CARD!

This is the 2nd project from my Christmas in July Online event that I thought I would share with you.

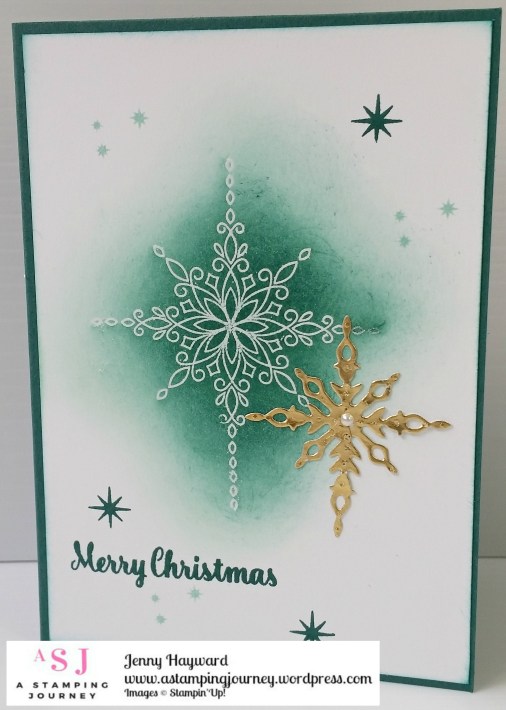
This card uses the Emboss Resist Technique.  Heat embossing itself is such a magical technique but add the ink to it and you get a WOW! effect – I think anyway.

Here is the card. I have used the Star of Light Stamp set and the Starlight Thinlits. I have a video below for you to check it out yourself.

Thanks for visiting and checking it out.  Be sure to subscribe to my Youtube channel so you get regular updates as I start venturing in to this world.  I would appreciate your feedback too for this Youtube novice. 🙂

Jenny

cards, Catalogues, Christmas, Classes, Stampin' Up!, Tutorials, Videos

CHRISTMAS IN JULY IS STARTING SOON!

In just a few hours Christmas in July is starting.  This is a fun time when I am bringing YOU some Christmas projects via video. We will also have some games, chatter and giveaways along the way. 

I hope you  can check in at the time.  Wear your slippers, grab a drink and be there at 7.30pm (AEST)  Link is below.  Invite a friend to the event too so we can all have fun together.

If you can’t make it you can stop by later to catch up.

Here are the details to remind you.

——————————

Christmas in July is a great time to start getting inspired for Christmas.  You can join from anywhere in the world!

Here is a sneak peek for you of one of the projects I will share with you.  I think you will love it.

WHEN IS IT?? Monday 24th July at 7.30pm – 8.30pm (AEST).  

ARE YOU IN??  Come and join HERE through Facebook.  

Don’t have Facebook?  I might share some of the projects at a later date – but you will miss the fun.

If you have trouble joining the event through the above link please let me know. I can’t wait to share everything with you.

See you soon,

HO! HO! HO!

cards, Catalogues, Challenges, Stampin' Up!

STAMPIN’ DREAMS BLOG HOP – CASE THE CATALOGUE!

Today I am taking part in the Stampin’ Dreams Blog Hop where the theme is CASE THE CATALOGUE.  I have to say first off I am a little excited to be a part of this Blog Hop, but I am a little daunted too. Have you seen the amazing line up in this Hop??  WOW!  How exciting to be a part of it! I hope you enjoy our little hop.

You would have just done a BIG jump from the US from the lovely Debbie Henderson’s blog HERE or just starting out on my blog.

Now CASE THE CATALOGUE.  Do you realise how many gorgeous projects are in this catalogue?  Where do you start?

I decided since I am focusing on Christmas in July this month I will CASE one from the Christmas section.  I chose the card in the top right on P 118.

This is my card.
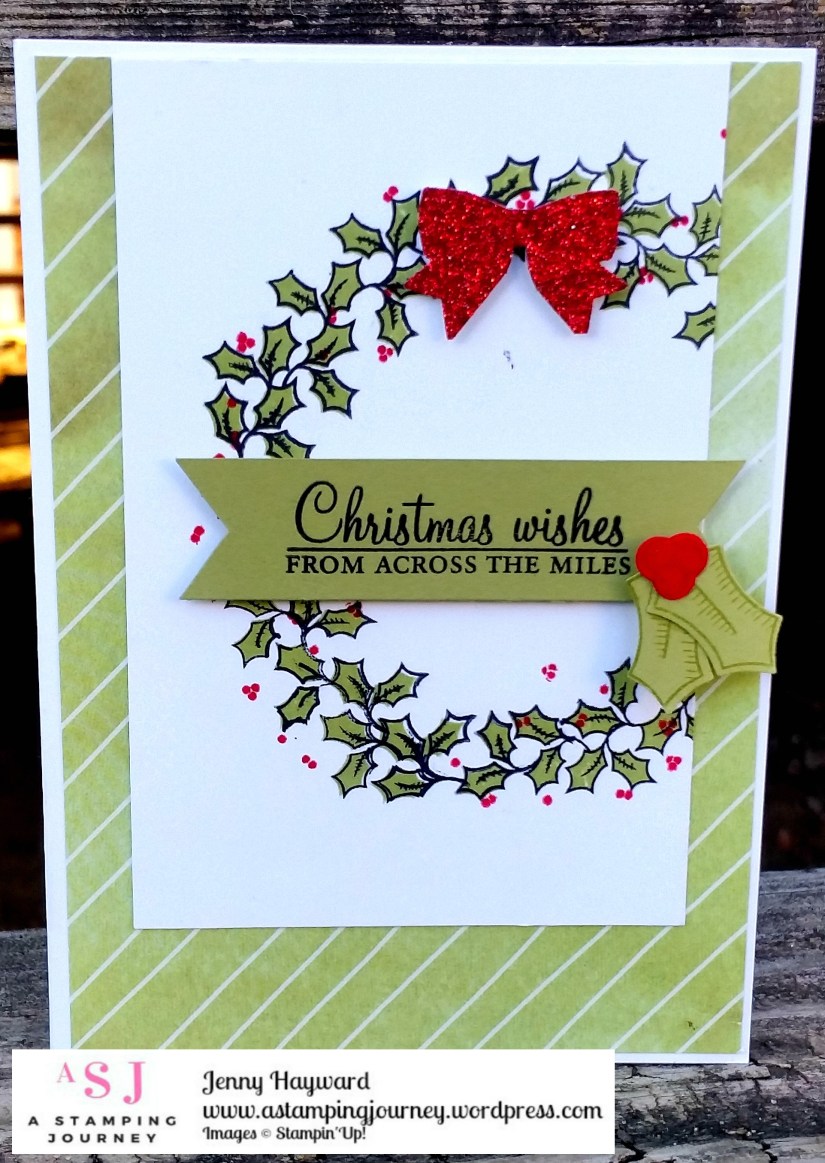
I created the card on a Thick Whisper White base.  The Designer Series Paper is from the Delightful Daisy pack.  The colour in this pack is actually Old Olive but I think the Pear Pizzazz that I used goes well with the lighter colourings in the paper.  I used the Holly Berry Happiness stamp set and the Holly Berry Builder Punch. This is a great stamp set if you don’t like colouring.  It is a 2 step one so it has the outline and the solid stamp to in-fill.  Adds colour so easily.  🙂

To stamp the wreath it is easier if you draw a circle in pencil on to your card first.  I traced around one of the Layering Circle Framelits and then you can stamp up your image around it. It is easy to see being in Photopolymer. Then just erase your pencil circle out. You can add the red berries in after.

The sentiment is stamped on a Pear Pizzazz card strip and then I flagged the ends.  I stamped and punched out the holly and check out the large red berries.  I am not sure if you can see in the photo below but I went over the berries with the Fine Tip Adhesive and left it to dry.  This adds a little shine to your berries.

The catalogue is a great resource for inspiration.  I always forget to look at it when I am stuck. What about you?  We should turn to it more often. 🙂

Now to continue the Hop you are off to Carolina’s blog HERE. Thanks for visiting me.

Jenny

cards, Catalogues, Stampin' Up!, swaps

RAK CARD SWAP!

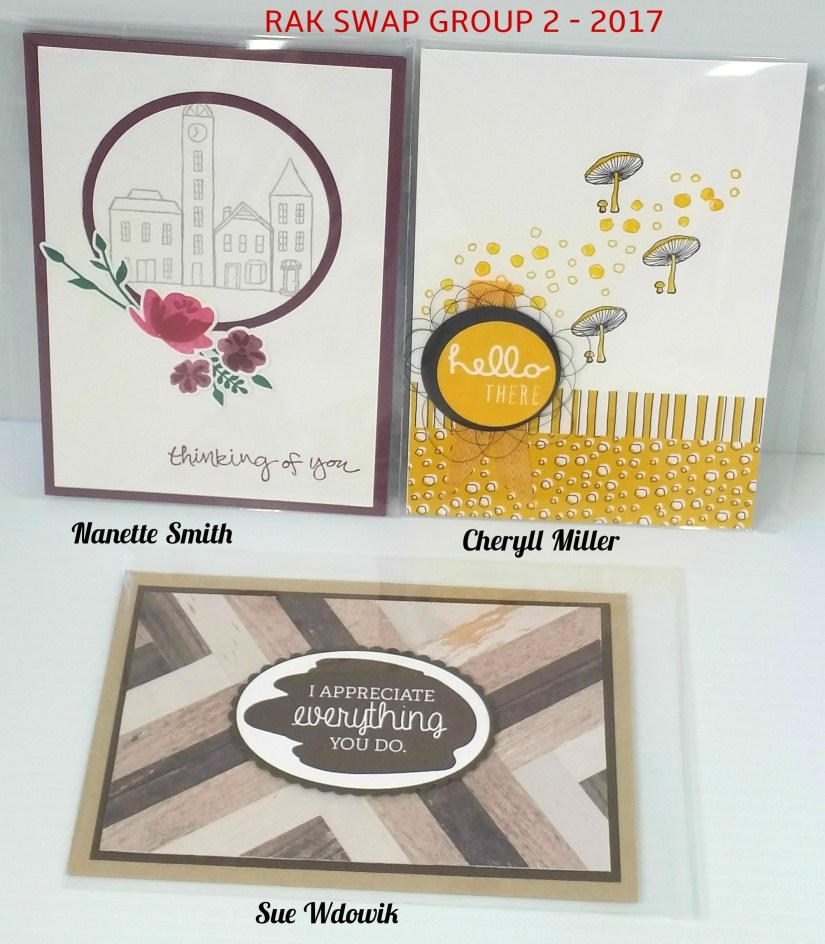
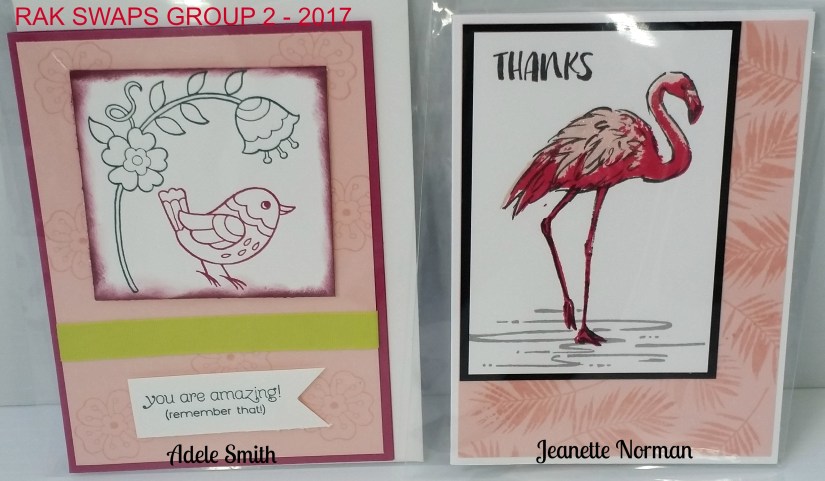
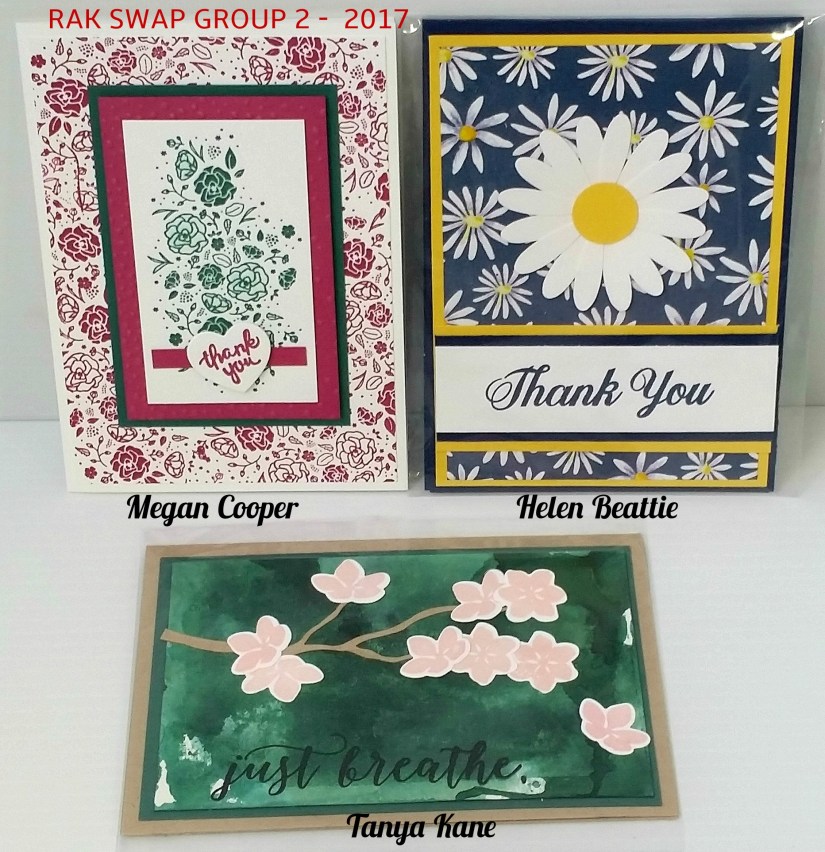
I recently took part in a card swap with Demonstrators around Australia.  There were several groups.  I thought I would share the card swaps I received.  This was for the RAK card swap (Random Acts of Kindness Facebook group).

Firstly, this is the card I created.  This was a card I made several weeks ago using the Eastern Palace Suite so I thought that I would make these.  You can see the post for this card HERE. 

So these are the cards I received in return.

Aren’t they great?? 🙂 Perhaps these might inspire you in one of your creating endeavours.

Thanks for looking,

Jenny


3D projects, Catalogues, Stampin' Up!, Techniques, Tutorials

USING THE ECLECTIC LAYERS THINLITS!

I have been sharing quite a few cards lately using the Oh! So Eclectic Bundle which includes the Oh! So Eclectic Stamp Set and the Eclectic Layers Thinlits.  (You can see them in the catalogue on p 133 and p213).

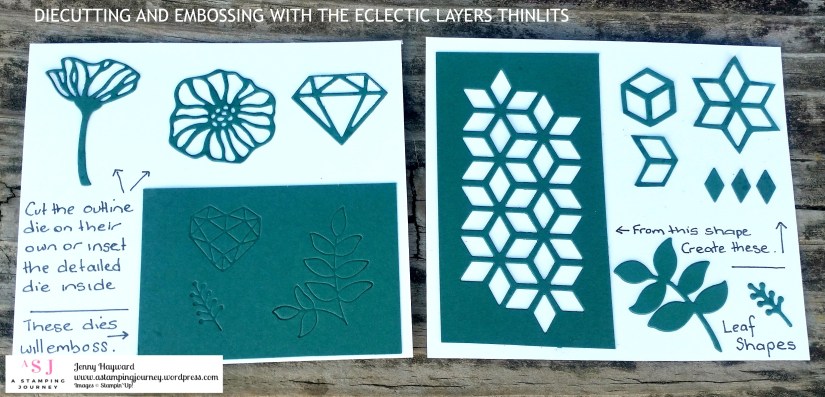
One thing with the Eclectic Layers Thinlits you may not realise is that some of the dies only emboss while others cut.  Some of the dies layer together to cut the outline and a detailed inside or you can use one on their own. It can be a little confusing  so I put together a little handy guide that is just the size to keep in the packet with the Thinlits so I can see at a glance.  I thought I would share that with you.

DIECUTTING AND EMBOSSING GUIDE WITH THE ECLECTIC LAYERS THINLITS

1) On the card on the left it shows some of the detailed shapes.  There are 2 different dies to create this shape; the outline die and a matching detailed die.  I find it easier to fit the detailed die inside the outline and cut them all together.  It is so much easier.  The outline die can be used on its own to cut the stamped image from the co-ordinating stamp set.

On this card too it show the dies that will create the dry embossed effect.   These dies will not cut.

2) On the card on the right it shows the diamond pattern.  I love the effect you get with this on cards.  Now if you are really patient you can cut sections of this diecut to create some other interesting shapes that you can add to your cards.  I am sure there are so many other combinations too.

In this Thinlits set there is also 2 leaf shapes you can cut to work with your flowers.

I hope that you might find this guide helpful.  Let me know what you think.

Hope your weekend is going awesome and you have time to steal away and create.

Jenny


cards, Catalogues, Stampin' Up!

ECLECTIC HAPPY BIRTHDAY!

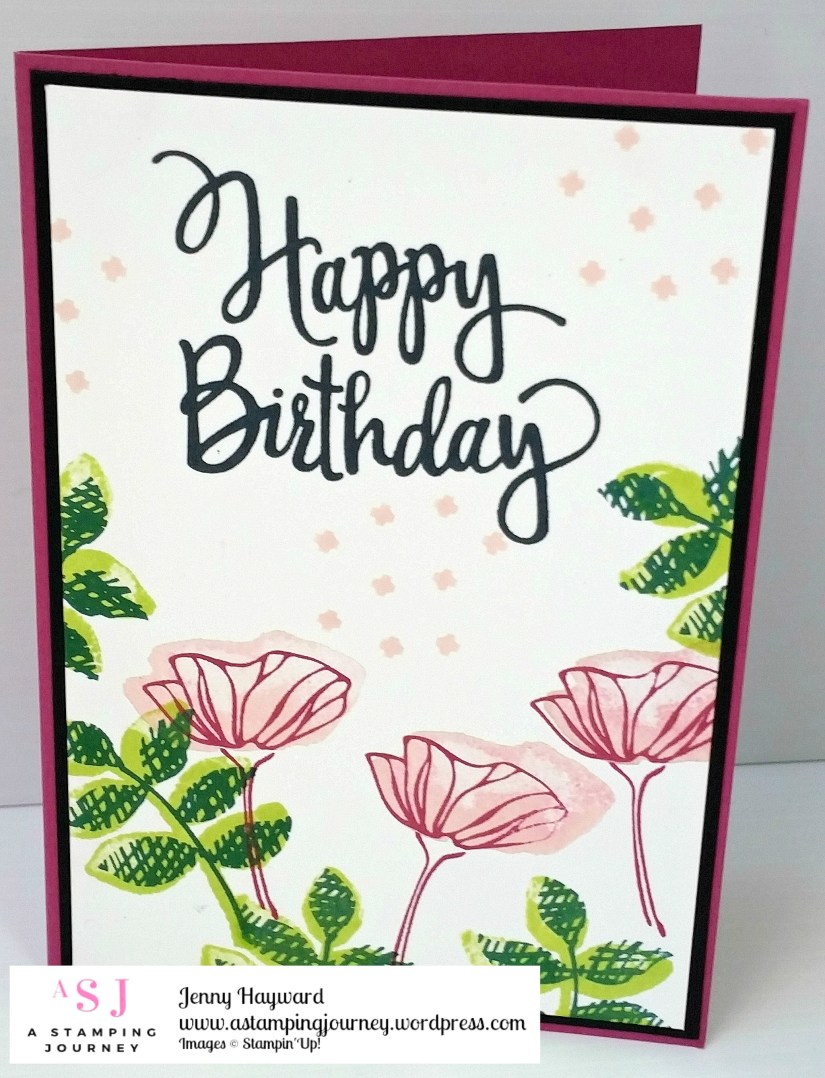
This card I am sharing today was my first play with the Oh! So Eclectic set last week.  I finally get to share it with you.

I have used Stylized Birthday with it for the sentiment.  I really don’t use this sentiment enough. It’s a great size without being overwhelming and I love the font.

I love this Oh So! Eclectic set too as you can stamp with the first stamp, overstamp it with the next one and if it is not lined up properly it doesn’t matter.  That’s the style.  🙂

The detailed flowers were first stamped with Berry Burst and then the solid image with Powder Pink.  Isn’t the washed out look nice?

The leaves are stamped with Lemon Lime Twist for the solid leaf and then Emerald Envy for the “hatched” leaf pattern.  I added some of the little “crossed” pattern in Powder Pink as a background filler.

It’s a very quick card to make a number of Birthday cards in a hurry.

Thanks for looking.  I will be back with some more cards with this set.

Jenny

Catalogues, Stampin' Up!

MORE VALUE, MORE PRODUCTS, MORE CREATIVITY!

It’s the first of July which brings some exciting news from Stampin’ Up!.  Did you want more?? Check these out!

Bonus Days was HUGE last year so it’s back again.

For every $90 you spend during July. You get a Bonus Voucher of $9 to redeem in August on any of your orders that month.  How cool!  

I am sure there are a few items on your wish list to get to $90 – and the bonus is you get a discount next month! 🙂


———————————

I am always talking about the great value when you join Stampin’ Up!.  In July it is even better!

So what is it??  Pay $169 and get $235 of products, PLUS you will also receive an Essentials Gift Pack FREE which includes a stamp set from the upcoming Holiday Catalogue. This is an additional value of $121.  HOW AMAZING!!  Check it out!

ALL THIS FREE!!!

So for $169 you get $187 of FREE Products – and you don’t pay shipping on all that either!  

I would love to welcome you to my team whether you want to join for your own discount or build a business and share with others.  Ask me for more information or Head to my website HERE and join straight away.  You don’t have anything to lose but so much to gain.  If you want to know more then head to my Page HERE for ’10 Reasons why you would want to join’. 

SO imagine what you can create with all these extra Free products??  Lots more value there.  If you are still undecided then just go and do it, You can stop anytime.

Have fun,

Jenny