3D projects, Catalogues

MOSAIC MOOD TEA BAG HOLDER AND A TAG!

I have 2 projects to share with you today.  I made them a few weeks ago but just getting to show you now.

I have these cute little Tea Bag Holders.  I made them up to send out with some of the Annual Catalogues.  These were made with the Mosaic Mood Specialty Designer Series Paper.  The paper is so shiny.  It is gorgeous really and I think they turned out ok with it.

Nothing like pouring over the new catalogue with a cup of tea in hand. 😉

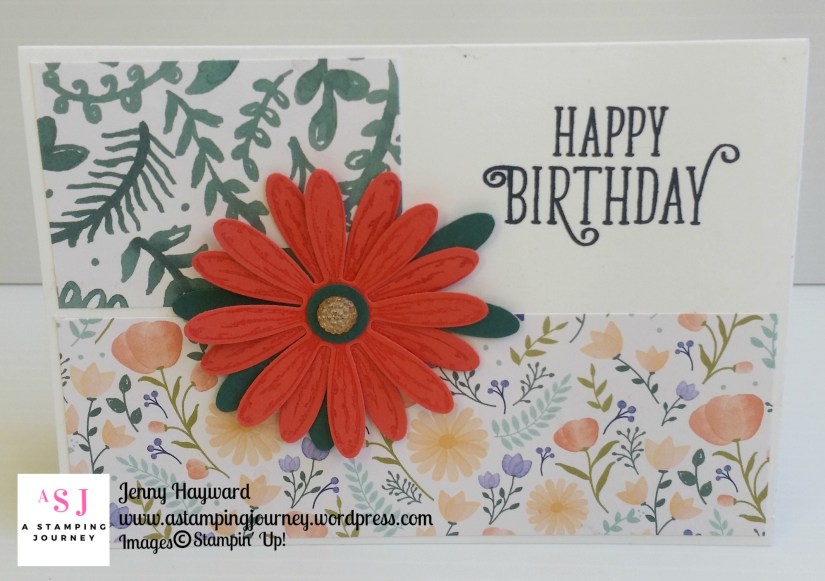
The sentiment is from the Delightful Day stamp set.  It is stamped on Mint Macaron and punched with the Timeless Label Punch.  Then backed on a white circle and the ring shape from the Stitched Labels Dies.

The little holders were made using the Envelope Punch Board.  I know it is retired but I love this little tool for making quick envelopes. The Tea Bag Holder is a Pootles one and you can find it -> HERE.

With some of the scraps from these little Treat Holders I made up a couple of tags.  These were for the Lucky Door Prizes for my launch.

I used the Delightful Day stamp set again too and the Stitched Nested Labels Dies. It’s so easy to make quick tags with the Delightful Tag Topper Punch.

Hope you like them.

Thanks for visiting,

Jenny

cards

A SPECIAL SYMPATHY CARD!

I needed to make a Sympathy card last week for a special friend. They are always hard cards to make aren’t they?

For this card I decided to use the Rose Wonder set. It’s always a great set to turn to for special occasions. I did a little search on Pinterest and decided to CASE this card from Brian King. It was simple, elegant and understated.

I didn’t have the type of paper Brian used so chose this paper from the Delightful Daisy DSP pack.  Not the usual colour for a sympathy but I thought it was OK. A simple flower cut with the Rose Garden Thinlits in white layered on Calypso Coral and a mat of White.

The sentiment is from Rose Wonder set.

Thanks for stopping by today.

Have a great day and remember to hug the ones you love.

Jenny x

cards, Personal Ramblings, Stampin' Up!

A 15 MINUTE WEDDING CARD!

It’s a crazy time of year isn’t it??? I feel I have fallen off the rails somewhere.  I need a holiday.  Oh! That’s right, I just got back a week ago from one. :/

Anyway,  you know how you get wedding invites at least 6 weeks before the Big Day.  So you know it is coming up. Haha! Well yes Josh has another wedding to go to today so of course I made a card late yesterday afternoon.  I had literally 15 minutes before I picked up my daughter from work.

Sorry the photo isn’t even great as it was late last night when I took a photo.  I had done a quick search on Pinterest earlier in the day to get ideas so I was inspired by one I saw on there – and it was quick!!  Isn’t that bad for a wedding. 😦

I used the Floral Themes stamp set.  The paper is from the Delightful Daisy Designer Series Paper pack.  Who would have thought!  I think it took most of the time to tie the ribbon!

To add to the dramas I had all my clear stamping blocks out in my studio for classes this weekend and I was in too much hurry to go outside and get them.  So I put the stamps on an inkpad to stamp it.  The trouble with that though is you can’t see where you are stamping.  Hehe! It was a bit of a gamble.  That explains the slight angle on the sentiment. 🙂

Later on I added an insert in the card. I added a piece of white copy paper and stamped the sentiment from the Rose Wonder set.  Sorry I didn’t take a photo.  I did relent and go and get a stamping block though.   I also got my Adhesive Pearls which were out in the studio too.  I think that finishes it off.

So a very quick card but my son was happy.

I need to make up a batch of wedding cards.  I say that all the time… He already has 2 invites on the fridge for the New Year.

So there you go.  I hope life isn’t too crazy for you.  I hope to come up for air soon.

Have a great weekend,

Jenny 

cards, Catalogues, Techniques

ALWAYS AND FOREVER ANNIVERSARY!

I was asked by a lovely friend to make 2 Wedding anniversary cards for 2 of her children who are both celebrating their anniversaries this month.  I haven’t made too many anniversary cards so wondered what to do.  Then … My order arrived with my Stampin’ Blends and the Always and Forever set.  🙂

These are the cards I made.

I wasn’t sure what I would do with the stamps though.  I cut some squares of white card and would see where it would take me.  I stamped the images in Memento Tuxedo Ink on Thick Whisper White card.  That is essential when using the Stampin’ Blends.  Then they were coloured them with the Blends.  On scrap card I stamped them again. For the tree stump I stamped it in Night of Navy and cut the little hearts and adhered them straight on to the image. For the tree rings I stamped it on Night of Navy card and cut the heart out and then raised it up with Dimensionals and added a Rhinestone to the heart.

Instead of adhering the white card to a card mat I added a strip of either Silver Foil or Copper Foil at the top and bottom of the white card.  The Designer Series Paper is from the Delightful Daisy DSP.  The sentiment is from the Best Birds set and cut with the Bunch of Banners Framelits.

What do you think?

You can see the Always and Forever stamp set in my store now -> HERE.

You can find out more about the Stampin’ Blends AND don’t forget my Blends Club.  Find out about that -> HERE.

Have a great weekend,

Jenny

cards, Catalogues

TWO MORE DAISY CARDS!

I have 2 more cards using the Daisy Delight bundle.  These cards were made for samples to show at the Craft Show that we did last month.  We focused on this bundle and it was only the day before that I got to make a few cards.  So they had to be quick.  No time trying to work it all out.

Firstly, you can’t go past the gorgeous Delightful Daisy paper.

For this card, cut a small piece of the Designer Series Paper smaller than the front of the card base.  Don’t be afraid to cut into it. It’s there to enjoy not to store on a shelf. Wrap some ribbon around the paper.  This is the Mini Chevron ribbon in Old Olive.  Instead of trying to tie a bow on the paper it is a bit flimsy, I adhered a strip down the length with snail adhesive and adhering the ends over the back of the paper.  Then tie a bow from some of the ribbon and attach that separately with a glue dot.  That is so much easier. Adhere that to the White card base. Almost done!

The sentiment is from the Label Me Pretty.  Stamp the sentiment in black and punch it out with the 1 1/4″ circle punch and punch a circle out from the Silver Foil with the 1 3/8″ circle.  Stamp the flourish label in Old Olive on Old Olive card and punch out with the pretty Label Punch.  Of course I added some silver thread under the sentiment and a Rhinestone.

The next I CASED from Claudia’s blog HERE. 

Have you got your sunglasses handy??  Got to love the Lemon Lime Twist.  I stamped the flower in black on Lemon Lime Twist card and punched it out. A strip of Lemon Lime Twist card was embossed with the Sparkle Embossing Folder.  Then you can cut the Happy Birthday from the Happy Birthday Thinlits.

Stay tuned for more Daisy cards to come.

Jenny

cards, Stampin' Up!, Techniques, Tutorials

A FLAP FOLD DAISY CARD!

This card I am showing you today was actually the first card I made with the Daisy Delight Bundle.  Usually my first couple of cards with a new set I turn to Pinterest and CASE a card.  I liked the idea of this card.  It is a Flap fold card.  Just a little different to the standard card.  I CASED it from Janet’s blog HERE.  I will give you the measurements shortly.  Janet has just the imperial measurements for her card but I will give you the Metric as well as the Imperial. First I guess you want to see the card.

Isn’t the Delightful Daisy Designer Series Paper just gorgeous??  On the top flap I stamped the Daisy in Calypso Coral twice and punched them out.  They were layered together and off-set slightly.  The centre was stamped in Pool Party and punched with the 1/2″ circle punch. I stamped the leaves in Old Olive for the outline and the solid image.  These were hand cut. The Daisy was then layered on a circle cut with the Layering Circle Framelits in Pool Party and then a larger one with the Stitched Shapes Framelits.  

The sentiment is from the Happy Birthday Gorgeous set. I made a discovery when I cut the sentiment out using the Straight banner die from the Bunch of Banners Framelits.  I cut the white card which I had stamped the sentiment on and it had left the centre where that was stamped but also a banner frame. So I cut another Banner in Calypso Coral to create a frame.  Cool trick!

Here is the inside of the card.  Just a simple “happy birthday” from the Happy Birthday Gorgeous set.

I think I have to make some more of these cards.  Do you want to make one?  Here is how.

FLAP FOLD CARD

Metric: Cut an A4 sheet of card lengthways in half.  This will measure 29.7cm x 10.5cm.  Score on the long side at 10.5cm and 14cm.

Imperial:  Cut standard card lengthways to measure 11″ x 4.25″.  Score at 2″ and 7.5″.

Your Designer Series Paper pieces for the front panels are cut just slightly smaller.

Thanks for visiting.  Have a great weekend,

Jenny

cards, Catalogues

DAFFODIL DAISY DELIGHT!

I realised I hadn’t shown you all my Delightful Daisy cards.  I started sharing them a couple of weeks ago but then there was something about a new catalogue coming out …:)

So I shall show you a few over the next couple of posts.

Today’s card is so bright and sunshine-y.  I love the gorgeous Delightful Daisy Designer Series Paper. The prints are so lovely.

This was the first time I had used the small flowers from the Daisy Delight stamp set.  I cut the circle from Stitched Shapes Framelits first so I could see where to position the flowers. The flower outline image and the filler image was stamped in Daffodil Delight and the stems were stamped in Old Olive.  I cut a scallop circle using the Layering Circle Framelits in Silver Foil.

The sentiment is from Butterfly Basics stamped on to Daffodil Delight card mat which was then embossed with the Softly Falling Embossing Folder.

So happy and bright.

Thanks for looking,

Jenny


cards, Catalogues, Stampin' Up!, Workshops

DELIGHTFUL DAISY DSP MAKE AND TAKE CARD!

This next card I made as a possible contender for a Make and Take card for the Craft Show.  It didn’t make the cut but I think it shows the lovely Delightful Daisy Designer Series Paper and the Daisy Delight Bundle.

This card was inspired by 2 cards I saw on Pinterest by Dawn Olchefske.  I wanted it to be a quick and easy card so  I used the different ideas for this card.

I made the card as a one layer card on Thick Whisper White card base.  One long strip of the Delightful Daisy DSP was adhered across the bottom and a different smaller piece was adhered to the top left hand side.

The Daisy was stamped in Calypso Coral ink on Calypso Coral card and then punched out with the Daisy Punch.  Yes it is Calypso Coral.  It looks more orange.

For the leaves I cut a daisy out with the Daisy Punch from Tranquil Tide ink.  Then snipped a few petals to adhere behind the daisy.   I punched a small circle out with the 1/2″ Circle Punch from Tranquil Tide to go in the centre of the flower.  Then added a Gold Faceted Gem. 

The sentiment is from Happy Birthday Gorgeous.

More Daisy Cards coming soon,

Jenny


cards, Catalogues, Classes, Stampin' Up!

A DAISY MAKE AND TAKE!

This past weekend I was at a Craft Show with my Stamping buddy Leonie.  I love meeting people and sharing stamping with them.  It is lots of fun to share in their excitement and joy when they discover new things.

I thought I would show you the make and take we did at our stand.  We focused on the Daisy Delight Bundle. I am so glad that is available again.

This card was CASED from Julie Davison on Julie’s Stamping Spot. I couldn’t locate this exact card on her blog. I originally found it on Pinterest and it didn’t link back to the exact post.

The card is a very simple one but I think effective and uses the Daisy Delight Stamp set, the Daisy Punch and the Delightful Daisy Designer Series Paper.  You can find all of them on Page 127 of the Annual Catalogue.  I changed the sentiment to Happy Birthday which is from the Happy Birthday Gorgeous set for the make and take.

This is the Bundle if you can’t get to see it in the Catalogue.

Now it’s back make sure you grab it in my store -> HERE now.

I have lots of cards using this bundle that I will share with you this week so be sure to check in.

See you tomorrow,

Jenny

Uncategorized

CAROLS OF CHRISTMAS – DAY 3!


DAY 3

This card was inspired by a card I saw on Pinterest using a different Christmas set.  I like the idea of the “negative” cut trees.  Check this out!!! The Designer Series Paper is from the Delightful Daisy DSP.  It’s not even a Christmas paper!  It looks like falling snow though doesn’t it.  🙂  The other trees are cut from the Dazzling Diamonds Glimmer Paper.

The sentiment on this card is from the Holly, Berry Happiness set.  Such a nice sentiment.  It is stamped in Smoky Slate.  Sometimes I like stamping in the grey.  It is just a little softer.

CAROLS OF CHRISTMAS

Order the Carols of Christmas this week and receive double Loyalty points – and receive a small gift to say Thanks too. 🙂

ORDER ONLINE HERE. (Australian residents only)  Please use the HOST CODE:  KDEM49NG

See you tomorrow,

Jenny