cards, Catalogues, Stampin' Up!

A TOUCH OF INK WITH ART GALLERY PAPER!

Today’s card I have used the gorgeous A Touch Of Ink Stamp set. I think the flowers team well with the Art Gallery Designer Series Paper.

I wasn’t sure about this card. I kept coming back and stamping more on it and adding a ribbon knot. I even asked on my Facebook page the other day for what people thought showing the 2 different options without the knot and then with the knot.

So now I have updated the card. It was suggested to move the knot down and I trimmed the tails of the knot. So here is the final card. I am much happier with it now. Sometimes we all need to ask for ideas and suggestions. I know I always second guess myself.

The flowers from A Touch Of Ink stamp set were stamped down the side of the white card and coloured with the Stampin’ Blends. I added some of the gorgeous Art Gallery Paper and some Art Gallery Ribbon. I added the knot of ribbon as it seemed to miss something.

I have loved using the A Touch Of Ink stamp set. It’s available as a free choice for Sale-A-Bration with an order over $180. I don’t want you missing out on it. I have an added bonus for you this week when you order.

If you are in Australia and need any supplies you can stop by my store -> HERE. I would love if you don’t have a current demonstrator if you shopped with me. Thank You.

Stampin' Up! A Touch of Ink stamp set
cards, Catalogues, Sale-A-Bration, Stampin' Up!, Videos

A TOUCH OF INK + OMBRÉ WITH A VIDEO!

Back with our Friday Flick. Today’s card is using the A Touch Of Ink stamp set. I so love this set.

The card was inspired by one I saw on Pinterest. I just saw the idea as I was scrolling through and realised I didn’t save it.

I’m using the Oh So Ombré paper with it. I love that you can get an ombré effect without all the sponging and inking. And I love the colours too.

Check the video out below. (It is also now on Youtube). If you are receiving this blog post via email update the video may not show so head to my blog by clicking on the title above to take you to the post.

Here is the card.

Stampin' Up! A Touch of Ink stamp set

The A Touch Of Ink stamp set is a free choice for Sale-A-Bration with orders over $180. The Ombré Paper is also a free Sale-A-Bration choice with orders over $90. They are both such great choices.

If you are in Australia and need supplies why not stop by my store -> HERE or you can Phone me on 0439844574 and I can help you. Don’t forget to pick your Sale-A-Bration choice.

This weekend I have an Ordering Special just for you. With your orders over $180 you can choose the A Touch Of Ink stamp set (if you like to) and Receive a sampling of the Oh! So Ombré paper from me and a card kit to make 2 cards with the A Touch Of Ink stamp set. Very cool!

Of course even better value though is if you have a lot on your Wish List is to join the Stampin’ Family. You save money all round. You only pay $169 and get $235 of products. Then get a discount each time you order so you save.

But it’s not just the discount. It’s being part of a community of fellow crafters. Of fun and inspiration. Find out more on my page -> HERE.

Free papers with SAB

Hope you enjoy today’s video,

Jenny

cards, Catalogues, Sale-A-Bration

A TOUCH OF INK WATERCOLOURED HUMMINGBIRD!

I had seen some gorgeous cards around with a watercoloured effect with the Hummingbird from A Touch of Ink stamp set. I wanted to have a go. I have to say mine didn’t turn out quite like the ones I had seen.

It’s created by heat embossing the images with White Embossing Powder. I used the Shimmery White card for the sparkle in the card. Once it has cooled then watercolour the images using the Water Painters and inkpads. To do this you can create a “well” of ink in the ink pad lid or I dabbed some ink on to a clear block and picked up the ink off that You can build up the colour as you go.

I like the effect. Maybe not the execution of my card. 🙂

I do love the effect of the edge of the card with the Stitched with Whimsy die.

Check that paper out though. That is the Highland Heather print in the Subtles pack you receive when you join Stampin’ Up! during Sale-A-Bration. There are some very cool patterns in the packs. And you receive every colour collection plus 2020-2022 Incolors. That’s 200 6″x6″ papers!

The A Touch of Ink is a free choice during Sale-A-Bration available with orders over $180. It’s such a gorgeous set.

But if you have considered joining the Stampin’ Up! Family then you might want take advantage of that now with Sale-A-Bration so you get your 200 6″x6″ squares of paper.

In Australia? You can shop in my store -> HERE. Don’t forget to add your Sale-A-Bration choice. Host Code: CJ7PPUEC Or you can contact me directly on 0439 844574.

Free papers with SAB

Have a great day,

Jenny

cards, Catalogues, Stampin' Up!, Sunday Suites

SUNDAY SUITES – DANDY GARDEN SUITE!

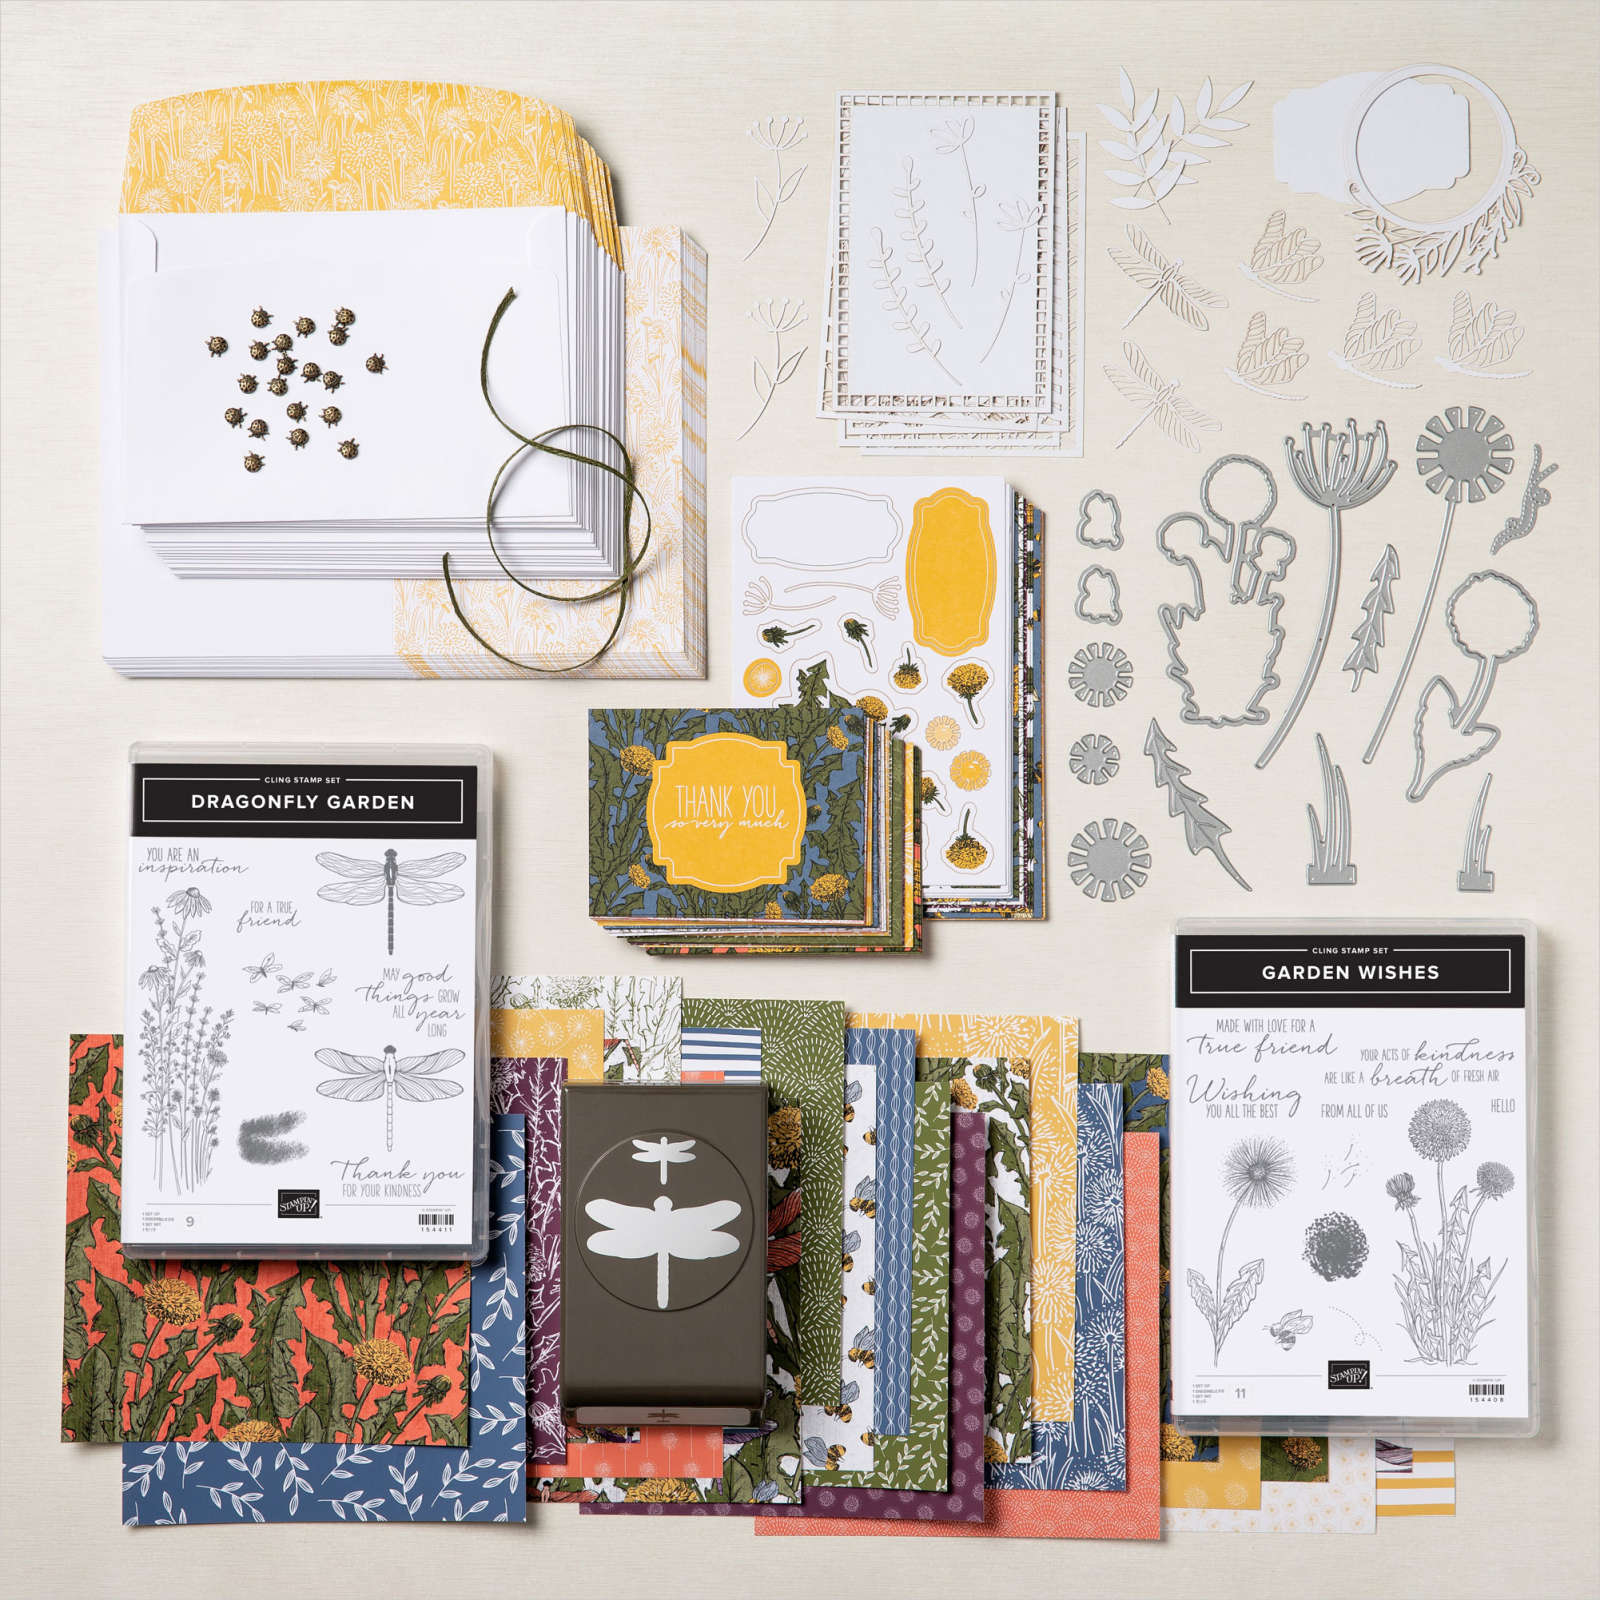
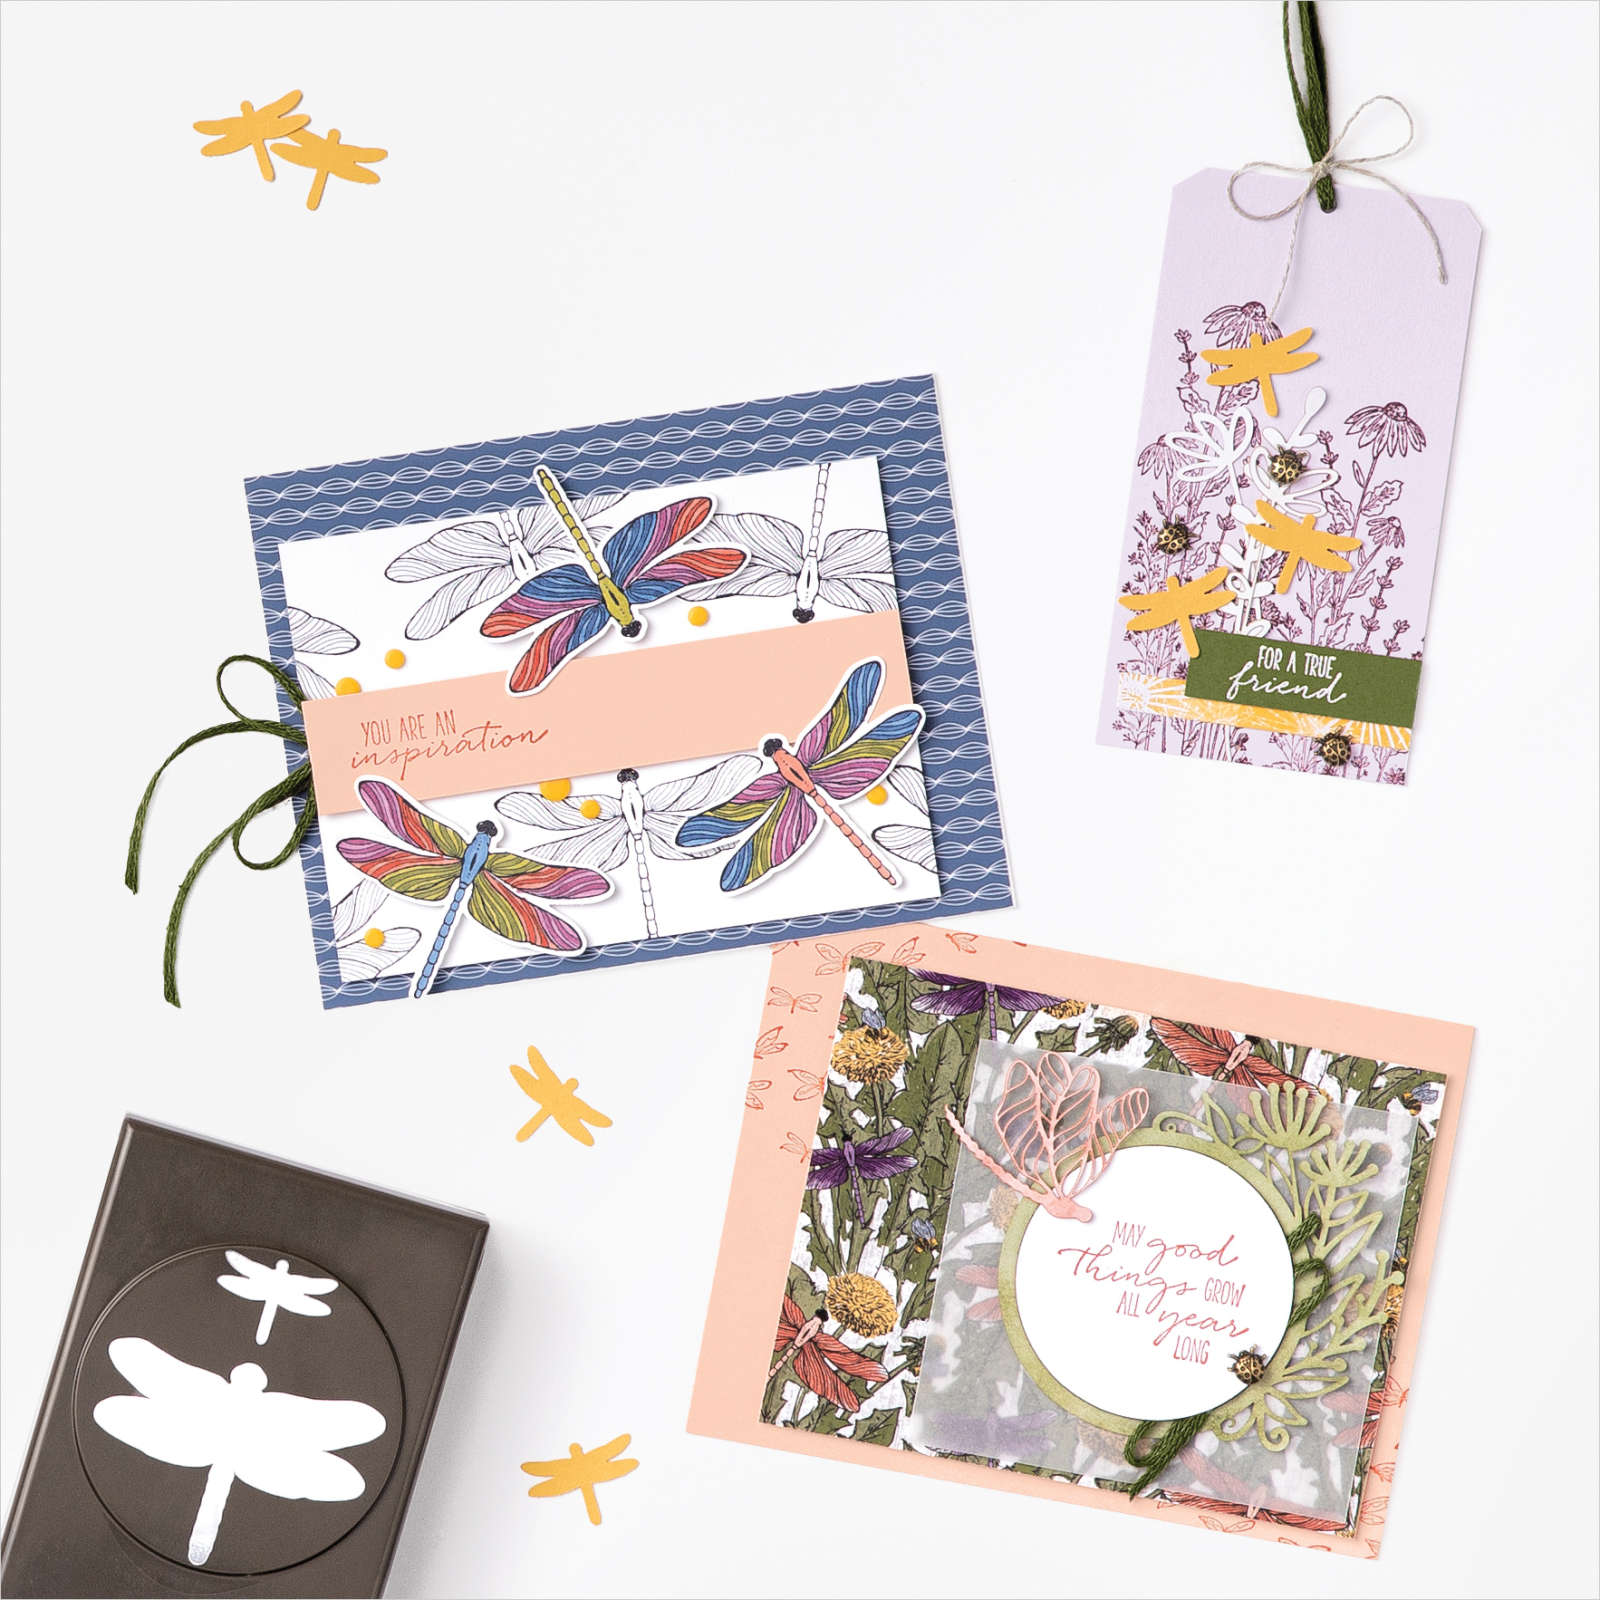
Back with Sunday Suites and especially checking out all the gorgeous new suites in the Mini Catalogue. Today let’s look at the Dandy Garden Suite Collection. There is so much to see in this suite.

The Dandy Garden Suite Collection includes:
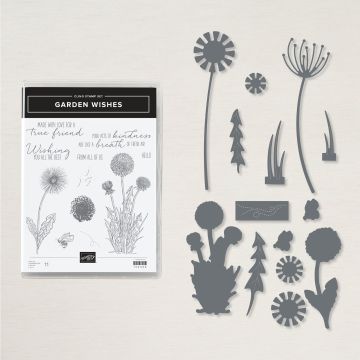
* Garden Wishes Cling Stamp Set
* Dragonfly Garden Cling Stamp Set
* Dandy Wishes Dies
* Dragonflies Punch
* Dandy Laser-Cut Paper
* Dandy Garden Memories & More Card Pack
* Dandy Garden Memories & More Cards & Envelopes
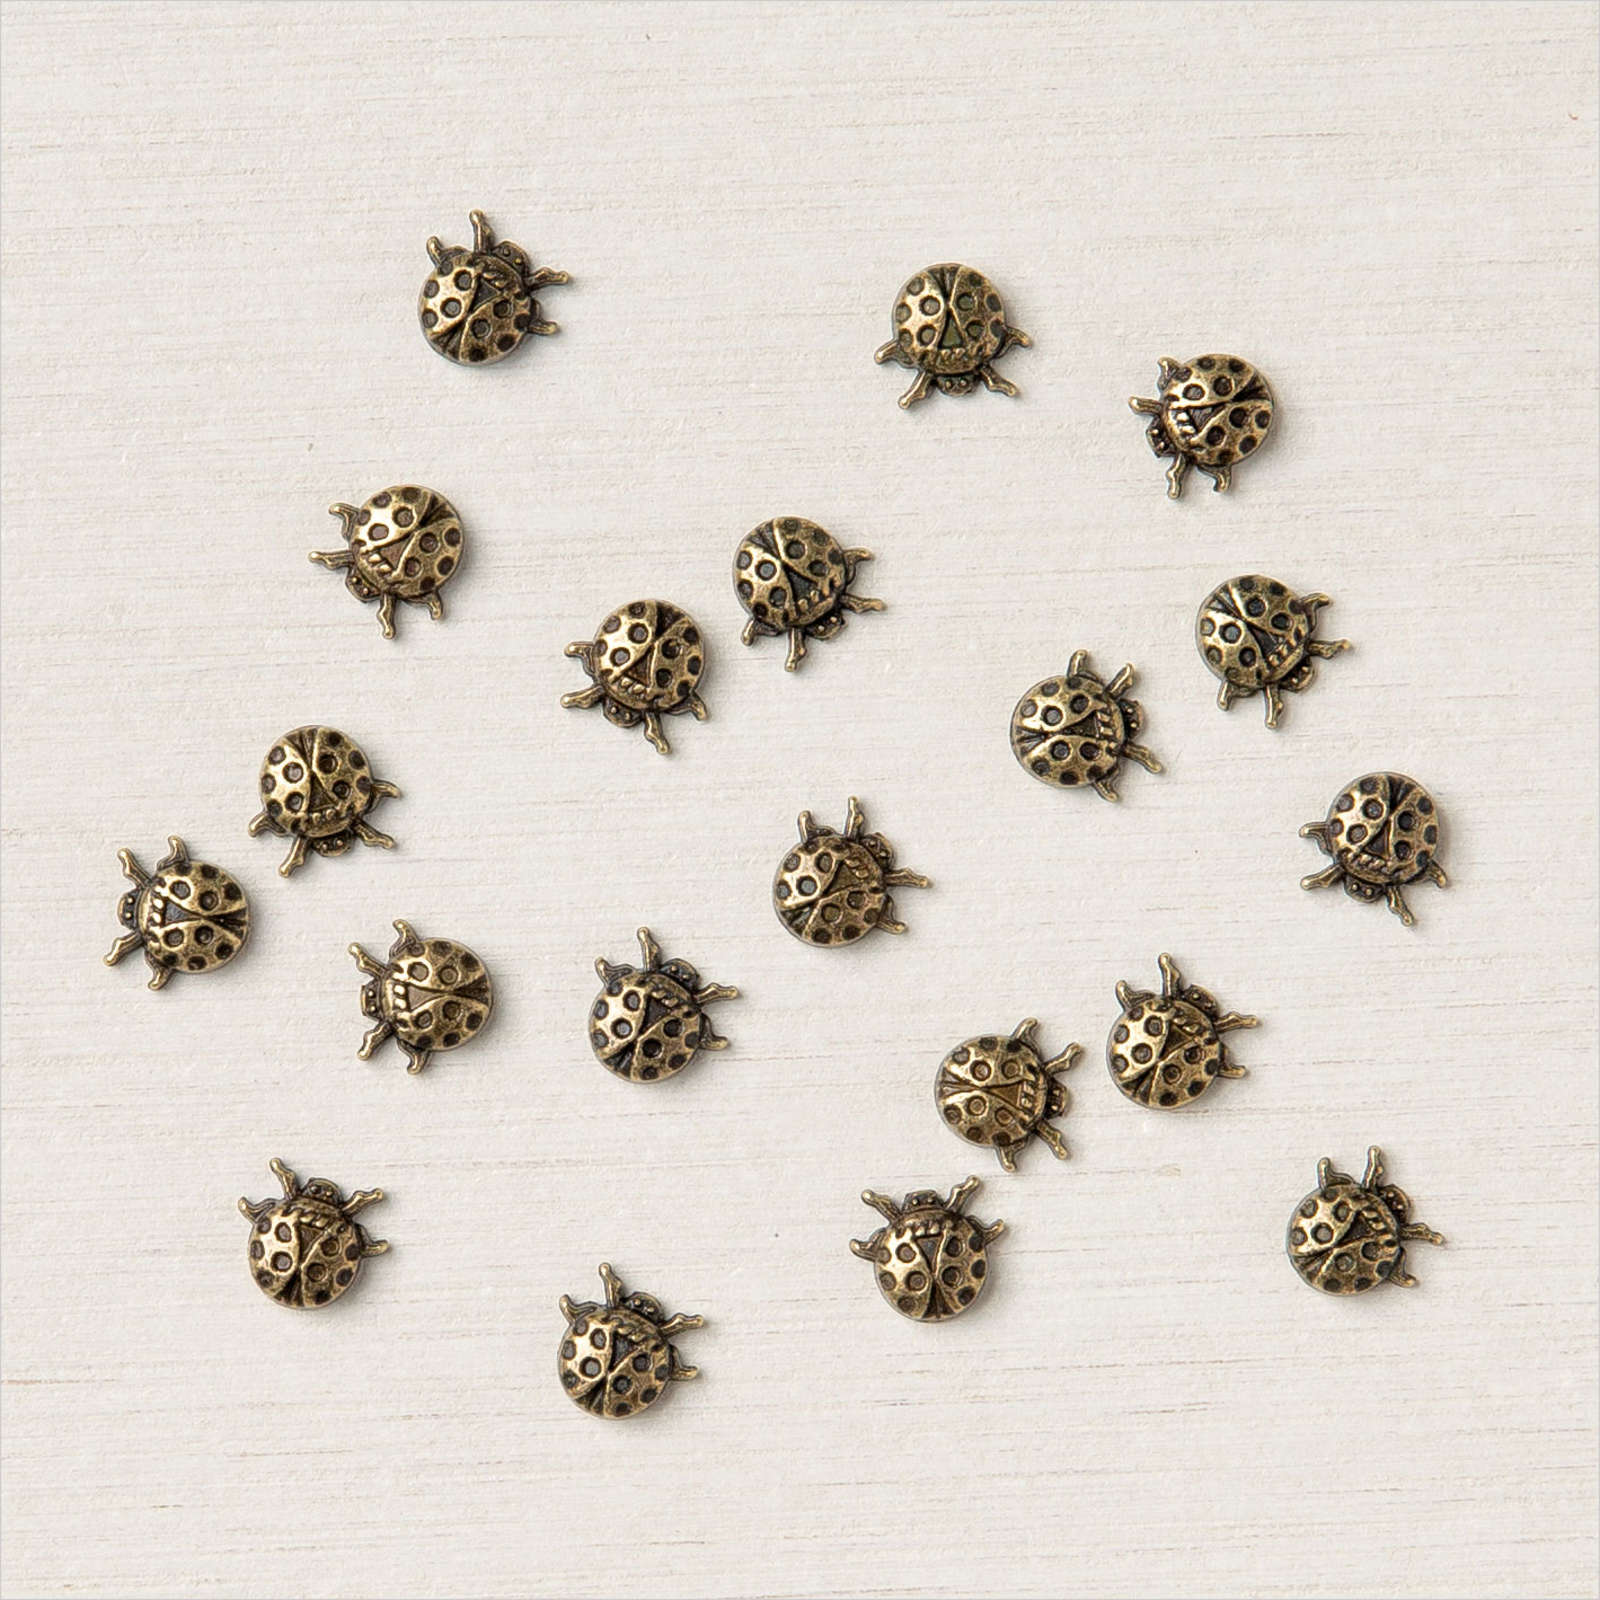
* Ladybug Trinkets
* Mossy Meadow 3/16″ (4.8 mm) Braided Linen Trim
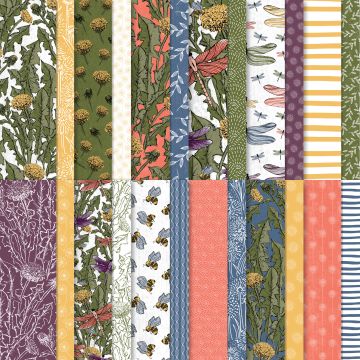
* Dandy Garden 6″ x 6″ (15.2 x 15.2 cm) Designer Series Paper.

With butterflies, dragonflies, ladybugs, foliage, and lots more “nature”. You will really have a lot to play with.

There are 2 bundles available in the suite. The Dragonfly Garden which has a stamp set and punch. And the Garden Wishes Bundle which has a stamp set and dies. Both very gorgeous and also work together well. I think the Garden Wishes bundle would work really well with the Dandelions 3D Embossing Folder available in the Annual Catalogue.

The Dandy Garden Designer Series Paper has some cool Daisy prints. I have to say when I first saw them I noticed how dark and heavy they seemed. They make great background prints or you can also use them just on their own. If you find them heavy the trick is to use smaller pieces on your projects.

The colours in the paper are – Blackberry Bliss, Bumble Bee, Calypso Coral, Misty Moonlight, Mossy Meadow.

How cute are the Ladybug Trinkets??

Something not to be missed in this suite is the Dandy Laser Cut Paper. This paper has laser-cut images of dragonflies and leaves and dandelions. It is so fine and detailed. These will add that “elegant” touch to your projects. You get 2 sheets. Each sheet: 9″ x 10″ (22.9 x 25.4 cm). You can see the dandelions in the card just above.

I have been using this suite a lot lately. Mostly getting ready for my Online retreat coming up in a couple of weeks. (Registration ends on Wed 27th Jan). Check back a few posts to check the details.

I will share projects I have made soon as but let me show you some of the great projects by Stampin’ Up! Artists.


In Australia? You can grab any of the Dandy Garden Suite products in my store HERE. Don’t forget the Host Code:

Or contact me directly on 0439844574.

If you join my Crafty Escape the Dragonfly Garden Bundle is included. Plus you will receive kits for 3 different projects. Be sure to check the past post.

Thanks for visiting me today. Have a great Sunday,

Jenny

cards, Catalogues, Videos

DARLING DONKEYS PART FLAP FOLD CARD + VIDEO!

I can’t resist those little Darling Donkeys. They are just the cutest don’t you think?? 🙂

Today’s card and video is this fun fold card. I called it a Part Flap Fold card. I’m not sure really the exact name of it. I have seen a few different names. But anyway it is so easy and such a fun card to make.

Here is the inside of the card.

Watch the video below. (If you are receiving this Blog Post via email the video may not show us so click on the Blog title above to go straight to post so you can check it out.

I will share the measurements further below to make your own.

MAKE YOUR OWN PART FLAP FOLD CARD

Card Base: 14.8cm x 21cm Scored at 10.5cm 5 1/2″ x 8 1/2″ Scored at 4 1/4″

Flower and Field Designer Series Paper: 14.4cm x 9.7 cm 5 3/8″ x 4″ Cut off 3.1cm 1 1/4″ off from the right hand edge.

White card: 1 piece @ 6.5cm x 9.4cm 2 1/2″ x 3 3/4″ (Front panel)

1 piece @ 14.4cm x 10.1cm 5 3/8″ x 4 1/8″ (inside)

Also Bumblebee card piece diecut with the larger rectangle from the Stitched So Sweetly Die. (if you don’t have these dies cut a card mat slightly larger than the White front panel card piece).

HOW TO:

After scoring the card base in the centre as indicated above also score in from the right hand edge at 3.5cm or 1 3/8″.

TIP: When adhering the front panel piece (Bumblebee rectangle and white stamped piece), be sure to just place adhesive down the centre on the back of the piece.

Did you know this Darling Donkeys stamp set is a free choice for Sale-A-Bration. You have got to love that right?? 🙂

In Australia, you can choose this with your qualifying orders over $90.

You can place your order in my store -> HERE and just remember to select your Sale-A-Bration choice before checkout.

Or, you can contact me directly and I can place your order for you.

Thanks for your visit today,

Jenny

Catalogues, Stampin' Up!, Techniques

WEDNESDAY’S WOW! #116 – CUT THE MANY MESSAGES STAMP!

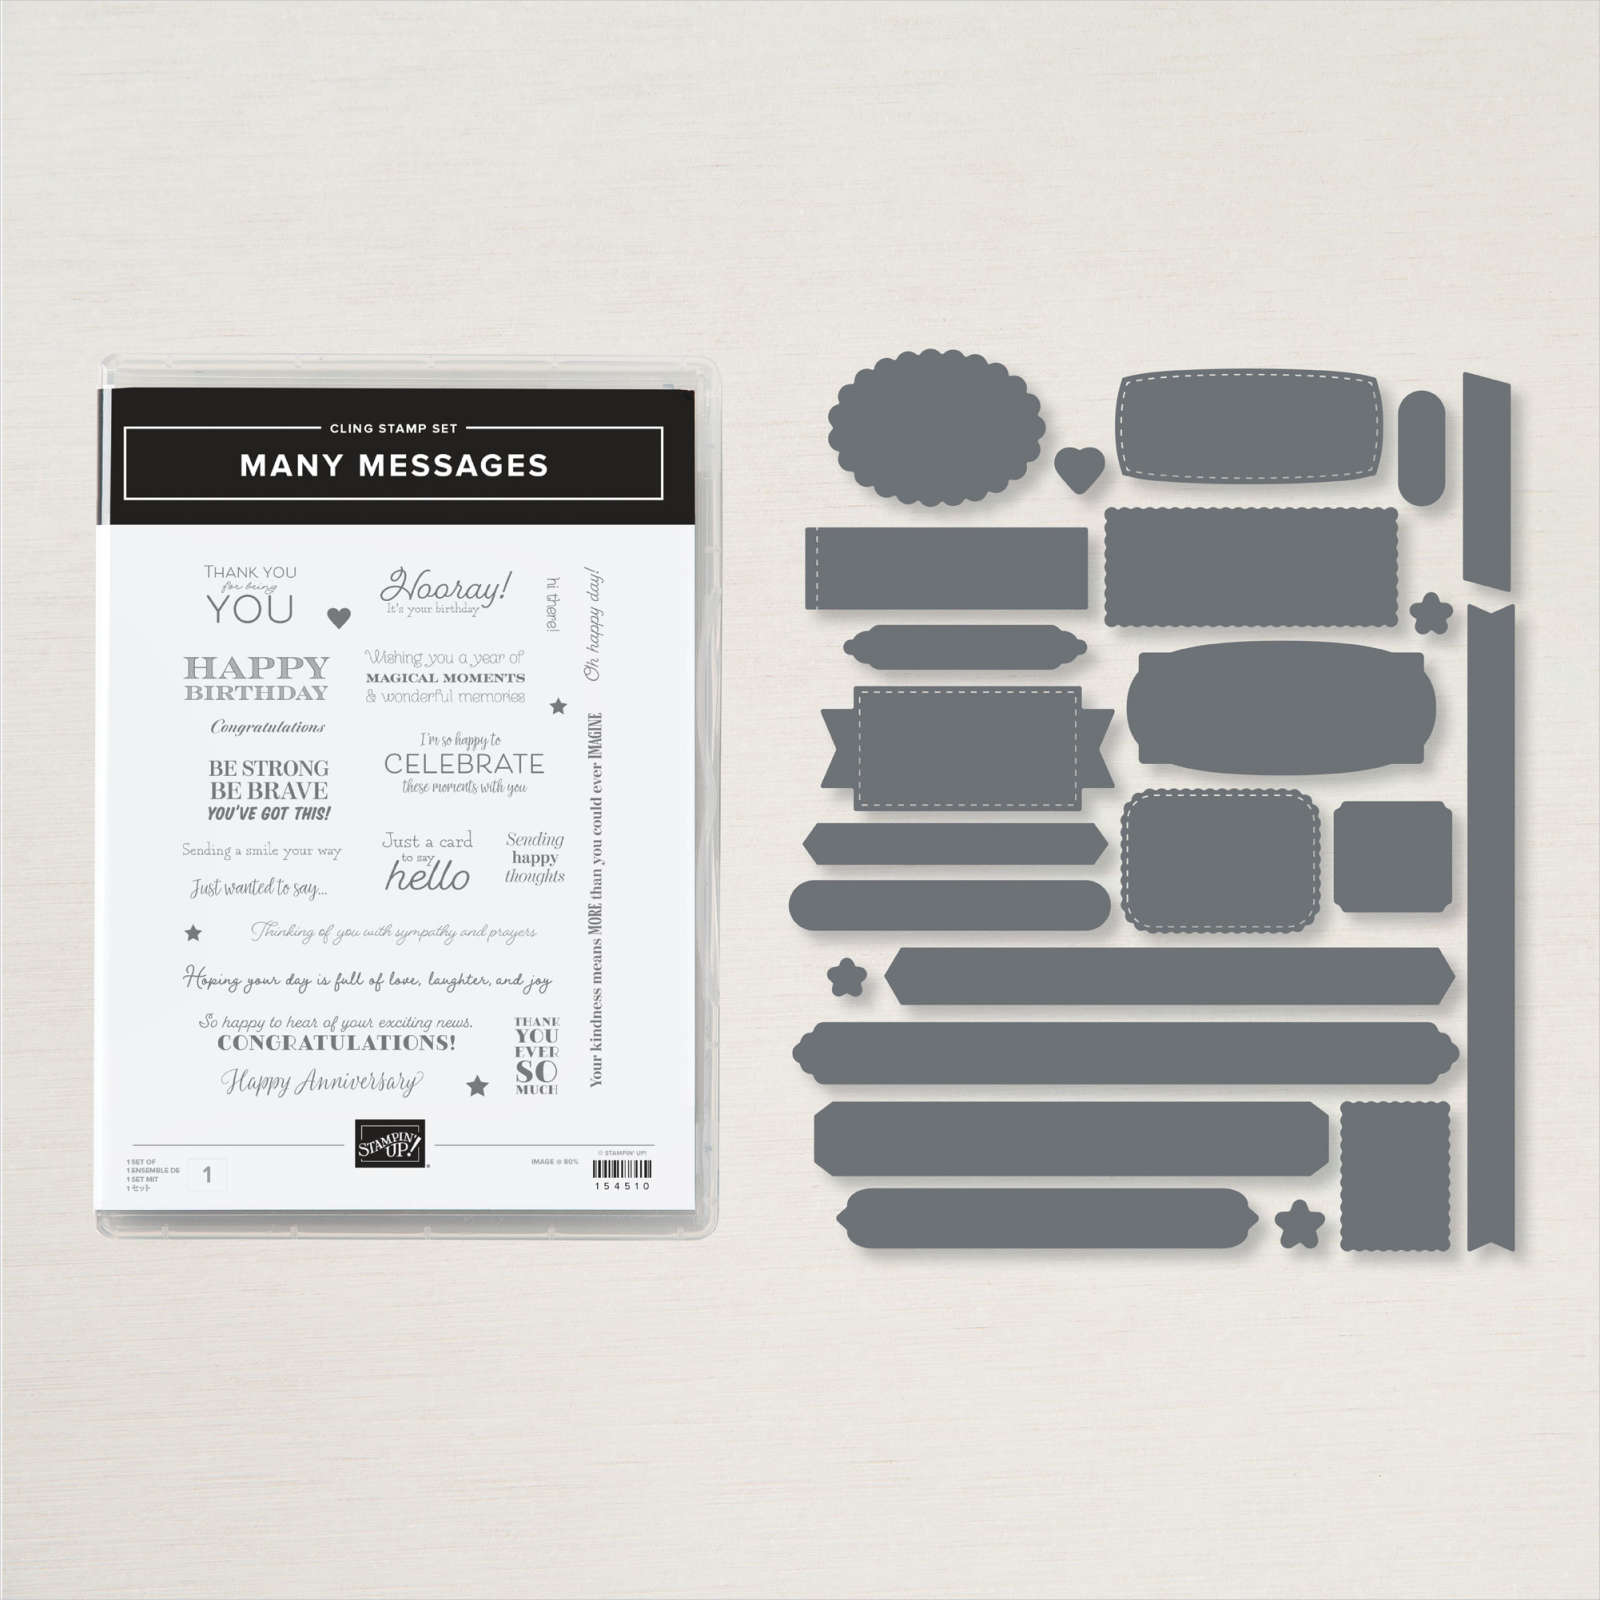
For Wednesday’s WOW! #116 I have a little tip for you with the Many Messages stamp set. What I’m going to tell you is … cut that stamp!

Yes I know it is pretty horrific to cut in to the rubber on a stamp. Why did I cut the stamp though??

When I first got the Many Messages stamp I realised it is one big stamp. Yes I was in a hurry when I ordered and didn’t read the catalogue properly. That’s ok though. 🙂

I loved many of the sentiments on the stamp but I didn’t want to ink the whole stamp or most of it to get the one sentiment. And I didn’t want to have a multiple of sentiments sitting around waiting to be used.

So … I cut it up.


With all the sentiments now separated I could use whatever one I wanted to.

TIPS WHEN CUTTING THE STAMP

First adhere the backing sheet (stickers) with the words on it on to the stamp. To do this, only remove half of the backing sheet. Line it up with the stamp and only put the one half of the sticker on to the stamp and press it down to smooth it out. Then peel off the other half and adhere the rest of the sheet.

When cutting the stamp, have the rubber of the stamp facing up so you can see the actual stamp. Cut carefully around the words being sure to leave an edge. It is better to cut them with the rubber side up rather than following the sticker as you don’t want to cut any of the words off. Use sharp scissors and take your time. After they are all separated you can then go back to each one and trim and straighten any of the edges.

The stamps can be stored directly on to the inside back of the case.

—

Another note on the Messages Die since we are talking about this. Don’t be limited just to the stamps in the Many Messages stamp set. Although they are a bundle and work together there are many other stamps you would have in your other stamp sets where the sentiments would fit in some of these spaces in the die. Check them out and see what you can find.

I hope you find these tips helpful when using this stamp set and the Die. You will find it so much more versatile.

The Many Messages Bundle can be found in my store now -> HERE.

Or you can contact me directly if you need help.

Have a great Wednesday,

Jenny

cards, Catalogues, Classes, Sale-A-Bration

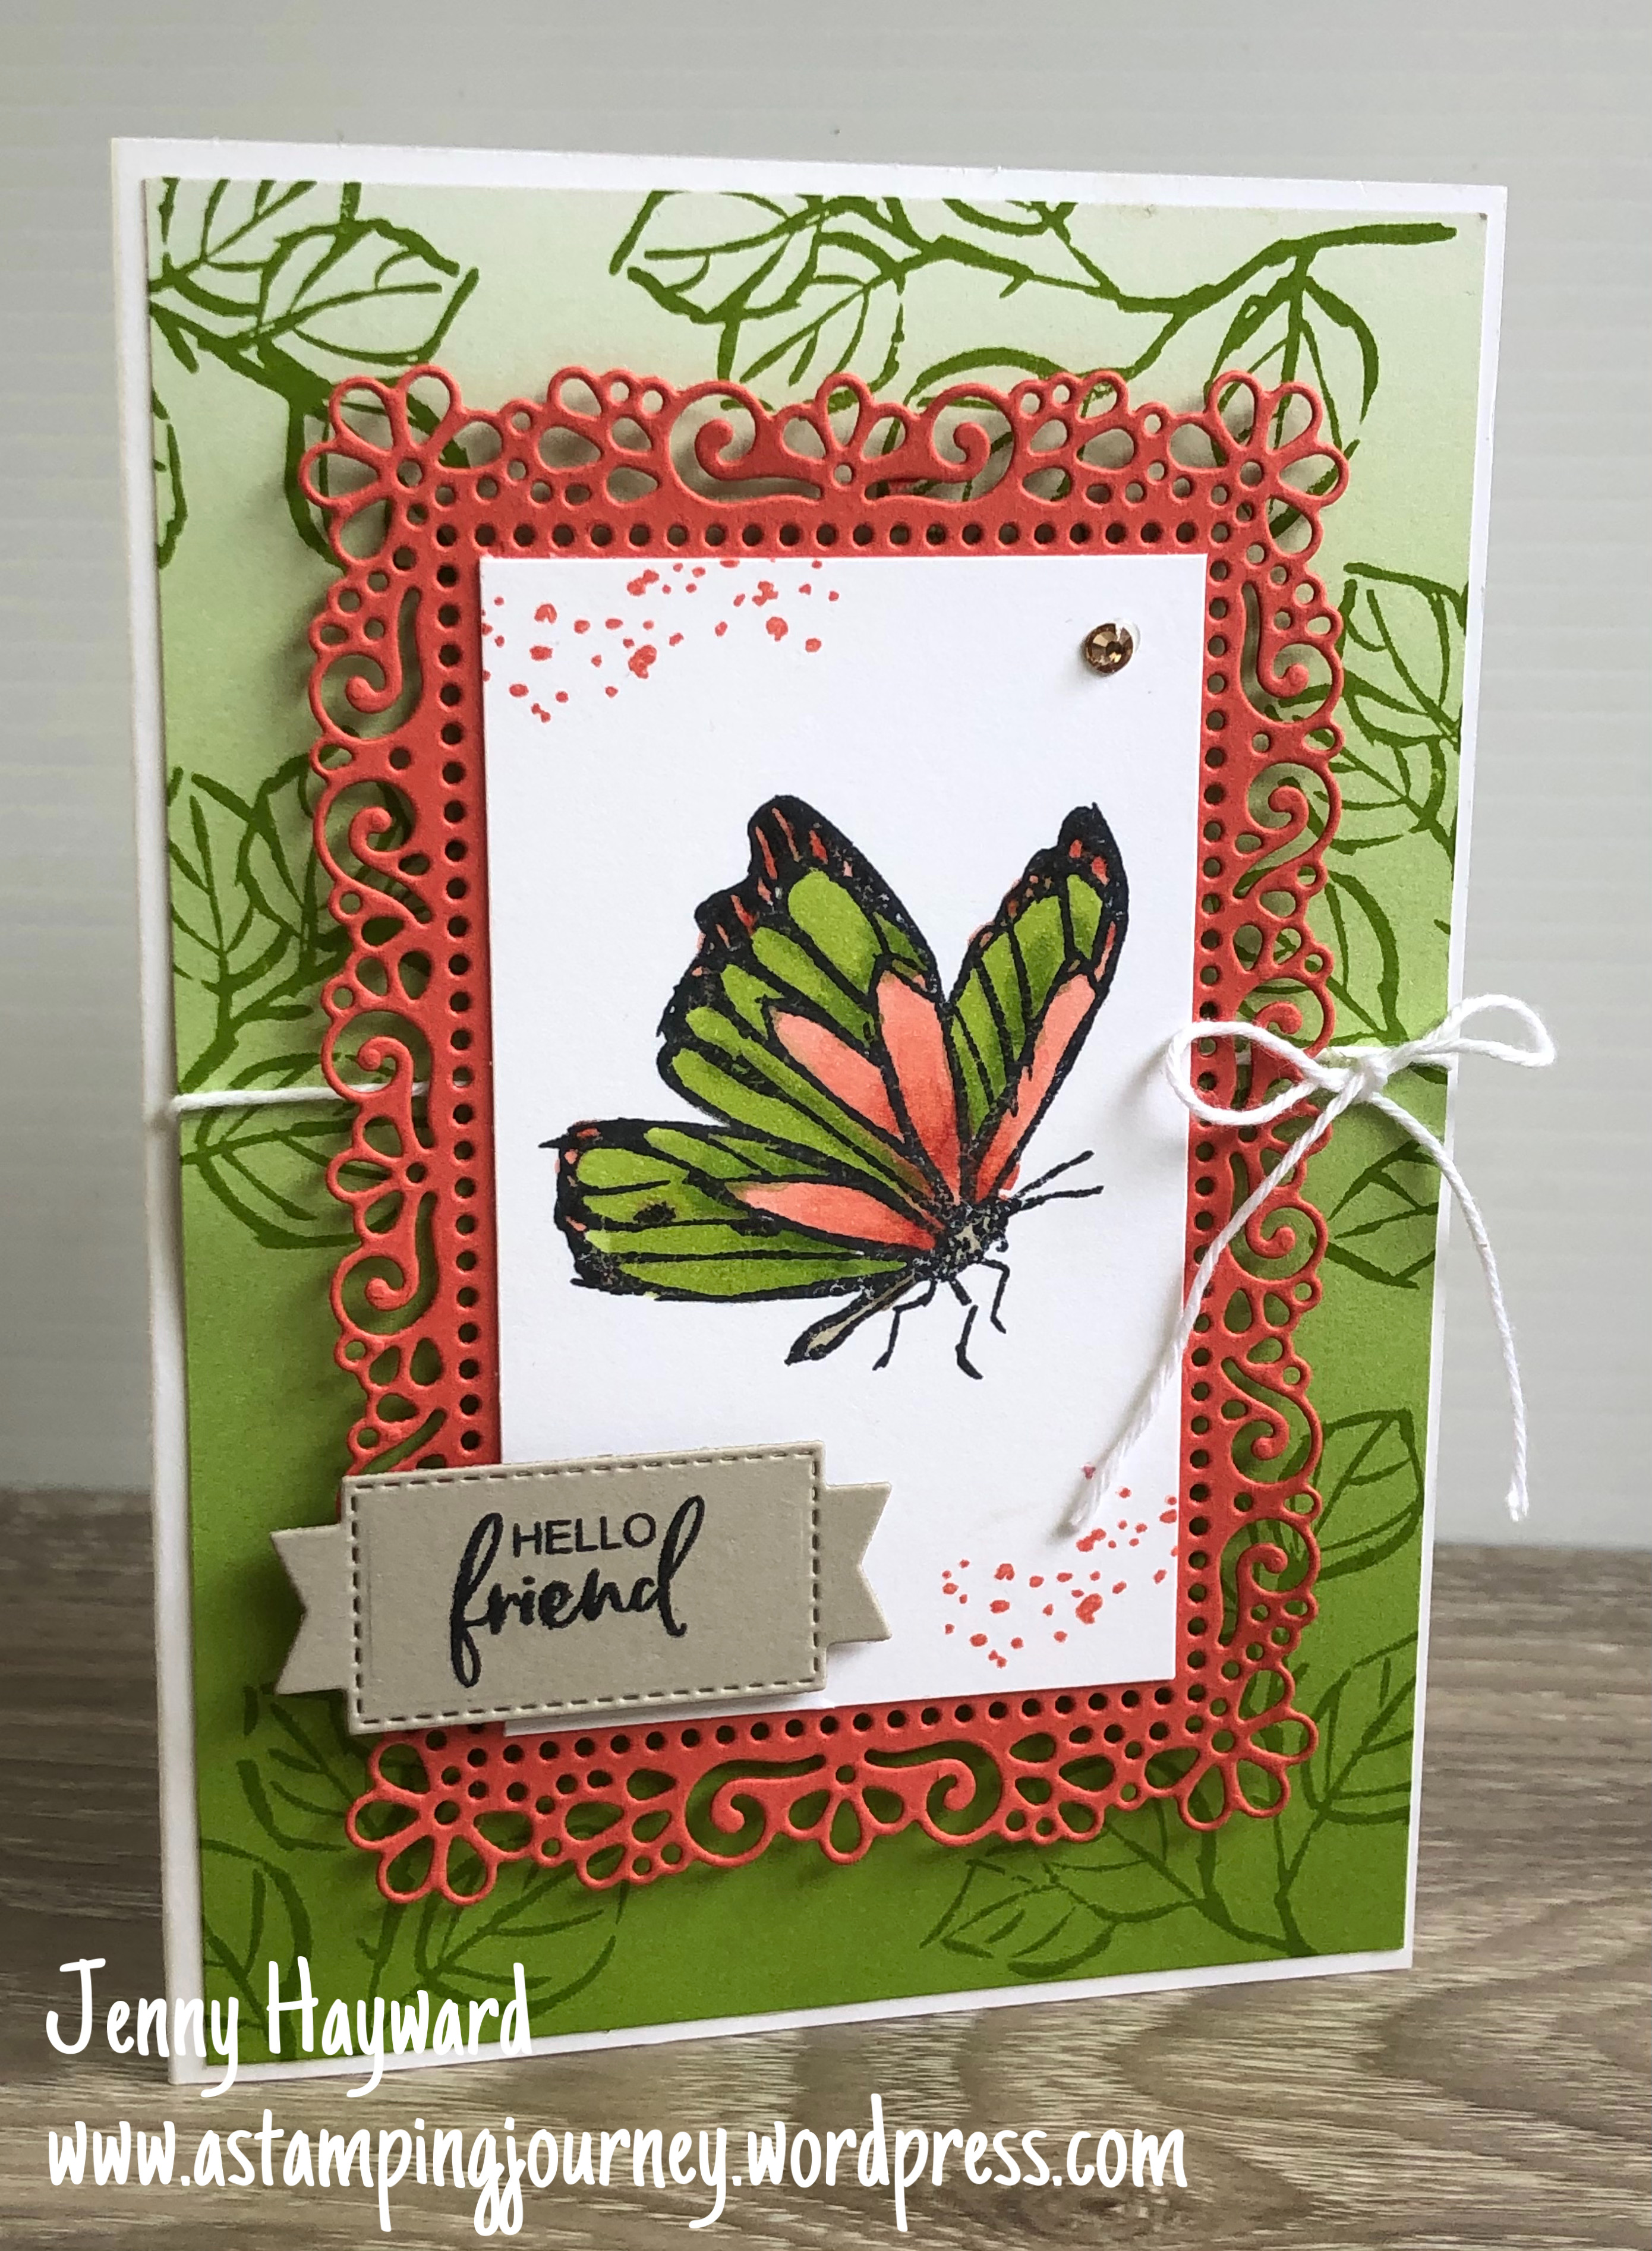
STAMPIN’ UP! A TOUCH OF INK – FLOWER AND FIELD!

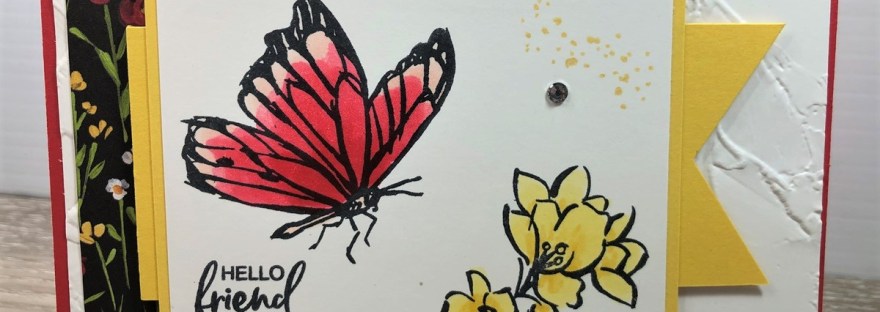
I am loving the A Touch of Ink stamp set available as a free Level 2 choice for Sale-A-Bration. (Level 2 is for orders over $180 AUD).

I have used this set a lot recently and we featured it at class on Friday. I thought I would show you one of the cards we made.

The paper is from the Flower and Field paper pack available as a Level 1 Sale-A-Bration item.

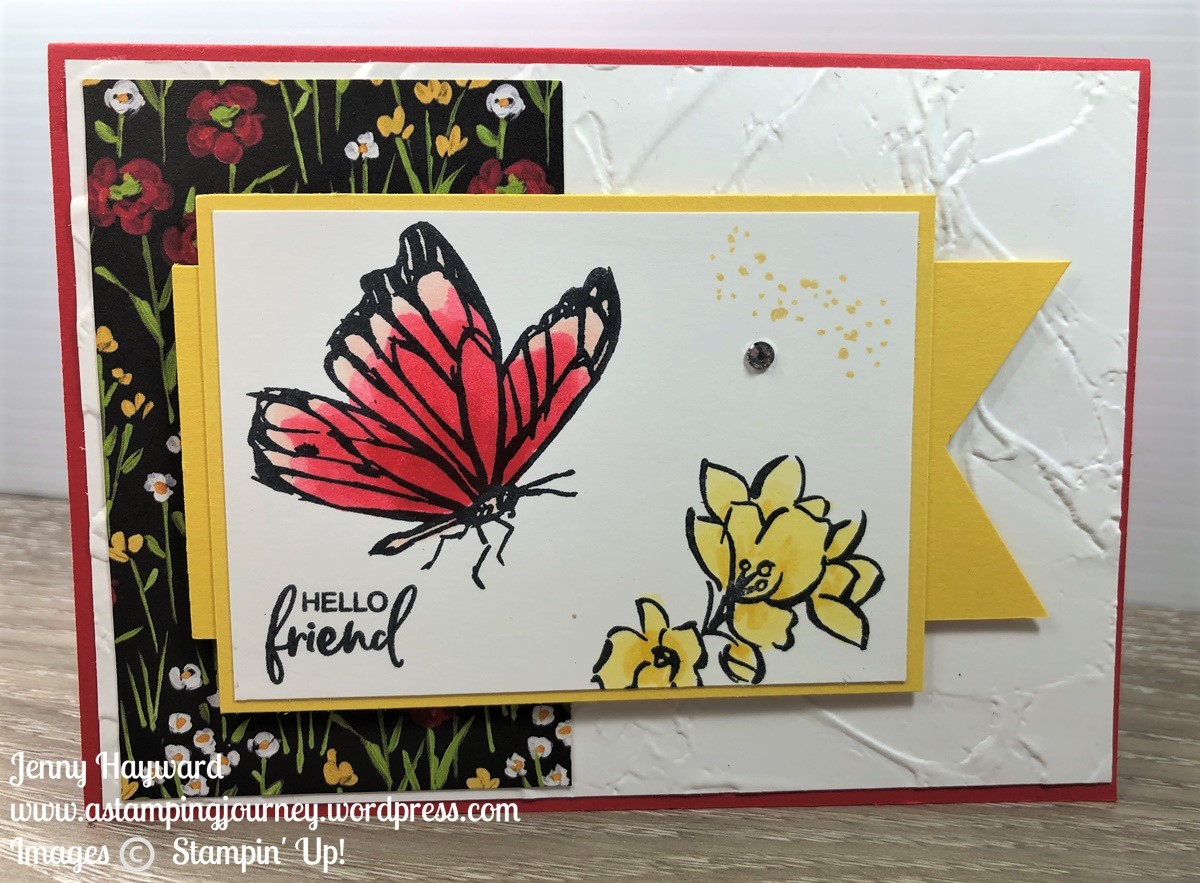
The butterfly and flower was stamped in Memento Black ink and coloured with the Stampin’ Blends. The Daffodil Delight banner was punched with the Banner Punch. I love the added texture with the Painted Texture 3D Embossing Folder.

Sale-A-Bration is much shorter this year, ending 28th February. Don’t miss out on any of the choices.

In Australia? I would love you to consider supporting me and shopping in my store. You can visit it -> HERE. Be sure to check out the Sale-A-Bration items -> HERE and select one when shopping.

If ordering online please use the Host Code: CJ7PPUEC Thank You.

If you need help contact me directly on 0439 844574 and I will put your order in for you.

And if you are a Wollongong Local and want to find out more about my classes please contact me.

Happy Shopping,

Jenny

cards, Catalogues, Classes

FINE ART FLORAL THANK YOU CARDS!

I like making little Thank You cards for my customers for when they order with me. I couldn’t help this month to use the new gorgeous Fine Art Floral Suite.

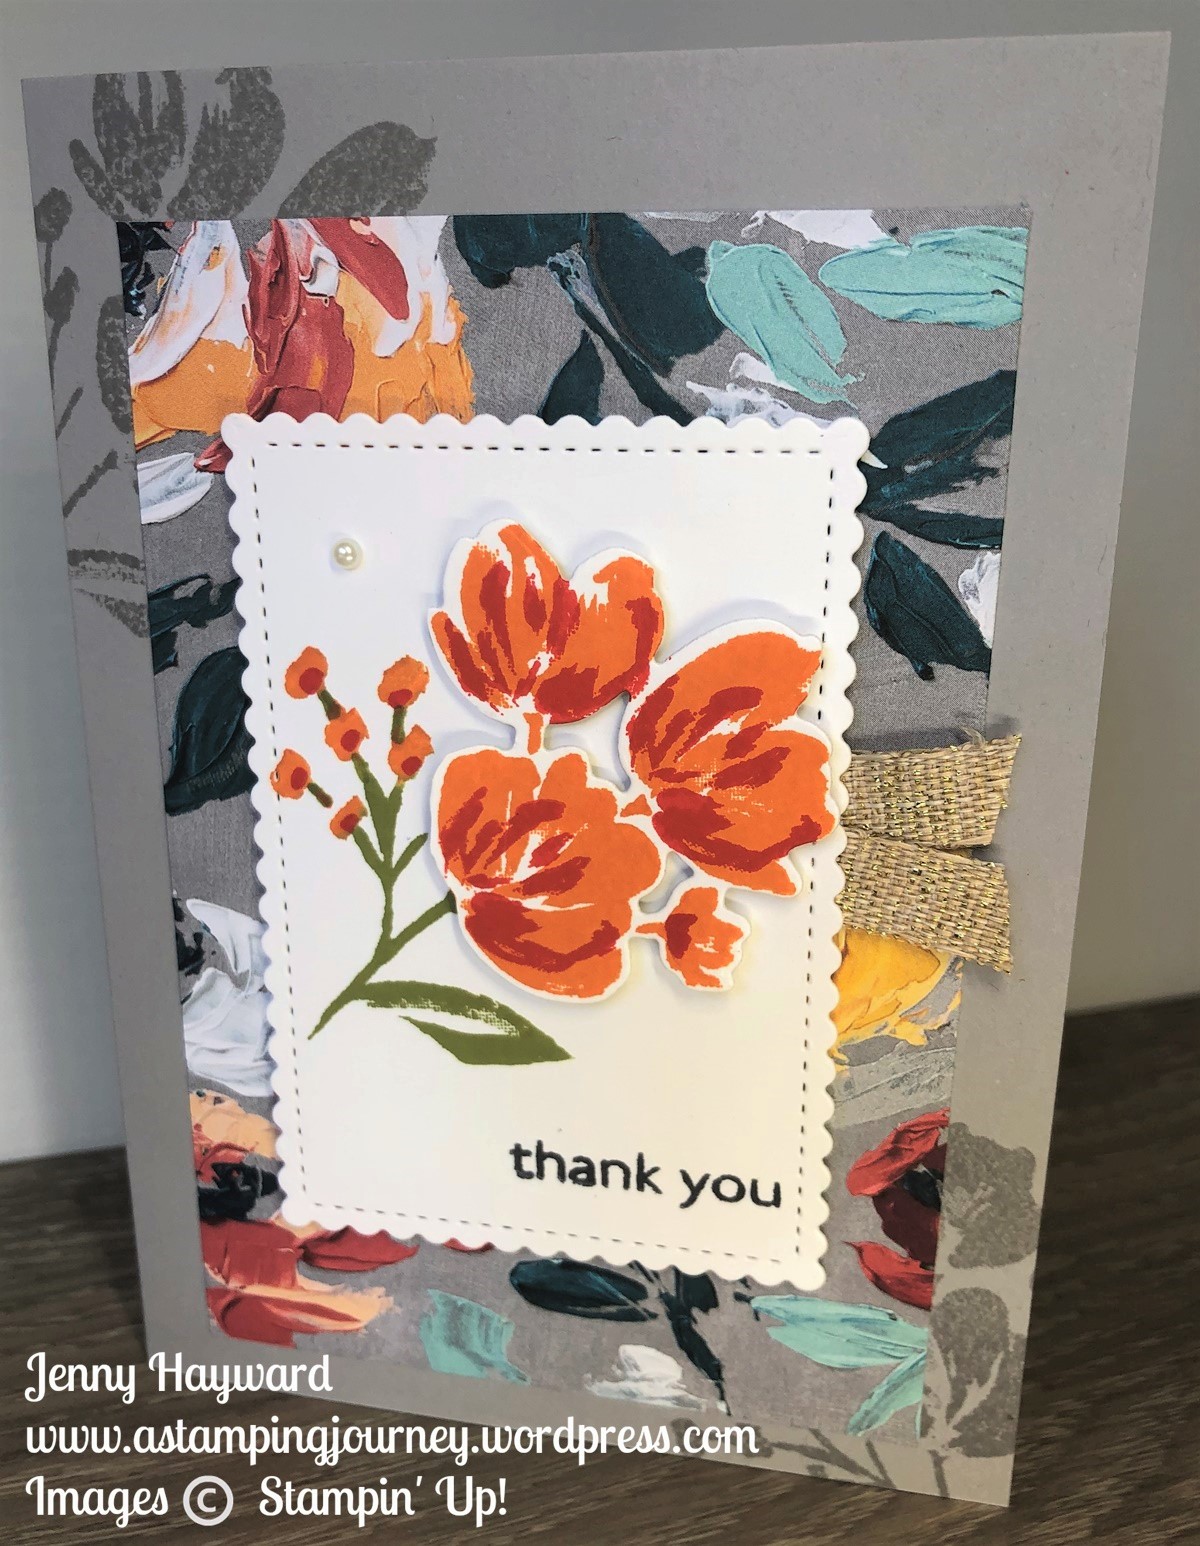
The Smoky Slate card base was stamped with the flower a couple of times with Smoky Slate ink. For the white card piece. Firstly diecut the white card with the scalloped rectangle frame from the Stitched So Sweetly dies.

Some tips with stamping the flower.

I first inked it with Old Olive and before stamping I used the Blender Pen to wipe off the Old Olive Ink on the small flower heads. To do this, swipe with the Blender Pen and rub off the ink on to scrap paper. Keep doing this until the ink is off. It takes a couple of goes. Then coloured them with a Blender Pen dipped in Pumpkin Pie ink. Then you can stamp it on the white card. With the Dark Poppy Parade Stampin’ Blends I coloured a little dot on the flowers.

I stamped the flowers again in Pumpkin Pie ink on to scrap white card and used the small detail flower stamped in Poppy Parade. Diecut the flower using the Floral Gallery Dies. I snipped off the stem on this one then raised the flower head up off the card Dimensionals. I love the extra height and dimension you get that way.

If you order with me this month you will get to receive one of these cards. 🙂

Stop by my store to order -> HERE or you can contact me directly and I will help you out.

Thank you for your orders. I know you will love the products when you get that package on your doorstep. 🙂

Remember if you have a big Wish List the best value is to join the Stampin’ Up! Family. You get so much more for your dollar. Pay $169 and get $235 of products. Plus with Sale-A-Bration you get a bonus paper pack of 200 6″x 6″ paper.

Free papers with SAB

You can phone me and we can chat about it if you have more questions. Or check my page -> HERE and read more on “9 Reasons you need to join the Stampin’ Up! family”.

I would love to welcome you to my JEN’s INK Team.

Have a happy day,

Jenny

cards, Catalogues, Classes, Stamp At Home Kits, Stampin' Up!, Workshops

ONE DAY “CRAFTY ESCAPE”!

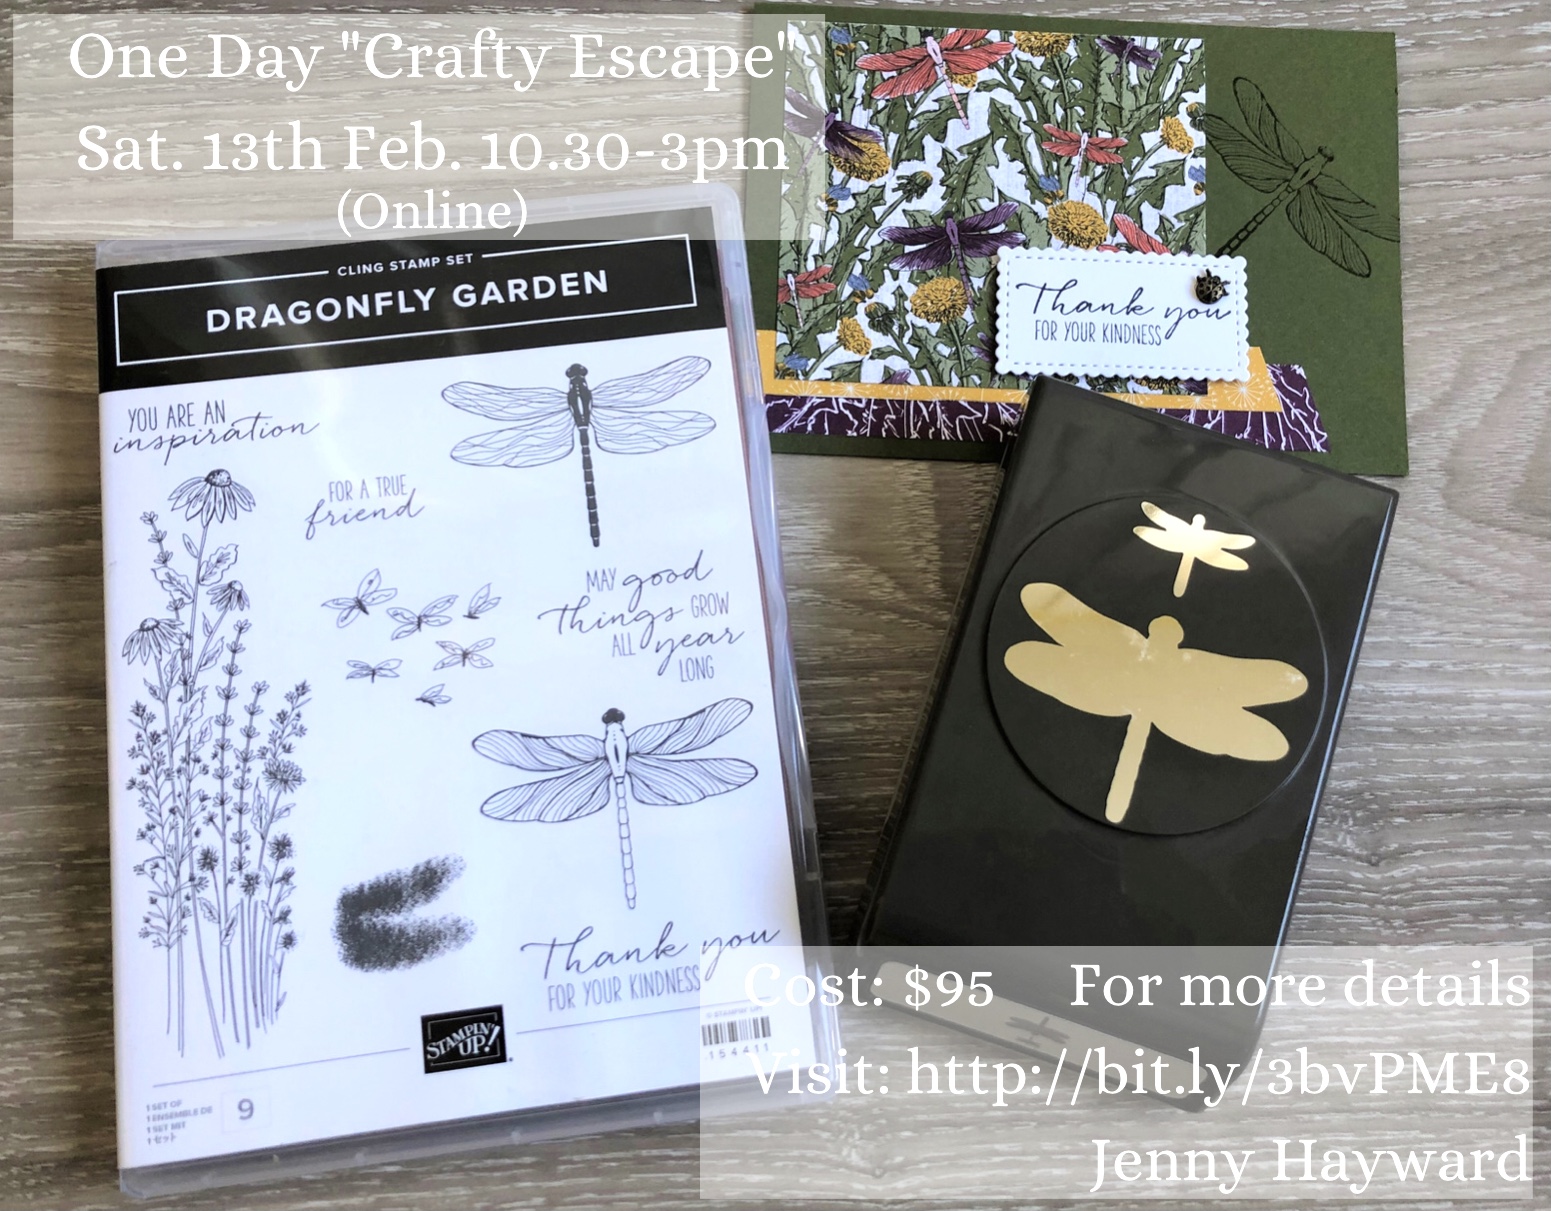
Come and join the fun in my first ever “Crafty Escape”.  Yes! a time for you to craft and chat away. 

WHEN: Saturday 13th Feb 2021 10.30am-3pm (Online via Facebook).

For this time it will only be available to Australian residents.


Games, Chatting and crafting will be run via a Private Facebook group.  Join for as often as you want through the day.  The link for the group will be sent out the day before the event.

Access to the videos and projects will be available for one month after the date so you can catch up if you can’t make it for any or all of the time.

HOW DOES IT WORK? 

You will make 4 projects throughout the day.  I will provide all the card materials (not including the stamps/punch) and provide instructions/videos to create the projects. You can create them throughout the day or at a later date if you can’t join in at the time.  There will also be some other fun surprises. 

COST: $95 (+ additional $20 to post the “Crafty Escape” Goody Box to you. Locals can arrange pickup). I can ship anywhere in Australia.
 

WHAT DOES IT INCLUDE?

Dragonfly Garden Bundle (stamps and punch), Card kits (card, Designer Series Paper and embellishments), and Mossy Meadow Trim.


PLUS some additional “extras”.

NOTE: The Dragonfly Garden Bundle will be used for 3 of the projects.  The 4th Project you can use a sentiment stamp set that you have at home already. 

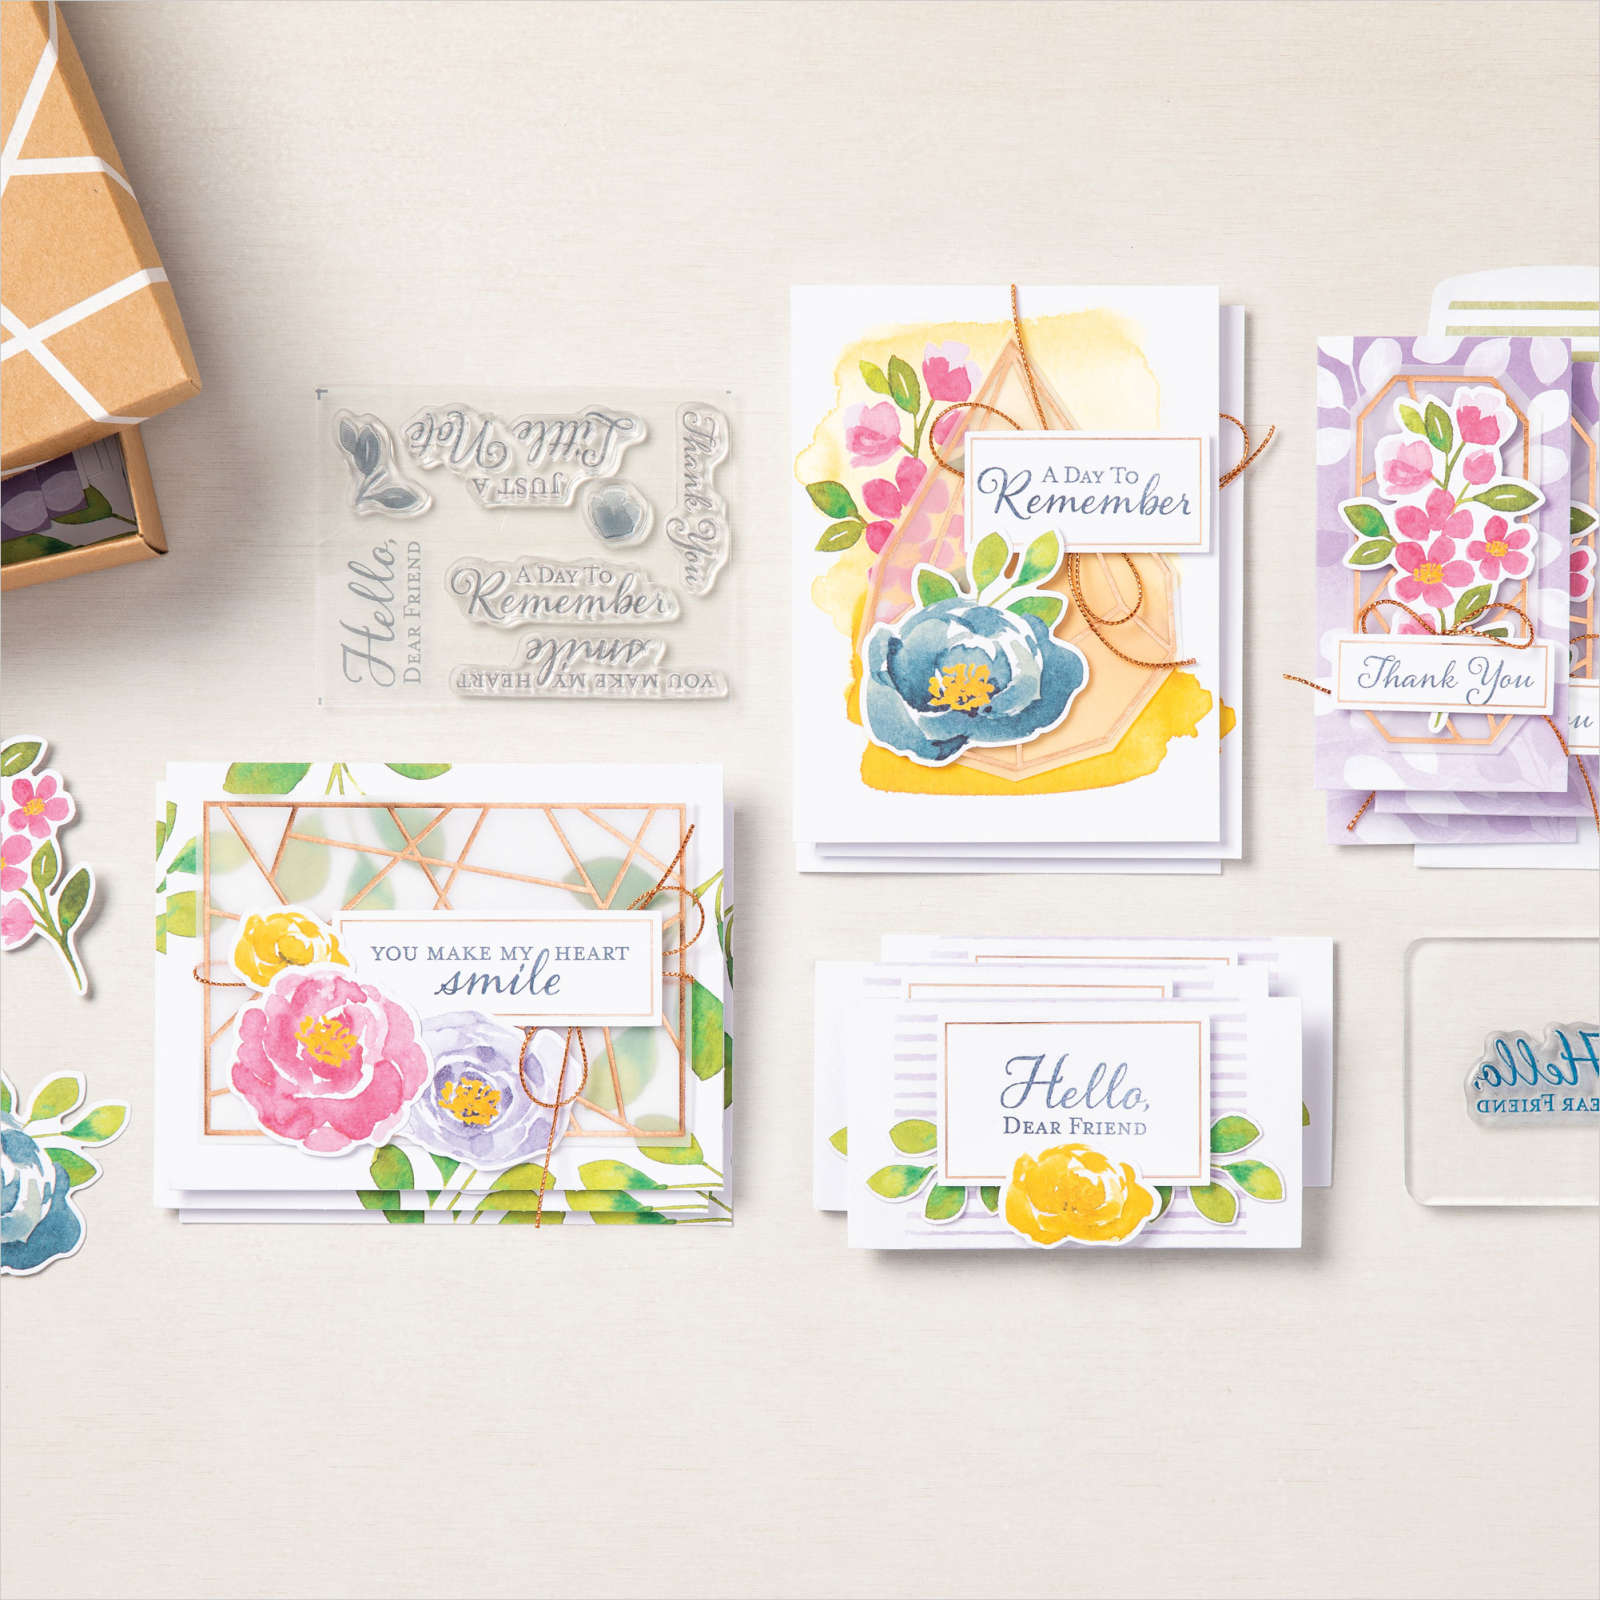
HELLO DEAR FRIEND CARD KIT (ENGLISH)

TO REGISTER:

Register and payment by Wed 27th January.

Payment by Paypal or Bank Transfer ( or cash for locals)

Details given after Registration.

Register -> HERE


“Crafty Escape” Boxes will be mailed out the week before the Crafty Escape weekend. 

Any late registrations (after the closing date) may not receive their box in time but can still join in on the day and complete the projects later. 

Any questions, don’t hesitate to ask. Email jghayward@yahoo.com or PH: 0439 844574

I look forward to having a “Crafty Escape” with you.

Jenny

cards, Catalogues

A SPECIAL CONGRATULATIONS WITH THE ART GALLERY BUNDLE!

I can now share this card with you. It is a very special Congratulations card for my son and his girlfriend/now fiance (eek!) on their engagement.

It had to be a special card. (I do hope I pulled it off too). I inked up my new Art Gallery Bundle that had just arrived and I also used the Curvy Dies.

The flowers were stamped first with Balmy Blue with the “solid” image flower and then added the Night of Navy for the highlights with the smaller detailed stamp. To add some little highlights to the smaller flowers I used the Night of Navy ‘Light’ Stampin’ Blends to add some dots.

The “Congratulations” was embossed in Gold but it is hard to see the shine in the photo sadly. The Balmy Blue card was embossed with the Pinewood Planks Embossing Folder.

I think they liked the card. 🙂

The Art Gallery Bundle is now available in my store. It makes beautiful cards for so many different occasions.

See it in store now -> HERE.

Or you can contact me directly and I can help you order any of the products.

Jenny