cards, Catalogues

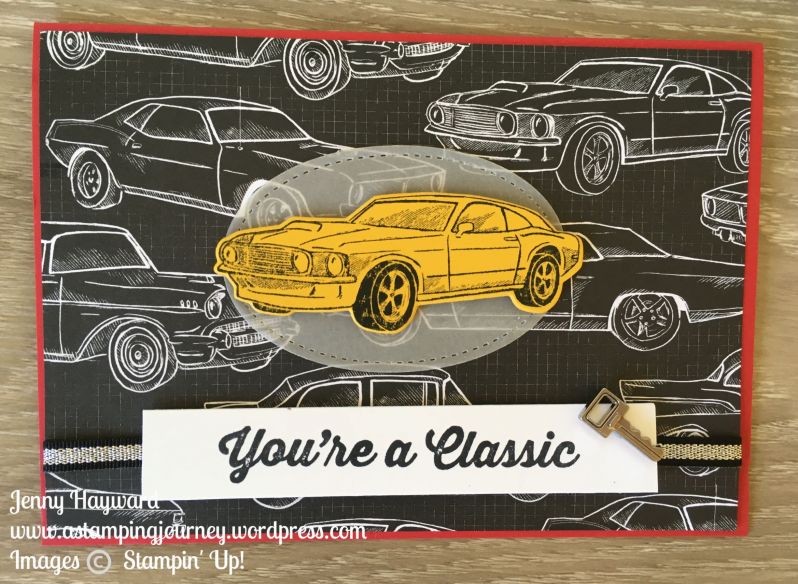
GEARED UP GARAGE WEEK – DAY ONE – CLASSIC MUSTANG!

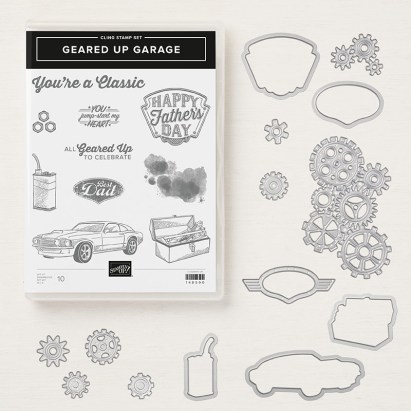
While I am away at Onstage this next week I thought I would share some cool men’s cards with the Classic Garage Bundle.  Cards for the boys are so hard to make aren’t they?? I hope these ideas help this week.

Today it’s just a classic car card.  So my husband tells me this is a Mustang.  He would know.  It’s just a car to me.  🙂

Anyway …  Here is the card.

You don’t need much with this card with this cool paper from the Classic Garage Designer Series Paper Stack.  And as I am not one for too much colouring I stamped the car on to Crushed Curry cardstock and cut it with the Garage Gears Thinlits.  This was layered on to a Vellum Oval cut with the Stitched Shaped Framelits.

You can have ribbon and bling on boys cards.  I finished it off with some Black/Silver Striped Metallic Ribbon and Classic Garage Metal Elements.

Have you noticed this suite in the catalogue? It is a great one for the manly cards and it is very simple to put together.

The Geared Up Garage is $84.50 AUS for the bundle.  You can add on the paper and elements and Black/Silver Metallic Ribbon if you like too.  See them and order -> HERE in my store. Please use the  Host Code: P3TZFUNA

Stop by for more cards with this suite over the next few days,

Jenny

cards, Catalogues, Stampin' Up!, Techniques, Tutorials, Videos

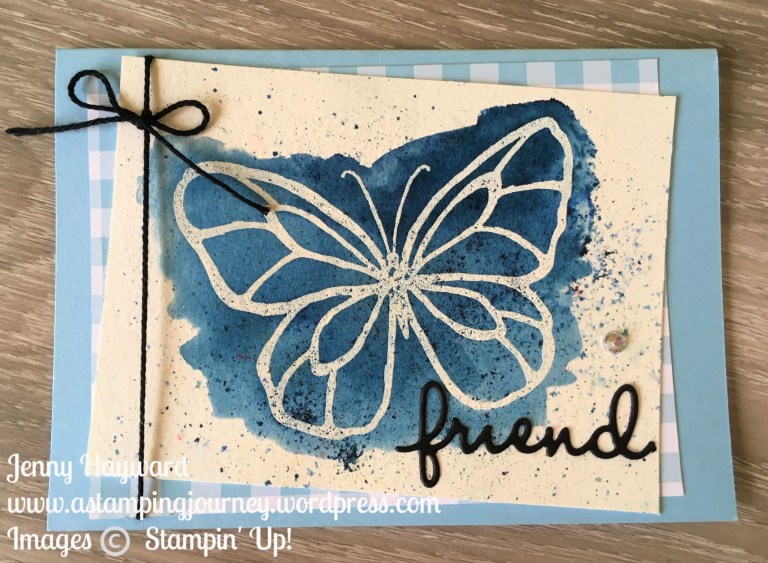
BUTTERFLY BLUE WITH BRUSHOS!

I have another card to share with you today using the Brusho Crystal Colours. I shared one yesterday. If you missed it just pop back a post.

This card was created a little differently to the one  I shared yesterday. Let me tell you about it.

Firstly on Shimmery White card you will heat emboss your butterfly.  If you are not familiar with heat embossing.  Rub over your card with the Stampin’ Buddy.  Ink up your image (I used the butterfly from Beautiful Day), with Versamark.  Stamp the butterfly on your card and tip over some White Embossing Powder.  Clear Embossing Powder would work as well.  Heat the image with the Heat Tool to melt the powder.  I LOVE heat embossing.  That is what drew me in to stamping all those years ago.  It never gets old.

With the Aquapainter, wash over the butterfly going outside the lines too.  Sprinkle over the Blue Brusho Crystal – and watch it dissolve and spread.  That’s almost as magic as Heat Embossing.  You may like to add some more Brusho to add more colour or wash over more water.  Just see what it looks like.  Let it dry.

** I made a similar card a little while ago and even did a video back then. (It’s not a great one – still learning in that aspect).  If you want to head back to see that card and maybe catch the video, then head back to this post -> HERE.

To finish the card, I layered it on a piece of the Gingham Gala Designer Series Paper.  Before adhering it down on to the Balmy Blue card mat I tied around some Black Baker’s Twine.  Then added the “friend” from the Well-Written Framelits.

Thanks for visiting,

Jenny

cards, Catalogues, Stampin' Up!

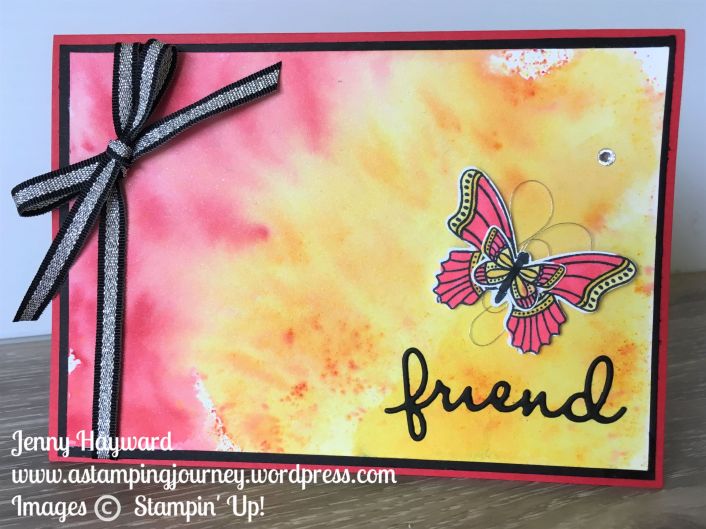
BRUSHOS BUTTERFLY!

It has been a little while since I have shared a project with the Brusho Crystal Colour.  I have to say I have had finished Brushos pieces sitting around for a while but it is only recently that I have put a card together.

For this card I used Shimmery White Card.  I sprinkled over the Brushos Crystals. In one corner I sprinkled over the Yellow and then spritzed it with water, slightly angling it across the card. Then I sprinkled over the Red along the left hand edge and spritzed it the other direction.  I added a little more sprinkles over afterwards just to add some colour where it didn’t quite go.  I liked the finished effect when I made it but I didn’t know what I was going to do with it.

Recently I had the Butterfly Gala set out and had this butterfly leftover from another project.  I had coloured it with the Stampin’ Blends.  It was just the right colours.  I added a few loops of Silver Thread behind it. The “friend” is cut from the Well-Written Framelits Dies. The card is finished off with some Black/Silver Metallic Ribbon.

I will share another one tomorrow for you so stay tuned.

Jenny

cards, Catalogues, Stampin' Up!, Tutorials

SPARK A LITTLE JOY WITH STORAGE BY STAMPIN’ UP!

Decluttering and organising is THE thing at the moment.  No area in the house is safe.  Now you have simple, functional storage for your craft space whether you have a designated room or you work straight from a box.  Storage By Stampin’ Up! is now available.

These units are made of a lightweight, durable plastic material that is easy to assemble and can stack to fit in your own area whatever your size.

Watch this quick video -> HERE to see how they all work together. 

Here are the different units and prices.  You can see how functional these pieces are.  Units specifically designed for your inkpads, Stampin’ Blends, Markers, Ink Refills and other special pieces.

Get a closer look at these products in my store -> HERE.

I have attached a chart below to show some of the ways you can configure the units.

It is hard to read, so download and print out your own copy so you can use it to measure out your craft area.

Download the chart -> 04.01.19_STORAGE_BY_STAMPIN_UP_CONFIGURATION_SP


Below are some Q and A you might be asking yourself.

Will old-design Stampin’ Pads fit in the Ink Pad & Marker Storage Trays?
No. The Ink Pad & Marker Storage Trays are designed to fit our new-design Stampin’ Pads only.

How high can I stack storage trays?
We stacked up to 50 storage trays without any issues, BUT we would not recommend stacking that high. While our Storage by Stampin’ Up! products are sturdy, the higher you stack them, the less stable they’ll become. Use your discretion when stacking.

Can I mount my Storage by Stampin’ Up! products on the wall?
No. Our modular storage products are designed to sit on a table (or similar flat surface).

How should I use the Open Storage Cube?
The Open Storage Cube can be used to hold any miscellaneous items like ribbon, embellishments and small punches. For more inspiration on ways to use items from our Storage by Stampin’ Up! product line, check out the configuration chart we created.

Can I mix and match Storage by Stampin’ Up! products?
Yes! Our Storage by Stampin’ Up! products are modular and designed with customisation in mind. Take a look at the flyer for more information on the size and dimensions of each item in our new modular storage product line.

How do the silicone feet work?
To protect your surface and prevent slipping, we’ve included peel-and-stick silicone feet with the Ink Pad & Marker Storage Trays, Stampin’ Blends Storage Trays and Open Storage Cube.

STORAGE SPECIAL BUNDLE OFFER

To help you get your Storage units together, join in my Storage Special Bundle Offer

TO ORDER

View the Storage By Stampin’ Up! units in my store -> HERE When ordering Please use the Host Code: P3TZFUNA

AND … A new, exclusive Tutorial Bundle is now available for April.  Here is a sneak.
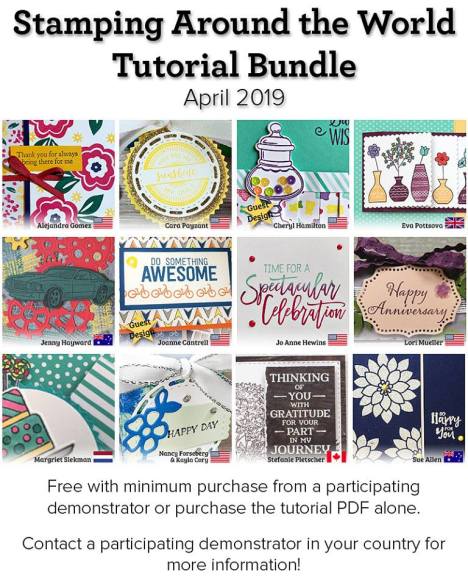
These will be emailed out to you directly.  Receive them Free with orders over $78 (Australian residemts only)

 OR

Purchase the tutorials for $20 AUS wherever you are in the world through my Paypal account.  Details given on request.

If you have any more questions please don’t hesitate to ask me.

Thank You and have a nice day,

Jenny



cards, Catalogues, Sale-A-Bration, Stampin' Up!

FAVOURITES FOR SALE-A-BRATION 2019!

I have loved many of the products from Sale-A-Bration.  I can’t believe that it is coming to an end.  I have made lots of projects.  Some you don’t get to see here unless you come to classes or they are for the exclusive Tutorial Projects.

I thought I would share some of my favourites though from the past 3 months.  You can click on the link on the project to take you to the original post with more details on the project.

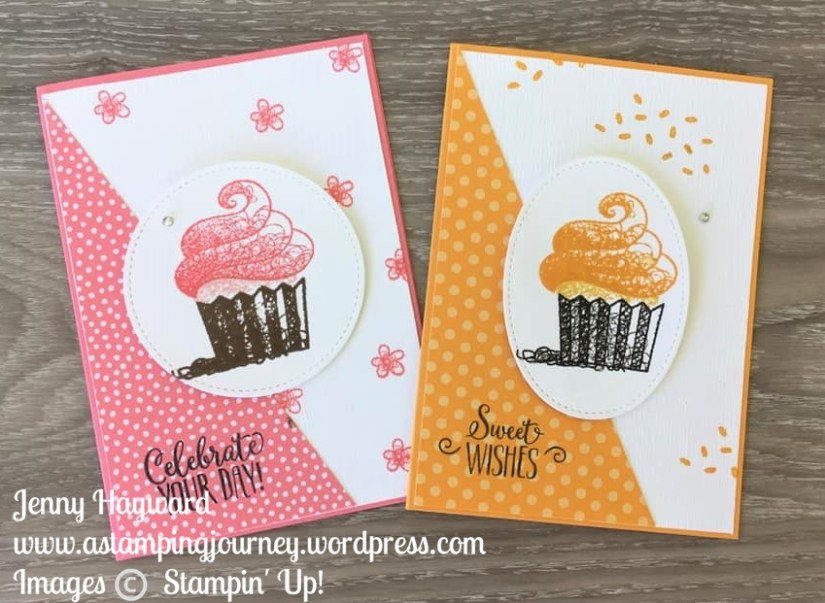
MANGO MELODY CUPCAKE

I shared this card in the previous post too but see this original post HERE.

BY THE BAY 

This was a fun Smooshing technique.  See the post HERE.

This By The Bay was stamped on the Grapefruit Grove Foil Sheets.  See the post HERE.

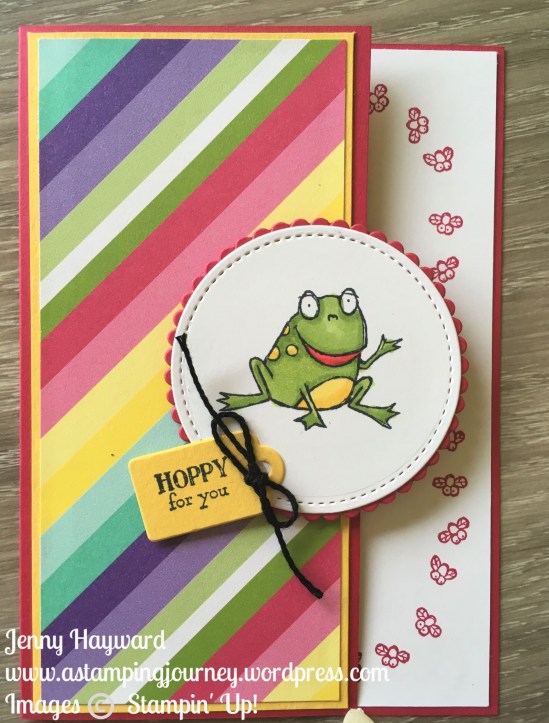
SO HOPPY TOGETHER

This is a bright, cheery froggy card.  I called it a Half-Fold card but it’s not quite half. You can see it in this post HERE.

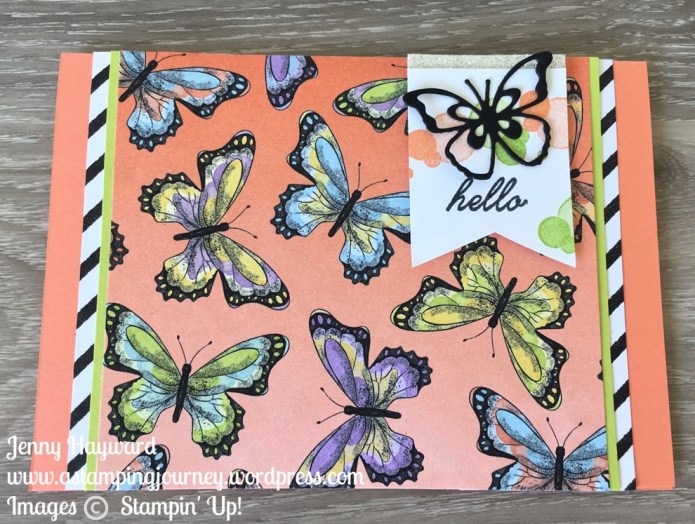
BOTANICAL BUTTERFLIES PAPER

We had a week of lots of butterflies just last week.  I shared lots of projects.  You can go back over the posts to see them all.  This was ONE of my favourites.  You can see it HERE.

What has been your favourite?  I would be interested to know.

Hope you have enjoyed this Sale-A-Bration.  You only have ONE DAY LEFT. 

Have you been contemplating?  There is not much time to contemplate any longer.  Shop and grab your Free Sale-A-Bration choice whether it be frogs, butterflies or flowers. Or maybe even one of the other choices.  With orders over $90 AUS you can receive your choice.

OR …

Maybe you have been contemplating joining.  What is your delay? Scared of signing your life away? maybe worried of not making your minimums?  Really, you can drop anytime.  What do you get? Apart from great value when you join with getting up to $146 of free products. You get discounts on all your later purchase.  Best of all you get to be with ME in my team.  OK, Maybe I don’t want to put you off with that.  But it’s lots of fun with lots of special friends.

See it all HERE but don’t delay. If you are in Australia come and join my JEN’s INK team.

Jenny

cards, Catalogues, Sale-A-Bration

A FLIRTY CUPCAKE!

A couple of months ago I shared a project with the Hello Cupcake Sale-A-Bration set. You can see that post -> HERE. You can see it below too. It was an angled piece of the Mango Melody from the Brights paper stack.   BUT I have been amazed how popular it has been on Pinterest especially since I realised I hadn’t pinned it yet!

This is the Mango Melody one.

I loved the card too and since I had some more angled scraps I made up another version.  This time in Flirty Flamingo.  The angle pieces were left over from when I made a banner.

This version is just a little different in that I cut the cupcake from a Stitched Circle rather than the oval and stamped the flowers in the background white card before I embossed it with the Subtle Embossing Folder although that is a little hard to see.

These are lovely summery colours don’t you think?

One 2 days left to get your Hello Cupcake set during Sale-A-Bration.  You don’t want to miss out on them.  You can purchase the Call Me Cupcake Framelits also for $47 AUS.

Grab them -> HERE in my store. When your order is over $90 then choose the Hello Cupcake set or any of the other Sale-A-Bration choices.

Don’t forget the Host Code: JQGFKFT9

You will also receive the Free Tutorial Bundle of 12 exclusive projects for orders over $78.  These are all fantastic projects that I think you will love.

Jenny

cards, Catalogues, Classes, Stampin' Up!

CELEBRATE SALE-A-BRATION CLASS THIS WEEK!

I can’t believe that it is the end of Sale-A-Bration.  The last 3 months have flown by.  This week in Class we are giving the Sale-A-Bration products ONE LAST LOVE.

Come and join in if you are a Wollongong local.  Here are the details.

CELEBRATE SALE-A-BRATION

WHEN: Friday 29th March at 10am or 7pm.

COST: $20 ($5 extra to use my adhesives)

CLASS IS FREE WITH ORDERS OVER $40

PLEASE RSVP BY THURSDAY 28TH.  You can drop a comment here to reply or email me at jghayward@yahoo.com

Can’t make the class?  You can still order up to 6pm Sunday 31st so you don’t miss out on your free products.

Here is a sneak of what we will be making.  3 gorgeous cards! Hope to see you there.

Jenny


3D projects, cards, Catalogues, Stampin' Up!, Techniques, Videos

BOTANICAL BUTTERFLIES WEEK BONUS – W CARD!

I have a bonus project to share with you today for Botanical Butterflies week.  It’s a ‘W’ card.  I have seen a few of them around and was wanting to try one.  We made this one at our team meeting on Wednesday night and I thought it was good timing. So you get a bonus project.

Don’t look closely.  It was made in a rush at the meeting.  There are lots of parts to this card but it will give you an idea.  And can’t beat those pretty butterflies from the gorgeous Botanical Butterflies paper.

This is the card closed.  Tied up with some of the lovely soft Lemon Lime Twist Organdy ribbon.  The sentiment is from Incredible Like You and the paper on the front is from the Gingham Gala Paper. 

This is the inside of the card with more pretty butterflies.

I won’t give you the details of how to make one as you can check it out for yourself.  The card was CASED from Jan B cards.  HERE is the link to her Youtube video.  It’s long one.  It goes for 47 minutes so be prepared with a drink in hand and take notes.  The card is very easy though once all the cutting is done and you can decorate it anyway you like.

What could you do inside? Some stamped and cut images, a baby card, maybe a 4 letter name. Endless ideas to work with.

Have fun with it.

I hope you like the Botanical Butterflies week.  The ideas I have shared could work with any paper.  This gorgeous paper is Free though.  Can’t beat that. 

This is a Sale-A-Bration choice for orders over $90.  You could choose the gorgeous Painted Seasons paper or any of the other choices.  You only have one week left so get on it.

In Australia? You can order in my store -> HERE.  

Have a great weekend,

Jenny


cards, Catalogues, Sale-A-Bration

BOTANICAL BUTTERFLIES PAPER WEEK – SPOTLIGHTING!

I have been sharing projects all week with the Botanical Butterflies Designer Series Paper that is available as a free choice for Sale-A-Bration.  Of course you could use the ideas for any paper because we need to #usethatpaper  I love this paper though which is why I am featuring it.

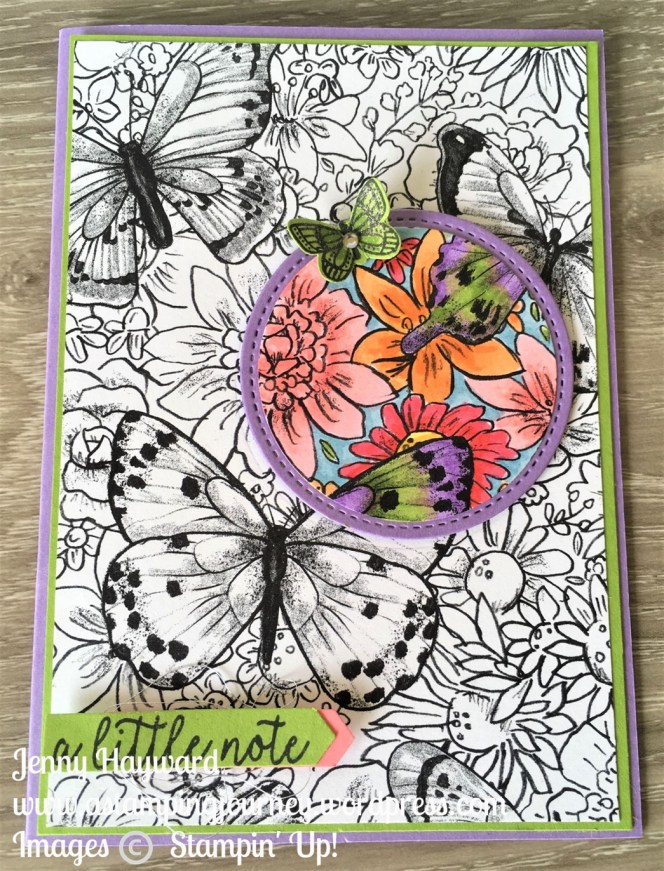
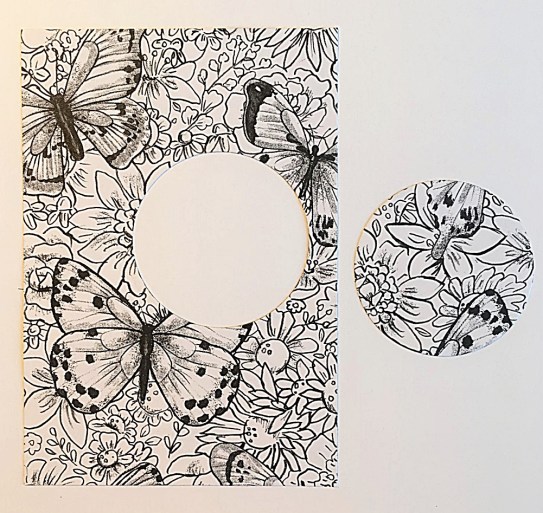
For this card I used one of the black and white prints in the pack and created a card with the Spotlight technique.  The idea with this technique is you take a small section of the paper/image and “highlight” an area.  

To do this I cut a circle from the piece of paper and coloured just that section with the Stampin’ Blends.  Then layered it on a diecut scallop circle and raised it up off the card.  It’s great as you don’t have to colour the whole piece of paper in.  Great for the “colouring challenged” 😉  I find too it’s not as overwhelming with a small area.

I hope you have liked all the projects I have shared this week.  What has been your favourite?

Tomorrow I actually have a bonus project so be sure to stop by.  If you haven’t already, subscribe to my blog. Click on the tab in the right column.  Then you will get an update each time I post.

Thanks for visiting me,

Jenny