Catalogues, Stampin' Up!

READY, SET, STARTER KIT!

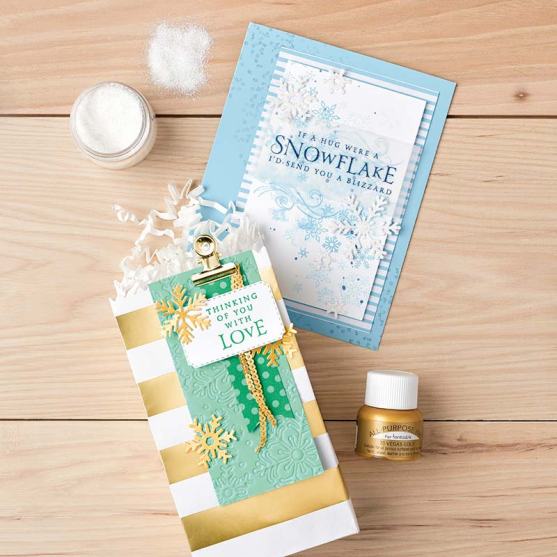
Until 31st December there is the option for the Ready, Set, Starter Kit.  All ready to go with set products PLUS a $50 credit voucher to use in the first month, Plus a Stampin’ Up! apron and a collapsible bin.  All this for $169.

Here is what you will receive.

NB: -There is still the customizable Starter Kit available to create your own choice but this doesn’t include the additional options.

      – The Ready, Set, Starter Kit is only available in the South Pacific Market.

WHY WOULD YOU WANT THE STARTER KIT ANYWAY?

–  You will get a minimum 20% off all your orders once you join.
– See the products before anyone else sees them or has access to them.
– Access to a quarterly Stampin’ Up! magazine full of inspiration.
– Access to an exclusive Demonstrator Facebook group and website.
– Opportunity to attend Demonstrator only events.
– You will have me to support you whether you choose to build a business or enjoy your hobby and get the discount all the way.
—–

** I need to know more ->  Email me at jghayward@yahoo.com
** I am ready to go NOW -> Head straight HERE to my Website.

I look forward to welcoming you to my JEN’s INK Team.
Jenny
cards, Catalogues, Christmas, Stampin' Up!

REAL RED FEATHERS AND FROST!

This is another card from our Shoebox Swap a few weeks ago.  This is using the Feathers and Frost stamp set from the 2018 Holiday Catalogue.  I don’t have this set as yet so it was good to create with it. This was created by Roz in our Inky Fingers team.

The Real Red card is embossed with the Tufted Embossing Folder.  The wreath was stamped in Shaded Spruce and then watercoloured with the Real Red and the Shaded Spruce inkpad and the Aquapainter.  The Shaded Spruce square card was embossed with the Woodland Embossing Folder.  On my card I stamped the bird separately on white card in Soft Suede and then coloured it with the Aquapainter.  I cut that with scissors and raised it up. To finish I added some Real Red Solid RIbbon.

It’s a lovely Christmas-sy Card don’t you think? Thanks Roz. 🙂

Thanks for stopping by,

Jenny

cards, Catalogues, Christmas, Stampin' Up!, Videos

WEDNESDAY’S WOW! #41 – BEAUTIFUL BLIZZARD!

Christmas for us here is warm – well often hot, so we don’t think of snow let alone blizzards.  So while the weather is a little cooler for us at the moment as Spring warms up I thought for Wednesday’s WOW! #41 we would look at the Beautiful Blizzard Bundle.  I think it is a lovely one.

You can find this on page 39 of the Holiday Catalogue.  It has some sweet images and I really love the Blizzard Thinlits Die.  This is a one piece die and is very versatile.  With the Die you can create a background by cutting the die on a single piece of card, Or use it as a mask to sponge over.  Why not use the individual snowflakes to add to a card?  Here are some samples for you.

For these ones the snowflakes are diecut and adhered to the card.  Check the gold ones out that have been daubered with Gold Shimmer.

Look closely at the Mint Macaron strip on the bag.  The Blizzard Thinlits die were dry embossed on to the card using the Embossing Mat.  This is a very cool effect.

Here are some more Beautiful Blizzard samples from Stampin’ Up! artists.  Very pretty ways of using the stamps and dies too.

This is the lovely Beautiful Blizzards Bundle.

If you want to see a video on working with this bundle check the Youtube video below.  It shows some great ways to use it including how they have made the cards shown above.

You can order this in my store now -> HERE.  Clear Mount is $80.  Wood Mount is $92.50. Please use the Host Code:  SGXSEFMS   Thank You and be sure not to mark your online order anonymous or I can’t send you your Thank You Gift. 🙂  You can order directly from me too if you prefer by emailing me or dropping me a comment and I will contact you with the details.

I don’t want to wish you a Blizzard for Christmas.  That would not be fun.  I do hope it is filled with the Beautiful Blizzard though. 🙂

Jenny

cards, Catalogues, Christmas

WISHING YOU WELL CHRISTMAS!

Yesterday I shared a card using the Wishing You Well set.  When I made that one I made a similar Christmas version.  It shows just how versatile this set is.  The layout is exactly the same as yesterday’s version with just a couple of changes.  Head back to the post to see it if you missed it.

This is the Christmas version.

For this one, the base is Shaded Spruce and the wreath is stamped in Shaded Spruce.  I am really liking this colour lately.  It’s a great green for traditional Christmas cards.  The bow was stamped on scrap white and cut out separately – with scissors – no punches or dies available. 🙂  The bow was raised up with Dimensionals.  The “spots” from Timeless Textures were stamped in Smoky Slate this time.  The strip of paper is from Under The Mistletoe Designer Series Paper available in the Annual Catalogue.  The sentiment from the Wishing You Well stamp set fits nicely in the Stitched Labels Framelits.  I layered the white stamped and diecut piece on to a Shaded Spruce one.  TIP: to do this diecut a Shaded Spruce one, cut it in half vertically and separate the piece as you layer it under the white one.  I added some Red Rhinestones to finish the card off.

I hope you like this version. Christmas is coming up way too quickly don’t you reckon??  3 months today.

Have a great day,

Jenny

cards, Catalogues, Classes, Stampin' Up!

WISHING YOU WELL MAKE AND TAKE!

Since I am sharing cards with the Wishing You Well set lately I thought I should show you this one.  This card was one of the cards we made at my Holiday Catalogue Launch a few weeks ago.  Everyone liked making this card even though it is fairly simple.  We made this on the weekend at a private class too.  They all liked it there also. 🙂  (BTW: If you can’t make a class you can book a Private class with me with a couple of friends. They are always a fun time).

The layout is based on the Freshly Made Sketches #352 – you can see that here. 

There was the option to stamp the bow on scrap white paper and cut it out (no Framelits or punch for that sorry!).  This was raised up with Dimensionals and that looked good too. The strip of paper is from the Country Lane Designer Series Paper.  The sentiment stamped on Crushed Curry was cut with the Bunch of Banners Framelits and we trimmed off one of the ends of the banner. We added a few loops of Silver Thread behind it.  To add some colour to the white space the “dots” from Timeless Textures was stamped in several places in Mint Macaron.

I made another similar card to this in Christmas colours.  Check that out in tomorrow’s post.

Thanks for stopping by today,

Jenny

cards, Catalogues, Christmas, Stampin' Up!

LEMON LIME GRAPE BOWS!

Just a quick card for this Sunday night.  A few days ago I shared a card with my new favourite colour combination with the Wishing You Well set.  Today I have another with those colours of Lemon Lime Twist and Gorgeous Grape.

This is a Mini card 10cm x10cm (4″ x 4″) and they are very quick to make.  Great for sending out little notes or with gifts.  I lined the bows up by sight.  You could use the Stamparatus and I did start doing that but the spacing wasn’t working out right.  The sentiment was stamped in Gorgeous Grape on Lemon Lime card and cut with the Farmhouse Framelits Dies.  I added a few loops of Silver Thread on the back of it and raised it up with Dimensionals.

Hope you like these quick cards.  Have a great week.

Jenny

cards, Catalogues, Stampin' Up!

GORGEOUS GRAPE AND LEMON LIME TWIST – WHAT A COMBINATION!

I have been using the Wishing You Well set  lately and it is one we used at my Holiday Catalogue Launch last weekend.  I made a few samples which I will show you over the next few days.

When making these cards I discovered a new Colour combination which is becoming a favourite. I have seen these 2 colours paired together quite a bit over the internet recently and I just had to try it myself.  How bright and fresh are these 2 colours, Lemon Lime Twist and Gorgeous Grape.

The Gorgeous Grape card is embossed with the Tin Tile Embossing Folder (which I think I adhered wrong again!).  This Wishing You Well set is one of the Distinktive style sets.  This means it gives different opacities to the stamped image creating depth to your image.  It gives a very effective result without too much stamping.

I simply stamped the leafy stem once with the Lemon Lime Twist onto white card.  This was then cut with one of the Layering Oval Framelits.  I could have layered the oval on to a different piece of card but instead I sponged around the edge of the oval.  The sentiment was stamped on Lemon Lime Twist card and cut with a Framelit from the Farmhouse Framelits Dies.  I wrapped some Silver Metallic Edge Ribbon around the Gorgeous Grape card before assembling it to the base card.

It’s a quick card to put together.  Watch for more cards with this combination.  Why not try it yourself??

This is the Wishing You Well set if you haven’t noticed it in the Holiday Catalogue.  For $33 AUS for clear mount it is pretty good value and is a great set for any occasion, Thinking of you cards, sympathy, birthday and Christmas.  It covers all bases I think. 🙂

Have a great day,

Jenny


cards, Catalogues, Christmas, Classes

CHRISTMAS STAMP A STACK CLASSES START THIS WEEK!

Get creating your Christmas cards now.  Stamp A Stacks are a great way to create a number of cards at one time.  You will create 6 cards at this class, 3 each of 2 designs.  Here is a sneak of them.

If you are a Wollongong Local come and join in.  I would love to see you . Everyone is really lovely too.  We have a fun time at these classes so don’t be too worried.

Friday 21st  September 10am or 7pm.

Cost:$20    $5 extra to use my adhesives.

BYO: Scissors and Adhesives.   $5 extra to use my adhesives.

PLEASE RSVP: Thursday 20th

Can’t make it?  Why not grab the kit to go?  Cost is $20.  All card and embellishments are included but no stamped images.

Comment below if you can come or email me at jghayward@yahoo.com
Jenny
Catalogues, Stampin' Up!

CLEARANCE RACK UPDATED – SOME UP TO 60% OFF!


Some recently retired Products have been now added to the Clearance Rack.  Ink pads are reduced to $4.60.  Ribbon is more than 50% off, many embellishments more than 50% off.  HUGE savings but they won’t stay around long.  If you want any grab them TODAY!  Seriously these WILL be snapped up.  

Here is just some of the items reduced to clear.

See the Clearance Rack in my store-> HERE.  Australian residents only. Sorry.

Order in store or directly to me.  I will put an order in tonight if you wish to order directly to me.   If ordering online see the link below and the Host Code.  

TO ORDER:

Email/Phone me directly with your orders.

OR

Order Online -> HERE.  Please use the Host Code this week: ME4VSE3W

Be sure not to mark anonymous when you order online as I won’t know where to send your little Thank You Gift. 🙂

Thank  You,

Jenny

cards, Catalogues, Christmas

DETAILED DEER GLIMMER!

I have another card using the Detailed Deer Thinlits.  This card was another from out Shoebox Swap in our Team Stamp Day a few weeks ago.

This card was created and shared to us by Vanessa Webb.  Isn’t it an elegant one??

Detailed Deer Glimmer

The sentiment is from the Merry Christmas To All Bundle.  What about those Galvanised Buttons?  They have a country/rustic feel. The red trim on his neck is from the Suite Season Specialty Washi Tape.  

I haven’t paid too much attention to the Black Glittered Organdy Ribbon which you can find on page 49 of the Holiday Catalogue. We don’t create for Halloween or Thanksgiving here so we tend not to focus on the later half of the catalogue.  This ribbon is really lovely though.  It is so soft – and very sparkly.  It works well for an elegant Christmas card too.  I may have actually bought some since making this card.  It is one of the ribbons in my Ribbon Share too. I just had to add it. (You can head back a few posts to see about that or you can email me to join in at jghayward@yahoo.com)

The background on this card is Merry Merlot cardstock that has been embossed with the Tin Tile Embossing Folder.  I rubbed over the card very lightly with some White Shimmer Paint with a Sponge Dauber.  It is just a subtle effect.  A scalloped Vellum Oval was adhered under the Reindeer too to finish.

Hope you like it.  Thanks for visiting me.  I have people from all over the world visiting me here.  It’s so lovely that the internet can join us together in our love of crafting.  Why not say Hello in a comment and let me know where you are visiting from.

Jenny