cards, Catalogues, Stampin' Up!

QUICK CHRISTMAS CARDS WITH SANTA’S WORKSHOP MEMORIES AND MORE CARDS!

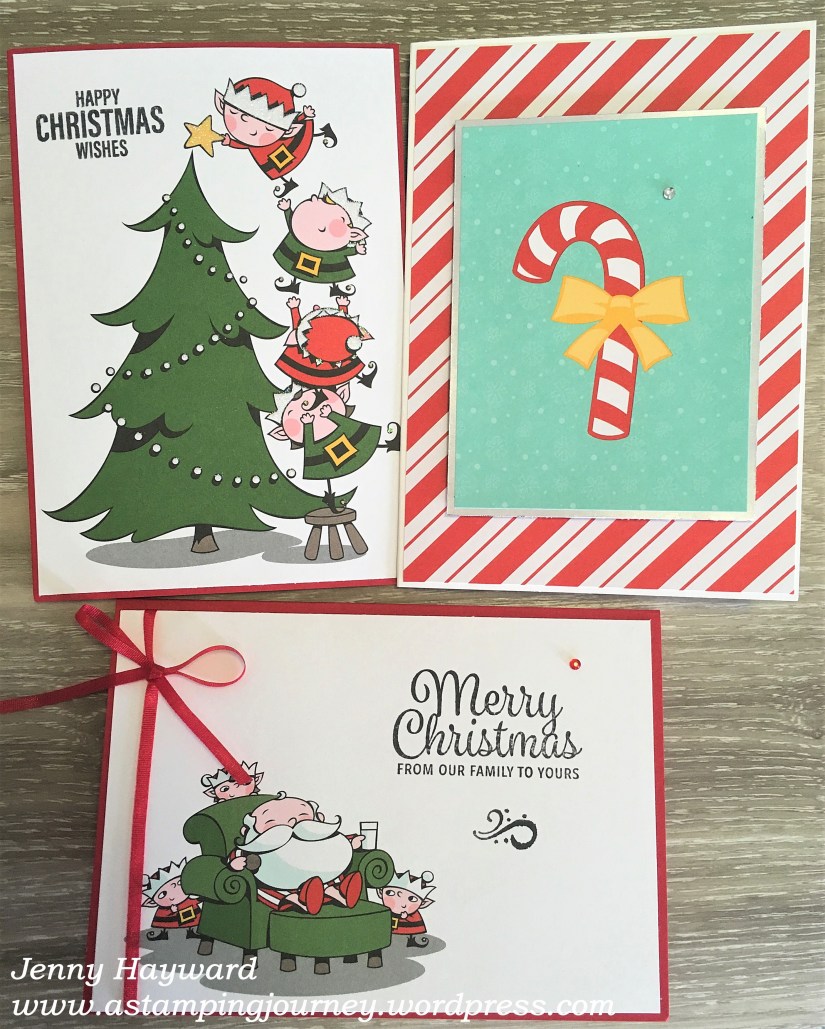
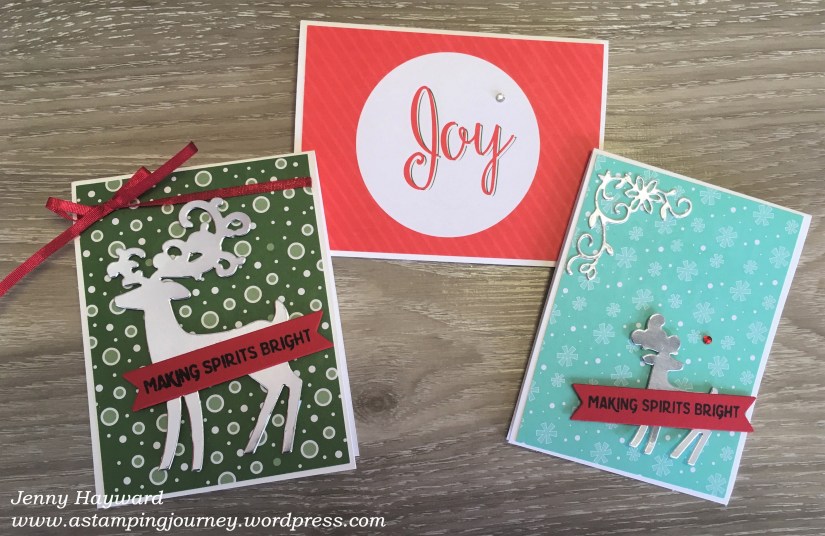
You might have seen the Santa’s Workshop Memories and More Card Pack in the Holiday Catalogue (p 21). Don’t just think of them as cards for Pocket Scrapbooking.  That’s what I did at first to be honest. They are really cute to make quick cards up.  Here are a few I had made up recently.

You can simply adhere them to a base card or layer 2 of the cards together (like I have done with the Candy Cane card).  I stamped on the sentiments in black on these larger cards.  Alternatively you can add a few extra embellishments (like I have done with the smaller reindeer ones).  The cards come in a couple of different sizes.  The larger ones are 10.2 x 15.2cm, the smaller ones are 7.6 x 10.2cm.

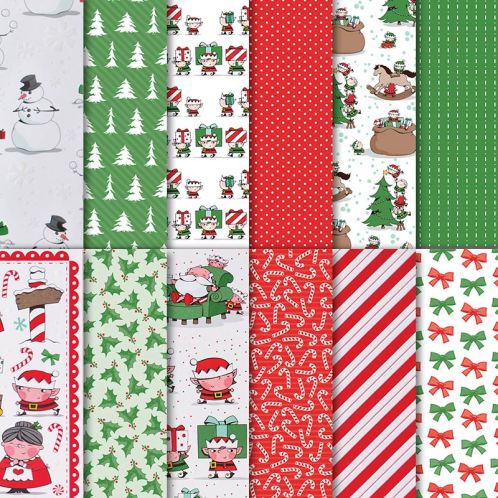
I must dig out some of the rest of these cards and make up some more.  They come together so quickly. So great when we all starting to feel a little time poor at the moment. Unfortunately you can’t buy these anymore which is sad.  You could get the Santa’s Workshop Specialty Designer Series Paper which is Twelve 12″x12″ sheets of paper which have very cute images.  That could work similar.  But you better get on to those if you want them as they are low inventory stock.

Here they are for you. Aren’t they cute?

You can order them in store -> HERE for $24.25.  Get on it. Please use the Host Code: BZ6KB7SU  

And remember don’t mark your order “anonymous” because then I can’t send you out your Thank You card and gift.

Have a great day,

Jenny

Catalogues, Christmas, Stampin' Up!

DOUBLE POINTS AND MORE NEWS!

I am heading away this week BUT that doesn’t mean the show doesn’t go on.  I have posts ready for you to go out so you don’t miss the inspiration. Well I hope it is inspiration.  Before I go I have some important updates.

DOUBLE LOYALTY POINTS
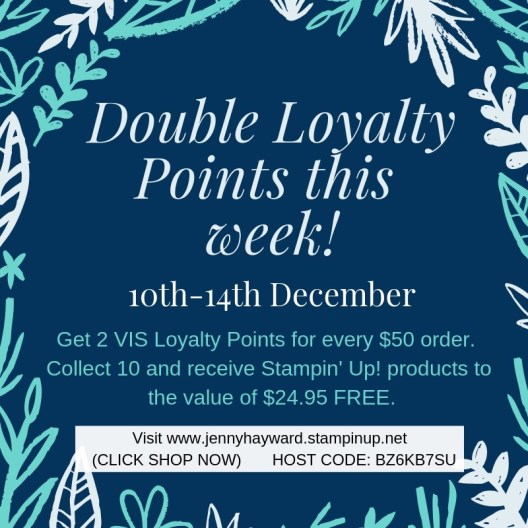
Did you know I have a Loyalty Program?  Yes! It is my VIS (Very Important Stampers) Loyalty Points Card.  For every $50 order with me you receive 1 point.  Collect 10 and you receive $24.95 of Free products of your choice.  I keep a tally for you and let you know when it is full.  There is no expiry date too. It is very exciting when you get to choose free products.

This week I am going to be away.  I have to say I am excited to get away – but this time of year is crazy.  Anyway, you benefit.  Get 2 POINTS FOR EVERY $50 orders this week.  You will be chocking up the points quickly to get your free products.

All you have to do is place a minimum $50 order in my store this week.  Great timing with the Year-End Closeout Sale too.  Make sure you don’t mark your order anonymous because I can send out your Thank You card and tick off those loyalty points. 🙂

Head to my store to shop -> HERE.  Only for Australian residents.  Please use the Host code: BZ6KB7SU

NB: Please note you may not receive your order until after Christmas.

——–

YEAR-END CLOSEOUT SALE IS ON 

It’s happening and some items are selling out already.  Have you checked it out?  These are retiring items from them current Holiday Catalogue and some surplus products from the Annual Catalogue. SOme items are reduced too which is a bonus. Do check it out and do order now if you want anything.

For the Year-end Closeout products Visit -> HERE

————-

REQUEST THE 2019 OCCASIONS CATALOGUE

They are on their way.  Do you want one?  You can now request the 2019 Occasions Catalogue And the Sale-A-Bration Catalogue.  (Australian residents only)

Head -> HERE to fill out the short form with your details.  They will be sent out late December to you.

————–

FREE TOTE WHEN YOU JOIN


Do you like this Tote?  Pretty cool hey! And it fits so much in it.  Use it to take your crafting goodies to your next stamp camp or a class you are doing?

You know what.  It’s FREE!  You have the option to choose this when you join Stampin’ Up! during Sale-A-Bration.  Yeah! you pay just a little extra on your kit ($61) but not as much as it is worth (valued at $87). There are only limited supplies that is why I am telling you now.  I missed out on buying one as a Demonstrator so I don’t want you to be disappointed.  Start planning now and get on it on January 3rd.

Here are the options.

OPTION 1: $315 of product for $169 – Pay no shipping.

OPTION 2: $315 of products Plus the Tote Bag for $210 – Pay no shipping.

Once you join you save on your Stampin’ Up! products each time you order with your minimum 20% discount.   How is that?  Pretty cool.  Why pay full price.

Ask me for a no-obligation information pack by emailing me at jghayward@yahoo.com      This will be mailed out late December as I will be away this week.

———-

Lots of information to digest.  Email me if you have any questions.  I will have limited internet this week but I will respond to you as soon as I can.

Have a great day,

Jenny

cards, Catalogues, Christmas, Stampin' Up!

12 WEEKS OF CHRISTMAS – WEEK 10 – STYLISH CHRISTMAS BRIDGE FOLD!

Week 10 for our 12 Weeks of Christmas series.  Can you believe it?  Have you been following along over the weeks?  I hope so.  It’s been fun but I can’t believe it’s coming to the end.

Today I have a Bridge Fold card for you.

I have used the set Stylish Christmas for this which can be found in the Annual Catalogue.  Don’t forget about those great Christmas sets that are in the Annual Catalogue.

The original design for the card was from Lyssa’s blog ->HERE.

I redesigned the card to make it larger and also converted it to Metric measurements.  I will add them below.

BRIDGE FOLD CARD

** These are for the metric measurements.  For Imperial measurements, head to Lyssa’s blog post in the link above. NB:  My version is taller at 14.8cm.  You would cut your card at 5 7/8″ instead of 4 1/4″ if you want that to be the same.  Each of your strips would be longer too at about 5 3/4″. Hope that makes sense.

Base card – 14.8cm x 20.3 cm.  Score at 3.2cm, 6.3cm, 14cm and 17.2cm

Front Strips – either card or co-ordinating paper. 2 pieces measuring 2.8cm x 14.4cm.

Centre Mat – 7.3cm x 14.4cm.

Centre piece – 6.9cm x 14cm.  Whisper White.

Front Strip – 3.2cm x 14cm.

Fold the Base card.  Adhere the strips to the front.  Stamp the centre piece as you like.  Adhere on to Centre mat and adhere to the Base card in the centre.

To adhere the Front strip: Fold the left hand edge to create a z-fold.  Adhere the strip in position on the left hand piece by lining it up to the left hand edge.  Leave the Right hand folds open, adhere the right hand edge of the strip on to the right hand edge.

Decorate the card as you would like.  Have fun with it.

Thanks for stopping by,

Jenny

Catalogues, Christmas, Stampin' Up!

MAYBE A CHRISTMAS GIFT FOR YOU IN THE YEAR-END CLOSEOUT SALE?

It’s happening now! Stampin’ Up! have just announced retiring items from the 2018 Holiday Catalogue and some have been discounted.  You will want to see these.   Some of them are up to 40% off.  

Some items from the Annual Catalogue that are in surplus too are listed.

Check them all out in my store -> HERE and get ready to shop.

Just some of the items you will see.


Christmas Traditions Punch Box reduced to $54.60


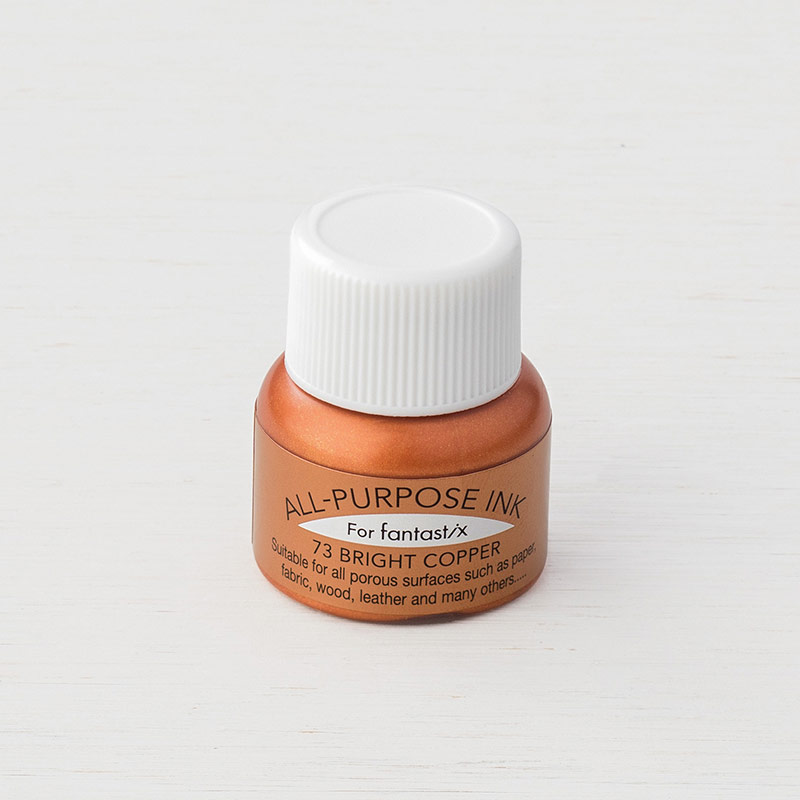
Bright Copper Shimmer Paint reduced to $10.50


So Santa (Wood mount reduced to $37.80


Candy Cane Builder Punch reduced to $24.80

HOW TO ORDER:

Contact me directly

OR

Shop online through my store -> HERE.(same as the link above)  Please use the Host Code: BZ6KB7SU

Thank you in advance for your orders.  I do appreciate them.  Every order receives a gift from me to say Thanks.
Go and grab yourself some bargains – or a Christmas present 😉
Jenny
cards, Catalogues, Stampin' Up!

ONE FOR ALL MINI THANKS!

I hadn’t got around to sharing this little card with you.  This card is just a small love note size, so 7.5cm x 7.5cm (3″x3″).  I made quite a few of these mini cards recently for Customer Thank You cards.  This is using the lovely One For All set.

I made 2 different versions. One in a Mint Macaron card base with the flower and stamping in Mint Macaron too and a Calypso Coral banner.  Then one in a Calypso Coral base card, stamping and flower with a Mint Macaron banner.  I cut the banner free hand by cutting in to the ends of the strip.  I added a Vellum circle cut from the Stitched Labels Framelits.  The flower is cut from the Seasonal Layers Thinlits.

I sent these out as a little Thanks for customers who ordered the last month or two.  With a little token gift too of course.

If you are in Australia you can purchase your Stampin’ Up! supplies from my store -> HERE and they will be sent directly to you.  Ask me for the current Host Code. Alternatively, drop me a comment or message and I can arrange your order.  I appreciate each and every order. 

Thanks for visiting,

Jenny


cards, Catalogues, Stampin' Up!

LAST DAY FOR SNOWFLAKE SHOWCASE PRODUCTS!

I have used the Snowflake Showcase products so much these past few weeks.  I am sad that they are ending TOMORROW.  Friday is the last day to grab any – or all of them.  I have had a few people do that.  They are all so lovely together.  See all the details and the special bonuses for getting the whole bundle.

But first one more card.

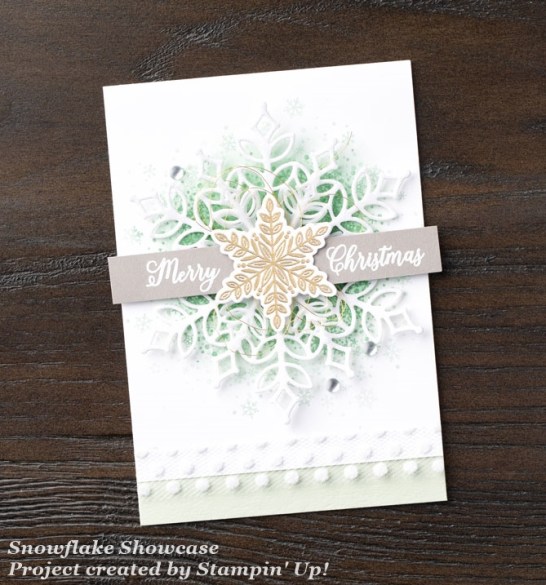
This card was created by one of the Stampin’ Up! Artists.  I love the background.  I think that it has been created with the Brusho Crystals.  Then a large snowflake was diecut from White Velvet Paper.  Have you got that paper yet?  The sentiment has been stamped and heat embossed in white on Gray Granite card.  A snowflake was stamped and added to the centre.  The card was finished off with some of the gorgeous Polka Dot Tulle Ribbon.  This is such a soft, delicate card.

Now please don’t regret not buying these products.  You do need them.  I know in Australia we don’t have snowflakes at Christmas but they aren’t just for snowy Christmas cards.  If you have seen some of the cards I have created there has been some all-occasion cards.  If you missed them then do head back a few posts or click on the tag ‘Snowflake Showcase’.

Here are the details for you again.

LAST CHANCE:

ORDER ANY OF THE SNOWFLAKE SHOWCASE PRODUCTS NOW AND RECEIVE A FREE GIFT.

Grab the Tutorial AND card kit to create 2 gorgeous projects when you order these items with me PLUS receive 1 sheet 6″x12″ velvet paper FREE.

  • Order the Snow Is Falling Stamp set and the Snowfall Thinlits.

COST:      $98 plus shipping.

  • Add the Happiness Surrounds stamp set for an additional $30 and you will also receive the Snowflake Trinkets for free

You can view the products closer and order in my store now -> HERE. 

Please use the Host Code:  BZ6KB7SU    Australian residents only sorry.

OR

You can contact me directly to order them for you.

——-

Your Free items with a Thank You card will be sent out to you separately so be sure to not mark your order anonymous.  Thanks for shopping with me.

Jenny


Catalogues, Stampin' Up!

LAST EXTRAVAGANZA SALE DAYS – TOOLS AND INKS – AND THERE IS SO MANY!

For the 27th and 28th (Tuesday and Wednesday) there is 10% off select Tools and Inks which include

  • Adhesives
  • Applicators
  • Cleaners
  • Cutting tools
  • Embossing folders
  • Framelits and Thinlits
  • Ink Pads
  • Ink refills
  • Markers
  • Punches
  • Scoring Tools
  • Stamp blocks and cases

WOW! So much! I am sure there are a lot to choose from here. They are all in limited supplies so if you want any grab them quickly.

Here are just some of them.

Head to my website(see below) to check the items for this sale.

THINGS TO REMEMBER:

– These items are only available  for the 27th and 28th and while the supplies last.

– Order directly to me or in my store -> HERE.  Please use the Host Code: AE4KW4PM

** Orders over $50 in total for the whole Extravaganza Week will receive a $10 Gift Voucher to use later in December. Orders over $100 in Total for the week will receive a $20 Gift Voucher. This is only available through me **
This is the last of the Extravaganza Sale so I hope you have got yourself some bargains.  Maybe even some Christmas presents.
Thanks for visiting,
Jenny
3D projects, Catalogues, Christmas, Stampin' Up!

12 WEEKS OF CHRISTMAS – WEEK 8 – PILLOW BOX CHRISTMAS!

Week 8 today for our 12 Weeks of Christmas series.  Are you enjoying these?  I would love to hear what you think.  I hope they are inspiring you. 🙂

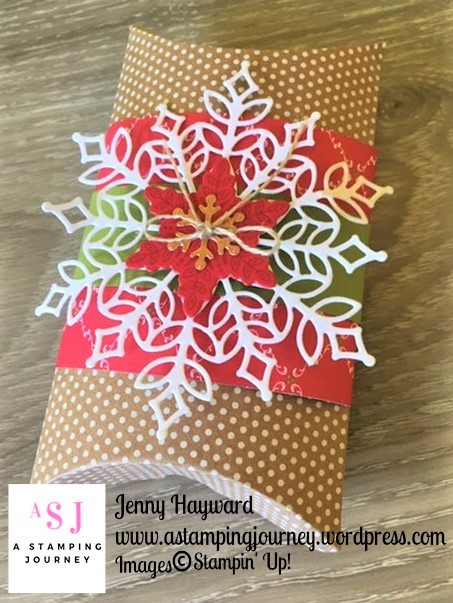
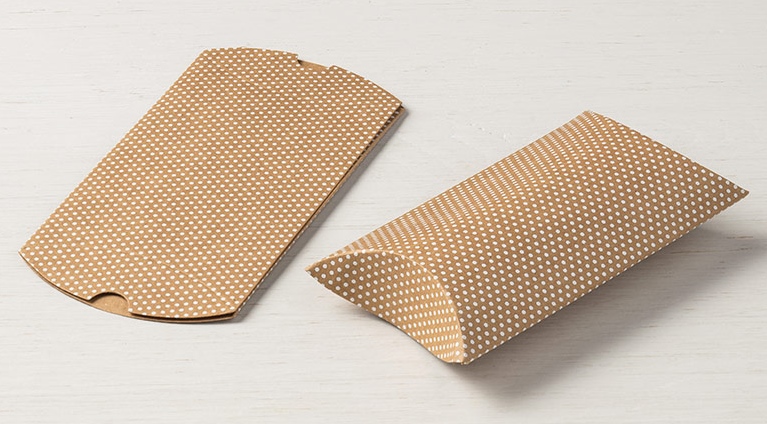
Today’s project is a gift box.  The Kraft Pillow Boxes make really quick gift packaging.  They are large enough to add a gift card and even throw in a few chocolates.

For this one I have use the Snow is Glistening Stamp set and the Snowfall Thinlits.  Not much longer to get these products if you want them.

I made a wrap for the Pillow Box using the Under The Mistletoe Designer Series Paper.  Then added a strip of Old Olive cardstock around it.  TIP: Assemble the Pillow Box before you adhere the paper so you have the right dimensions with it being expanded.  The larger snowflake is cut with the White Velvet Paper, then a snowflake is stamped in Real Red on to Red card and cut with one of the snowflake Thinlits.  A tiny snowflake is cut from the Copper Foil.  I added a small bow from the Linen Thread. I just realised I edited this photo upside down as the bow doesn’t sit the right way.  Oops! Oh well! That’s OK right. 😉

Simple but very easy to do.  You can dress up any treat with these.

You can grab these Kraft Pillow Boxes in my store now -> HERE.  Unfortunately they are not one of the discounted items for the Extravaganza but they are still great value at $8.75 for 10 boxes.

The Under The Mistletoe DSP is one of the papers at 10% off today and tomorrow for Extravaganza.  Grab your pack at $17.32 in my store -> HERE. I have used this paper a lot this Christmas. Make sure you grab some for your Christmas creating.

Thanks for stopping by today,

Jenny

Online Extravaganza is on now.  Check all the reduced papers and embellishments HERE but this ends on the 24th.


Catalogues, Stampin' Up!

STAMPIN’ UP! EXTRAVAGANZA IS GO!

IT’S HERE AND IT’S BIG!

For the next 6 days Stampin’ Up! have a HUGE Extravaganza Sale.  10% off Select items from the current Annual Catalogue.  They are spread out over the time so every second day there are different items reduced.

Are YOU ready for it?

It’s time for DAY 1 and DAY 2 with select papers and Embellishments reduced including Cardstock, Designer Series Paper, Buttons, Glitter, Ribbon and Twine AND lots more.

Head to my website (see below) to check the items for this sale.

THINGS TO REMEMBER:

  • These items are only available  for the 23rd and 24th and while the supplies last.
  • Order directly to me or in my store -> HERE.  Please use the Host Code: AE4KW4PM
  • Orders over $50 in total for the whole Extravaganza Week will receive a $10 Gift Voucher to use later in December.  This is only available through me.

SO GO NOW AND SHOP  

Any questions please don’t hesitate to email me at jghayward@yahoo.com

Thanks for shopping with me,

Jenny


cards, Catalogues, Classes, Techniques

WEDNESDAY’S WOW! #47 – MAKING UP A SHIMMER PAINT SPRAY!

This weekend is my Shimmer Paint Technique class.  I have been having lots of fun sponging and spraying this stuff around.  For our Wednesday’s WOW! #47 I thought I would share with you how to make the Shimmer Spray up.  Also, I will show you one of the cards we will make in class using this spray.

MAKE YOUR SHIMMER PAINT SPRAY

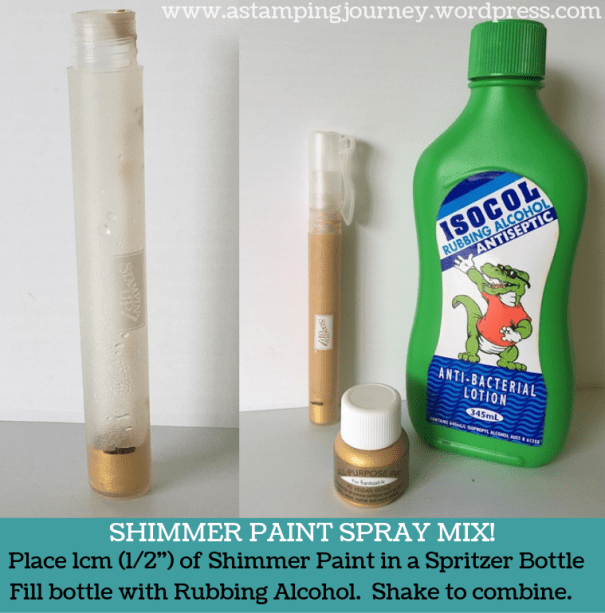
Add a small amount of the Shimmer Paint in a Stampin’ Spritzer bottle.  I added about 1cm, or approximately 1/2″.  The more paint the more intense the spray will be. Then top up the bottle with Rubbing Alcohol.  The Rubbing Alcohol can be picked up at most Chemists (or Drug Stores).  You can add water instead of alcohol but it doesn’t dry as quickly.  Give it a good shake to mix them together.  Before you use this each time if it has sat for a while then be sure to shake it.  That’s all there is to it.

TIP: When you are spraying your card check which direction the nozzle is as to where it will spray …  You might like to spray inside a box or cover the table to avoid any random spraying.

The further away you hold the spritzer the finer the mist will be.  Bring the Spritzer in closer and it will be more heavier.

This is the card we will be creating on the weekend.  (By the way there are still spaces if you are a Wollongong local and want to join us. Check the previous post for class details).

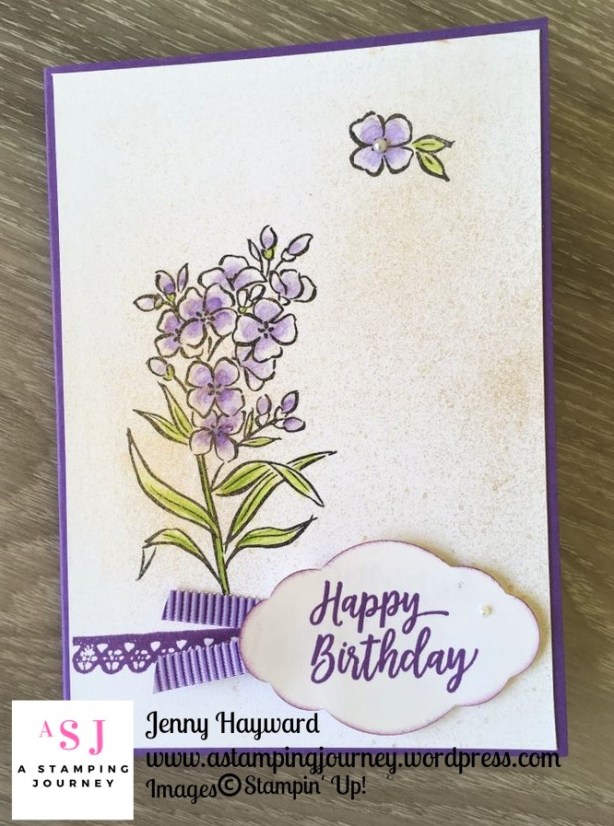
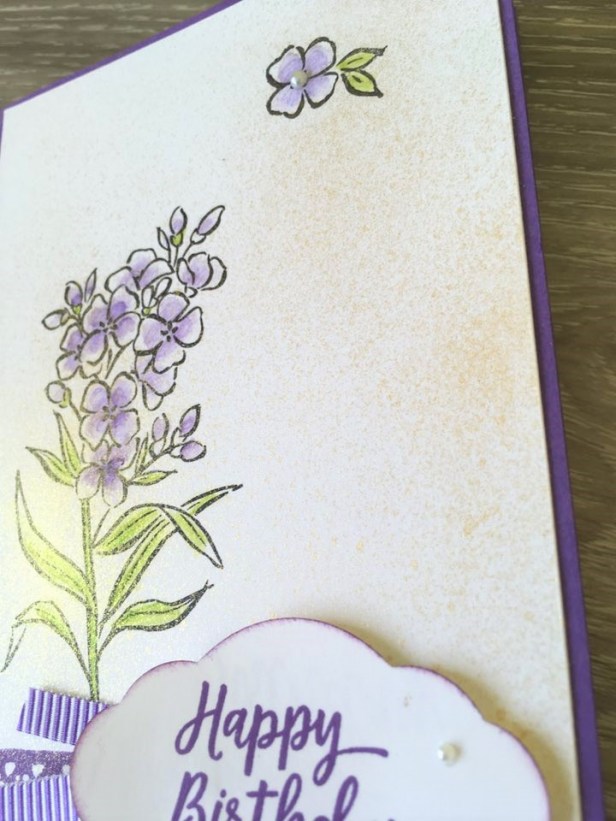
I have used the Southern Serenade stamp set and stamped it on to Shimmery White cardstock.  That gives extra sparkle but also is good for the liquid used.  I stamped the images in Black Stazon and coloured them with the Watercolor Pencils.   After it was finished I spritzed the card.  This spray is using the Vegas Gold Shimmer Paint.

You can see the Shimmer Paints on page 38 of the Holiday catalogue or view them in store ->HERE.  Scroll down the page to see each one.  There are 4 colours: Vegas Gold, Bright Copper, Champagne Mist (which is a silver) and Frost White.

Get your Free Sponge Dauber for each pot of Shimmer Paint you order from me this week.  Each pot is $14.

TO ORDER: Contact me Directly 

OR 

ORDER ONLINE -> HERE.  Please use the Host Code: KGQKCBA4

See you again soon,

Jenny