cards, Christmas

MORE LOTS OF JOY!

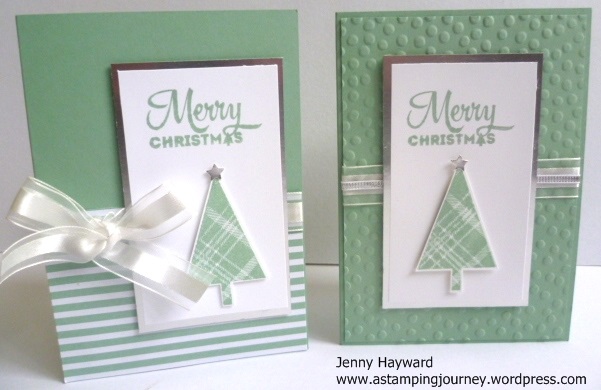
I made these cards even earlier than the one I showed last post. These are using the set ‘Lots of Joy’ again which is found in the Annual Catalogue.  I have to say I made these in a hurry. Just simple cards but they can be done quickly.

P1170116

Both are in Mint Macaron. I have used a left-over piece  of the Envelope Paper on the left one.  On the right one I embossed a piece of Mint Macaron with the Decorative Dots Embossing Folder. The tree was stamped and punched with the Tree Punch.  The white piece is layered on some Silver Foil.  I finished them off with the Organza Ribbon.  I added some Silver Ribbon to the right hand one. Simple!!

Thanks for stopping by.

Jenny

Christmas, Classes

LOTS OF JOY FOR CHRISTMAS!

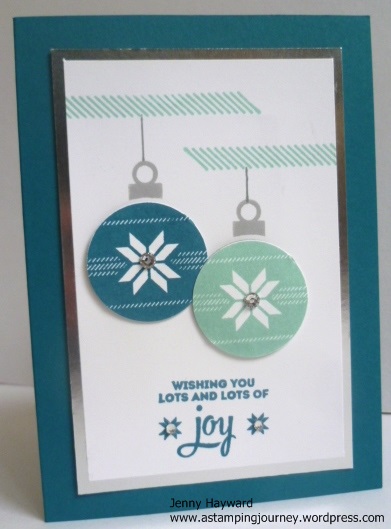
I made this card a few months ago before the Holiday Catalogue came out and I was starting to plan for Christmas.  It is probably about time I showed you.  This is using one of the stamp sets in the Annual Catalogue – ‘Lots of Joy’ and using one of my “go-to” colour combinations of Island Indigo and Pool Party.

P1170120

I first stamped the angled lines in Pool Party and then stamped the baubles firstly in Smoky Slate on a piece of Whisper White and then again on scrap card in Island Indigo and Pool Party. I punched these out with the 1 1/2″ (3.8cm) Circle Punch. They were raised up off the card and I added some Adhesive Rhinestones for the bling factor.  The white card piece was matted on to some Silver Foil sheet BUT I want to show you a little trick to save your precious Silver Foil.

I cut the Silver Foil to size and then cut a rectangle in the centre.  This can then be used for a later project.  Check out the photo below.

P1170110

Thanks for visiting me today.  Have a great day 🙂

Jenny

cards, Christmas, Tutorials

SNOWY OWLS!

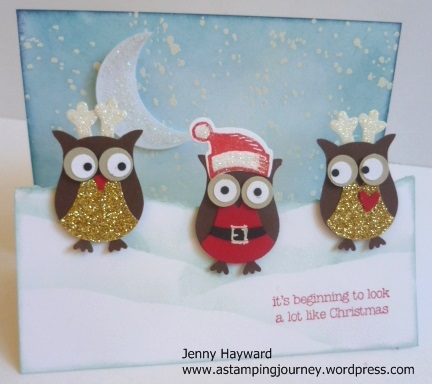
I made this cute card at our stamping weekend and I haven’t shown you yet.  Well actually I half made it and I had to finish it when I got home and that is probably why you haven’t seen it yet.  I get lots of comments about this card at my classes.  I CASED this from my friend Leonie who I think CASED it from Pinterest??  I will show you it then I will tell you about it.

P1170702

Does this have the cute factor??? This is using the Owl Punch.  The owl hat is from the ‘Snow Place’ Set and the antlers are cut with the ‘Snow Friends’ Framelits.  I drew the “santa Belt” with the white gel pen.  The greeting is from ‘Christmas Cuties’. The Moon is punched from a circle punch with a “bite” punched out with the circle punch again. I wanted to tell you about the background though and the card base.

Firstly for the card base I will give you the instructions but not the exact measurements  as you can make it any size you like really. The card base width is a standard size card (so metric – 14.8cm). The length is the length of your standard card (metric is A4).  Score the card length in equal thirds.  Score the right hand end section in half again.  So it is a bit like an odd-shaped “M” ??? Makes sense?? Yes!!!  🙂  On the back panel I cut another piece of white card to that size.  On this piece I stamped the “splodges” from ‘Gorgeous Grunge’ in versamark and heat embossed in White Embossing Powder.  I sponged over Soft Sky and Marina Mist and directly on the edges I sponged Night of Navy.  I adhered that piece on to the back panel.

For the front I cut another piece of white card to the size of the front. I tore across the top edge. Then masked sections with scrap paper to sponge “hills” on to the piece with Pool Party – I think? I sponged around the whole front piece with Pool Party too.

Lots of punching but lots of fun to put together.

Thanks for stopping by now.  I am off on holidays for 2 weeks. YAY! Don’t worry you won’t miss me too much.  I have some posts scheduled.

Jenny

ORDER ONLINE 24/7 at my store HERE. (Australian Residents only)    This month please use HOST CODE: DRVPXZ7DB


3D projects, cards, Christmas, Classes

CRAFT FAIR MAKE AND TAKE!

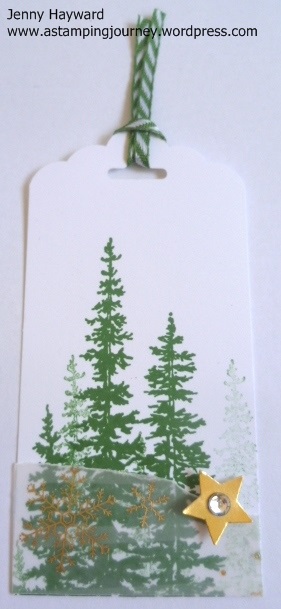
Now that I have shared a lot of the projects that I have made for the markets and Fairs I thought I would show you the Make and Take I had at the last Craft Fair event.  It had to be quick and I hope impressive??  I made a quick tag. Of course with the very beautiful set ‘Wonderland’.

P1170790

This tag was inspired by one from my friend Vanessa.  Simply stamp the trees in Garden Green on a piece of White cardstock and stamp again to stamp a fainter impression.  Tear a piece of the Winter Wonderland Vellum Stack to adhere at the bottom.  Punch out a small star with the Gold Foil and add a Rhinestone.  At the top punch with the Scallop Tag Topper Punch and tie off some Garden Green Striped ribbon.

It was a simple one for even those who had never stamped before and they loved it. I don’t think you can make a bad project with this set really. Can you??

Did you realise that this set will not be available after January 4th?? You better grab it now. Don’t regret it.  Now how many times have you debated about a stamp set and then after it is gone you realised you REALLY SHOULD HAVE BOUGHT IT!!!! Don’t regret this one.

Order it at my Online Store NOW!  Head HERE.  Please use the Host Code: DRVPX7DB

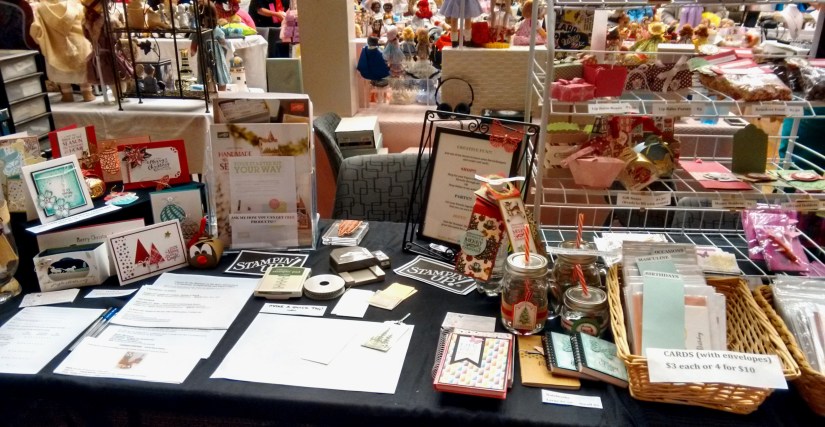
Now before I leave you I thought I would show you my display at the last Fair.  We were all squashed in but that was OK right??  This set up was similar to most of the events I have done recently.

doll bear craft fair 2015

A close up of the shelves with the boxes and other of the gifts.  The Easel Calendars were on the shelf above which you can’t see.

image-3333

Thanks for stopping by.  See you again soon,

Jenny 🙂

3D projects, Christmas, Classes, Stampin' Up!

LAST CLASS OF THE YEAR WITH A SPECIAL LUMINARY!

It’s the last class of the year THIS FRIDAY.  We have a special project to make.  This Luminary was inspired by a few I have seen on Pinterest so I thought it would be nice to finish off the year with.  How about it?? Are you local in Wollongong?  Come and join us.  Here are the details.

Friday 4th December – 10am or 7.30pm.  End of year Christmas. 
Come along for a fun time of celebrating and stamping. We have a special project for our last class – and maybe some surprises.  Cost: $15 BYO:Scissors and adhesives.  PLEASE RSVP by Wed. 3rd December. (Thurs. am the latest).  🙂
RSVP ASAP TO RESERVE YOUR SEAT!!!
3D projects, Christmas

FAIR PROJECTS UPDATE!!

Last week was a very busy week.  I had 3 markets/fair events.  It was great seeing some familiar faces and meeting up with new people.  I thought I would share some of the projects I made for the markets.  Having 3 in the week was interesting also to see just how different things sold.  So I will let you know about that too.

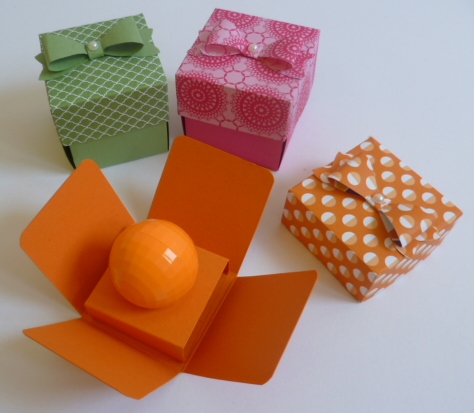
A little while ago I picked up some lip balm balls and sticks reduced at a local store so I grabbed those to make some cute holders for them.
P1170781

The tutorial to make your own Lip Balm Boxes can be found HERE.  They are so quick to make.

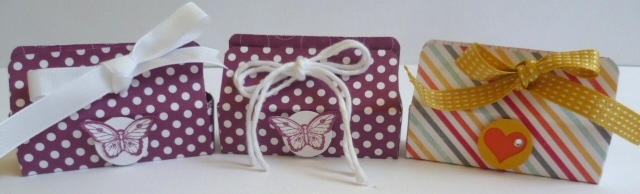
Here are some tiny Lip Balm Purses.  Both of these created some interest.
P1170785

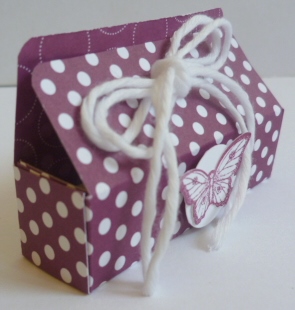
Here is a close-up from the side. (sorry I realised I hadn’t met the tops together neatly before I took the photo!)
P1170787

These are cute little purses. It was great to use up some retired papers too. You can make your own from the tutorial HERE. 

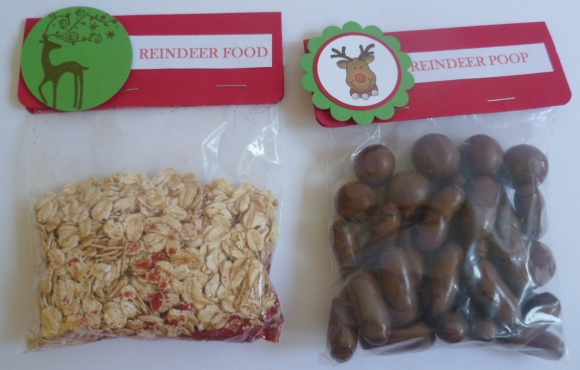
Now I made these fun little packs too.  There is a cute  poem on the back of them and I forgot to take a photo of these.  I will add them below.
P1170780

The Reindeer Poop was very popular at one event at a school.  It appealed to some boys sense of humour, or was it that there was no other chocolate sold there at the time?? 😉  I made some more bags up but then I didn’t sell one bag at that craft fair. You never know!

Here are the poems. I found these on Pinterest.

REINDEER FOOD

Just Sprinkle on the lawn at night,

The moon will make it sparkle bright.

As Santa’s reindeer fly and roam,

This treat will guide them to your home.


REINDEER POOP

I heard that you’ve been naughty,

So here’s the inside scoop,

All you get for Christmas,

Is this bag of Reindeer Poop!


I have more to show you but that is enough for one post.  Pop back again and I will show you some more in the next post.

Jenny

cards, Christmas

MORE WEEKEND CHRISTMAS PROJECTS!

Back to more of our Stamping Weekend projects.  I will share some more of the Christmas ones I did.

P1170671

This one I CASED from Pinterest from http://www.bekka.stampinup.net and I changed it up a bit. I have used ‘Lighthearted Leaves’. Isn’t this such a versatile set!! You can use this for Christmas and any occasion. I added my card to a Cherry Cobbler base.  The vellum is the Fancy Foil Designer Vellum in the Annual Catalogue.  The greeting is from ‘Wondrous Wreath’ which I heat embossed in Gold.  I finished it off with some Gold Twine and the centres of the leaves I added some Rhinestones that had been coloured with Sharpies.

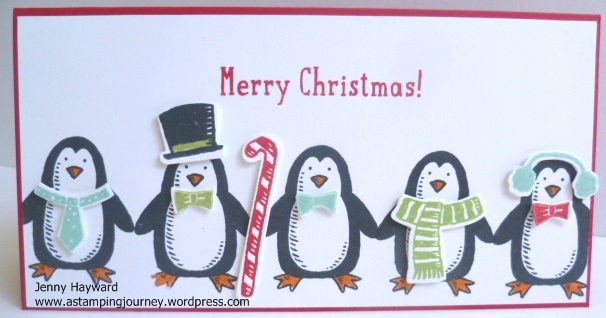
I love these little penguin dudes.  How cute are they!! I have CASED this from my friend Leonie.  It is longer than the standard card to fit them all in.  You can dress these dudes up anyway you want and cut them with the matching Framelits.

P1170673

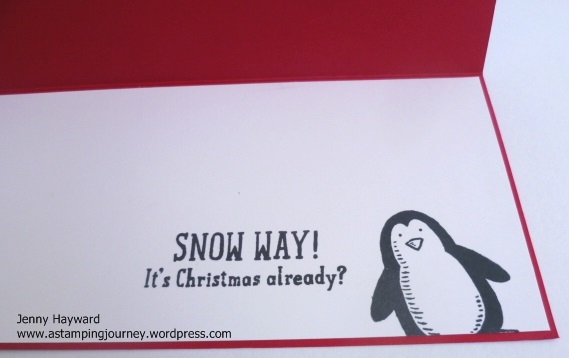
This is the inside of the card.  I forgot to colour his nose!

P1170674

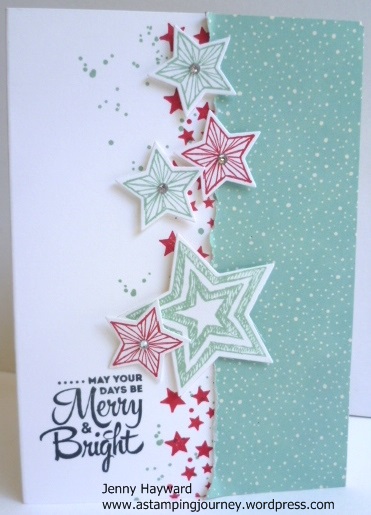
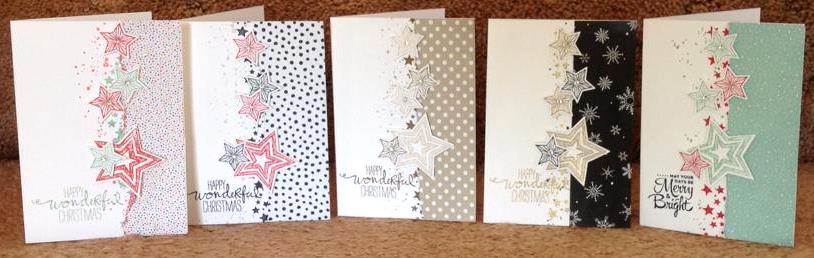
This next card we CASED from Pinterest too.  This is using the set ‘Be The Star’.  This is not your typical Christmas set but it is great to use other sets for Christmas.  I tore a strip of DSP from the ‘Home For Christmas’ pack and adhered that down the side of a Thick White card base.  I curled up the edge a little. I stamped the smaller stars in red near the torn edge.  I stamped the other stars in Pool Party and Real Red and cut them out.  The greeting from ‘Lots of Joy’ is stamped in Black. The “splodges” are from ‘Gorgeous Grunge’. I added some Rhinestones to the centres of the stars for some added sparkle.

P1170669

We all made this card at the same time.  It is interesting to see how different they turned out in different colours.  Aren’t they great???

star cards

Thanks for stopping by.

I will see you with more weekend creations next time.

Jenny

3D projects, cards, Christmas

STAMPING WEEKEND PROJECTS!

A couple of weekends ago we had another fun stamping weekend.  These are great opportunities to get lots of stamping done PLUS lots of laughs!!! I thought I would show you some of the projects I made. I think these will be over a couple of posts so be prepared. 🙂 I realised that I hadn’t shown you all the projects from the last one so I might have to get back to that later.  For now, here is some of my creativity from the weekend.

One of my main goals for the weekend was to make some projects to sell at a few upcoming vendor fairs I am doing.  I started off making some bottle tags. These are great for the Christmas period as Wine is a popular gift to give.  Why not hang a tag off your wine gift!

P1170706

These ones are using the ‘Wondrous Wreath’ stamp set and Framelits.

P1170703

These ones I have used the ‘Cozy Christmas’ stamp set and the gorgeous ‘Home for Christmas’ paper.

These took a while but they were fun to make.  I found a few different versions and tutorials for these when I went looking.  It all depends on how you want to decorate them or whether you want them longer to fold up the card to make a pocket to tuck a treat in as well.  For mine the card measures 20cm x 6.5cm (8″ x 2 1/2″).  Score your card at 6.5 cm (2 1/2″).  I punched out the circle using the 1 3/8″ circle punch.

I have to say these were the only projects I got made for the Vendor Fairs.  I got a little distracted with some other fun stamping projects. 🙂

After making these tags I had lots of circles punched out.  What is one to do??? Not waste them now!  I used a lot of them on a card.  I had some idea in my head but wasn’t sure how it would turn out. Check it out though.

P1170668

I laid the circles out on a piece of Whisper White for the card mat.  When I was happy with the arrangement I glued them down and then ran the piece through the Big Shot with the Stars Embossing Folder.  Then I used markers on the greeting from ‘Cozy Christmas’ and cut it out using the ‘Tags and Labels’ Framelits and layered this onto a Gold Foil tag.  I wrapped around some Gold ribbon and then layered it all on to an Old Olive card mat and then a Real Red card base.

Next post I will show you some more Christmas projects I made.

Stop by again soon,

Jenny

3D projects, cards, Christmas, swaps

TEAM CHRISTMAS SWAPS!

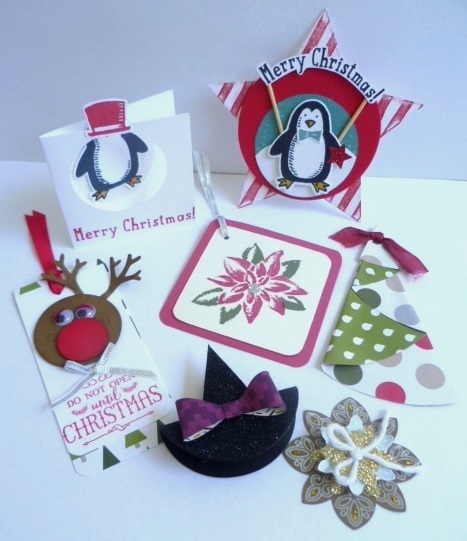
I thought I would show you the swaps I received from last week’s team meeting.  There are some really cute ones here.  I think Tags were very common 🙂  They are great to use as tags or add them to cards.

P1170689

Sorry for the lighting.  Sigh! Must do something about this BUT you can get the idea anyway.

Now the cute little penguin card in the back does have a head.  Sorry about the photo.  The penguin is stamped on the inside of the card and a circle window is punched on the front with the hat on the front.  It is so cute.  I love all these ideas. Thank you to all the clever demonstrators in the Inky Fingers Team.  Nice to share ideas.

I will show you my swaps.  Once again – tags! Now that wasn’t the theme but funny how it works out.

P1170686

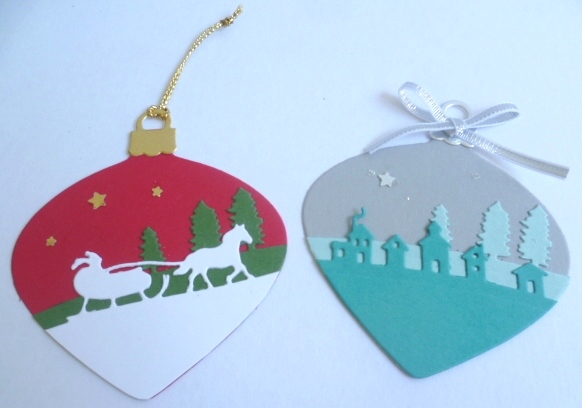
I CASED the red one from Pinterest and made up the other in Smoky Slate, Pool Party and Bermuda Bay.  These use the ‘Sleigh Ride’ Edgelits.  For the red one I punched out stars from Gold Foil using the Star Border punch.  The Smoky Slate one I have punched out one star in Silver Foil. Then I added some Dazzling Details for a sparkle but you really can’t see that well sorry.

I better get going. Our internet is being switched off soon to transfer it over to the new NBN network.  Hopefully it is not too long offline.  I think my kids are going to die!!!!! 😉

Thanks for visiting.

Jenny