3D projects, Christmas

12 WEEKS OF CHRISTMAS – WEEK 12!!

Latte 12 weeks Header

Can you believe it.  It’s Week 12!! Where have those weeks gone??  They have certainly flown by. Today’s project is brought to you by Libby.  She has some quick and easy gift giving ideas.  They are so cute. 🙂

Christmas is only one week away and if you are looking for some quick stocking stuffers these projects will fit the requirements.

All you really need for these projects is the Envelope Punch Board and a few punches including the Scallop Tag Topper Punch.

Project 1 – Candy Cane Treat Box

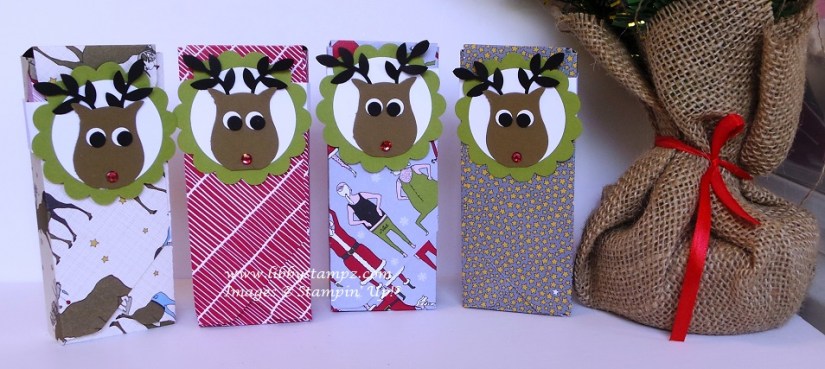
candy cane treat

These little pouches are quick and easy to make with the Scallop Tag Topper Punch, some Jiggle Eyes, ribbon, Blendabilities ( to colour the Rhinestones) and some Candy Canes of course. They easily fit 2 Candy Canes inside and could fit more if you wanted or some other treats. If you don’t want to give sweets, it would fit some coloured pencils inside or other small gifts.

Project 2 – Reindeer Poop (M & Ms Peanuts)
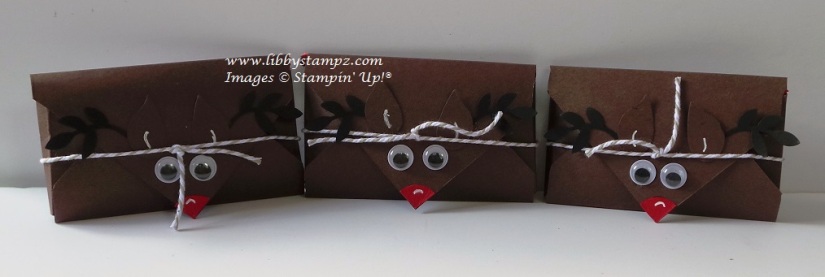
reindeer poop

This little treat is made using the Envelope Punch Board, some Jiggle Eyes, the Bird Builder Punch, ½” Circle Punch and the White Signo Uni-Ball Gel Pen for highlights.
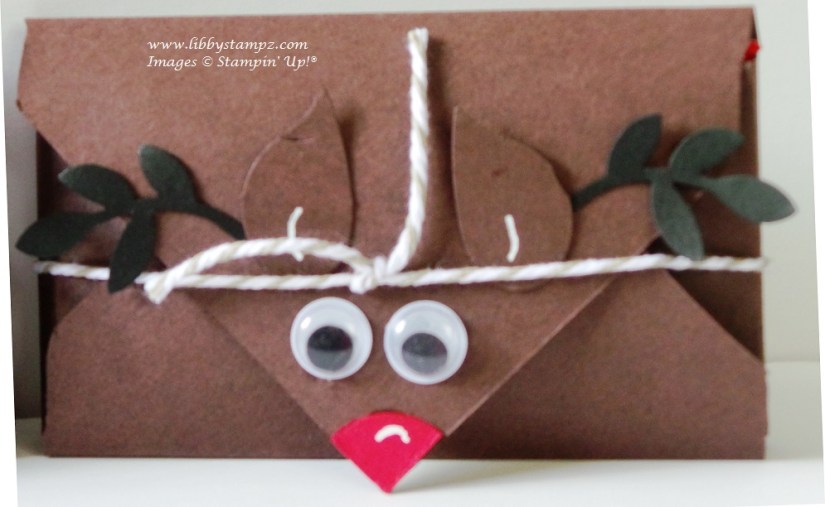
reindeer poop close-up

It fits 1 small packet of M & Ms inside quite neatly and on the back I have adhered the Reindeer Poop Poem (available in the pdf).

Project 3 –Maltesers Pouch
Malteaser pouch

This treat uses the Envelope Punch Board again. It’s a pouch with a Belly Band and fits 1 of the Merryteasers in it. It would also fit individual chocolates such as Freddo Frogs, Caramello Bears, and Santas etc.

malteaser pouch - single


Of course we have a bundle for you.

Latte Girls Week 12 Bundle –

Just $90 plus postage. (RRP $101.85 + postage). Save over $10!

Bundle 1

Or Upsize your bundle and get the Santa & Co DSP as well for the special Latte Girls price of $105 + postage (RRP $120.80 + postage).

Bundle 2

Remember you will need to contact me to get this bundle at these prices as it’s exclusive to the Latte Girls 12 Weeks of Christmas Design Team! 

Do you want the written tutorial? No worries – simply comment here with your email address and I’ll send you a copy!

Thanks for stopping by today.  Enjoy creating these cute treat pouches.

Jenny


3D projects, Christmas

12 WEEKS OF CHRISTMAS – BONUS PROJECT!!

Latte 12 weeks Header

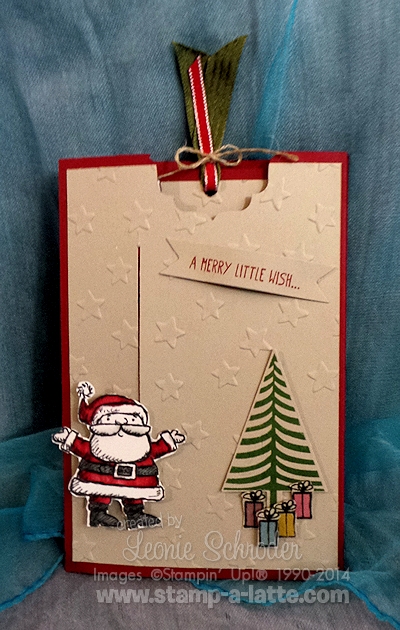
Wait! it’s not Thursday when we usually post our 12 Weeks of Christmas projects.  I know.  We have a Bonus project for you today created by Leonie.  This is a really cute Santa Slider Card.

SantaPocketSliderCard

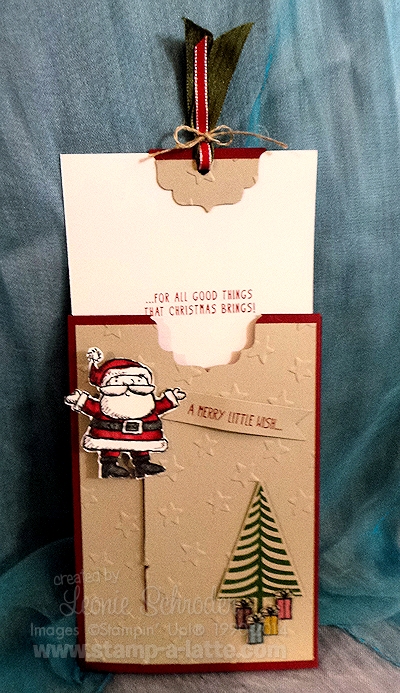
So you pull the tab and ribbon and this is what happens …

SantaPocketSliderCardopen

He is a pretty excited Santa jumping up and down with glee at all the presents he has left you. 🙂

Leonie had a lot of fun making this card and she has included a Video Tutorial as well as a written Tutorial as some things are hard to put into words. While it may seem a little fiddly at first they do become easier the more you make them.

Here’s the Video Tutorial ….

Now as always we have a special Latte Girls 12 Weeks of Christmas Bundle …

Latte Girls 12 Weeks of Christmas Bonus Bundle 2 – just $60 plus shipping.

bundle

Now maybe you’d really like that tree punch so lets add that and you can get all four items for $80 plus shipping!  Now how nice would that be wrapped under the tree?  Now if you want it for Christmas you’ll need to order it within the next couple of days to make sure it arrives in time and you may like to opt for tracking for an extra $3.95 to be sure.

Remember you’ll need to contact me to get this bundle at this price as its exclusive to the Latte Girls 12 Weeks of Christmas Design Team!

Want the written tutorial? No worries – simply comment here with your email address and I’ll send you a copy!

Thanks for stopping by.  Have a Happy day 🙂

Jenny

3D projects, Christmas

12 WEEKS OF CHRISTMAS – WEEK 11!!

Latte 12 weeks Header

Another fantastic project for you in our 12 Weeks of Christmas series.  Today Narelle brings you this great Table Decoration.  Doesn’t this look cool??  Your very own Christmas Tree made out of paper that can adorn the centre of your table this Christmas.

IMG_2241

Narelle said it was so much fun to make and really didn’t take long either.

She added some sparkle by using the Silver Sparkle Dazzling Details and some scattered gold sequins from the Gold Sequin Trim.

PC102073

Then she made a star for the top using the Star Framelits and the Bright and Beautiful Stamp Set.
PC102074
PC102072
If you want to make one for your Christmas table, then be sure to email me or drop me a comment for the instructions.
 
The complete supply list to make your own is in the instructions, but as always we have a bundle deal for you.
Purchase these.
products in bundle
and get this FREE!
products in bundle - Copy
This deal is only available by contacting me, and is not available in my online store. So make sure you contact me soon.
Have fun creating these. 
Jenny


3D projects, Christmas

A STAMPING GIFT CARD!

Christmas is fast approaching.  Only 2 weeks to go! Yikes! Have you finished your Christmas shopping yet?? I certainly haven’t.  I think the hardest part is working out what to get people.  I think it gets harder each year.  Do you have some crafty friends or family members you still need to buy for?  Or maybe someone still needs to buy you a gift and not sure what to buy you.  Gift cards are an easy solution.  I have Stampin’ Up! Gift Cards available. Why not grab one of these in any$$ value.  They can then go shopping later on and I can have the order shipped directly to them. (Only Australian Residents).  The new Occasions Catalogue AND Sale-A-Bration starts on January 6th so lots of new products they can choose from.

What to do:

Choose the Gift card you like, let me know the value and I  will have a nice Gift Card Holder for you to present it in.  Easy as!  Don’t leave it too late though.  🙂

P1100511 - Copy

I hope your Christmas shopping goes smoothly.  It is getting a bit crazy in the shops now.

Jenny
cards, Christmas

A SHABBY CHRISTMAS STAR!!

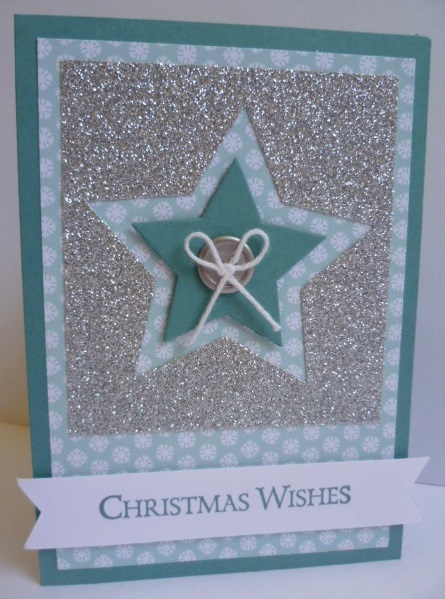
I was playing around a couple of weeks ago with some “bits” that were sitting around on my table.  I love this “shabby” style of Christmas card I made. (If you could call it that style!).  Here it is.

P1140936

I had a piece of silver glimmer paper with a star cut out from a previous project.  I really didn’t want to waste it.   Hey! It was nicely centred and positioned the right way especially compared to some other stars I had cut recently.  I layered a scrap piece of DSP from Nordic Noel DSP onto the Lost Lagoon base card.  I adhered the silver Glimmer piece onto this and added a smaller star cut from Lost Lagoon.  To the centre I added a little silver button and a White Baker’s Twine bow.  The greeting from Ornamental Pine is stamped on a strip of Whisper White card. I flagged the end of the strip.

This card really didn’t take that long to put together.  It is a one-of-a-kind though!! 🙂

Thanks for stopping by today,

Jenny
PS. Don’t forget the CLEAR-OUT SALE is on now. Some items are already sold out.  Head over to my store HERE and check them out.  You can order there and  it can be sent directly to you or email me your order.  (Australian Residents only). Thanks 🙂

3D projects, Christmas

12 WEEKS OF CHRISTMAS – WEEK 9!!!

Latte 12 weeks Header

These weeks are just flying by! Week 9 of our 12 Weeks of Christmas projects.  Today’s project is brought to you by Virginia. These are great little boxes using the Curvy Keepsakes Thinlet.

setof5finished1a

This versatile little Thinlets set creates the sweetest gift box in a shape that can be hung on a Christmas tree, used as holders for party favours or bonbonniere boxes for weddings/engagements/christenings etc.  They can even be used with Vellum for a table decoration by putting a little battery operated tea light inside to make it glow.

The first sample is a gift box that shows you how you can use both sides of patterned papers to create a unique customised Keepsake boxes.  You do not have to have larger sheets of pattterned paper or cardstock either.

You can see how much they will hold by these photos below as well. Two standard tea light candles, or one Votive candle.

TrimTheTreeTagPetitePunch1a

 TrimTheTreeTagPetitePunchOpen1a       TrimTheTreeTagPetitePunchOpen1b

The tutorial  that you can request will show you exactly where to place your sheets of paper/card on your Big Shot machine’ magnetic platform so that you can make the most of smaller pieces, or, as in these samples, use two different patterned sheets from the Trim The Tree Double Sided Patterned paper stack (page 7 of the Holiday catalogue).

all4piecesgluedAndCurvedWithBoneFolder1a

For the next samples, Wirg has used translucent Vellum sheets (page 193 of the annual catalogue). You can cut out both pieces from an A4 sheet as well as stamp the little baubles from the Cheerful Christmas Stamp set (page 15 of the Holiday Catalogue) – or any stamp set of your choice.

 vellumCherryCobblerTagChristmasCheerTealightOpen1a     vellumCherryCobblerTagChristmasCheerTealight1a

For the Christmas one, Wirg has used Cherry Cobbler and stamped the pieces before gluing them together.  When assembling you can put them together so that the stamping is on the inside of the closed box. Doing this gives a more subtle look. If you put a little battery operated tealight inside, it’s gives a beautiful effect as you can see.

StippledBlossomBlackberryBlissKeepsakeBox1a

The 2nd Vellum sample uses stamps from the Stippled Blossom stamp set, Whisper White and Blackberry Bliss ink pad.  Isn’t it pretty!

Here is another sample. The Four Feathers stamps and matching Framelits are brilliant for this.

curveykeepsakebox2a     curveykeepsakebox2b

FYI the battery operated tea lights can be picked up at most Discount stores and are quite inexpensive.  Check your local discount stores. At this time of year, they are quite popular.

Tip 1: Remember, you can cut your A4 sheets of vellum in half and cut the two pieces you need at the same time as the Vellum is quite fine and you can do two sheets at once.  Don’t do this with cardstock and thicker papers as Framelits are quite thin so you may not get a clean cut right through.

Tip 2:  As ink can take a little longer to dry on Vellum, give it a blast with your heat tool to dry it. And please be aware, when using a Blackberry Bliss inkpad, it’s a very strong ink. The slightest bit still on your fingers or craft work area can transfer onto your vellum without you realising.

This week’s bundle deal, (which you will not find in my online store), is as follows;

  • White Vellum, A4 cardstock $10.95
  • Trim the Tree Paper Stack $11.95
  • Linen Thread $7.95
  • Gold Sequin Trim $8.95

That’s a total of $39.80 + SHIPPING. However, if you order the bundle from me then you only pay $35.00 (+Shipping) + also receive a free bottle of Tombow Multipurpose glue!

REMEMBER: if you want the pdf tutorial sheet with how to place your dies and using two different patterned papers to make these OR if you want to place an order then drop me a comment or email me. 🙂

Thanks for stopping by.  I hope you stop by again soon,

Jenny
3D projects, Christmas

12 WEEKS OF CHRISTMAS – WEEK 8!

Latte 12 weeks Header

We are now up to Week 8!!! Today’s project is brought to you by Libby.  This is very cute!  Libby has made a bag with a shaker frame on the front, a Star Gift Box and two cards to pop inside the bag.This would make a lovely gift to give someone before Christmas. 

12WeeksChristmas_Week8

Here is a closer look at the bag.  What a great idea having the Shaker Star on the front!

Wk8_12Weeks2014_22.jpg _ bag

The shaker frame is made using the Stars Framelit Dies, ‘Many Merry Stars’ Photopolymer Stamp Set, Confetti Stars Punch with Red Glimmer Paper and Frosted Sequins.

Wk8_12Weeks2014_18.jpg _ Shaker frame

The bag itself is made using the ‘Under the Tree’ Speciality Designer Series Paper from the Holiday Catalogue.

The Star Gift Box has a small Kit Kat Chocolate inside it and would be great as a stocking filler or a teacher gift, teamed with a bottle of wine or a coffee voucher etc.

12WeeksChristmas_Week8_8.jpg _ star

The two cards also use the ‘Many Merry Stars’ Photopolymer Stamp Set and the Stars Framelit Dies with the Big Shot.

This card uses layering of stars and Dimensionals to give depth and dimension. Both cards are stamped inside and the envelopes are also stamped.

12WeeksChristmas_Week8_9.jpg _ card

The last card uses the nesting of the Stars Framelit Dies again to make a frame of Gold Glimmer Paper which adds some sparkle to this card along with the Frosted Sequins.

12WeeksChristmas_Week8_10.jpg _ Card 2


If you would like the full instructions for this set of projects then drop me an email or a comment. 


THIS WEEK’S SPECIAL BUNDLE

Now you can order this bundle through me personally at this special price

$65 + Shipping.

Many Merry Stars Photopolymer Stamp Set

Confetti Star Punch

++
Thanks for stopping by.  I hope you’re getting your Christmas crafting on this weekend 🙂
Jenny
3D projects, Christmas

NOTEBOOKS AND MORE FOR CRAFT FAIRS!

Today I thought I would show you the notebooks I made for my recent Fairs I have been to.  These were all fun to make too and a great way to use up the scrap paper bits you have lying around.

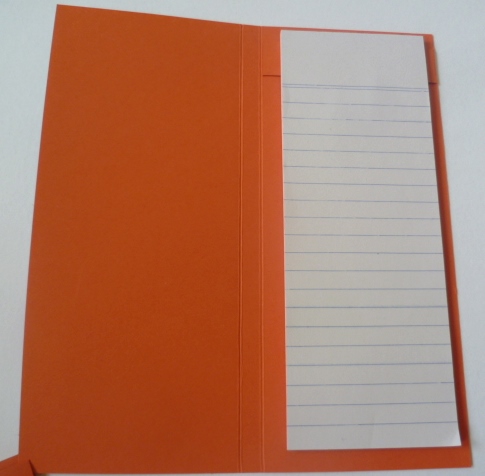
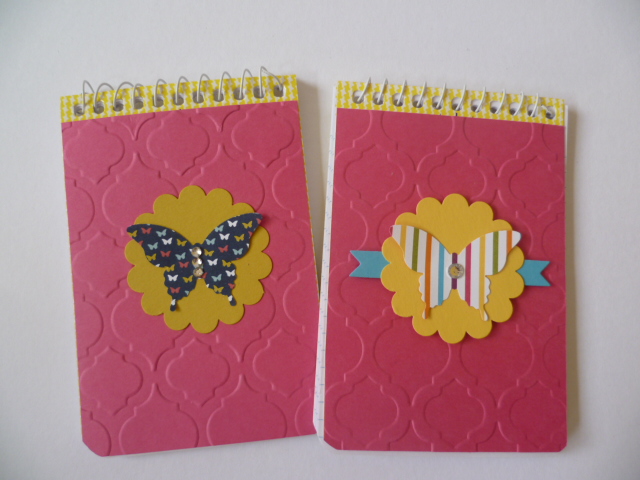
Firstly, some notepad covers.  Very useful to have around the home or by the computer for quick notes.

P1140669

P1140671


To make these: Check the size of your notepads but I will give you the measurements for these ones.

Cut your card to 28cm x 21cm.  Score on the long side at 9cm, 10cm and 19cm.  Turn your card 90′ and score on the short side at 1cm and 3cm.  Cut off the small section on the top (only on this section and then the larger section below.  Does that make sense?? I didn’t make a template to show you.  You just want to end up with a small strip towards the top that the Notepad hangs off from the backing card on the notepad.  Decorate the front as you like.


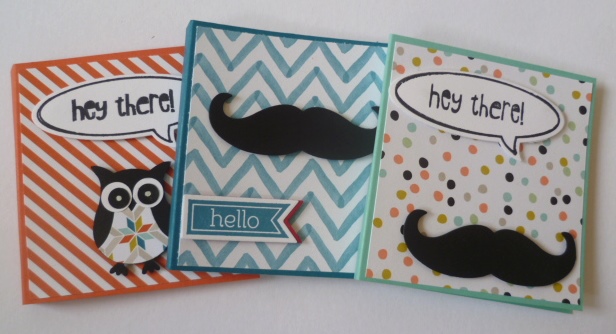
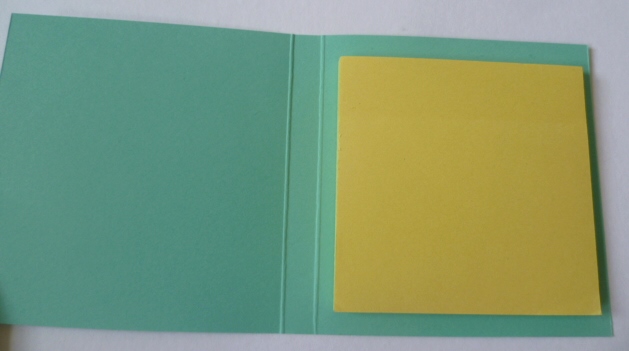
Some post-it note holders.  These are fun to make.

P1140672


I don’t have an exact measure for these but they are simply a small piece of card that folds over to fit.  Make sure to allow extra to score 2 lines in the centre to create a spine in the middle. Decorate the front as you like.

P1140673


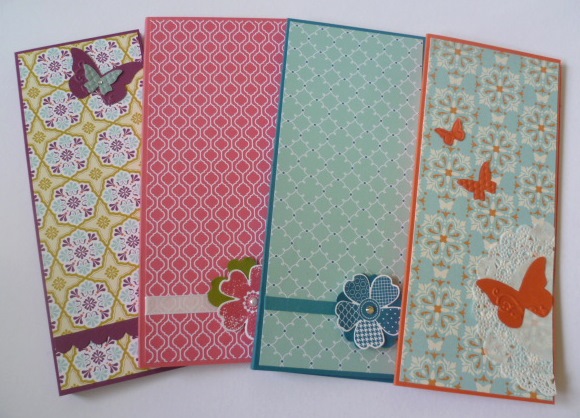
Notepads: just cover notepads as you like.  I didn’t want to fiddle with the spiral top so I just chose some coloured paper that co-ordinates closely to it.  I think it is OK!  Decorate with butterflies and bling!

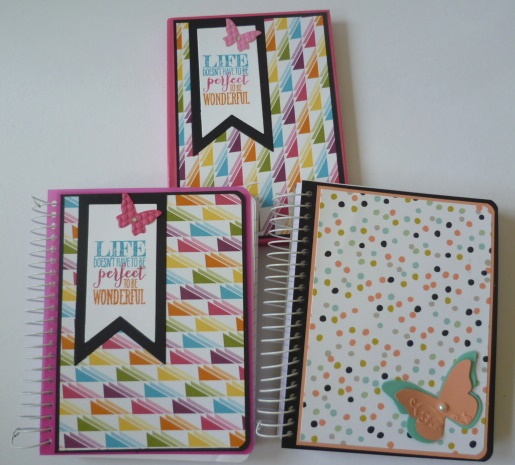
P1140674


These notebooks I picked up from the discount store too and just decorated them as I liked.

P1140675


Hope you liked these ideas?  If you missed the previous posts on Craft Fair projects then you can check HERE. Don’t forget to check the previous post too.

Thanks for stopping by,

Jenny

PS. Week 8 of 12 Weeks of Christmas is due out today.  As I am away from the computer I am not able to post it today so when I get back tomorrow I will post it as soon as I can. 🙂
3D projects, Christmas

MORE CRAFT FAIR PROJECTS!

I am away this week but thought I would schedule a few posts for you – so you don’t miss me too much 🙂  The last couple of months I have done a few Fairs and School Fetes so I thought I would show you the projects I have made for these.  Previous posts for these on my blog have been really popular (and I will add the links at the end if you have missed those).  I know when I have done these I have searched around the internet looking for ideas so I am sure you might do too.

Here are some of the projects I have recently made.

Firstly, I made up some Gift Card Holders.  These are very useful at Christmas time I think as many people give Gift Cards as gifts.  I used the Envelope Punch Board and made it to the Gift Card size holder on the measurements.  These were decorated with all kinds of stars.  Some of the stars had been sitting around my desk so it was a good way to use them.

P1140680

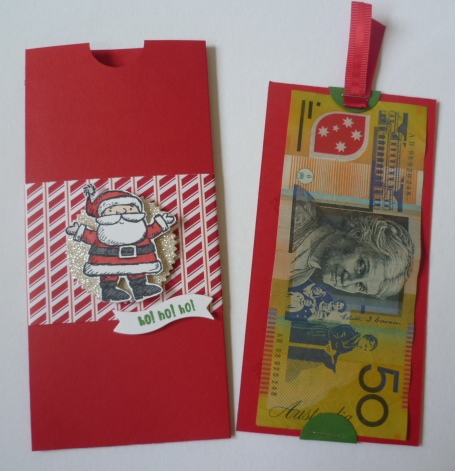
Many people give money as Gifts too so I thought it would be nice to dress up the cash instead of just sticking it in an envelope.  I found this idea on a blog somewhere and I am sorry I am not sure where now though.  I did adjust the measurements to make a better fit for our size notes. I have the instructions just below.  Just check your own currency note size to fit.

P1140677

P1140678

MONEY HOLDER  (in metric).

Cut card to 18cmx18cm.  Score on one side at 8.5cm and 17cm.

Fold on the score lines. Punch a half circle on the front flap with the 1″ circle punch.  Add Sticky Strip or other strong adhesive along the narrow tab and fold up on the score lines and adhere together. Decorate as you like.

Insert

Cut card 8cmx16cm. Punch out 2 1″ circles from co-ordinating cardstock fold in half.  Staple one on each end towards the edge of the card to allow the note to slip in on either end.  Remember just to check the measurements for your own currency.  You can’t see but I stamped the insert front too.

Now how can you forget your furry friend.  These were very popular at my fairs.  I just cut the topper from the Top Note die and folded it in half.  The stamps are from the the set ‘D is for Dog’.

P1140679

You can check previous posts on Craft Fair Projects HERE.

Stop by again in the next few days I have some more projects to share with you.

Jenny

3D projects, Christmas

CURVY KEEPSAKES HANDBAG!!

I am sure you have seen all the amazing creations around using the Curvy Keepsakes Framelits. They are so clever.  I have been making some projects myself with them and I will show you these another time.  When I first saw the Framelits I thought it would make a cute little handbag. Recently I have seen some floating around the internet.  I thought I would show you my Christmas version – and it uses the set ‘December Wonder’ that I have been focusing on this past week.

P1140939

I am sorry I didn’t take a side-on view.  It would give you a better idea how it looks.  I will try and update this later. To create the bag I have used some of the Nordic Noel DSP.  I just cut the paper to size to fit half of the Framelit, the section with the curvy handle.  I cut 2 of these out.  Where the base is I trimmed off about 2cm (3/4″).  I added Sticky Strip to one of the bases and assembled the two together.  You can add some little chocolate treats and tie around some ribbon and add a tag.  For this tag I stamped the “Very Merry” in Garden Green and punched it out with the 1″ circle punch.  I cut one of the Oval tags that come with the Curvy Keepsakes framelits from the Gold Foil Sheets and layered them together with a little Real Red banner cut from the Bitty Banners Framelits.  I added 3 small pearls on the tag to finish and hung that from the ribbon with Whisper White Baker’s Twine. A cute treat bag in no time!!

I hope you enjoyed the projects this past week with the ‘December Wonder’ stamp set.  It is a fun set.  This is available in the Holiday Supplement Catalogue but these products are only available stocks are limited.  So get in soon for any of these items.  You can order directly from me or from my store HERE.

I hope you can join me again this week.  I will be away on a Family Holiday but I have some posts scheduled so don’t forget to stop by,

Jenny