Here is another card using the set ‘December Wonder’. I thought the Hexagon ’25’ would work well with the Hexagon Punch. I did find a card similar on Pinterest that inspired this card.
I punched out some Hexagons with the Hexagon Punch from the ‘Nordic Noel’ DSP and lined them up on the Lost Lagoon piece. To get the ’25’ in the right position I punched a Hexagon from scrap paper, added some 2 way glue to the back and let it dry a little so it was repositional. Then I placed it in position in the centre, removed the DSP hexagons and then punched out the shape over the scrap paper one. The stamped ’25’ was placed behind the Lost Lagoon card using Dimensionals to raise it up a little. I adhered the rest of the Hexagons in place and stamped the Snowflakes over the card. This piece was adhered to Whisper White card with Dimensionals and then adhered to the Lost Lagoon card base. I finished it off with some Rhinestones and Silver Ribbon bow.
Thanks for stopping by to visit today. Do say ‘Hi’ and let me know where you come from. I love to hear from you.
I was playing around with a new stamp set last week ‘December Wonder’ from the Holiday Supplement Catalogue. At first I dismissed the set because it was marked as Project Life – and well I don’t do a lot of Project Life and certainly not Christmas. (Did you think that about the set too???). Then I had another look at it and thought it is still such a great set for your cardmaking. There are some really great images. I will show you a few projects over the next few days with the set and you can see what you think.
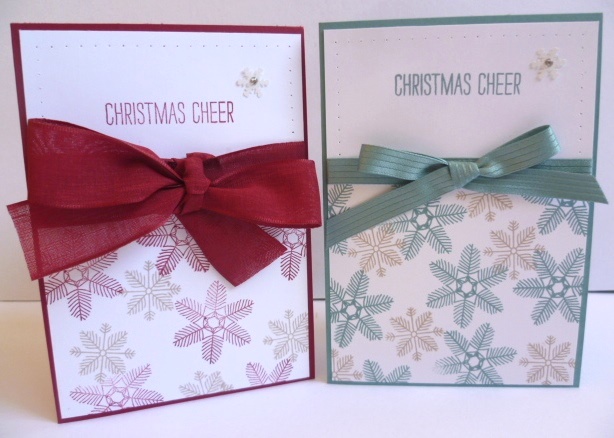
Here are the cards I first made.
These cards were inspired by a card on Pinterest that used ‘Endless Wishes’ but I don’t have that set. (Yes really!). I stamped the small and large snowflake on the bottom of Whisper White card. Stamped the greeting from the set and then pierced holes around the card with the Paper Piercer and mat. I tied around some ribbon, added a snowflake embellishment from the Frosted Sequins Embellishments in the Holiday Catalogue and added a Rhinestone to the centre. Quick cards that you could reproduce in a hurry.
The colours I used were Cherry Cobbler and Crumb Cake with the Cherry Cobbler Sheer Linen Ribbon and then for the second one Lost Lagoon and Crumb Cake with Lost Lagoon Satin Ribbon.
Here is the stamp set for you to check out if you haven’t already noticed it in the catalogue. 🙂
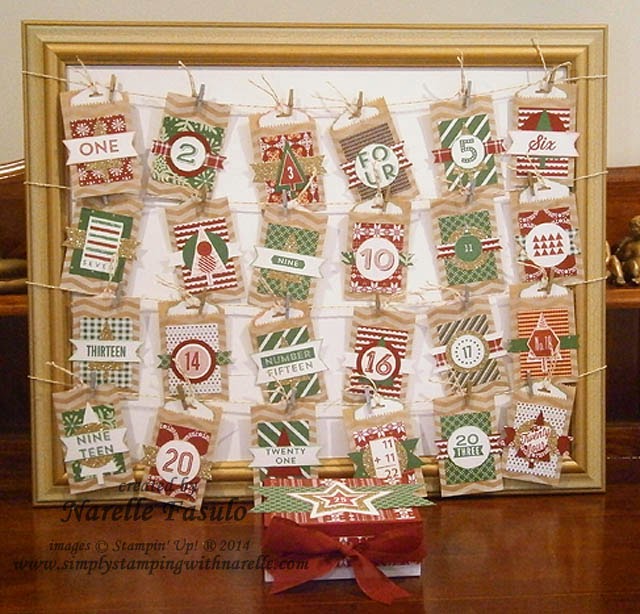
We have another great project for you for Week 6 of our 12 Weeks of Christmas. Today’s project is this very cute Advent Calendar by Narelle.. It is such a clever idea!
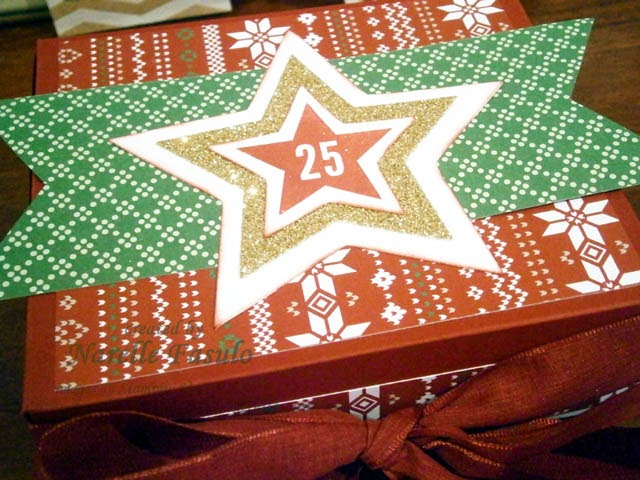
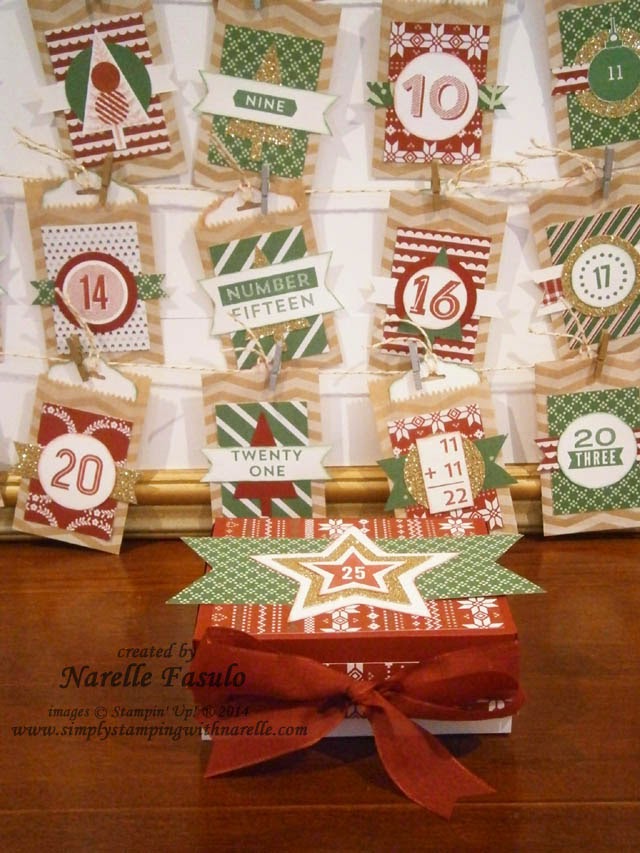
Now this Advent Calendar is a little different to your normal Advent Calendar that is filled with sweets and small treats. This one is made up of little pouches, each with a tag inside. You can write anything you like on the tags, or you could add Gift Vouchers etc into the pouches. Now because there are little pegs to hold the pouches onto the bakers twine, you will need to make sure you don’t put anything heavy in them. And for the big day, Christmas Day, there is a gorgeous box which can contain a small gift.
In my Advent Calendar I have written something on each day that corresponds to the day number. The idea is that the child takes out the tag each day and on it is written things they can experience and claim throughout the year. For example, the tag may have on it “10 trips to the Movies”. They keep the tag and throughout the following year they can claim these 10 Movies. They simply keep count on the back of the tag how many times they have claimed it already.
I love this idea as it is a gift that keeps giving throughout the year and it isn’t all about buying gifts. A lot of the tags are about experiences and spending time with the child. And let’s face it, it also eliminates a lot of sweets that children really don’t need at this time of the year with all the extra treats around already.
Aren’t these little pouches cute that Narelle has made. And what a great idea to have little “gifts” that aren’t sweet treats?? I know that this is not how Narelle wanted it displayed as there was sickness in her house this week but I think it is a cool idea – and she has done an awesome job 🙂
If you would like to get instructions on how the different elements were created like the box and the little bags, then just drop me an email or comment and I will get that to you.
If you want some ideas of some “non-sweet” gifts then here are some ideas. Narelle tailored these to her daughter and include a lot of her favourite things but they might just work for you too.
1 trip to the Zoo 2 friends sleep over 3 favourite restaurant visits 4 trips to the drive-in 5 dates with Mum 6 dates with Dad 7 pizza cooking nights 8 trips to the beach 9 bowling games 10 baking sessions with Mum 11 trips to the local pool 12 trips to the Movies
13 shopping days with Mum 14 popcorn and movie nights at home 15 sightseeing drives 16 Youghurtland frozen youghurts 17 stories read by Mum 18 stories read by Dad 19 games of UNO 20 Ice Cream Sundaes 21 craft sessions with Mum 22 trips to the Library 23 family board game nights 24 trips to the park
Now as always we have a special bundle available for purchase. This bundle comprises some of the items used to create this Advent Calendar. So here it is:-
You get this product bundle for the special price of $89, AND get these FREE.
So not only do you get the items above at a reduced price but you also get the Clothespins added in for nothing.
Drop me an email or comment to order this and I can take care of it for you. Orders can be sent anywhere in Australia. You can not order this bundle through my online store, you must contact me to purchase.
The weeks are flying by! We are up to Week 5 of our 12 Weeks of Christmas now. This week’s project is brought to you by Virginia. Today we a have a project to show you how you can use My Digital Studio (MDS) to create your own projects. This is great when a stamp set you are after or one that has retired it may be available in MDS. You can print these out and colour them using your Blendabilities.
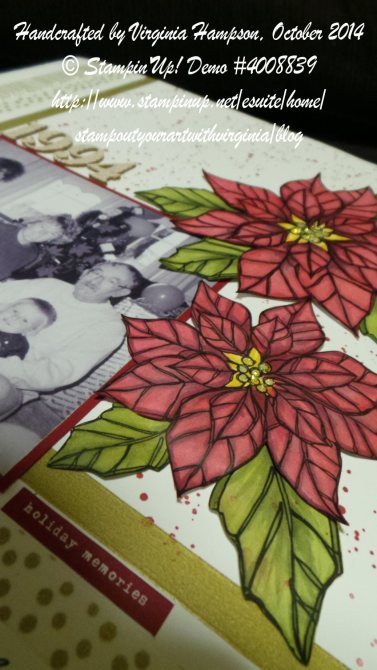
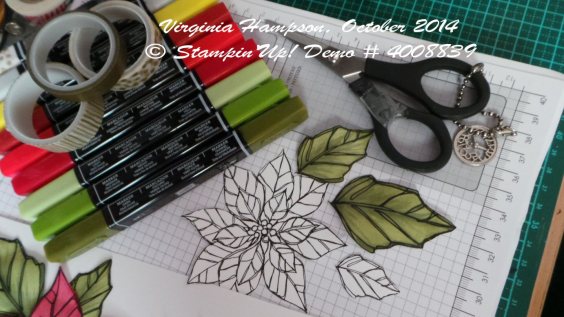
Virginia has created a Hybrid Scrapbook page. She has used the Poinsettia and Leaf from the ‘Joyful Christmas’ digital stamp Brush set (#135269). You can print these out using your Microsoft Word programme but you need to print them out using an inkjet printer on Whisper White A4 card stock. Virginia worked out how many she wanted to colour in and printed a number of them at a time.
Colouring is so easy using the Blendabilities to colour in the Poinsettia in two sizes and the leaf in 3 sizes. These were coloured using the Cherry Cobbler, Old Olive, Daffodil Delight and Smoky Slate Blendabilities alcohol markers. The lightest of the Smoky Slate being used to help give more shading and depth to the colouring.
Next after colouring them in, Virginia cut them out with a small pair of paper snips. Or you may use an electronic die cutting machine if you have one and you are comfortable using it’s print and cut functions. After she cut them out, she gave the backs of the coloured and cut out image a bit of ‘burnishing’ with the stylus using the scoreboard and bone folder. Doing this makes them more 3d looking. Just a tip: put the Stampin’ Piercing mat underneath as cushioning.
To Create the page:
Virginia took three rolls of washi tape (Watercolour Wonder set, main catalogue) and put a strip of each along two edges of the 12×12 so they crossed over in the bottom left hand corner. These three different rolls of Washi tapes are perfect for any occasion but really shine on a Christmas layout. She layered the black and white photo onto Cherry Cobbler card stock. Using the ‘Gorgeous Grunge’ stamp set you can stamp the paint splatter with Cherry Cobbler ink to create a background. The coloured in images were then placed around the sheet of 12×12 Whisper White card stock and were adhered using Dimensionals and snail adhesive.
The year 1994 is from the cork stickers from the Project Life Seasonal Snapshot Accessory pack. Using the finest of the Project Life journaling pens, Virginia did a little journaling between the lines of the washi tape.
If you would like a full copy of how Virginia created this layout including how to print out from either MDS or Microsoft Word then send me a message or comment and I will send it out to you.
Now for this week’s special, how about this:
For $70.00, purchase the Cherry Cobbler, Old Olive and Daffodil Delight sets of Blendabilities, the Color Lifter and get the Watercolour Wonder Washi tape pack FREE!
That’s $70 plus postage with Free washi tape (valued at $8.95) Contact me to place your order!
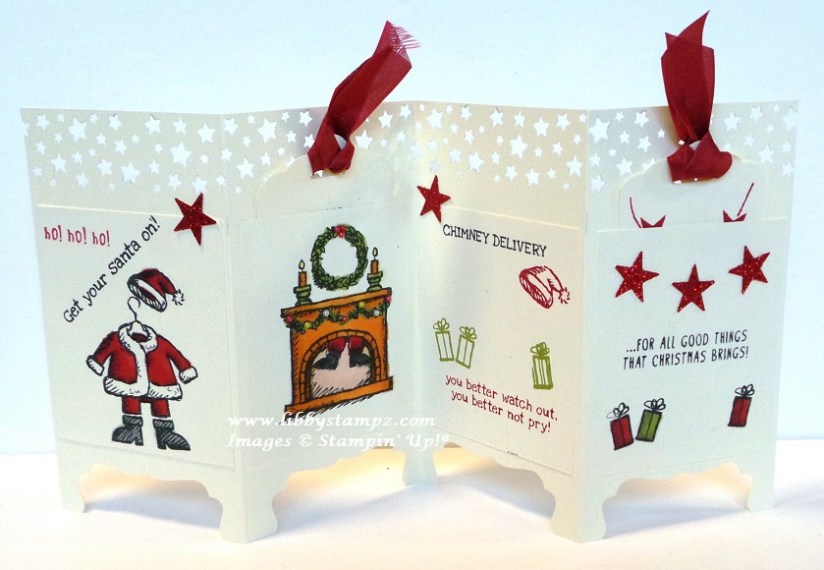
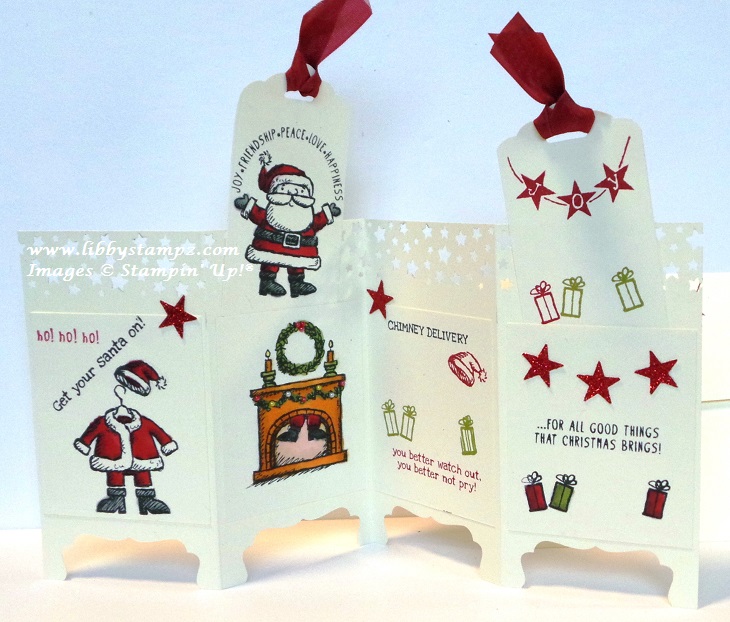
Have you been enjoying the 12 Weeks of Christmas projects the last few weeks. Well, today I have a bonus project for you from the very clever Libby. This bonus project is a bit of fun and you could use the tags to write recipients names on them or use the back of the screen to write your personal message.
HERE IS WHAT YOU NEED TO RECREATE THIS CUTE PROJECT.
Stamp Set – Get Your Santa On
Card – Very Vanilla, Red Glimmer Paper
Ink – Tuxedo Black Memento Black; Cherry Cobbler; Old Olive
Other – Basic Jewels Pearls; Stampin’ Trimmer; Simply Scored; Bone Folder; Acrylic Blocks; Stampin’ Mist; Stampin’ Scrub
This card opens so you can create your own scene using all or most of the stamps from Get Your Santa On and it has little tags inserted so you can add some little surprise messages or images. This particular one will fold down to fit into a C6 sized envelope.
If you would like a detailed PDF tutorial to create this card then drop me a message or email and I will get one sent your way.
As we have done with our other 12 Weeks of Christmas project, we have a special bundle for you. Now this bundle is only available if you order through me and not through my online store.
SPECIAL BUNDLE OFFER
Get your Santa On $27.95
Confetti Stars Punch $37.95
P & P $5.95
TOTAL = $71.85 get a free Tuxedo Black Memento Ink worth $9.95
Contact me today to order this special bundle just for Australian Residents.
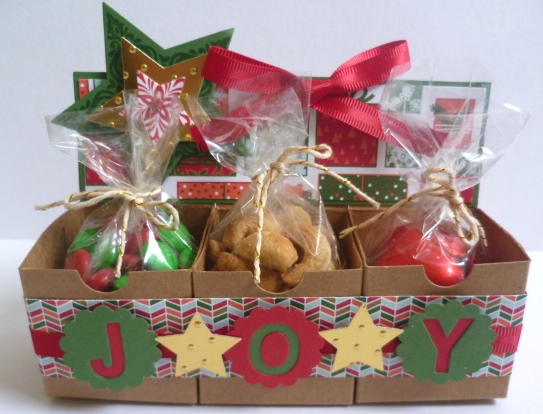
We bring you another Christmas project this week for our 12 Weeks of Christmas – and today it is my turn to share a project. I do hope you like it. Today I have a Tiny Treat Gift Holder for you.
This little Treat Holder will fit a variety of treats all together for you to give someone special this Christmas. Really it is just so simple. I have used 3 of the Tiny Treat Boxes available in the Holiday Catalogue. These are a bargain at $11.95 (AUS) for 24 boxes. They are so cute and there are so many different ways you can use them. This would be a really cute gift to give someone as a little extra or for those “Hard to buy for” people.
For this I have adhered 3 of the boxes together with Sticky Strip and then decorated them using the Nordic Noel Designer Series Paper. I have added some stars from the Bright and Beautiful stamp set and cut with the Star Framelits. Additional stars were cut from Gold Foil Sheets with the smallest Stars Framelits. The gorgeous Red Satin Ribbon finishes the box off. Of course, you can decorate these boxes however you like. Fill some Cellophane bags with treats and tie them off. I used the Gold Twine for this.
If you would like a detailed tutorial to create this project then just drop me a message or email. If you need any products to create the project then let me know or you can order directly at my Online Store Here.
And of course, we have a special bundle for you this week to help you create this project. These are the items you will receive in your Bundle AND receive 10% off!
Bundle Price is $44.80 plus Shipping and Handling.
I have to show you this new product in the Stampin’ Up! Holiday Catalogue supplement that was just released on Monday. Stars just typify Christmas don’t you think and why not ‘Many Merry Stars’.
These kits contain all you need to create 26 stars. All the diecut papers and embellishments.They come in all different sizes and look fun to sit on the top of a shelf or under the tree.
Here is a video to show you how they are put together.
But don’t just think of them as stars sitting on the shelf. There are so many other beautiful ways to create them. Check out this gorgeous display.
Here is a video to show you how to use this kit in other different ways.
If you would like to order your own kit of Many Merry Stars then drop me a message OR head over to my store HERE.
I told you in the last post that there are some more offerings for our Christmas creating. Well, the ‘Merry and Bright’ Christmas supplement is out now! These products are designed to work well with the current Holiday Catalogue. There are some fun Star Kits, a different Star stamp set, more Project Life offerings and a few additional kits and stamp sets. These products are only available while stock last so you have to be quick to grab them.
You can view the Catalogue Online now HEREor I can get one in the mail one for you. I have added the link in the right hand side bar so you can check it out later rather than come back to this post. If you have any questions then don’t hesitate to ask me. 🙂
Do you love creating for Christmas??? Do you just create cards or like to decorate the house and send cute projects as gifts for your friends??? It really starts getting you in the Christmas mood when the creating begins – or is that just me!!!
Well, as if the Holiday Catalogue wasn’t enough for you Stampin’ Up! have released a Christmas supplement. Starting October 20th, 2 days time!!! Here is a sneak peek of the cover just to get your started.
There are stars and kits and Project Life.
You will be able to check it out Online from Monday BUT if you want your very own “starry” catalogue then drop me a comment and I will get one to you ASAP.
“It’s beginning to look a lot like Christmas” HAHA! Now I have got that song in your head I will sign off. 🙂 (sorry!)
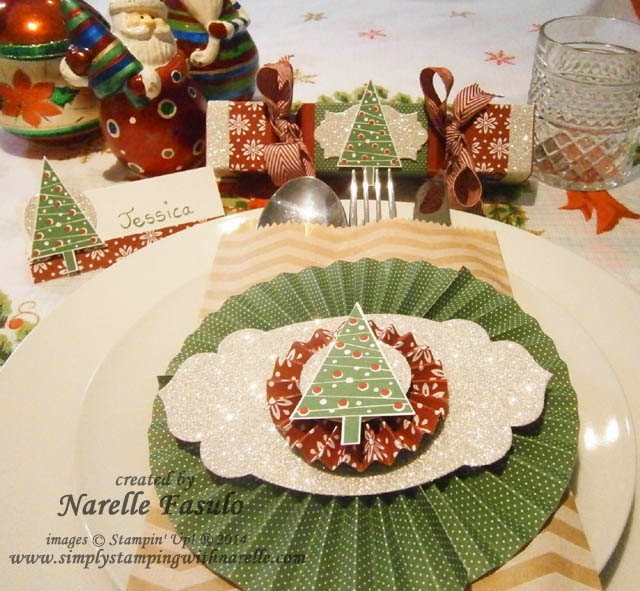
We have another project in our 12 Weeks of Christmas series today. This project is brought to you by Narelle. Check this project out for your Christmas entertaining. This is a lovely Table Setting.
This table setting consists of a cutlery bag, a bonbon and a name place card. I think these would really dress up your Christmas table and make it something special.
Here are some photos of the individual items and also some videos showing how to make the key components. For full instructions and a complete list of supplies, please email me for a detailed pdf.
CUTLERY BAG
I just love this Cutlery Bag. I know you could just put the cutlery on the table next to the plates, but that would be boring, right ? Making this bag gives you a reason to create and show off a little to your guests. I am sure they will be appreciative of the effort you went to and the table will look so festive and special.
Here are a couple of videos showing you how to make the rosettes.
BON BON
Bon Bons are a fun thing to have at Christmas time aren’t they?? The cute hat and funny jokes and the little novelty inside. But once they are pulled apart they are thrown away. With these Bon Bons not only are they a lot of fun but they will look pretty having them on the table. The bonus of these is that you can fill them with wrapped chocolates or something as an extra treat, and the guests get to keep them as a memento of a wonderful gathering with family and friends.
Here is a video how you can make them.
NAME PLACE CARD
Can you see this on your Christmas Table this year?? It would make all your guests feel pretty special.
The full materials you need for these projects are in the PDF that I can send you but here is some special products put together for the Bundle this week.
We have these 4 products on offer in our Latte Girls’ 12 Week of Christmas Bundle Three(3). You can get all these products for the fantastic price of $77. That’s a saving of 10% . Gotta love that !
Contact me with your order. This deal is not available online.
Don’t forget if you want the detailed instructions and a complete list of supplies used, please email me to get the pdf.
You can purchase everything you need to make these items and more, from my online shop.
I hope this helps you with your Christmas preparations.