Christmas, Classes, Stampin' Up!

CHRISTMAS STAMP A STACK!

I know it’s September but we do need to start thinking Christmas cards.  I have a Christmas Stamp A Stack on this Friday for you to get some of those cards done for you. We will create 6 cards – 3 each of 2 different designs. I have a little sneak peek for you.  I think you will love them.

sas-on-fri

Here are the details but if you can’t make the time let’s make another time just for you.  I would love to show you how to create them.

WHEN: Friday 23rd September at 10am or 7.3opm at my place in East Corrimal.

COST: $15 or $20 if you use my adhesives.

PLEASE RSVP: Wednesday 21st September

Why not bring a friend and receive a special gift.

Hope to see you there.

Jenny

cards, Catalogues, Stampin' Up!

RED MERRIEST WISHES!

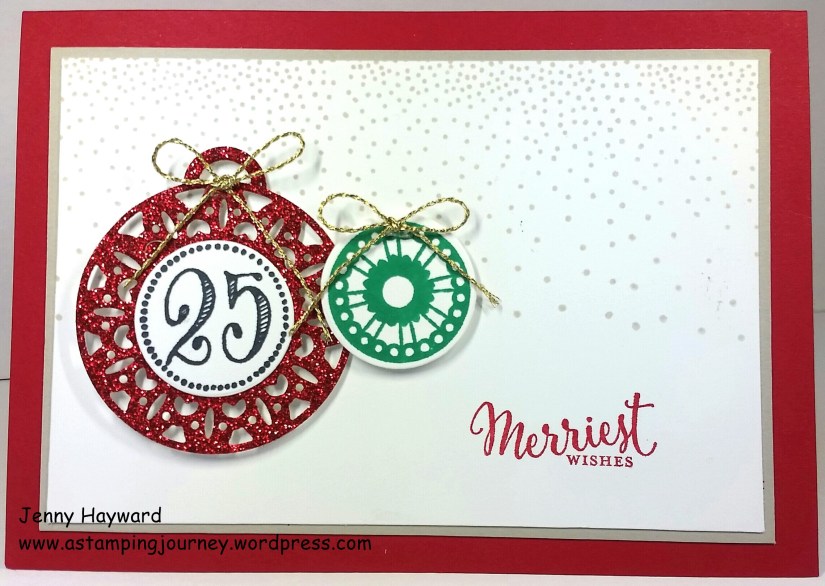
I really liked the Merry Tags Framelits when I saw them in the Holiday Catalogue.  I got to finally play with them the other week.  Now I can share the cards with you.  I wasn’t sure where this card was going when I first started it but I was happy with the end result.

merriest-wishes-in-real-red

It’s great to  have different shapes in the Merry Tags Framelits set.  You have the detailed tags and you have circles as well.  So many options to create different looks.

For this card, the card base is Real Red and the card mat is Sahara Sand.  I stamped the dots in Sahara Sand on to Whisper White.  A number of people have asked me what you would do with the dotty stamp in the Merriest Wishes set.  I stamped them a few times along the top of the White card reinking the stamp each time.  I think they make a nice background or you could stamp them on card and cut them with one of the circles. What do you reckon?

I cut one of the detailed tags in Red Glimmer Paper and stamped the “25” in Memento black and then punched it out with the 1 1/4″ Circle punch. The small ornament shape is stamped in Emerald Envy and punched with the 3/4″ Circle punch.

The ornaments were raised up on the white card with Dimensionals and then finished off with some Gold Twine and to finish I stamped the sentiment in Real Red.

If you haven’t noticed these yet then here they are for you.  You can find them on p 21 of the Holiday Catalogue.

merriest-wishes_stamp-set       merry-tags

If you buy the bundle you can save 10%.  Pay $81 Wood Mount $68  Clear Mount.

You can order these in my store HERE or by emailing me directly.  If ordering Online please use the Host Code this week:  RYWGMMKD      Thank you kindly. 🙂

Thanks for stopping by.  I hope your weekend is a stamping one.  My daughter heads off tomorrow for a 2 week school excursion through Central Australia.  I am going to miss her but maybe I will have a little extra creating time. 🙂

See you again soon,

Jenny

Stampin' Up!, Weekly Deals

SPECIAL OFFERS AND CLEARANCE RACK. EITHER WAY YOU SAVE BIG TIME!!

We have a new week for the Special Offers – and this is the last week!  Here they are for you.  Check them out.  These are 25% off.

special-offers-_-3

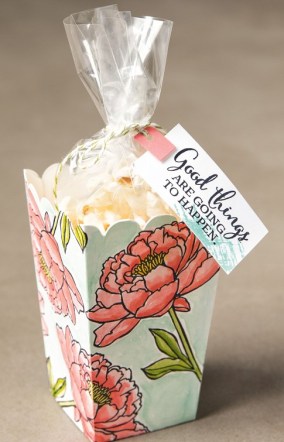
I have seen a lot of cute boxes with the Popcorn Box Thinlits but isn’t this one by Stampin’ Up! just gorgeous!

popcorn-box

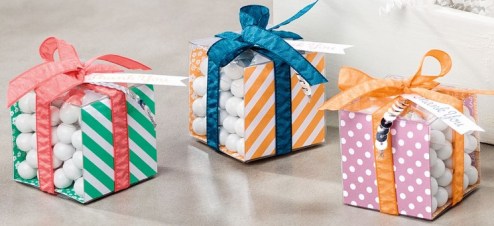
The Clear Tiny Treat Boxes can make some sweet gifts in no time.  You could just simply wrap them in some pretty paper and tie up some ribbon.

clear-treat-boxes

Remember you can order HERE or contact me directly.  If you order Online Please use the Host Code: RYWGMMKD  

clearance-rack-3

You know I keep forgetting about the Clearance Rack.  This week I was reminded when Stampin’ Up! mentioned that a large number of products had been added.  You can save a huge amount on these items. I think it would be good to stop for a visit there yourself and see these bargains.

See them HERE.   You can order directly there too or contact me.  Don’t forget the Host Code: RYWGMMKD   if you are ordering online.

 Here is a taste of just some of the items on the Clearance Rack.

clearance-rack-_-1

clearance-rack-_-2

Please ask if you have any questions,

Jenny

3D projects, Catalogues, Christmas, Stampin' Up!

HOME SWEET HOME!

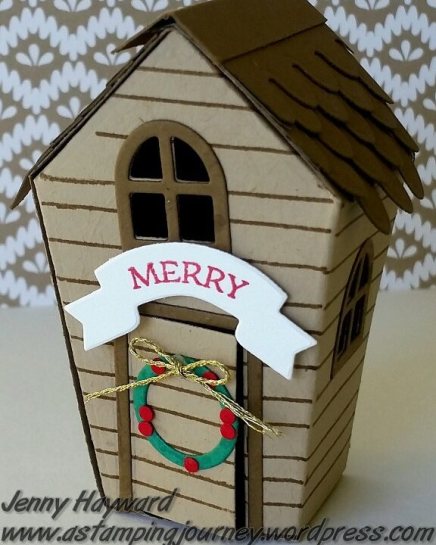
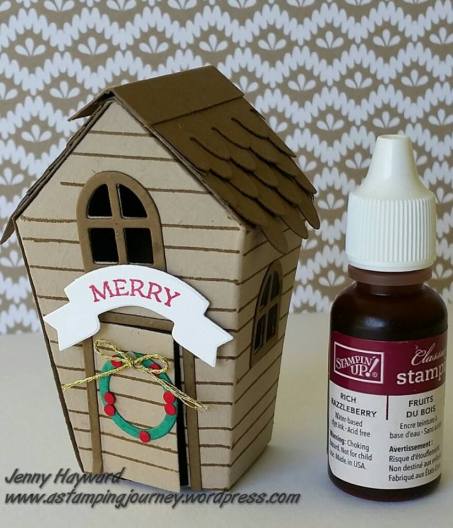
A couple of weeks ago with my order I got the new ‘Sweet Home’ stamp set and the matching Thinlits.  I finally had a play recently and made a cute little house.  I thought I would show you.

merry-house

These ‘Home Sweet Home’ Thinlits have so many special little “bits”, OK well dies to be more technical – 22 in fact.  You can create so many variations.  I will say this did take some time but I think now I have made one I can whip them up pretty quickly.  I think the most time consuming part was the roof. Also, I found it a little tricky lining up the stripes on the walls of the house. This house was CASED from Pinterest but I added the circle wreath on the door using one of the dies and then punched some small red circles from the 2-step Owl punch for the “berries”.

In the photo above it doesn’t really give you much idea of the size.  I thought I would take another photo for comparison.  Check out the size against an ink refill.

merry-house-size

Isn’t it the cutest??  I can’t wait to have some more play with these.

Have a wonderful day/night wherever you are in the world.

Jenny

3D projects, Christmas, Stampin' Up!, Tutorials

CHRISTMAS TREAT BOX!

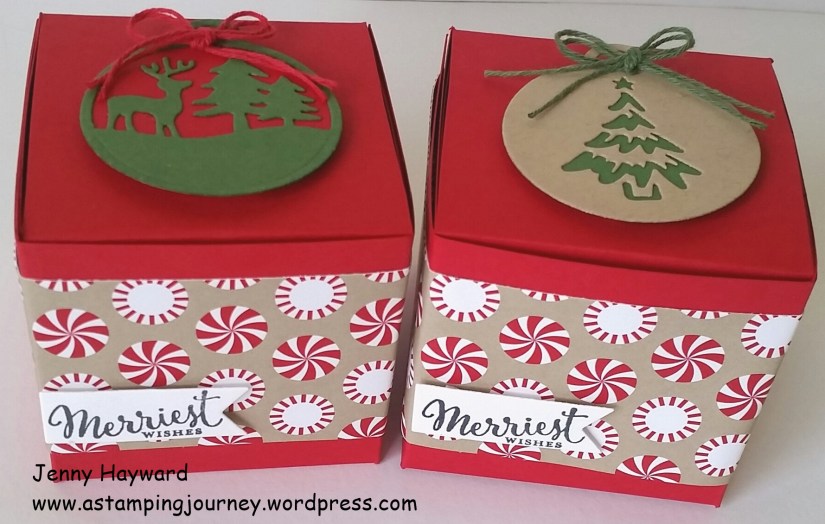
In a post or 2 back I showed you a cute little Christmas Treat Box and I said then that I would show you how I made it.  I thought I would tell you about it today. It is so quick to make and seriously you can make up a number of these in no time.

Here is the box if you forgot – and to save you going back a couple of posts.  You can go back if you like to though. 🙂 You can see all the other fun projects I shared from my Holiday Catalogue Review too while you are there.

christmas-box

These are so Christmas-y.  These are called “SEVENS” boxes.  WHY? Well it is all in the measurements.  I have made a number of these over the years.  I like how quick they are to make and you can fit a fair amount of treats inside.

I  will tell you the measurements and then give you a link to the original creator for the assembly of the box.  On that blog post it doesn’t have Imperial measurements so I have put created one for you my lovely friends if you use Imperial Measurements. 🙂

SEVENS BOX (Metric)

Using a full sheet of A4 card, score your card.  On the short side score at 7cm and 14cm. On the long side score at 7cm, 14cm, 21cm and 28cm.

Rather than relay the cutting and assembling of the box you can refer to the original blog post which you can find HERE at Marelle’s blog.

2 AND A HALFER BOX (Imperial)

It doesn’t really have the same ring to it as a “SEVENS” box does it but it would be a bit odd to call it that!).

NB: Please try this on scrap paper first before creating it on card to see that the measurements are correct.  This will be a slightly smaller box that the “SEVENS” box but still a good size.

Cut your card to 10 3/4″ x 7 1/2″.  On the short side score at 2 1/2″ and 5″.  On the long side score at 2 1/2″, 5″, 7 1/2″ and 10″. Cut and Assemble the box as in the link in the Metric measurements above.

Once you have made one I don’t think you will stop.

Enjoy. 🙂

Jenny

Catalogues, Stampin' Up!, Weekly Deals

SPECIAL OFFERS FOR THIS WEEK FROM STAMPIN’ UP!

specialoffers_shareable-2_sept2016_eng

Look at this.  It is Wednesday and I am actually telling you about the Special Offers that started TODAY!! From 1-21st Stampin’ Up! are offering 25% off select products.  You have got to love that. 🙂

Here they are for this week (8-15th). Do you fancy some Cake and Sprinkles this week??special-offers-8-15

I like this cute card with the Cupcake Cutouts courtesy of Stampin’ Up!

cupcake-cutouts

TO ORDER

If you like the look of any of these items and you haven’t got a Demonstrator already then stop on by my store HERE to order.  Or you can contact me directly.  (Australian residents only).

Thanks for visiting today.

Jenny

Blog Hops, cards, Stampin' Up!, Techniques

HOLIDAY CATALOGUE BLOGHOP!

International blog hop Sep 1

International blog hop images

I’m excited to be a part of this International Blog Hop as we showcase some exciting new products from the Holiday Catalogue! Are you ready?? It’s just a small one but I think you are going to love these projects.  You might have come from Alexe‘s blog or just starting here.  Don’t worry you can hop anywhere.

For my projects today I am showcasing the Paisleys & Posies stamp set and the Paisley Framelits.  These new products are so fun and cheery.  I reckon anyway.

For my first card I thought I would create my own dry embossed background.  Here is my card and then I will show you how I have created it.

Embossed paisleys

The card is on a Thick Whisper White base.  See the background?  I have embossed the Dapper Denim card using the Paisley Framelits. 

To create the background lay the Framelits pieces on to your card making sure the cutting edge of the Framelits face up NOT DOWN on your card.  Position them as you like.  Here is a photo to show you.

Embossing with the thinlits

Run the piece through your Big Shot on the platform you normally would with the Framelits.  Just double check your Framelits are facing up before you roll it through. (I made a little mistake with this the first time!!).  You will see once you run it through that the pieces will be embossed. You could try this with a number of different Framelits.

Embossed card with paisleys

I didn’t want too much to finish the card off so it didn’t hide the embossed pattern. I just cut some Paisleys from Gold Foil Sheet.  The sentiment from Tin of Cards is Heat Embossed with Gold Embossing Powder and cut with the Tags and Labels Framelits.

I have another card to show you using the Paisleys & Posies stamp set. I called on a technique and colour combination I used a little while back.  It was good to pull this one out again.

Emboss resist Paisleys

This one is the Emboss Resist Technique. If you are not familiar with it, Stamp your images in Versamark on white card and then heat emboss in White Embossing Powder. Sponge over the card using your chosen colours.  I have used Tempting Turquoise, Elegant Eggplant and Bermuda Bay.  Once you have inked the card, rub over the card with a tissue to wipe off the excess ink on the embossed parts and you will see your images “POP” even more.  It’s quite magic.

I finished if off by tying around some Thick White Twine then layering it onto Perfect Plum card mat.  I found that a better match than using the other colours that I sponged with.  It was then layered on to a Thick Whisper White card base. Just a note too: I stamped my sentiment from Tin of Cards onto the card before stamping any of the Paisleys so I knew where to position them.

Hope you like these cards?

Now off to Amberlee’s blog HERE.  Enjoy your little Global trip.  🙂

If you get lost along the way then here are the blogs to visit.  (If the links aren’t working immediately just be patient and come and see again soon. Also you may wish to use Google Translate if you haven’t got a Translate tab on your computer).

Elizabeth Green

Alexe Guillemette

Jenny Hayward – You are here 🙂

Amberlee Batchelor

Jenny

Catalogues, Stampin' Up!

THE HOLIDAY CATALOGUE IS NOW LIVE!!!

Woo Hoo! I am excited! You can view the Holiday Catalogue Online NOW – if you haven’t already seen it.  Here is the link below and I will add it to the side bar as well.  AND, if you want a little preview of some of the exciting new products, check the video out below.

holiday16_en-sp

You can head HERE to download the catalogue.

If you want your own copy of the catalogue sent to you, then ask me. 🙂

For your viewing pleasure, check this video out HERE.

Later today I am going to share some projects for our International Blog Hop so make sure you come back and visit.


cards, Catalogues, Stampin' Up!

CHRISTMAS THOUGHTFUL BRANCHES!

Today I am going to show you a couple of Christmas cards with the Thoughtful Branches set. You can see just how versatile this set is.  A set for so many different occasions.

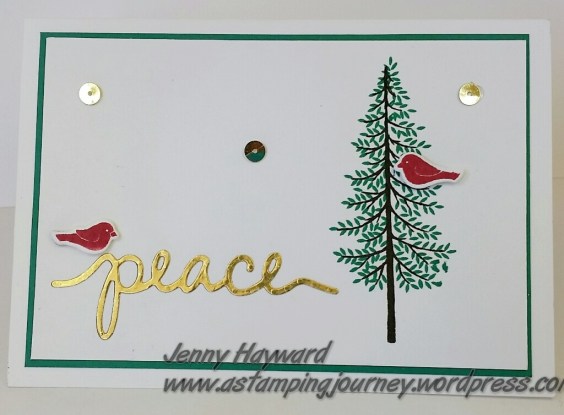
Here is the first one. I CASED this from Pinterest but changed the colours.

peace tree

I have used Emerald Envy for the card mat and for the tree branches. I will say it was a little tricky lining up the branches with the trunk.  Thank goodness for clear stamps!! But it took a couple of goes.

Just a tip: Stamp the tree trunk first.  (this one is in Early Espresso).  Then ink up your branches and hold it over the trunk.  Just move the stamp around until you have lined up a few of the tree branches with the branches on the trunk. I started at the bottom of the branches and worked up the tree. Have a practice on scrap card if you like.  I did fill in a couple of leaves with the marker because I missed, but hey! you wouldn’t have known if I didn’t tell you. 😉

I did try to stamp the branches first and then stamp in the trunk but I think it is much easier to stamp the trunk first. Have a play and see what works for you.

The sentiment is cut from Gold Foil Sheets with the Christmas Greetings Thinlits.

The next card is one I CASED from my friend Leonie when we had a stamp day.  I think this was CASED off Pinterest.

Christmas

The tree is cut from Dazzling Diamonds Glimmer Paper.  I hope you can see the sparkle. The ground and the 3 trees are stamped in Versamark and then Heat embossed in White Embossing Powder on to a piece of Whisper White just a little smaller than your card base.

The sentiment is from the Merriest Wishes set (coming out TOMORROW in the Holiday Catalogue!) I stamped it on scrap white and heat embossed it, then just flagged the ends with scissors. I have to say this was the first time I had used the Copper Embossing Powder. WOW! I think it is more like Rose Gold.  I may have ordered it now!! 😉

So are you convinced you NEED this set yet?  I am sure you have seen lots of samples around.  Today is the last day to order it but we have been told by Stampin’ Up! there are still some supplies left so they will be available until sold out. SO, go and get your set now!!

If you are in Australia you can order directly from my store HERE. Please use the HOST Code: AEA9A3PT

Tomorrow the Holiday Catalogue goes live.  I am excited to share more projects from this catalogue. Join me later tomorrow as I am taking part in a Global Blog Hop showcasing projects from this catalogue.  Can’t wait!

Have a happy day,

Jenny

cards, Stampin' Up!

HAVE YOU GOT THE THOUGHTFUL BRANCHES BUNDLE YET??

Thoughtful Branches Header

Time is running out to get this gorgeous set.  Tomorrow is the last day.  Don’t miss out because I am telling you, you will be sorry.  Don’t come to me on Thursday asking to order it.  You know what I am going to say!! 🙂

So, grab it now.  You can get just the stamps or just the dies but why not get the bundle and save 10%.  ($92.50 AUS)

You can order it by emailing me or ordering Online at my store HERE.  If you order online please use the Host Code: AEA9A3PT

Also, if you order from me you will receive a PDF of some gorgeous projects PLUS get 2 Loyalty VIS points.

Here are a few cards that I have made recently.  You might have seen a glimpse of these on earlier posts.

This first one was CASED off Pinterest. I added some stamping down the side with the tree top stamp and added some twine on the side.  I think this would be a good masculine card.

3 trees

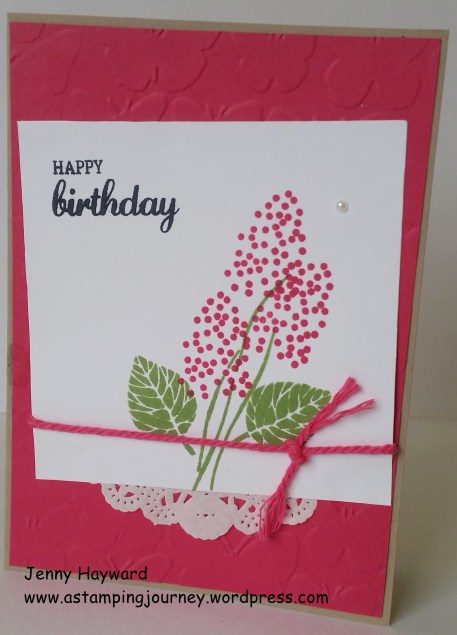
This next one was inspired by one on Pinterest.  I embossed the background with the Fluttering Embossing Folder and added some Melon Mambo Twine.  The doily is the retired ones.

Melon Mambo flowers

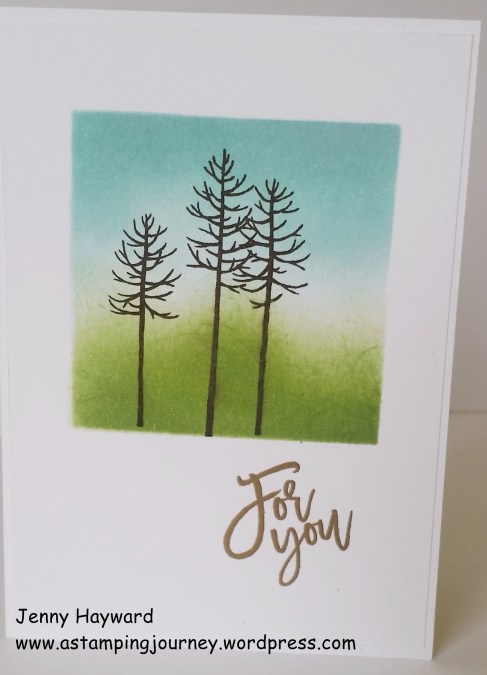
For this next one, I have sponged the card and stamped the trees.

Sponged Trees

To create this, you can cut a square from scrap paper to form a window. Then lay this window piece over your white card to create a mask.  Then sponge your colours over it.  I have used Soft Sky for the top section and Pear Pizzazz on the bottom section. Before removing your mask stamp the trees in Early Espresso.

I heat embossed the greeting in gold Embossing Powder.

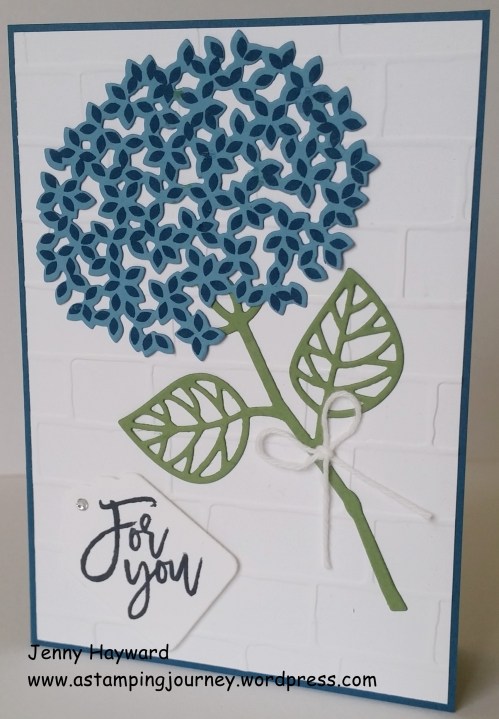
You might have seen this version around your blog travels.  I wanted to make it myself.  I stamped the flower head/tree top stamp onto Marina Mist card with the Dapper Denim.  (I think it was those colours!).

hydrangea

Tomorrow I have some Christmas cards for you.  Come back and visit and check them out.

Have a great day/night,

Jenny x