Catalogues, Christmas, Classes, Stampin' Up!

HOLIDAY CATALOGUE OPEN HOUSE!!

If you are a Wollongong local come along to my Holiday Catalogue Open House.  You can see and play with lots of products from the Holiday Catalogue.  It’s time to get started on those Christmas cards if you haven’t already done so. Come and see what is new.  Here are the details.

HOLIDAY CATALOGUE OPEN HOUSE!

WHEN:  Saturday 19th September at 2pm.
Stop by for a short time or stay the whole time.  

COST: $10 which includes 2 Make and Takes (Check them out below),

Giveaways, Lucky Door Prize, Yummy Afternoon Tea and …

pick up the Holiday Catalogue if you haven’t already received one.

PLEASE RSVP by Thursday 17th.  Book early as places are limited and booking up already.

See you there. 🙂

Blog Hops, cards, Catalogues, Christmas, Stampin' Up!

ESAD HOLIDAY CATALOGUE BLOG HOP!!

ESAD Blog Hop Header Holiday 2015

Thanks for joining us today for another ESAD Blog Hop.  This time we are focusing on some of the awesome products in the new Holiday Catalogue.  You might have just come from Kelly’s Blog or you might be starting here. Either way you can take the Hop around in a circle.

There is so much to love in this catalogue so it was hard to choose but I decided on picking the first stamp set that made my wish list.  (Maybe because that was near the front – I don’t know.  It is all so good!).

Firstly, I need to tell you about what ESAD is about.

ESAD Info Holiday 2015

OK.  Now I am looking at the ‘Home For Christmas’ product suite on  page 8-9 of the catalogue.  I love the vintage feel of these products.  Sorry lots of photos but I think you will rather quickly look at photos than lots of information when you are hurrying on your hop. 🙂

P1170376

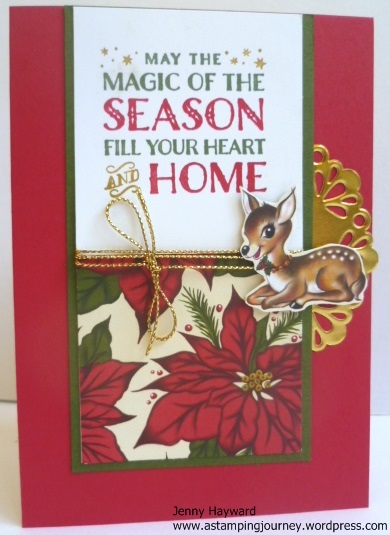
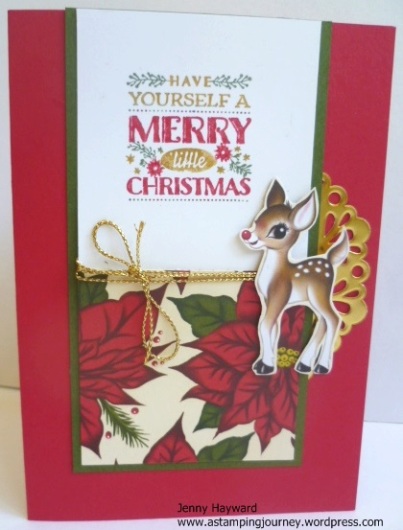
I have used the markers to colour the sentiments from the ‘Cozy Christmas’ stamp set.  The sweet deers are from the ‘Home for Christmas’ Designer Series Paper that I have fussy cut out.  So cute! The beautiful poinsettia paper is from the same ‘Home For Christmas’ pack.  You don’t need much more to this.  I have added some Gold Cord and Gold Doily.  Here is a close-up of the cards.

P1170379

P1170377

So I had to then make a bag using the Curvy Keepsake Framelits to make a cute set.

P1170385

P1170388

P1170394

I hope you like these.  Thanks for stopping by. Now get hopping to the next stop on the Blog Hop. You will now go to Libby’s blog HERE.

If you get lost then here are all the blogs to join in.

1. Libby Dyson

2. Paula Reid

3. Keryn Campbell

4. Carly Middleton

5. Rachael Lewsley

6. Narelle Fasulo

7. Emily Campbell

8. Emma Palonek

9. Jo Weedon

10. Rebecca Scurr

11. Andrea Buckland

12. Rochelle Blok

13. Kathryn Ruddick

14. Monique Fielder

15. Bernie Collins

16. Liv Ingle

17. Sally Williams

18. Ria Kaire

19. Delys Cram

20. Jessica Williams

21. Lou Kitzelman

22. Barbara Williams

23. Kelly Kent

24. Jenny Hayward

cards, Stampin' Up!

CHRISTMAS GREETINGS!!

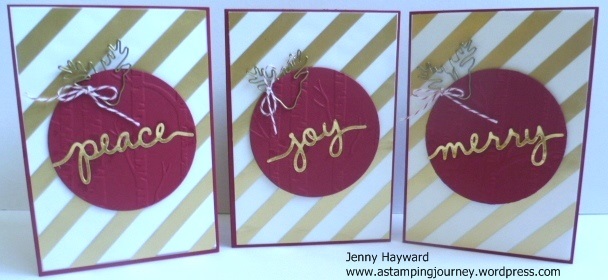
Have you checked out the Holiday Catalogue yet??? What is on your wish list??  There are so many great products it is hard to choose.  I have the link in the right side bar for you to check out if you haven’t already. I was playing with some of the new things they other day I made up this set of cards to show you.  They are using the new ‘Christmas Greetings’ Thinlets.  I have a little trick I wanted to tell you about.

P1170299

I will show you each card close up so you can see them better.  The layouts were inspired by some cards I had seen on Pinterest.

I cut a circle from Cherry Cobbler card and then embossed it with the Woodland Embossing Folder. There is some lovely Vellum sheets in the Holiday Catalogue but I don’t have them as yet so I have used the Gold Fancy Foil Vellum from the Annual Catalogue.  I adhered some Whisper White card on to the back of the vellum. Don’t you just love the cute Reindeer clips??? I tied some Cherry Cobbler Baker’s Twine onto them.  I cut the words from the ‘Christmas Greetings’ Thinlets (p34) from Gold Foil Sheets.

P1170304

P1170307

P1170306

TIP: In this set of Thinlets there are 3 words “peace”, “merry” and “jolly”.  Now I didn’t want jolly for this so when I cut the word I then carefully snipped off the “ll’s”.  If you cut it off near to the “l” letters then you have a little tail.  I adhered the tail of the “y” over the “o” tail.  Does that make sense?  Using the new Fine Tip Glue Pen (p 43) it makes it easy to adhere the letters together and  also adhere the letters to the circle.  You only need a very little bit let me tell you.  I found that you needed to just hold the piece down for a minute to take hold.

Hope you like these cards.  I’m loving playing with this new stuff.  Go check the catalogue out if you haven’t already done so.

Have an awesome day 🙂

Jenny


Catalogues, Christmas, Stampin' Up!

DO YOU WANT TO SEE THE 2015 HOLIDAY CATALOGUE???

It’s September 1st which means ….It’s Spring!!! Well in the Southern Hemisphere it is BUT even more exciting – (can I say that??) – Yes, even more exciting is the 2015 Stampin’ Up! Holiday Catalogue is live TODAY!!!

You are going to absolutely love this.  There is so much AWESOMENESS!! Now click HERE to go and view it online.  (I will add the link in the sidebar shortly for future reference).

2015_HolidayMini_en-AU

I have been playing with products in this catalogue for a few weeks now.  (Just one of the benefits of being a demonstrator!).  I have posted a few projects recently and I have more to share with you too.  Yesterday I had a quick play and made up this card.  This was inspired from some cards on Pinterest.

Christmas

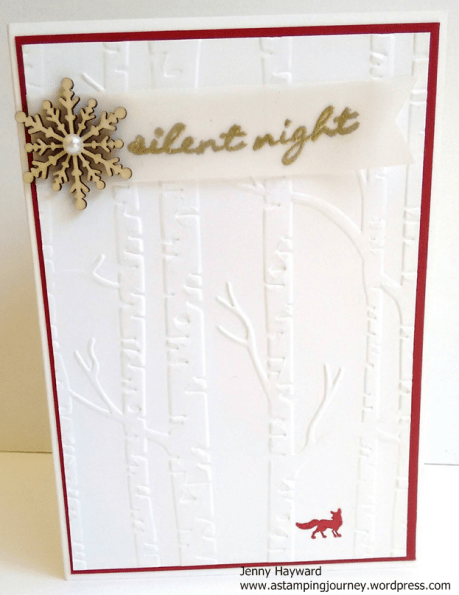
I have used the new ‘Woodland’Embossing Folder.  Now this is towards the back of the catalogue (p39) and can be overlooked especially by us downunder as we don’t celebrate Halloween and Thanksgiving and people tend to stop after the Christmas products; BUT keep going there are some awesome products that you will be able to use anytime.  The stamp set is ‘Jingle All the Way’ (p12) and I love those sweet wooden Snowflake Elements (p23). I have finished it off with an Adhesive Pearl.

So now I am going to stop talking so you can go looking at the catalogue.  If you want to get any of that goodness and don’t have a Demonstrator then let me know.  If you would like a Catalogue sent to you then let me know too.  I know you can read it online but it is so much nicer to have the real thing. 🙂

Happy Reading 🙂

Jenny

Stampin' Up!

HAPPY STAMPIN’ UP! BIRTHDAY TO ME!!!

happy birthday balloons and presents

It’s my 7th Stampin’ Up! Birthday!!! Woo Hoo!! Let the party begin!!!

It has been a fun ride. Bumpy in parts, but hey that’s part of the journey isn’t it??? I have loved to create and share my projects with you.  I hope I have inspired you along the way. 🙂

I have had this blog running for over 6 years now. A number of you have been with me since those early days and I thank you so much for still being here with me.  Whether you have been with me for a long time or a short time, or just popping by today,  I thank you for sharing the journey with me.  I am excited for another year of creating with some fantastic products, especially as very soon we welcome in the new Holiday Catalogue with lots of exciting products for your Christmas creating!!

So I want to say Thanks!

As a special gift to you to say THANKS, I am offering 20% off all orders for this weekend only.  This offer will end at 8pm on Sunday 23rd August (Australian residents only).

How to Order:

Email or Phone me 0439 844574

OR

Order Online  HERE  Please use the Hostess Code X4GXMQRK 
** Note: If you are ordering online, you will need to pay the full price at the time of checkout but I will then reimburse you later.


Thanks for sharing the ride with me.

thank you

cards, Stampin' Up!

SIX-SIDED SAMPLER CASES!!

How was your weekend?? Monday comes around too quickly doesn’t it!! I have another 2 projects from out Stamping weekend.  These are with the set ‘Six-Sided Sampler’.  I don’t own this set so it was good to use it. Both these cards were unashamedly CASED.  I am not sure the original creators but they were from Pinterest I believe.

First one uses the set ‘Awesomely Artistic as the main images.  These are stamped on Smoky Slate cardstock and matted on Early Espresso and Island Indigo is the base.  The flowers/blossom is stamped on Whisper White card in Island Indigo and fussy cut around.  The centre of the leaves/flowers are coloured with Blender Pens and then I used a Daffodil Delight Marker in the centres.  This was raised up off the card with Dimensionals. The hexagon shape from ‘Six Sided Sampler’ set is stamped in Whisper White craft ink.  The ink is so wet so you just need to touch the inkpad very lightly.  I just eye-balled to line up the hexagons but you could use the Stamp-A-Ma-Jig if you like.  I am just a bit lazy and didn’t bother getting it out!!!  The centre of 2 of the hexagons are coloured in with the chalk marker.  I finished it off with some Linen Thread and then Dazzling Diamonds on the dragonfly.

P1170046

This next card was the last card we made on the weekend.  We literally had about 15 minutes left but just had to make this.  It was a bit stressful to be honest as the clock was ticking. So I just stamped and punched and then headed home to finish assembling it back home.  I chose to make mine in Watermelon Wonder.

P1170044

I have also used ‘Papillion Potpourri’ stamp set and the greeting is from ‘A Dozen Thoughts’.  The greeting is cut with the little label from the ‘Mini Treat Bag’ Thinlets. Some of the hexagons are raised up and some adhered directly onto the doily.

I have just a couple of cards left from our stamping weekend.  I am really excited to get more stamping done with the new holiday products though.  One thing at a time hey!!!

Thanks again for visiting.  I do appreciate it.  Do stop by and say Hello. 🙂

Jenny 

cards, Catalogues, Stampin' Up!

FESTIVE FLOWER POINSETTIA!

I received my preorder for some new goodies from the upcoming Holiday Catalogue.  Oh! It was just like Christmas – literally!! Opening up all the fun new products and the sparkly papers.  It was all so festive.  I had to open all the packets straight away and punch and cut and emboss.  One of the first things I used was the new Festive Flower Builder Punch. I can’t show you the punch yet (just wait until September 1st).  I made up the flower and today just added it to a card.  Here you are….

pointsettia.

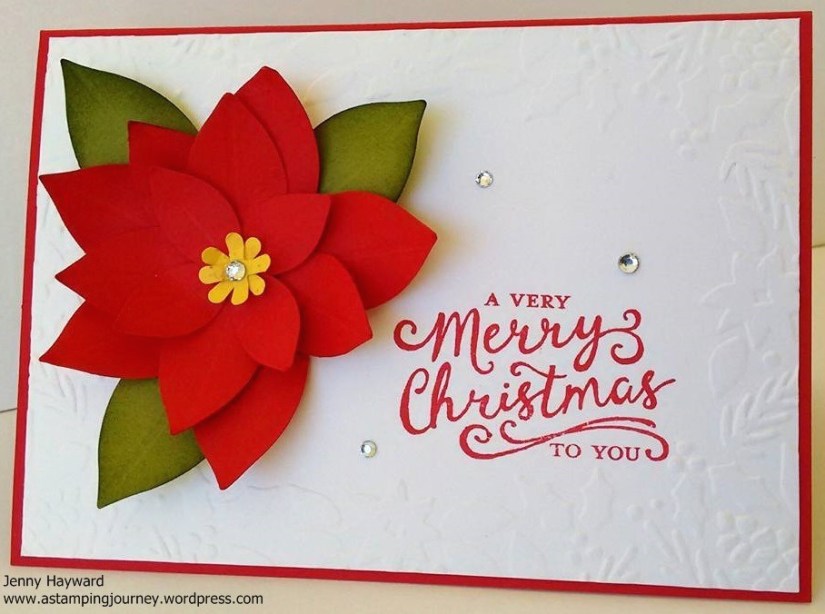
I have used Real Red for the card base.  The flower is Real Red and Old Olive.  You will find a few new products on this card.  Apart from the fun Builder Punch you have a co-ordinating stamp set which the greeting is from – ‘Reason For The Season’ (Don’t you love that font!), and the gorgeous new Embossing Folder ‘Boughs and Berries’.

So now you really want to see the Catalogue don’t you?? If you would like me to send you a catalogue, then just leave me a comment or email me and I will send one to you. Australian residents only.  I am going to start mailing them next week.

Thanks for stopping by,

Jenny

Stampin' Up!, Weekly Deals

SHINY STUFF FOR THIS WEEK’S WEEKLY DEALS!!

I have been thinking Christmas.  Probably because I have been playing with new toys from the upcoming Holiday Catalogue.  It is good being a Demonstrator because you get to see and play with products earlier.  That’s a bonus with joining Stampin’ Up! if nothing else 😉 but of course there are so many good reasons.

Anyway, I want to show you this week’s Weekly Deals.  There are a few shiny items on this week’s deals.  Isn’t shiny and sparkly just the thing for Christmas!!

To order please email me ASAP or you can order directly Online at my store HERE.

aug 12

cards, Challenges, Stampin' Up!

VELLUM BIRTHDAY BLOSSOMS!

On a Facebook group I am on they recently set a little game.  It was a Tic Tac Toe Board.  Pick 3 items in the one row to make your card.  I thought that would be fun.  I took a little time out from my regular creating to have a go.  I will show you the card but first I will tell you the process I went through in making this card.  Maybe it will help you when the MOJO has gone out the window. 🙂

Firstly, I selected the 3 elements from the Tic Tac Toe Board to include on my card.  I chose Birthday, Flowers and Red.  That’s half the battle right!!  Well I pull out all my flower stamps – and there are quite a few.  I really wanted to use one of the new ones. OK, Birthday Blossoms, Definitely Dahlia or Garden in Bloom??

The colour was already chosen.  I don’t often use red except for Christmas but I chose Cherry Cobbler.  I love the richness in this colour. I knew I wanted to white emboss the vellum too.  Just an idea I had.

How to put it together though?? That is what sends me undone and generally I just put it all aside in the “too hard” basket.  I contemplated things for a little while and wondered what to do. When the ideas weren’t really coming together for a card I thought … Why not look at a card sketch.  I went to Pinterest and I have a board for Card sketches. You know you can actually use the ideas you pin not just PIN them to a board!!! 😉 Straight away I looked at the board and found what I was after.

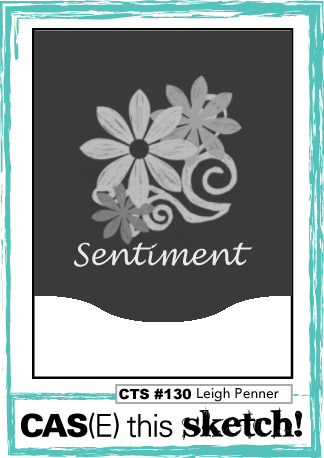
So here is the sketch I worked with. It is from this great site HERE. I like the simple sketches.
CTS_130

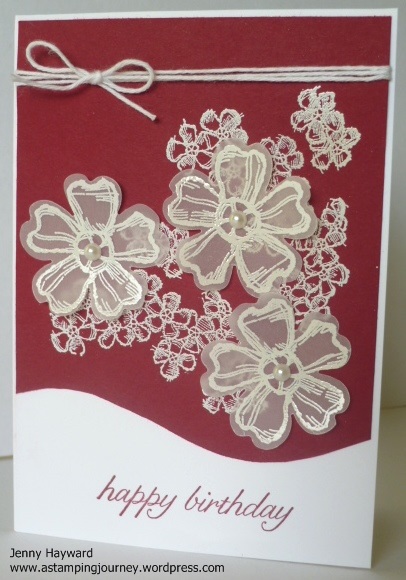
Here is the final result.

P1170158

I used Birthday Blossoms Heat embossing the small blossoms in White Embossing Powder onto the Cherry Cobbler card.  The larger flowers were heat embossed in white on vellum and then punched out with the Pansy Punch. To get the curve on the card I hand-drew a curvy pencil line on scrap paper until I was happy with it.  I cut that out and then used that as a stencil on the Cherry Cobbler card.  I lightly drew the line and then cut this curve out.  I was happy with the result of that.  It really could have gone any way!!

The greeting was stamped in Cherry Cobbler onto Thick White Cardstock as a card base. I added some large Adhesive pearls to the centre of the flower and finished it off by wrapping some White Baker’s Twine around the card a few times. I did stamp the inside with the blossoms in Cherry Cobbler and one of the greetings in the set.  I didn’t take a photo of that.

I hope explaining the process might help you next time.  I will try and remember that myself 😉

Have a great “stampy” week.  I will be back to share more soon.

Jenny