Wednesday’s WOW! #155 – Create a layered look with Masking.
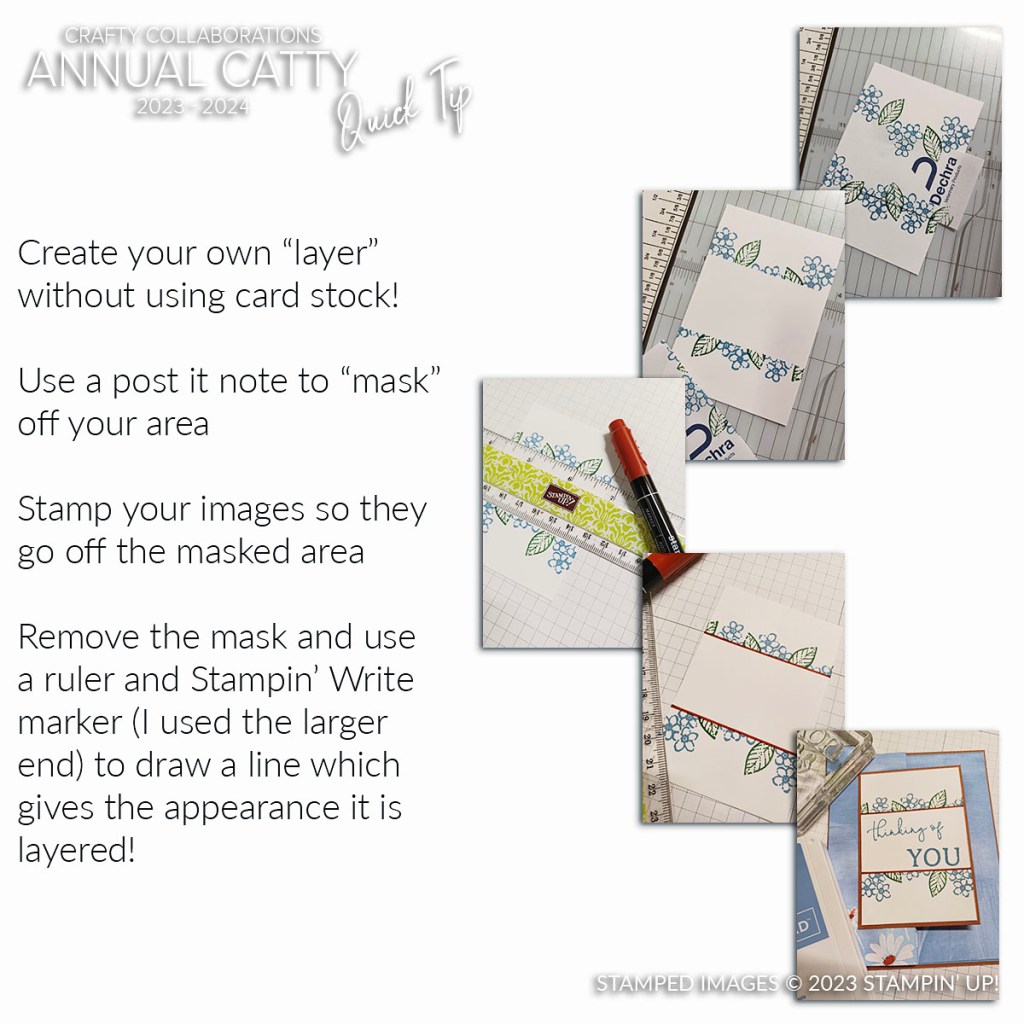
Here is a way to create a great effect on your One Layer cards (as in just a card front) by giving the look of layers using a mask. See how.
To create the look firstly use a post it note to mask off an area. You can position it across ways or even at an angle.
Stamp your images so they stamp over the edge of the masked area on to the card. Remove the mask. You could leave it as it is and stamp your greeting BUT to give the look of a layer. Use a ruler and Stampin’ Write Marker (Thick Tip) and draw a line. This highlights the section.
What do you think? How about trying this on a project and see how it looks.
Happy Wednesday.
Jenny
Need some supplies and you are in Australia? I would love to serve you. You can head to my store and shop Online -> HERE. Please use the Host Code: DGASD34B
If you want great value for your crafting supplies you can’t miss out on this.
It’s all been happening to celebrate Stampin’ Up!’s 35th Birthday. They want to share it with you and invite you in to the Stampin’ Up! Community too.
You get so much more for your dollar but then afterwards you can enjoy 20% off all your later products. How much savings you can get!! Not to mention meet some great new stamping friends and the fun.
Here are the details. Choose which option you would like.
Purchase the Starter kit of products of your choice when you Join Stampin’ Up! in October. To celebrate Stampin’ Up!’s 35th Birthday get 35% off or 35% more.
Option 1 – Choose $235 of products of your choice and pay $109.85
OR
Option 2 – Choose $317.25 of products of your choice and pay $169.
AWESOME! AMAZING! INCREDIBLE whatever option you go for.
If you are still not sure head to my post on my blog -> HERE to answer your questions. Ask me if you have any question.
Drop me an email or text/phone me.
OR if you have your list ready you can head to my website –> HERE.
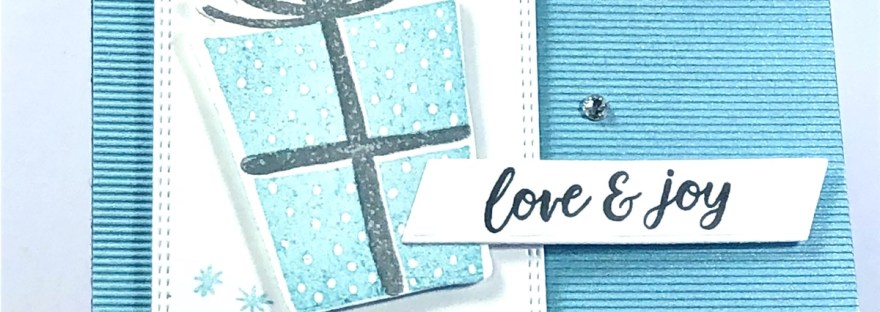
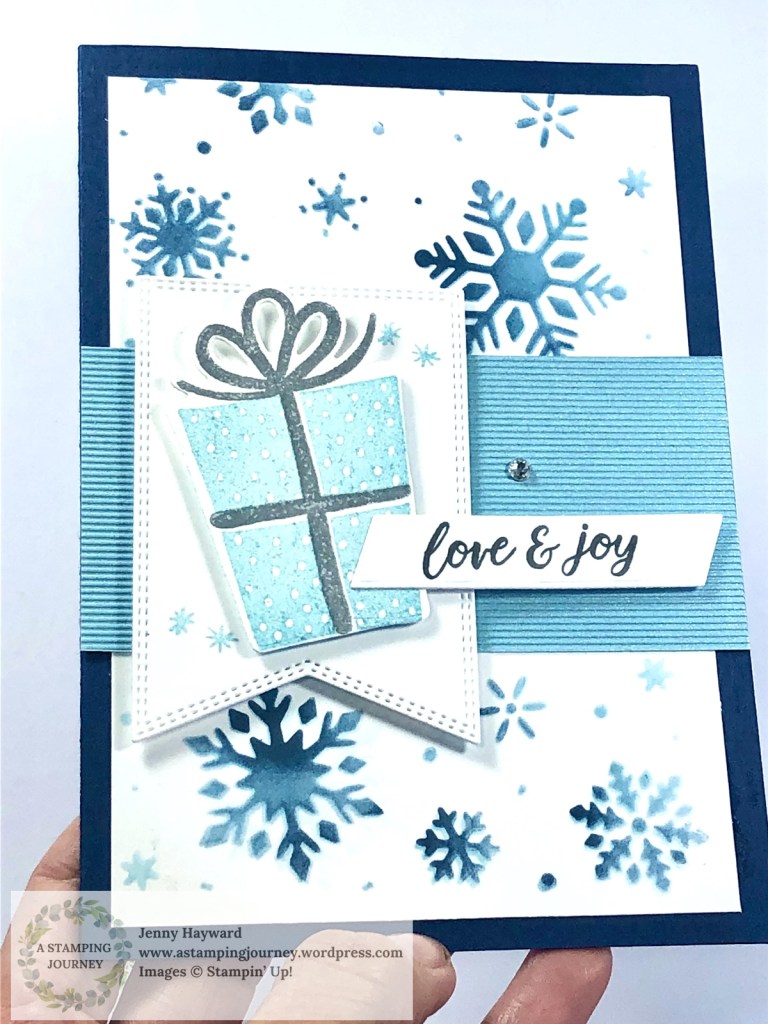
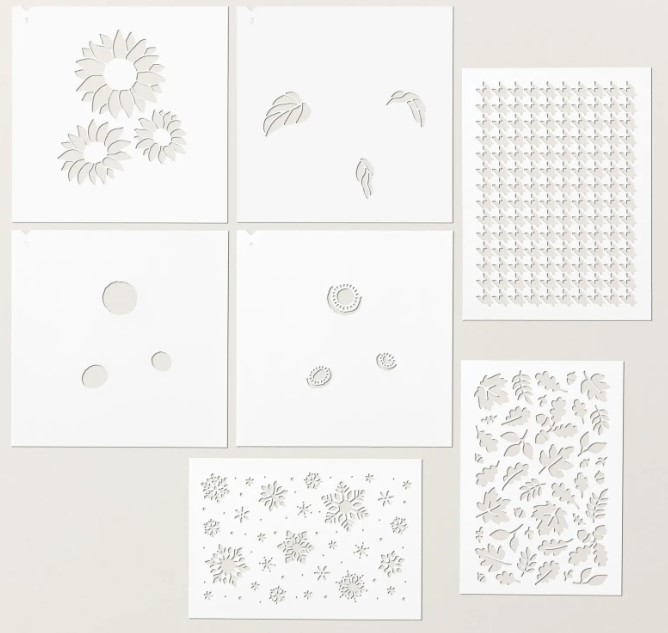
This card is using one of the other masks in the Abundant Beauty Decorative Masks. While there is the set of masks to build up the Sunflower there is also the snowflake mask, the leaves and the Argyle pattern mask.
For this one I have used the snowflake mask.
The snowflakes were ink blended with Balmy Blue ink and then a touch of Night of Navy ink added on parts of the snowflake.
I used the Sending Cheer Bundle with it. It’s hard to tell but the bow on the gift is heat embossed in Silver Embossing Powder for some shine. I have used the Nested Essentials Dies for the banner.
If you are wondering about the blue strip. That is from the Textured Shimmer Paper pack. It has a subtle shine. It’s a shame you can’t see it.
We made this one for one of the cards in my classes recently. If you are a Wollongong local we would love you to join us. They are lots of fun. Send me a message and I can send you the details for our upcoming classes. If you are not local you can grab the Class Kits by Mail.
This is the Abundant Beauty Decorative Masks if you haven’t noticed them yet.
I have a Stand Up Box Card for you today. I have made this one a Christmas version but you could create one for any occasion.
The video will show you step by step in metric and inches.
Here is the card.
Side On view
Top view
Flat view. Ready to post in a standard envelope.
Ready to watch the video. See it on Youtube or you can watch it below here.
You can see the measurements in the video but if you want to receive it as a Tutorial this will be sent out in next week’s Newsletter.
I send out a Free Project Tutorial each week. You can join up with my newsletter and receive these great project inspirations. Head to this link to sign up http://eepurl.com/dHRjGv Or there is a link in my side bar of my blog. If you are watching this after October drop me a comment and I can add you to the newsletter mailout and send it then.
Hope you get to make one,
Happy Crafting,
Jenny
If you are in Australia and need supplies I would love to serve you. Pop on over to my store -> HERE. Please use the Host Code: 9U6Y3AFW Or contact me directly and I can help you.
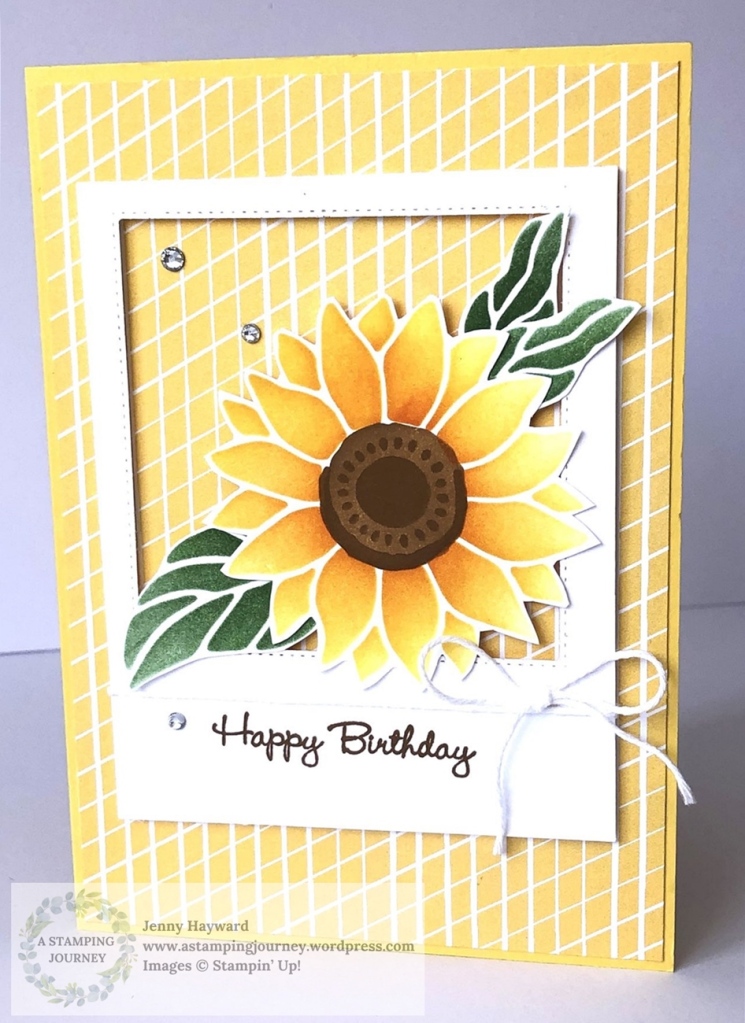
When I was creating an earlier card I diecut a square from a piece of white card with the Stylish Shapes Dies. There was still some white on the scrap piece that I could do something with later. You save bits like that right??
When I made one of the Sunflower cards recently I grabbed it to stamp my sentiment on.
BUT I thought hang on a minute – that would make a great frame! So I sponged some more Sunflowers with the Abundant Beauty Decorative Masks, cut them out and added them to the frame. How good was it that I actually centred the words on it though too.
Here is the card.
Here it is side on to get a closer look.
The Abundant Beauty Decorative Masks has layers that you can build up your flower adding ink or texture paste or even heat embossing. It creates such a great effect.
The paper is from the Les Shoppes Designer Series Paper. The sentiment is from the Go To Greetings stamp set.
Do you have “happy accidents”?
Happy Crafting,
Jenny
If you are in Australia and need some crafting supplies I would love to serve you.
You can shop online in my store -> HERE. Please use the Host Code: 9U6Y3AFW
It’s Sunday Suites time. Today let’s check out the Garden Walk Suite a little more.
The Garden Walk Suite has stamps and paper to make floral paper crafts with a modern spin. Although I think it’s a little more rustic/vintage.
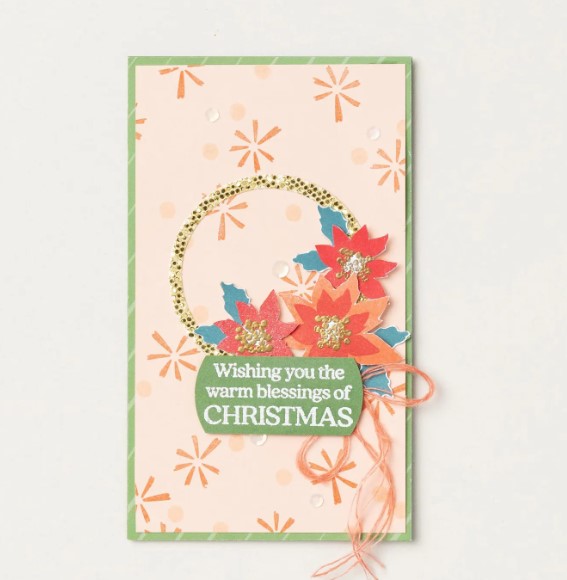
The images in this suite represent flowers from all seasons, so you can create your own season-specific floral cards or projects. So it’s great for Birthdays and Christmas and Just Because cards.
Let’s have a look closer at all that is included.
The Garden Walk Suite includes:
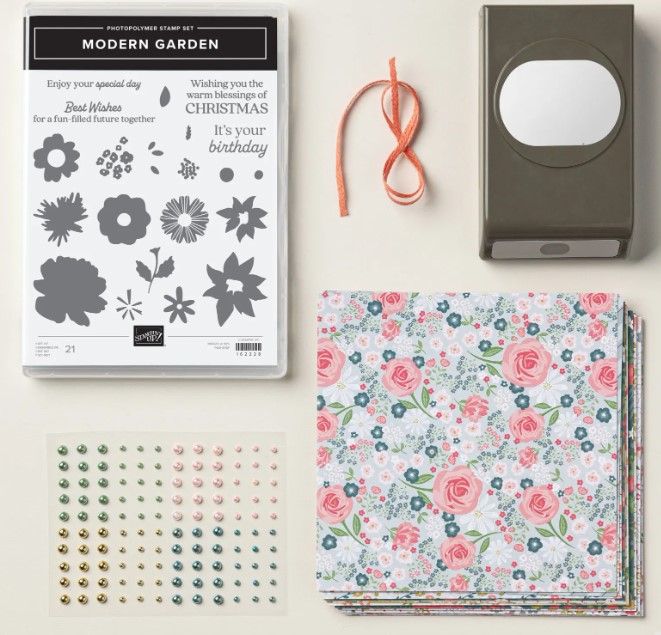
The Modern Garden Bundle (Stamp Set and the Modern Oval Punch)
Garden Walk 6″x6″ (15.2cm x 15.2cm) Designer Series Paper
Calypso Coral Braided Linen Trim 9.1m
Blooming Pearls – 120 adhesives pieces in Garden Green, Gold, Petal Pink and Pretty Peacock.
The Modern Garden Bundle can be ordered as a Bundle or individually. But you can save 10% by buying it as a bundle. The stamps can be used for all occasions and make up different flower combinations. The Modern Oval Punch can be used for many different elements not just for sentiments on your projects. The Punch is 6×4.1cm, 2-3/8″ x 1-5/8″
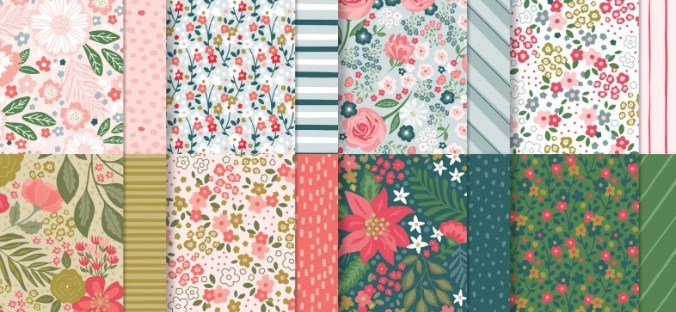
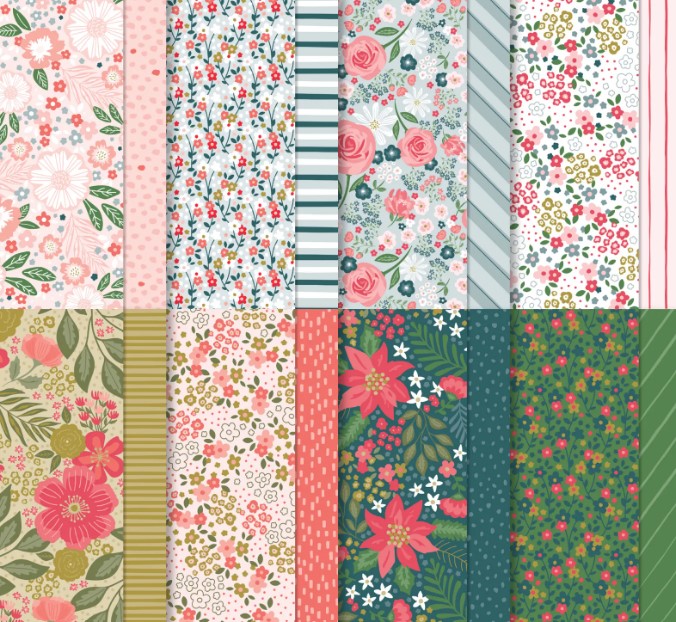
The Garden Walk Designer Series Paper comes in 48 sheets – 6 each of 8 designs.
It contains flower patterns ranging in size from small to large. Use it as a background or try fussy cutting some of the larger flowers to use as accent pieces. Even stamp directly on the paper prints with some of the flower images. The colours in the paper are – Calypso Coral, Garden Green, Mossy Meadow, Poppy Parade, Pretty Peacock, Wild Wheat.
You want to see how it’s used though don’t you. These samples were created by Stampin’ Up! artists.
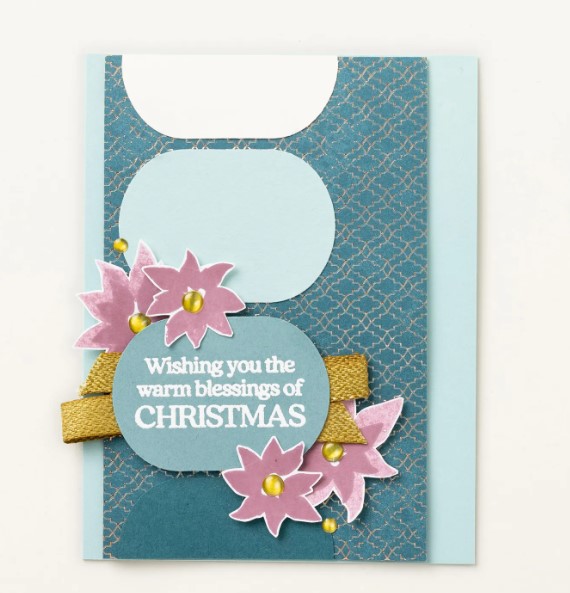
Use the punch as an element on your cards.
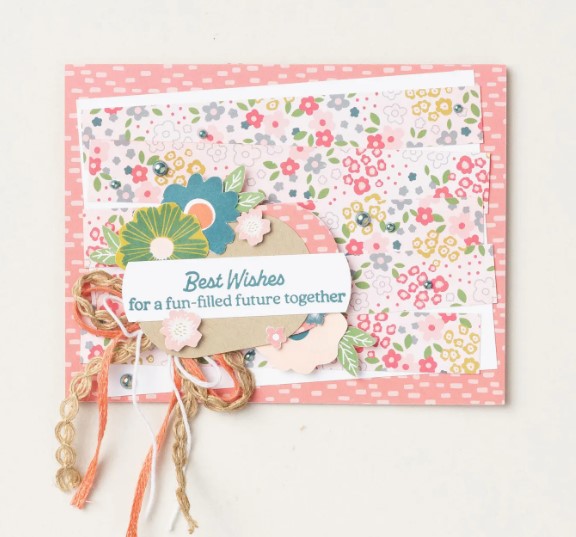
Use strips of the pretty Paper.
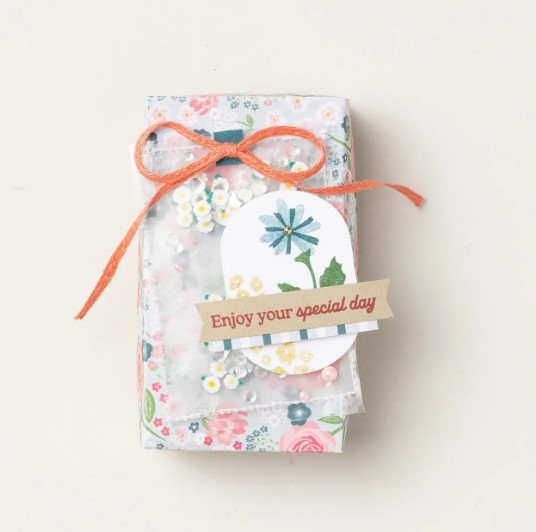
A gift bag box but check the tag?? It’s a little shaker tag with the Loose Daisy Embellishments inside.
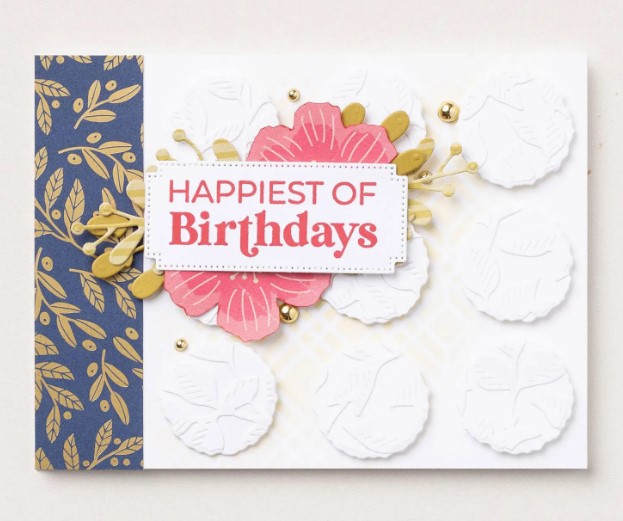
Fussy cut some of the flowers from the paper out. But check the background too. White card was embossed with the leaves Embossing Folder and then circles diecut with the Deckled Circles Dies. Pretty cool effect!
Stamp directly on the paper.
You can see more of the Garden Walk Suite online -> HERE.
If you are in Australia and need supplies for your next project you can stop on by my store at that link there. Please use the Host Code: 9U6Y3AFW
Wednesday’s WOW! #154 – How to get a crisp stamping with Photopolymer stamps.
Sometimes when you stamp with Photopolymer stamps you don’t get the crisp stamping result that you would like. Do you find that?
I have particularly recently BUT I have a couple of tips for you to be sure to get a better stamping.
Firstly when stamping give your Photopolymer stamps a clean with the Stampin’ Mist and Scrub. This will remove some of the residue from production. You could use an eraser too.
Then when you stamp be sure to have something underneath your card. The Piercing Mat or even a catalogue. It will give you a little “bounce” and your stamped image should be much more crisper.
Did you find that helpful?
Happy Stamping,
Jenny
Are you in Australia and need supplies?? I would love to serve you.
Contact me directly
Or Head to my store -> HERE and order. Please use the Host Code: 9U6Y3AFW
How awesome is that?? You can save a bit there – or maybe more craft supplies 😉
You can stop by my store -> HERE to order if you are in Australia. Please use the Host Code: 9U6Y3AFW
Or Contact me directly and I can help you out. BUT be sure to do that today.
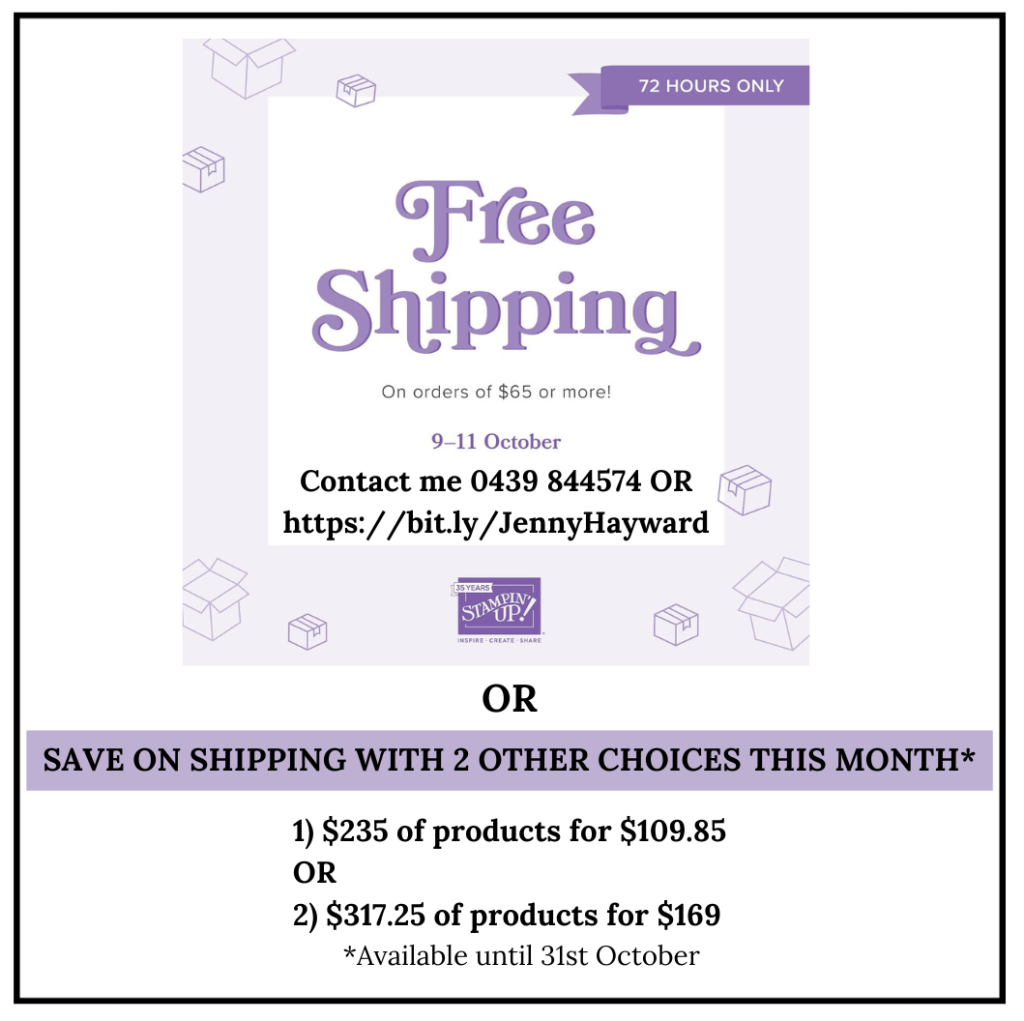
But of course the savings don’t stop there.
There are 2 other great options that will continue this month and there is no shipping on those either.
You can join the Stampin’ Up! Community and save all the time. Not to mention meet some great new stamping friends.
Purchase the Starter kit of products of your choice when you Join Stampin’ Up! in October. To celebrate Stampin’ Up!’s 35th Birthday get 35% off or 35% more.
Option 1 – Choose $235 of products of your choice and pay $109.85
OR
Option 2 – Choose $317.25 of products of your choice and pay $169.
AWESOME! AMAZING! INCREDIBLE whatever option you go for.
What will it be for you?
If you have any questions drop me an email at jghayward@yahoo.com or Message me on 0439 844574.
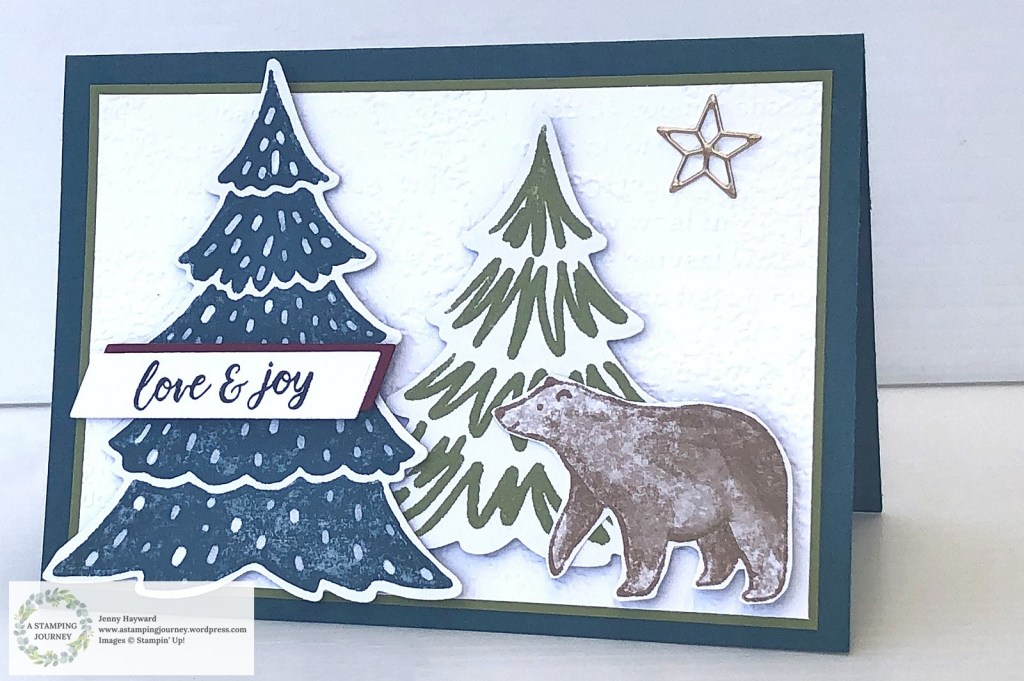
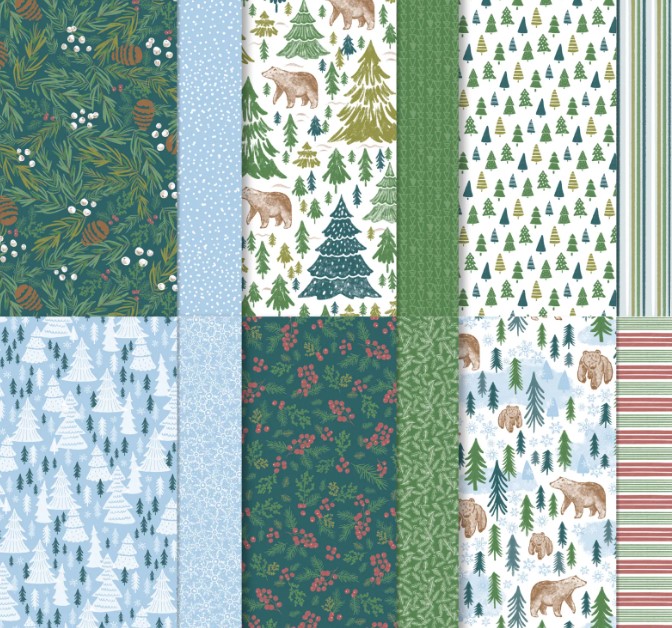
I have been playing with the ‘A Walk in the Forest’ Paper.
It has some great images. Some you can cut with the tree die in the Merriest Trees Dies Set. That’s always clever.
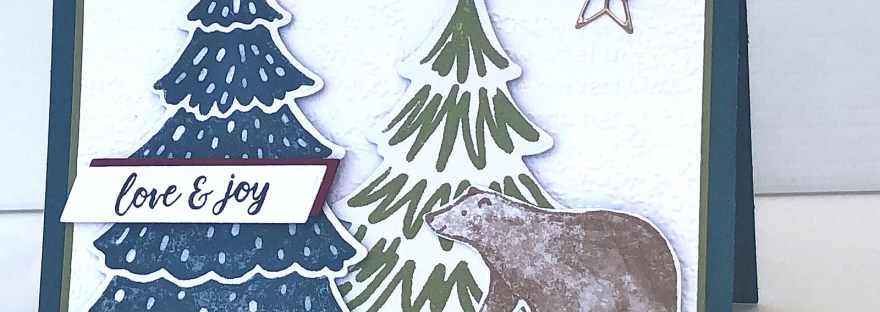
For this card I diecut some trees and fussy cut the bear. How would you be meeting a big brown bear walking in the forest? We don’t have that problem in Australia. Maybe we would come across a snake or bush turkey or kangaroo. But never a bear. This bear does look happy though if you did come across it.
It is hard to see but I have embossed the white card mat with the Timeworn Type 3D Embossing Folder. The star is diecut with a star in the Merriest Trees Dies.
Something else I do love about this paper. It is the Product Giveback in the Mini Catalogue. For every pack of this paper sold Stampin’ Up! will donate $4.25 to Anglicare Toy’s N Tucker Christmas program. The Toys N Tucker program provides hampers and Toys to disadvantaged families at Christmas. This is a fantastic cause and close to my heart so I would love it if you supported it.
NOTE: Each country has a different organisation that Stampin’ Up! will donate to so check your local market.
This is the A Walk in the Forest Paper.
You can see more about the paper in my store -> HERE.
Now We’re Going on a Bear Hunt. (Do you know that song??…)
Happy Crafting,
Jenny
If you are in Australia and need some supplies I would love to serve you.
You can order in my store -> HERE. Please use the Host Code: 9U6Y3AFW
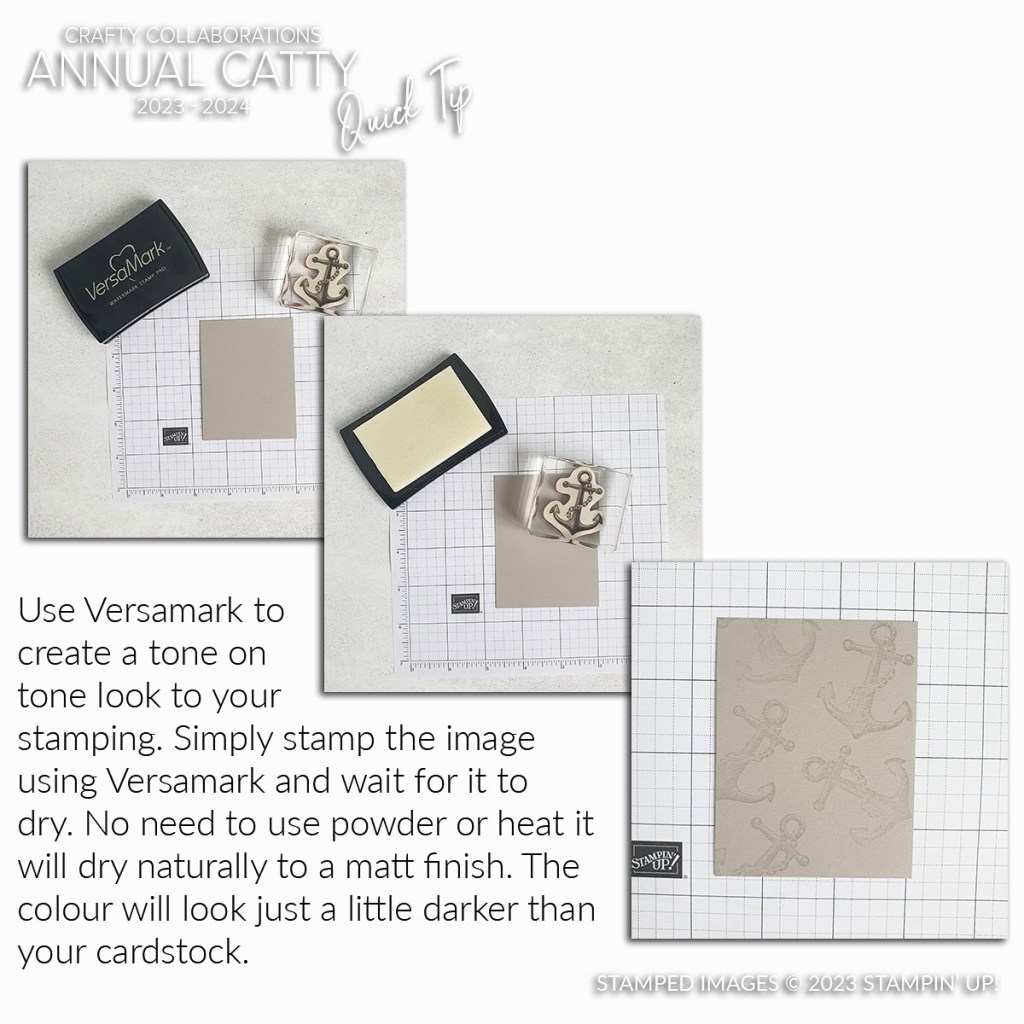
Wednesday’s WOW! #153 – Get a Tone on Tone effect with Versamark Ink Pad.
The Versamark Ink Pad is what you need to use when Heat Embossing. You ink the images with Versamark before adding your powder to heat up.
BUT Versamark is great to give a Tone on Tone effect. It’s really effective but also good if you don’t have the matching ink pad. You can use Versamark to stamp the images on the card and it gives a slightly darker tone. It does look cool!
Have you tried this?
What other ways have you used Versamark? Drop me a comment to let me know.
Hope you pull out your card and ink and start creating soon.
Happy Crafting,
Jenny
If you need some supplies and you are in Australia I would love to serve you. You can contact me directly
OR head to my store -> HERE. If ordering Online Please use the Host Code: PGECWEG9.