I had a little play today. I am trying to make a little more time for my own creating. So I played along with the Colour INKspirations challenge. This is a Facebook group that has recently started. Here is the colour palette.

Don’t these look yummy – and so cool after the hot week we have had here this week. So I made not one but 2 cards! I was on a roll.
Here is my first card.

This one uses the set ‘Day at the Beach’. I have had this set for a while now but this was the first time I have inked it up. I have used the Shimmery White card to stamp the iceblocks on. (I think in some countries you call these icelollies??) I tested other paper to stamp them on but I found the Shimmery White worked best. The Thick Whisper White just warped too much even though you can watercolor on it at times.
TO COLOUR THEM:
I inked one iceblock at a time then used the aquapainter to colour it straight away pulling some of the colour in from the image lines. I also added some more colour by picking it up off the inkpads with the aquapainter. I think a big part of watercolouring is patience. Let the images dry and THEN go back over it adding more colour with the inkpads and aquapainter and building up the depth of colour if you want to.
TO ASSEMBLE THE CARD:
The stamped piece is layered on to Sweet Sugarplum card and then to a Mint Macaron card base. The “spots” are from the ‘Timeless Textures’ set to match each iceblock. It was hot here so they melted quickly. 😉 I added a nice sparkly HAPPY from Silver Glimmer Paper with the ‘Hello You’ Thinlits the birthday is from ‘Crazy About You’. It has been some time since I have pulled these out. Of course, I added some Rhinestones for the bling factor. 🙂

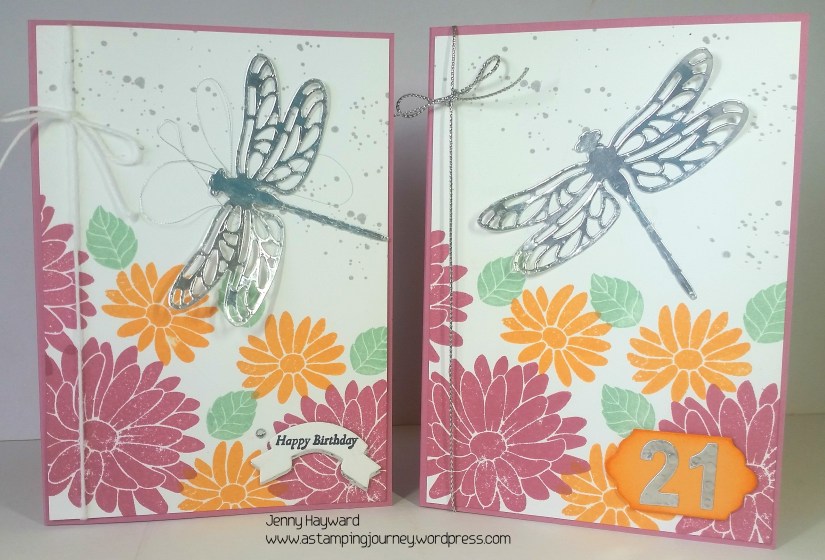
My 2nd card is using the gorgeous ‘Detailed Floral Thinlits’.
TO MAKE THE CARD:
Cut 2 pieces of Whisper White to slightly smaller than your card base. On one piece of card cut the 2 Detailed Floral thinlits dies. The smaller die at the top the larger die at the bottom. On your second piece of Whisper White you will sponge your colours on. Take one colour at a time and sponge a colour in different places over the card. Then take your next colour and move on to each colour. You can go back over the card at the end to fill in patches or add more intense colour in parts.
Here is the finished panel I had when I was finished. (Maybe I should do a video on this???).

TO ASSEMBLE THE CARD:
Using your Fine Tip Glue carefully add the glue to the back of the cut panel and then adhere the 2 pieces together. TIP: I find when using this glue that it runs very quickly. You don’t need to squeeze the bottle. When I have covered the piece in glue I turn it over onto scrap paper and press very lightly just to take off some of the excess glue so it doesn’t ooze out from under the piece when you are sticking it down.
Once done I adhered this to the Blushing Bride card base. Since I had the Hello You Thinlits out I cut a Happy from the Blushing Bride Glimmer Paper. The “for you” is from the Crazy About You set again. I stamped that on to Blushing Bride card and punched it out with the Classic Label Punch. The piece was sponged around with Blushing Bride ink to add some highlights.
Hope you like them. Have a great day. 🙂
Jenny