cards, Stampin' Up!, Techniques

BIRTHDAY BLOSSOMS TRI-FOLD CARD!

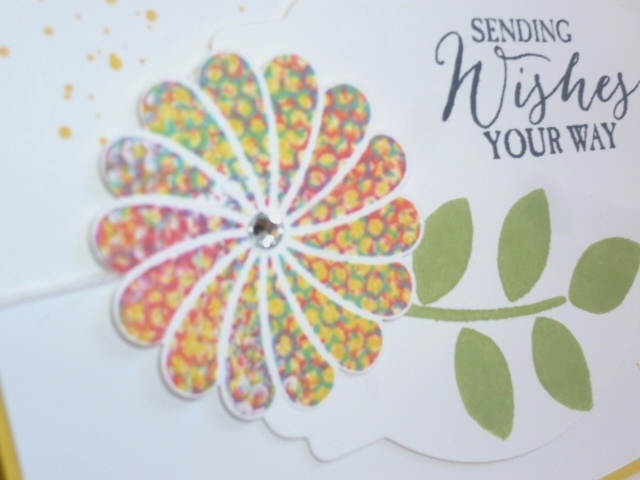
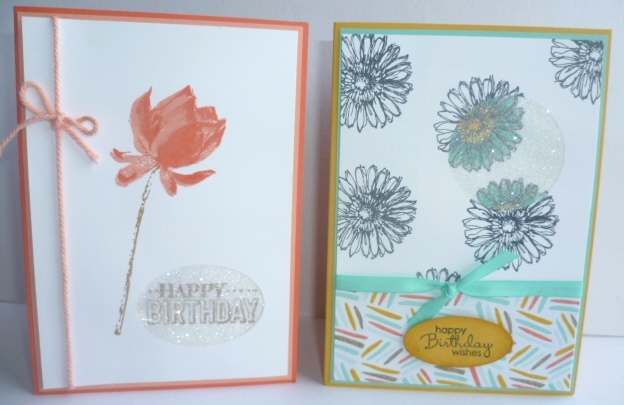
Here is one of the cards we made at our stamping weekend.  I like the way this turned out. Andrea first made it and had CASED it from Pinterest. (Sorry I don’t know who the original creator was). Of course, we all really liked it and had to copy. 🙂

P1170032

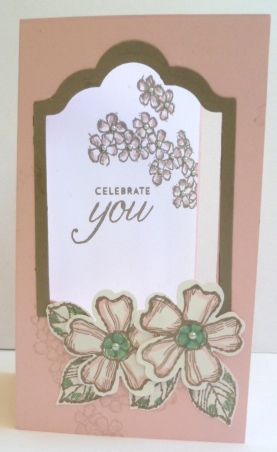
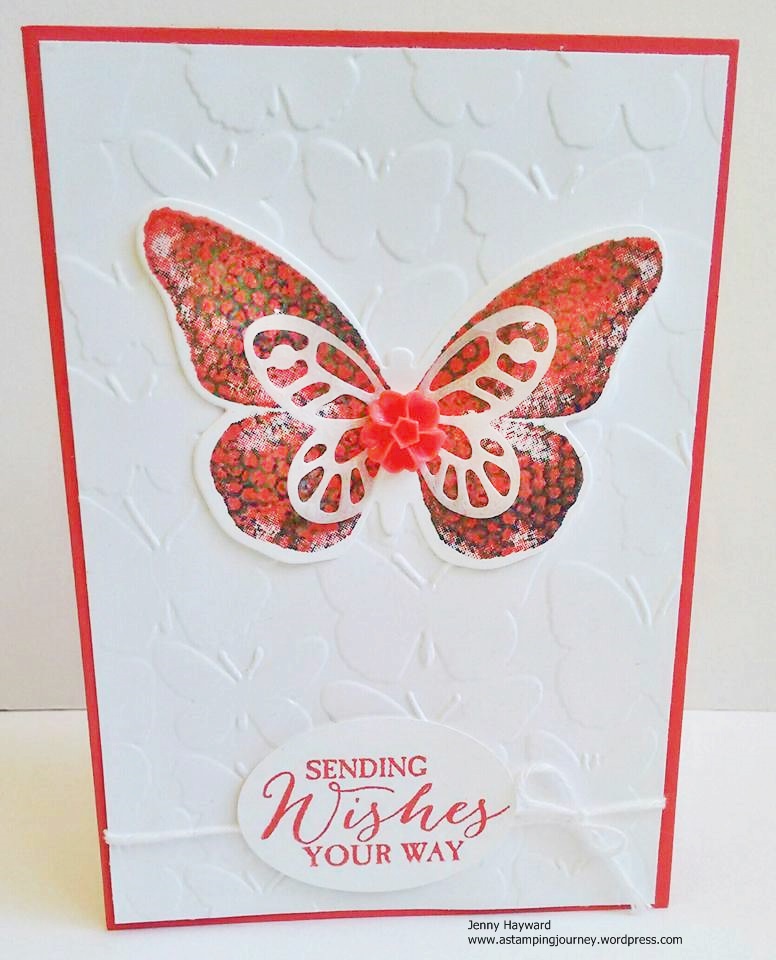
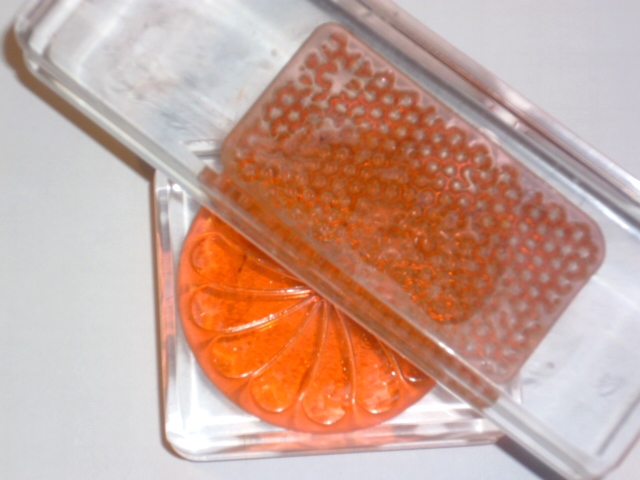
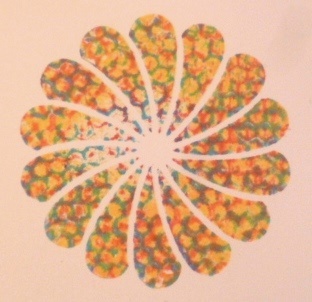
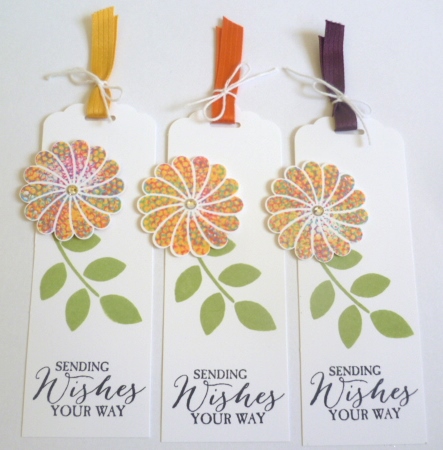
The base card is Pink Pirouette and the frame is Tip Top Taupe.  To make the frame I used the ‘Lots of Labels’ Framelits using 2 framelits together.  I used the smaller framelit that I used for the frame to cut a window in the front of the card.  I stamped the flowers and leaves in Tip Top Taupe in scrap white card. The great thing is the flower matches the Pansy Punch – no cutting!!! You do have to cut the leaves out but that is OK. I went around the outlines on the flowers and leaves with the Markers (Pink Pirouette and Mint Macaron) and I coloured the centres in. I added some pearls for some glam.  The small flowers were inked in Pink Pirouette and then stamped off before stamping on the base card in the bottom left corner.
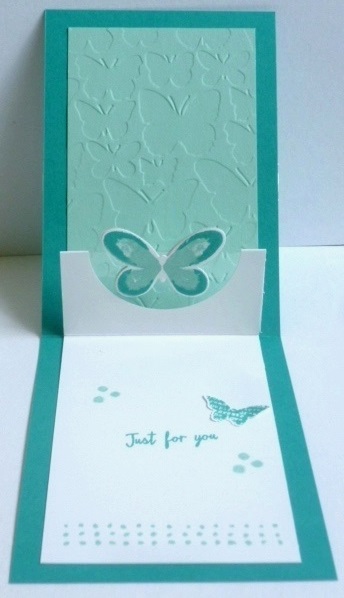
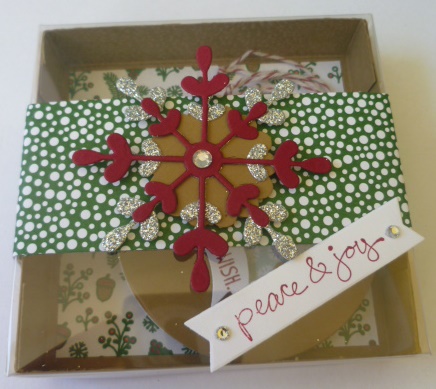
Now open wide …..

P1170034

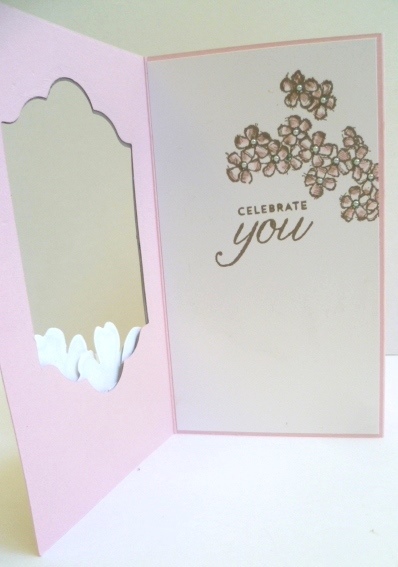
The smaller flowers were stamped on a piece of Whisper White in Tip Top Taupe and coloured with the markers again.  The greeting was stamped in Soft Suede.  You can’t quite see but I added tiny pearls to all the centres.
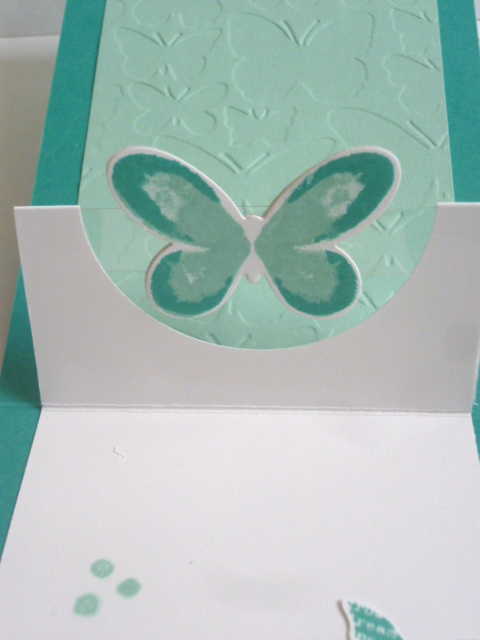
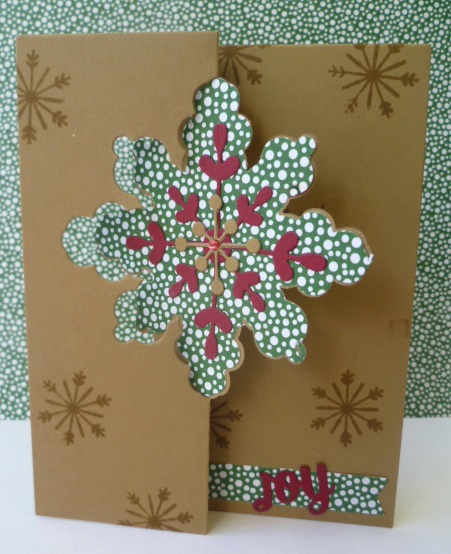
Now open it out….

P1170035

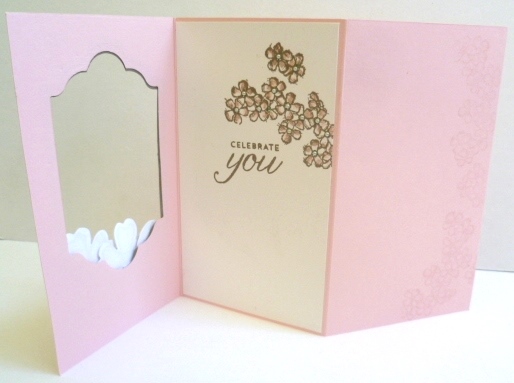
I inked up the small flowers again in Pink Pirouette and stamped them off on scrap paper. Then I stamped them on the next flap along the edge on the right side. I repeated this a few times of inking, stamping off  and stamping on the card.

Do you want to know the dimensions???  It is basically a standard base card and score the card in 1/3rd’s.  If that makes sense??  I did make this card a little taller though (15.4cm x 21cm).  It is easy to make your own and just a little different to the standard card.

Thanks for visiting me today.  Have a super wonderful day today 🙂

Jenny

cards, Techniques

HALF CIRCLE POP-UP!

Here is one of the first cards I will share from my Stamping Weekend.  Each of us had a Make and Take to share.  I chose this one.  I completely CASED it, but that’s OK Right??? 🙂  I came across this cool Half Circle Pop Up Card by Julie Davison and loved the idea of it.  The other girls liked it this weekend too.  I will give you the link for it further down.  Here is the card.

P1160991

On this card I have used the ‘Watercolor Wings’ stamp set and ‘Tin of Cards’ set.  I love this set for the sentiments even if you weren’t making the kit. The colours are Bermuda Bay and Pool Party. The fun part is when you open the card.  Check it out.

Surprise!!! The butterfly pops up.

P1160985

I love how the butterfly pops up. You can see how that works in the close-up in the photo below. You have a little strip of acetate across the circle.  Love it!!

P1160989


The Pool Party piece at the top of the card is embossed with the Fluttering Embossing Folder.  I didn’t realise I had embossed this on the opposite side until I was putting the card together but I don’t think it matters.  I still went with it.  The little butterfly is from the ‘Butterfly Basics’ set.

If you would like to make this type of card yourself, then head over to Julie’s blog HERE and she has a video and the PDF instructions.  It is such a WOW card – and it really is very simple to create.

Have fun making them.  I can’t wait to try this card again.  My mind is buzzing with all the different stamps you could try this with.

Come back soon.  I have lots more projects to share.

Jenny

cards, Techniques

A FUN STAMPING WEEKEND!

Don’t you love it when you can get away with your stamping buddies and stamp to your heart’s content.  Bliss!!!  So fun to share ideas and inspire each other and laugh and have fun.  I thought I would show you the results of my weekend of stamping.  Well actually it was a little less than a weekend as I arrived mid Saturday morning.  I am showing you them all in a group now but over the next couple of weeks I will show you them individually.

card weekend

Such a variety! It was good fun to try some new techniques and play with some new sets.  I do hope you like them.  Stay tuned for some upcoming posts on these ones.

Have a great day and I hope you can get creative today,

Jenny


cards, Stampin' Up!, Techniques

FAUX SHAVING CREAM BUTTERFLY!

A little while ago I shared the Faux Shaving Cream technique with you.  I showed everyone at our team meeting this week so beforehand I played around with a few other stamps using this technique.  I thought I would show you the card I made.

2nd faux shaving cream

There is quite a few new products on this card. Can you spot them??

I have used the set ‘Watercolor Wings’ and the butterfly was cut with the new Framelits, Bold Butterfly.  I have used 2 of the new Incolors Watermelon Wonder and Cucumber Crush.  (I also used Pacific Point for this technique too).  The other stamp I used to create the honeycomb effect was from Butterfly Basics. The White card is embossed with the lovely new embossing folder ‘Fluttering’.  How gorgeous is this folder??  The greeting I have used here is from ‘Butterfly Basics’ which continued from our recent Occasions Catalogue.  See the centre of the butterfly?  I cut the smaller butterfly with the Bold Butterfly Framelits from regular old baking paper! How cool!  In the centre of the butterfly I added a Watermelon Wonder In Color Blossom Accents. I was really happy how this turned out.  You really have to play with a few different ink colours and different stamps to see what effect you get.

If you missed the post showing the Faux Shaving Cream Technique and want to have a go yourself, you can find that tutorial post HERE on my blog.

Thanks for visiting today.  I hope you have a wonderful weekend. 🙂

Jenny

Stampin' Up!, swaps, Techniques

FAUX SHAVING CREAM FLOWER!!

I have always been fascinated in the Shaving Cream technique but I haven’t got around to trying it. I think it is the mess!  The shaving cream and reinkers and ….. Just too hard!  SO, when I came across THIS technique on Splitcoaststampers a few weeks ago when I was looking for a different technique for a class, I thought I could really try this one.  Here is the card I made.

P1160643

The layout for the card was INSPIRED from Deb Currier from artfeltcreations.com.  I changed a few things around and I created the Shaving Cream flower.  I loved the effect.  Here is a close-up. (OK a little blurry!)

P1160646

I don’t usually share a tutorial for the Technique Classes I do but this technique is so cool I just wanted to share this with you my lovely readers. Of course, you can read about it at the Splitcoaststampers link above too.  It is a bit like the Kissing technique if you have tried that.

SHAVING CREAM TECHNIQUE

1. Choose 3 co-ordinating ink colours. I have used Daffodil Delight, Tempting Turquoise and Melon Mambo.  I found the darker colours didn’t blend well and just looked messy 🙂

You will also need 2 stamps: One solid image stamp and one patterned stamp.  I have used the flower from ‘Crazy About You’ and the honeycomb pattern from ‘Butterfly Basics’.

2.  Ink up your solid image stamp with the lightest colour. Don’t stamp it on your card yet.

3. Ink up your patterned stamp with one of the other ink colours. Press it on to your solid image stamp and give it a slight twist.  Clean your patterned stamp and ink again in the same colour.  Press on to your solid stamp on the other part of your stamp and give a little twist.  See the photo below.

P1160660

4. Clean your stamp again and ink your patterned stamp with the other ink colour.  Turn your solid image stamp 1/4 turn.  Then press your inked patterned stamp on to the stamp and give a little twist. Clean your stamp.  Ink it again in the same colour and stamp on the other part of your solid image stamp and give a twist.

P1160663

5. Now give your solid image stamp a little huff to re-moisten the stamp and then press on to your piece of card.

P1160667

It gives a really cool effect.  Don’t you think???

I really loved the effect so I made some tags up using this technique for our team swaps last week.

P1160671

Here is a close-up.

P1160727

So why not give this technique a try.  It is so cool and each time will work out different.

Have a happy, stampy weekend 🙂

Jenny

Stampin' Up!, Techniques

WEEKLY DEALS AND UPDATES!!

Wednesday again which means it is WEEKLY DEALS time.  I love these deals.  There have been some great deals lately to save you money.  I have a reminder too on the retiring list and Clearance Rack so you can check about that but before you leave here today you have to see this cool technique video I have posted below.

Here is this week’s deals.

May 19

Punches and Big Shot dies are always great! How can you get these??

Contact me directly to place your order

OR

Order Online at my store HERE.

Have you checked out the RETIRING PRODUCTS (see Here) OR THE CLEARANCE RACK (see Here)??? Items are selling out fast.  Check them out and contact me to place your order or Order online. (Australian residents only and if you haven’t got a current Demonstrator). 🙂

Of course, I can’t leave without sharing a project.  Check this fun technique out using Watercolouring and Spritzers. I love the effect!

cards, Sale-A-Bration, Techniques

COLOURING SHEER PERFECTION VELLUM!

You have probably seen one of the new release product choices for Sale-A-Bration – the Sheer Perfection Vellum.  This is so gorgeous.  I am going to focus a little on this product this week.  If you haven’t seen it yet, here it is.

sheer perfection vellum

It is 24 sheets of patterned vellum paper.  You receive 2 of each design. There are 12 designs all up and the paper measures 15.2cm x 15.2cm (6″x6″) sheet. Have I said how gorgeous it is already???  It truly is.

You can leave this vellum as it is and layer it on your cards OR you can layer it over another colour cardstock for the colour to show through OR colour it with your Markers.

To show you how easy it is to colour this vellum, Stampin’ Up! have put together a very quick video of 2 cards that are a cinch!

SU! vellum

Here is the video.


You can receive a pack of these papers as your Free Sale-A-Bration gift with your $90 order. Now there is only 1 WEEK LEFT OF SALE-A-BRATION so don’t delay.  I will show you some more cards using this paper later in the week.  Until then, I hope you find some creating time for yourself. 🙂

Jenny

cards, Classes, Techniques

GLITTER WINDOW CLASS!

This month’s Technique class we are going to make ‘Glitter Window’ cards.  Lots of sparkle with this technique and it can be used for any occasion.

Come and try it.

WHEN: Saturday 14th March at 2pm.

WHERE: My place, East Corrimal.

COST: $15 or Free with a minimum order.

BYO: Adhesives and Scissors.

PLEASE RSVP BY THURSDAY 12TH BY EMAIL OR COMMENT HERE.


Here are the cards we will make plus a sample for you to keep.

P1160217

Look forward to seeing you.  🙂


3D projects, Blog Hops, cards, Techniques

STAMP-A-LATTE HOLIDAY BLOG HOP!!

Latte Holiday blog hop banner

Welcome to the First Stamp A Latte Holiday Blog Hop.  We all have some great projects from the Stampin’ Up! Holiday Catalogue to share with you today.  You may have just come from Narelle’s blog Here or you may be starting out here. Either way sit back and enjoy your little hop around.

Today I am focusing on the Snowflake Thinlets. I really like this Thinlets set.  They are so versatile for a number of different occasions not just Christmas.  Not only does it contain the Thinlet to create the Flip card but it has a 2 different size snowflakes, a tree, a heart, banner and 3 words (Brrr, Joy, snow).

snowflake thinlets

On to my projects.  I have made a cute little tag box and a flip card.

P1140514

Firstly, the card…

P1140516

I have used the Nordic Noel DSP with Baked Brown Sugar and Cherry Cobbler cardstock. The snowflakes stamped on the card are from the ‘Cheerful Tags’ set.  They co-ordinate so well with this die I think.  I cut a large snowflake in Cherry Cobbler and a smaller one in Baked Brown Sugar to layer them together.  The Rhinestone in the centre was coloured with the Blendablilites.

What made this Thinlet die even more useful is that recently I discovered that you can cut the centre large snowflake out.  I was watching the Stampin’ Up! Snowflake Thinlet video here and they showed this little tip.  I will show you below.

Cutting a Thinlet Snowflake.

Cut a piece of DSP or cardstock larger than the shape and cut it out with your Big Shot.

P1140456 - Copy

Turn the Snowflake to line it up in the Die the other way to cut it out completely.  I found it easier to lay the Die upside down on a cutting plate and place the DSP or cardstock into the Die rather than try and line the Die over the paper. Then you can just lay the other cutting plate on top and cut it.

P1140457

This is what you end up with. How cool!

P1140458


Now on to the box.

P1140518

Once again layering some cut Snowflakes on the top.  The greeting is from the ‘Good Greetings’ set that you can get for free this month. Check the blog post here if you missed those details.

Now on to the inside.

P1140519

I used the Nordic Noel DSP again. I added a strip of DSP on the top of the acetate lid but it doesn’t wrap right around.  I lined the bottom of the box too.  This one was the reverse side of the DSP strip used on the lid.  It holds these cute tags I made.  I just made 3 but you could easily fit lots more in there.

Here they are close-up.

P1140520

I used the 1 3/4″ circle Punch to cut the Baked Brown Sugar circles. The tree and snowflake are cut from the Thinlets.  The Star is one from the Star Framelits set.  These Banners were cut with the Bitty Banner Framelits.  Here is the back. The “to” and “from” is from the ‘Cheerful Tags’ set again.

P1140521


OK now you have had a photo overload.  I will spare you anymore so you can be on your way.  If you would like to know how I made the cute Tag Box then stop by tomorrow and I will post a tutorial.  I think I have taken up enough of your time.  You need to get on to the next blog now.  Thanks for stopping by today 🙂

Remember to stop by and comment on each blog so you can be in the running for a prize.  You will go in a draw for a Trim the Tree DSP Stack and a pack of Rhinestones (Australian Residents Only & Stampin’ Up! Demonstrators are ineligible for the Blog Candy).  Now on to Virginia’s blog Here.

If you get lost here are a list of blogs you will visit today.

  1. Leonie Schroder     http://www.stamp-a-latte.com
  2. Narelle Fasulo         http://www.simplystampingwithnarelle.com
  3. Jenny Hayward      http://www.astampingjourney.wordpress.com
  4. Virginia Hampson    http://www.stampinup.net/esuite/home/stampoutyourartwithvirginia/blog
  5. Libby Dyson           http://www.libbystampz.com

cards, Techniques

DON’T MISS OUT ON MY ONLINE PARTY!!

My Project 67-001

It’s On TOMORROW!!! Have you joined in the group yet? Here are the details. 

WHEN: Friday 19th September starting at 7.45pm.  If you can’t make it at that time then you will be able to go back and join in later.

WHERE: Through a Private Facebook Group, and you can join wherever you are in the world!  If you are not on Facebook then read below.

To join head Here to the group page and CLICK ‘JOIN’. Do this before the event so you are all ready to go.  

WHAT: There will be fun projects and games and Giveaways PLUS go in the draw to win!!!

For every $50 order you will go in the draw to win the cute little stamp from the Holiday Catalogue ‘Bearing Gifts’.

Bearing Gifts


Here is a sneak peek of one of the projects I am sharing.

P1140442 - Copy


OK, so you are not on Facebook?? Here is how you can join in.

1) Go and visit a friend who has Facebook and join in together.  You can have your own party!

OR

2) If you place an order then you can receive the tutorials for the projects I share.  If your order is over $50 you still can enter the draw for the cute stamp set.  

** If you are ordering ONLINE  (which you can do through my Online store Here  you can use the Hostess Code  WDVPNNM7

** Demonstrators and non-residents of Australia are not eligible to enter the prize.  Non-residents are not able to order through me due to Stampin’ Up! conditions.

 
So what are you waiting for ?? Come and join in. I look forward to chatting to you on the 19th!!!
 
Jenny