cards, Catalogues, Christmas, Stampin' Up!, Tutorials, Videos

WATCH IT WEDNESDAY #2

I think many people liked the idea of Watch It Wednesday when it launched last week.  Thanks everyone for your comments and messages.  Each Wednesday I am planning to bring you a video on a fun new project, or product help.

We are back for Watch It Wednesday with #2.  Today I have 2 videos for you.

Since the 2017 Holiday Catalogue has just gone live I thought I would bring you a fun video of one of the Bundles in the Catalogue.  This is the Ready For Christmas Bundle – and you just have to love Bonnie from Stampin’ Up!.  She is so gorgeous. 🙂

What do you think of this Bundle?  That little Dachshund is so cute.  I like that you can see how all the little pieces can go together.  Even thinking out of the box (Carrot???) 😉

This next video is a great one by Stampin’ Up! to see many of the products in the Holiday Catalogue.  I love how they have been putting these videos together recently for the catalogues. I would imagine they would take some time though.

I hope you liked them. Thanks for stopping by today,

Visit again soon,

Jenny

cards, Stampin' Up!, Techniques, Tutorials, Videos

WATCH IT WEDNESDAY STARTS TODAY!

Starting today I have a new segment on my blog:  Watch It Wednesday!

Each Wednesday I am going to bring you a video.  It might be of a cool stamping technique, a new card or helpful tips on Stampin’ Up! Products.  They might be from Stampin’ Up! or myself or ones I have seen on my blog travels that I thought I would share with you.  So watch out each Wednesday.  Be sure to subscribe to my blog so you don’t miss any.  You can find the link in the right side bar.

Today’s first edition of Watch It Wednesday.

I have been having a play with watercolouring lately And I have to say I am not all that great.  I came across this video from Stampin’ Up! which I found helpful.  Check out the video below on watercolouring. (NB: If you receive these blog updates via email you may need to click on the blog title and go directly to my blog to view it). 🙂


What do you think?? What that helpful?

Join me again next week for Watch it Wednesday,

Jenny

3D projects, cards, Catalogues, Christmas, Classes, Stampin' Up!, Tutorials

CAROLS OF CHRISTMAS – DAY 5!

DAY 5

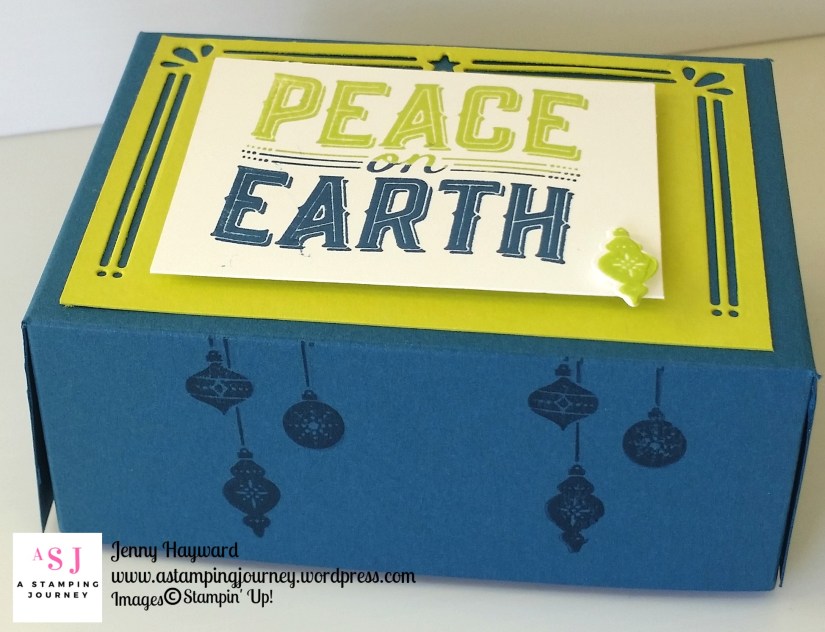
Today’s project is actually a gift box.  It is always good to have little boxes to fill with chocolates or treats.  This is not a new box for me but I will give you the instructions shortly.

I created the sentiment the same way as I did on the card from yesterday.  You can go back to that post to check it out if you like.  This box was just the right size to add the die cut frame on the top of the box.  The ornaments on the side was added as an afterthought.  It needed something there.  I probably should have thought of that before I assembled the box.  So stamping on this afterwards was a little stressful.  I held a clear block to the back of the panel when I stamped – and held my breath. That is an important stamping requirement you know. 😉  It turned out well not just once but twice.  I was so lucky!!

To make the box:

I designed this box a few years ago now.  You can find the Original post with the instructions in Metric and Imperial on this post HERE. 

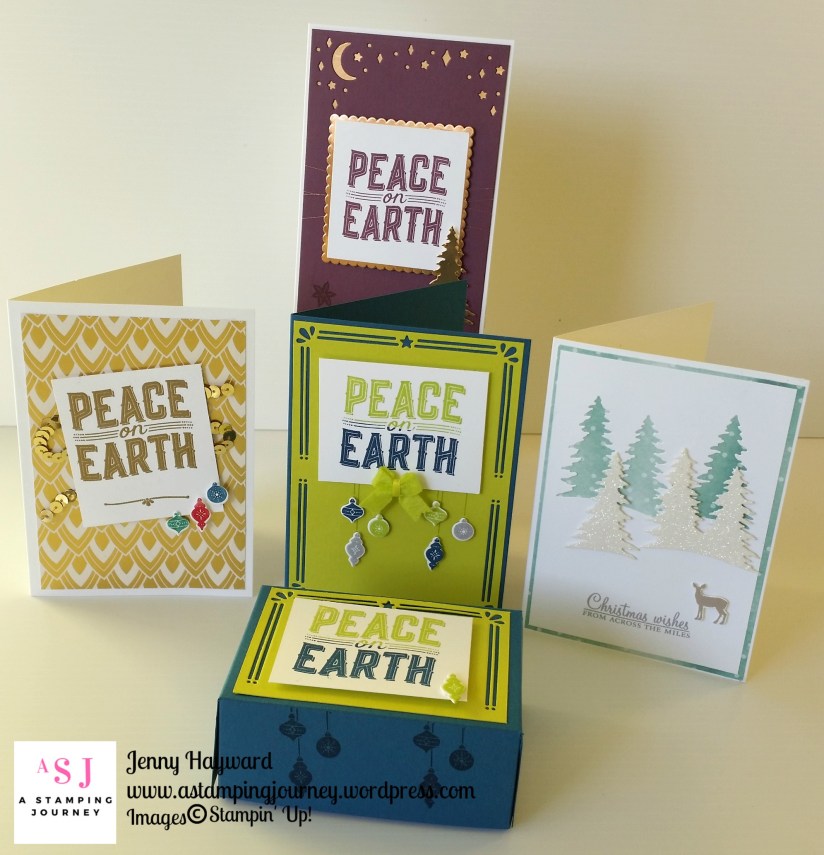
Here is the card and the box together to see what a great pair they make. Funky for Christmas do you think?? 🙂

CAROLS OF CHRISTMAS

Order the Carols of Christmas this week and receive double Loyalty points.  And receive a small gift to say Thanks. 🙂

ORDER ONLINE HERE. (Australian residents only)  Please use the HOST CODE:  KDEM49NG

If you would like a free copy of the upcoming Holiday catalogue mailed out to you then drop me a comment.  It will be on it’s way very soon.

————————-

So, what has been your favourite project from this week?? Here is a review to remind you.

I would love to know your thoughts.  Drop me a comment and I am going to pick a random winner for a special prize.

Thanks for visiting me all this week.  Do continue to drop by.  I love you to visit.

Jenny

3D projects, Stampin' Up!, Techniques, Tutorials

MORE 6″x6″ TREAT HOLDERS!

Yesterday I showed you some more Z-fold cards and they had little treat holders.  I thought I would share with you how to make those particular ones.

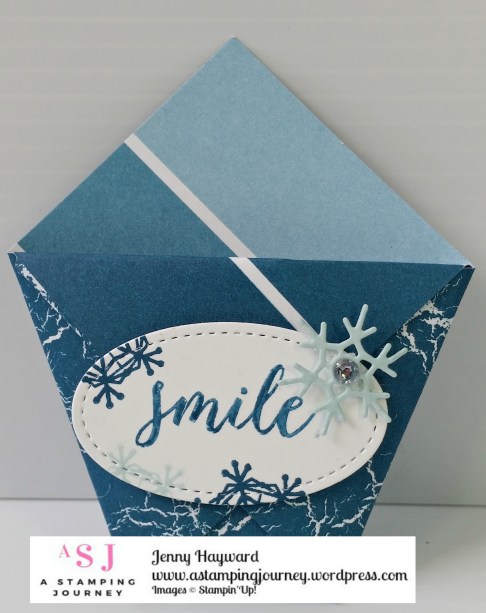
Firstly, the Dapper Denim Napkin fold.

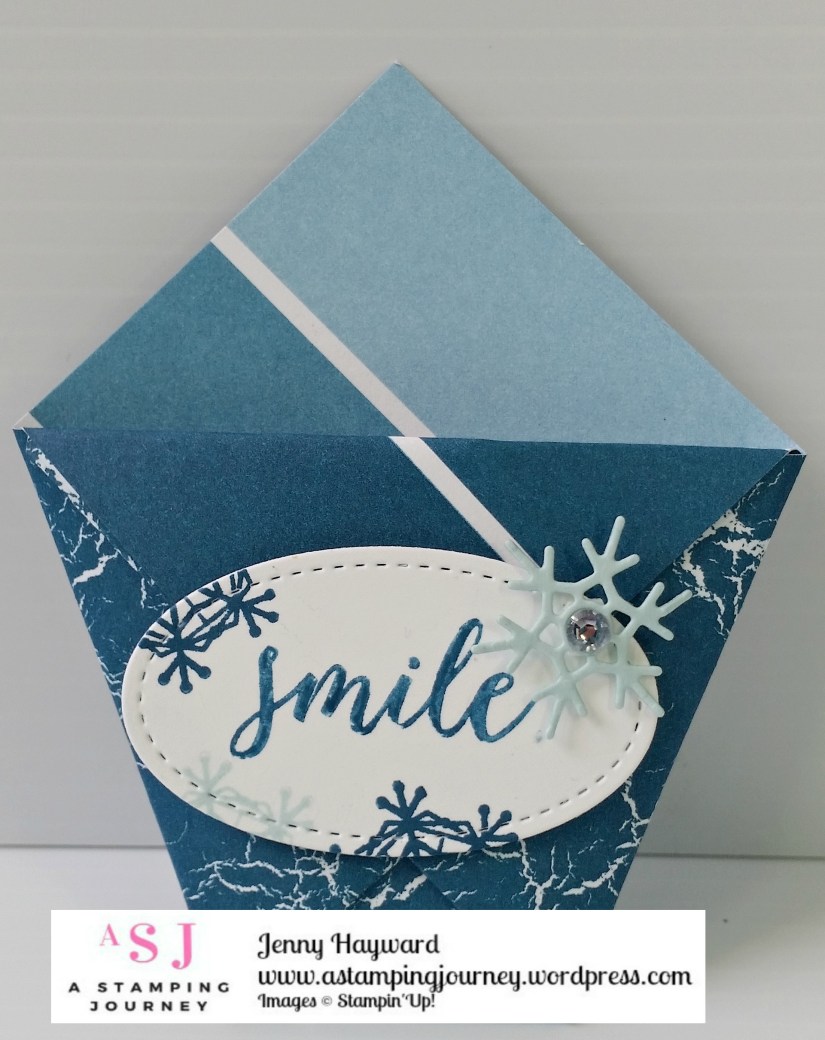
These are one of the easiest, quickest treat holder you could possibly make.  I used to make them a lot when I was younger but had forgotten about them until recently.  They are a good size to fit a small chocolate treat in.  Here is how to make them.

Of course, you can make these any size you like.  The principal is the same.  Just be sure that your paper is square.

For this particular version I used the Color Theory paper stack in which the piece measures 6″x6″ (15.2cm x 15.2cm).

NAPKIN FOLD TREAT HOLDER

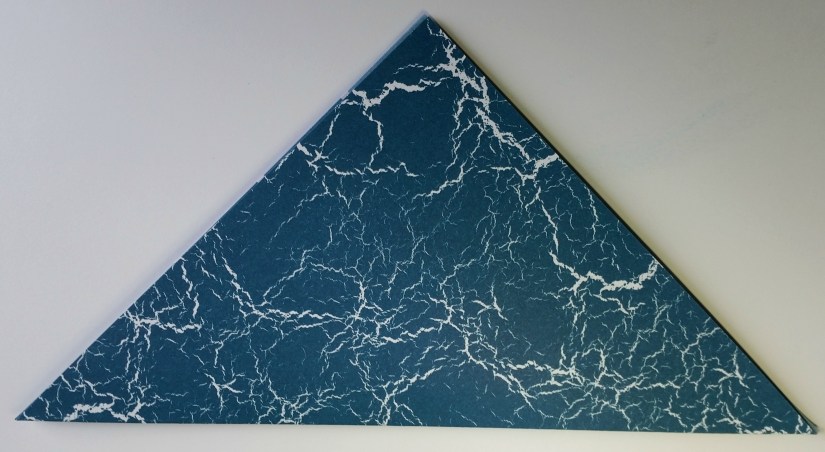
1. Fold your paper piece in half diagonally.

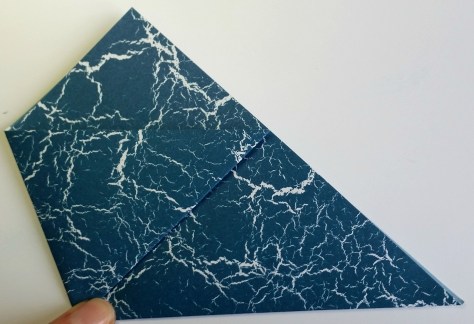
2.  With the fold towards you, take the left hand corner and fold it to about the mid point on the paper on the opposite side.  See the photo below to see what I mean.

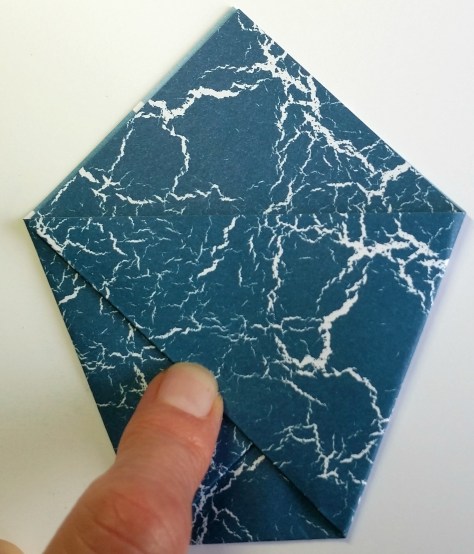
3. Fold the right hand corner so it overlaps the last fold and for the point to reach the mid point on the opposite side.  Place a little adhesive behind the folds to help it stay closed.

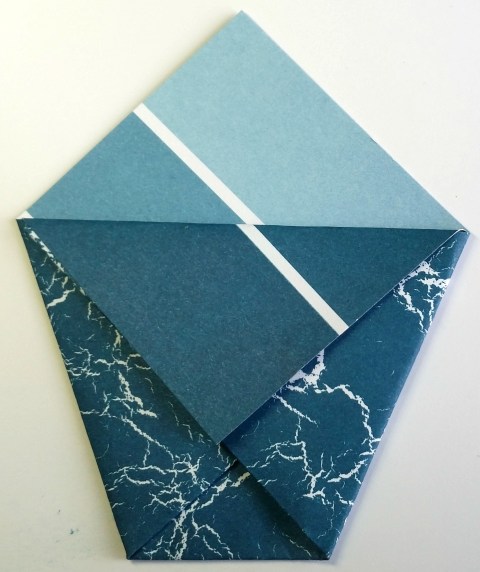
4. Take the top point and fold just one layer down over the 2 folds. Place adhesive behind it to keep it closed.

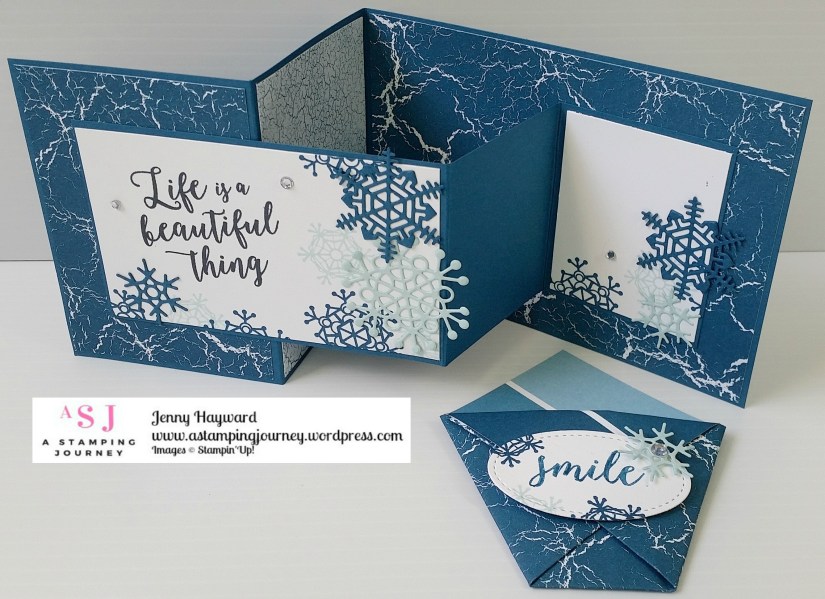
Add a tag or embellishment as you like.  For this version, I used the Dapper Denim marker over just the “smile” word in one of the sentiments from the Colorful Seasons set.  Cut that with the Stitched Oval Framelits.  I stamped a few snowflakes on to the piece too and finished it off by cutting some “snowflake” embellishments from the Layered Seasons Thinlits.

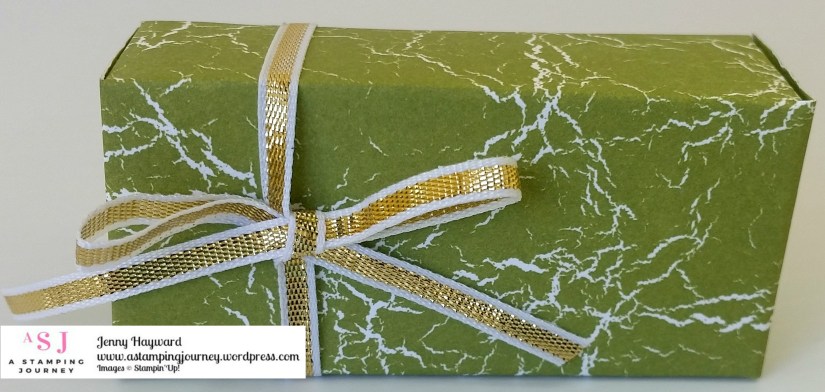
OLD OLIVE MINI BOX

This little mini box is so cute.  You could fit a lipstick or lip balm in it or a small chocolate.  The finished size measures 7cm Wide (2 3/4″),  3.2cm Deep (1 1/4″) and 2.2cm Height (7/8″).

This was made with the Envelope Punch Board.  When I went back to find the tutorial for this I couldn’t seem to find it.  I am sure I used the one by my lovely friend Tanya HERE.  When I made it up again though it was slightly longer.  The tutorial at that link is a paid Tutorial for lots of different sized boxes with the Envelope Punch Board, but for $2 it is not a bad purchase. 🙂  Have a look on Pinterest though for a few other versions.  There are larger ones but I was in keeping with the 6″x6″ paper.

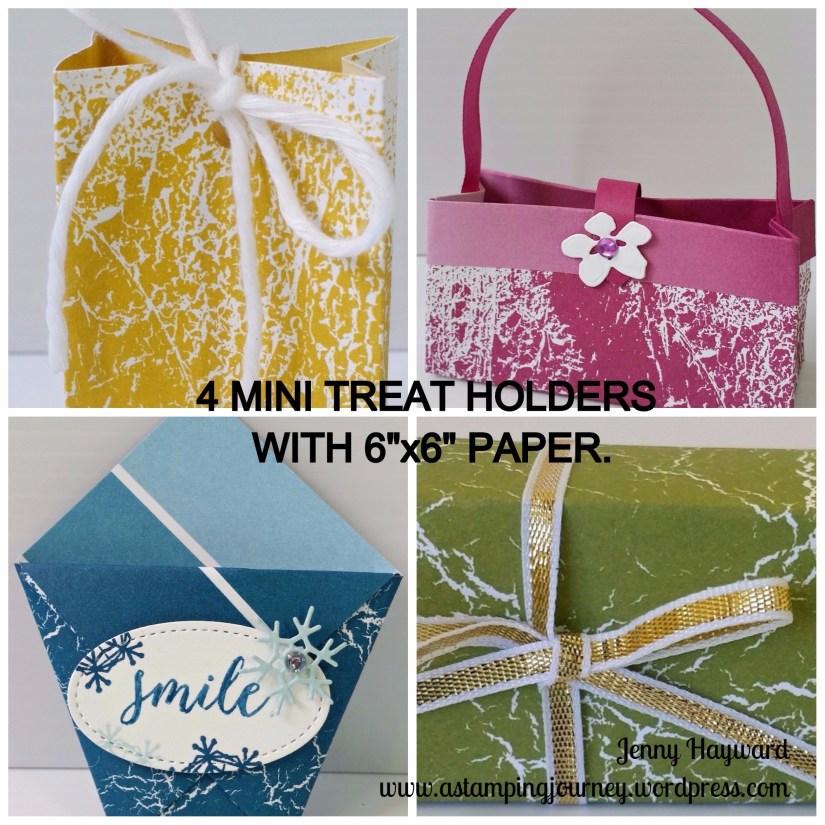
So here are the 4 little treat holders made just with a piece of 6″x6″ paper.  There are so many others too but it is amazing what you can make with such a small piece.

JUST A NOTE: If you want to see the tutorials for the Daffodil Delight bag Head -> HERE (Pootles blog) and for the Berry Burst Bag Head -> HERE.

Enjoy,

Jenny


3D projects, cards, Tutorials

AS PROMISED – MORE Z-FOLDS WITH COLORFUL SEASONS!

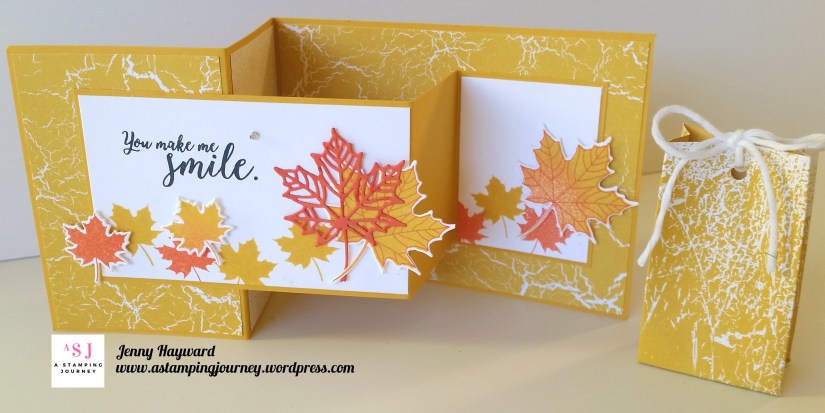
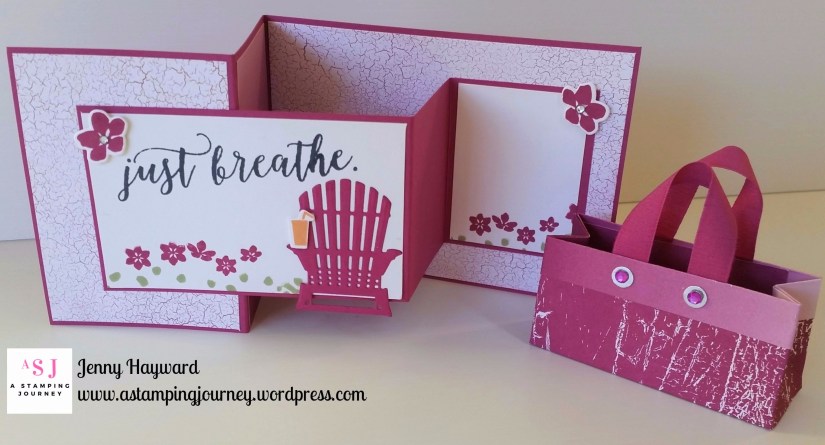
A few weeks back I shared some Z-fold cards using the Colorful Seasons bundle.  They have been HUGELY popular on my blog since.  You can see the original post HERE but these were the cards I shared then just to jog your memory.

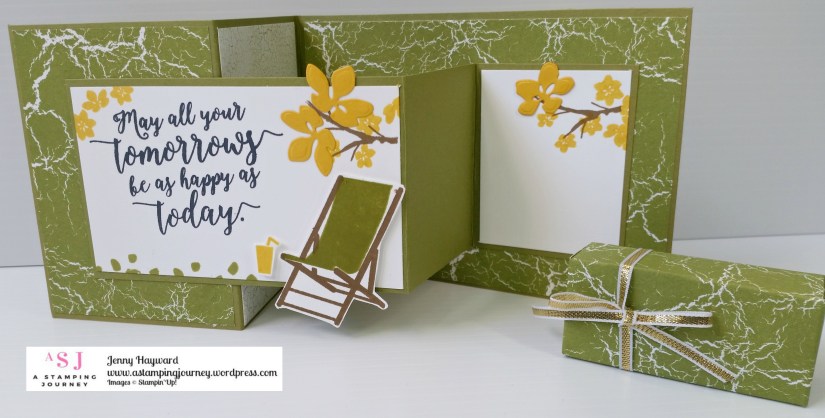
I used the Color Theory Paper Stack that has 4 colours in the set; Crushed Curry, Berry Burst, Dapper Denim and Old Olive. At the time I said I would create 2 more with the other 2 colours. I finally have got around to creating these and wanted to share them with you.  Of course,  I made different matching bags for these too.  Each of the bags/boxes I made are created with one piece of the 6″x6″ paper stack.  I will give details of those individually in tomorrow’s post.

Firstly, the Old Olive version with a Mini box. It’s a great size box to add a Lip Balm or mini chocolate.  I just kept the wrapping simple with some Gold Taffeta Ribbon.

And for the Dapper Denim Version with a Pouch for the Treat Holder.

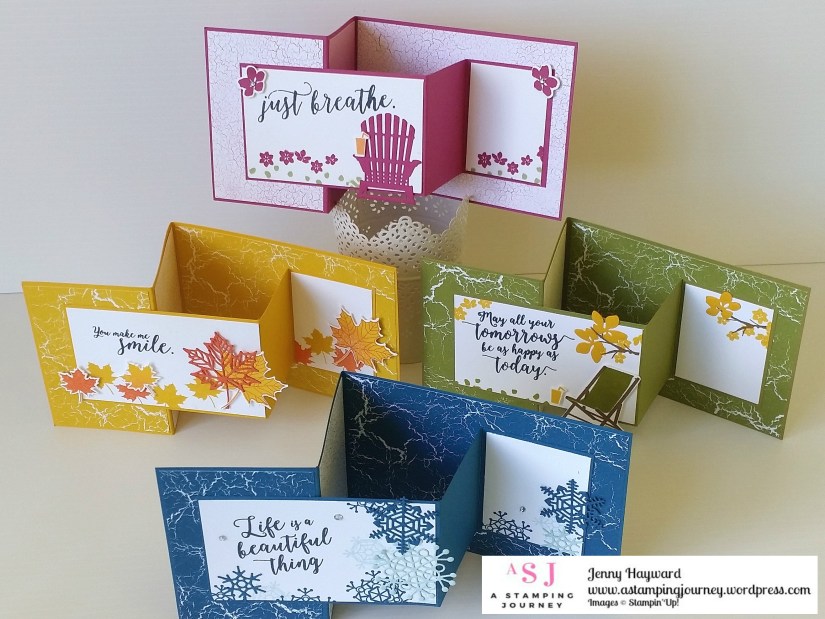
Now here are the 4 z-fold cards all together.  It’s a bit hard to capture them all in one photo but I hope you get the general idea. There is a different sentiment for each colour.

If you want to make your own Z-fold card I followed Amanda’s blog post HERE. (for Metric)  

If you are after Imperial measurements then I located a video by Dawn Griffith HERE.

For the box and the little Pouch I will post all the details tomorrow to make those, so stop on by.

I hope you like these new versions of Z-fold cards?? Thanks for visiting,

Jenny


cards, Catalogues, Classes, Stampin' Up!, Techniques, Tutorials, Videos

STARLIGHT EMBOSS RESIST CARD!

This is the 2nd project from my Christmas in July Online event that I thought I would share with you.

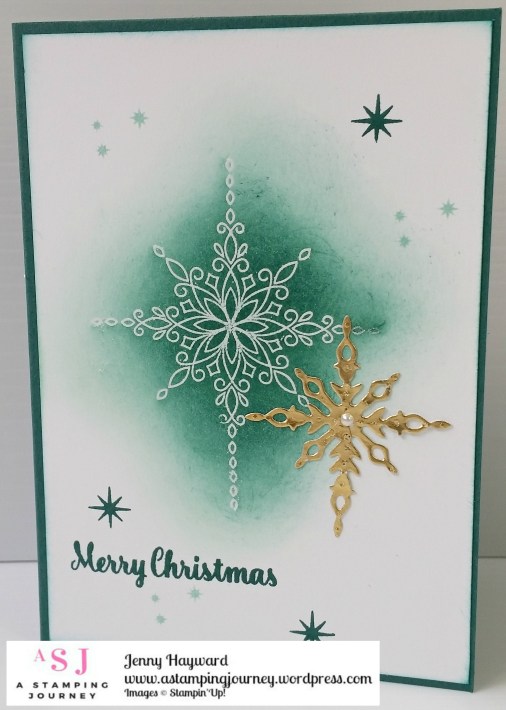
This card uses the Emboss Resist Technique.  Heat embossing itself is such a magical technique but add the ink to it and you get a WOW! effect – I think anyway.

Here is the card. I have used the Star of Light Stamp set and the Starlight Thinlits. I have a video below for you to check it out yourself.

Thanks for visiting and checking it out.  Be sure to subscribe to my Youtube channel so you get regular updates as I start venturing in to this world.  I would appreciate your feedback too for this Youtube novice. 🙂

Jenny

3D projects, Christmas, Stampin' Up!, Tutorials, Videos

STARLIGHT CHRISTMAS HANGER!

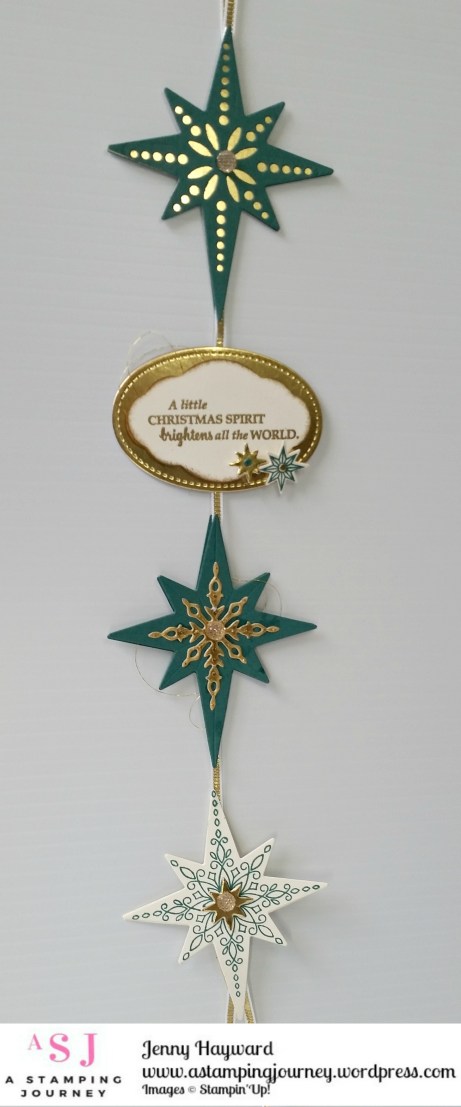
Last night I had my Online Christmas in July class.  You might have seen it advertised.  I thought I would show you the projects.  I won’t normally do that but I thought since I am celebrating Christmas in July this month – why not!!

In both projects I used the Star of Light stamp set and the Starlight Thinlits.  This first project is a Christmas Hanger that you could maybe hang from a window or in the house somewhere, even in the tree!  I have the photos and I have added a video further below. Go and check it out!

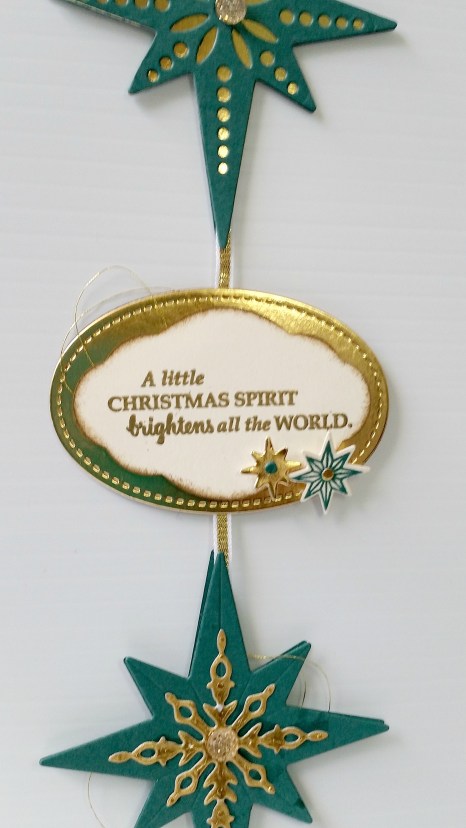
Here are a few close-ups for you to see.

Isn’t this saying beautiful.

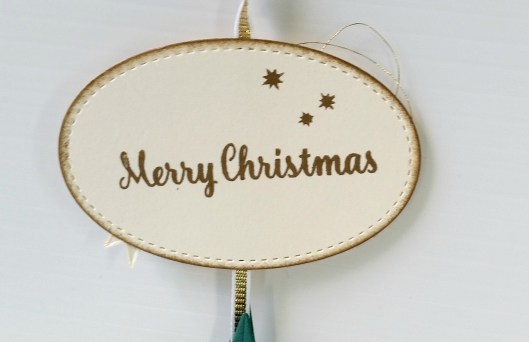
This is the back of the sentiment.  It’s good to have things on the back for when it spins around.

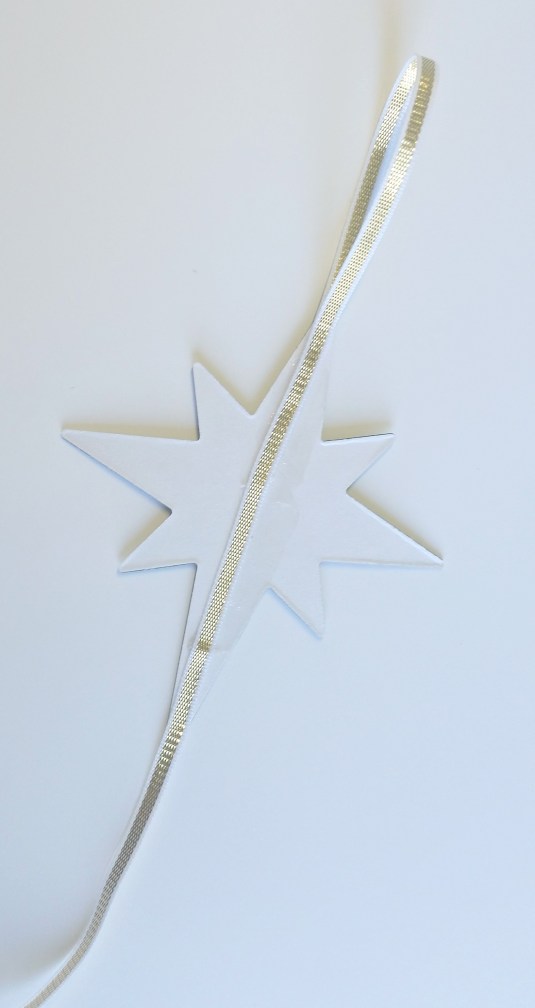
Just to show you how I attached the ribbon.  I added some Fast Fuse Adhesive to the back of the star.  Then looped over some Gold Taffeta Ribbon and stuck that down to it.

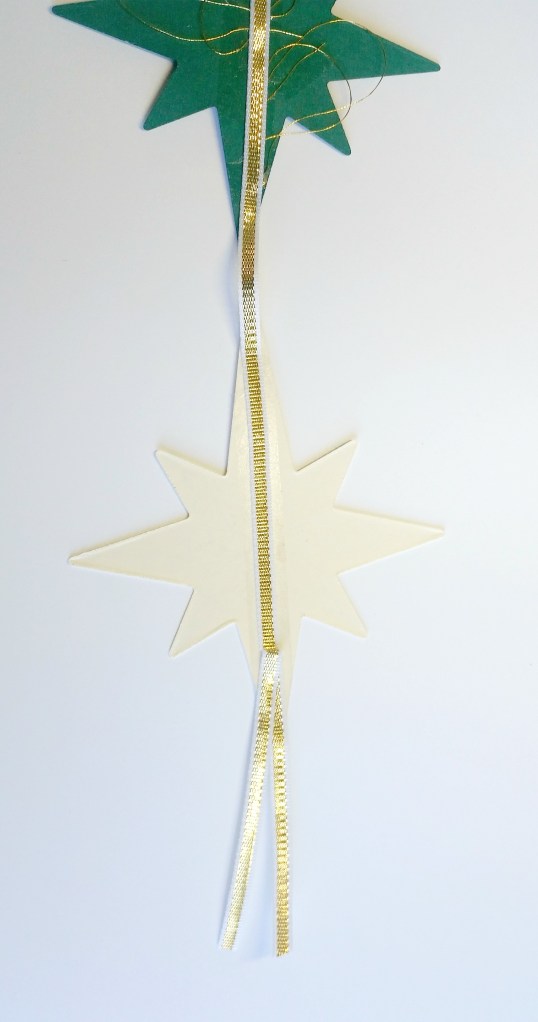
Add the Fast Fuse to the back of each star.  You can loop around some Gold Thread and stick that down too.

If you would like to see this more close-up check the video out.

I think some different colour variations are in order.

I will post the other project tomorrow.

Thanks for looking,

Jenny

cards, Catalogues, Christmas, Classes, Stampin' Up!, Tutorials, Videos

CHRISTMAS IN JULY IS STARTING SOON!

In just a few hours Christmas in July is starting.  This is a fun time when I am bringing YOU some Christmas projects via video. We will also have some games, chatter and giveaways along the way. 

I hope you  can check in at the time.  Wear your slippers, grab a drink and be there at 7.30pm (AEST)  Link is below.  Invite a friend to the event too so we can all have fun together.

If you can’t make it you can stop by later to catch up.

Here are the details to remind you.

——————————

Christmas in July is a great time to start getting inspired for Christmas.  You can join from anywhere in the world!

Here is a sneak peek for you of one of the projects I will share with you.  I think you will love it.

WHEN IS IT?? Monday 24th July at 7.30pm – 8.30pm (AEST).  

ARE YOU IN??  Come and join HERE through Facebook.  

Don’t have Facebook?  I might share some of the projects at a later date – but you will miss the fun.

If you have trouble joining the event through the above link please let me know. I can’t wait to share everything with you.

See you soon,

HO! HO! HO!

3D projects, Catalogues, Stampin' Up!, Techniques, Tutorials

USING THE ECLECTIC LAYERS THINLITS!

I have been sharing quite a few cards lately using the Oh! So Eclectic Bundle which includes the Oh! So Eclectic Stamp Set and the Eclectic Layers Thinlits.  (You can see them in the catalogue on p 133 and p213).

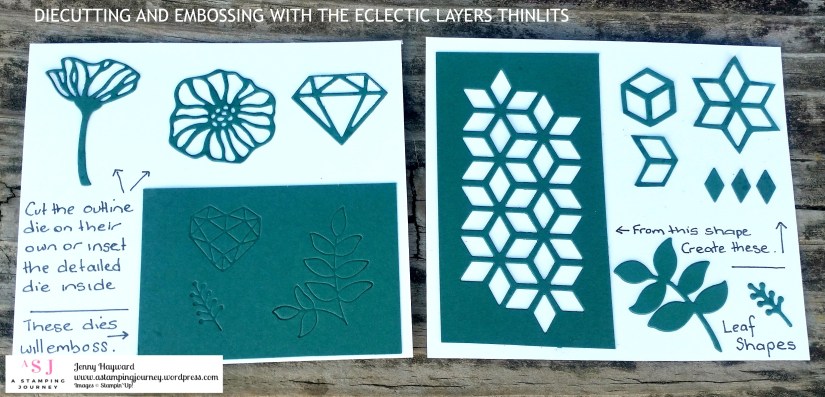
One thing with the Eclectic Layers Thinlits you may not realise is that some of the dies only emboss while others cut.  Some of the dies layer together to cut the outline and a detailed inside or you can use one on their own. It can be a little confusing  so I put together a little handy guide that is just the size to keep in the packet with the Thinlits so I can see at a glance.  I thought I would share that with you.

DIECUTTING AND EMBOSSING GUIDE WITH THE ECLECTIC LAYERS THINLITS

1) On the card on the left it shows some of the detailed shapes.  There are 2 different dies to create this shape; the outline die and a matching detailed die.  I find it easier to fit the detailed die inside the outline and cut them all together.  It is so much easier.  The outline die can be used on its own to cut the stamped image from the co-ordinating stamp set.

On this card too it show the dies that will create the dry embossed effect.   These dies will not cut.

2) On the card on the right it shows the diamond pattern.  I love the effect you get with this on cards.  Now if you are really patient you can cut sections of this diecut to create some other interesting shapes that you can add to your cards.  I am sure there are so many other combinations too.

In this Thinlits set there is also 2 leaf shapes you can cut to work with your flowers.

I hope that you might find this guide helpful.  Let me know what you think.

Hope your weekend is going awesome and you have time to steal away and create.

Jenny


3D projects, cards, Techniques, Tutorials

A 90TH OH SO ECLECTIC Z-FOLD!

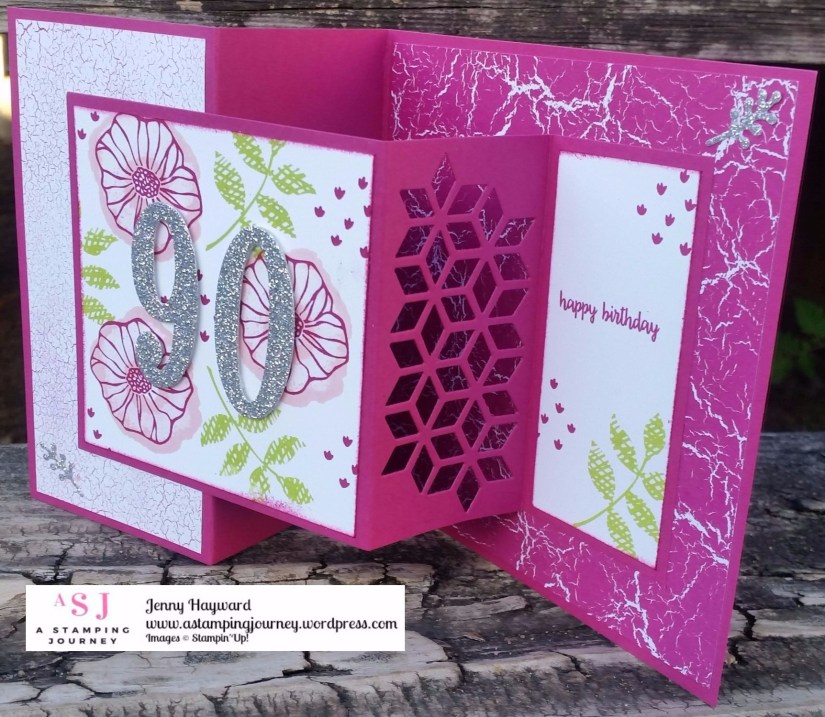
It is my Mother-in-Law’s 90th birthday today.  We had a small family get together yesterday.  I thought I would show you the card I made for her.  She had put in a request for it to be in Berry Burst, her new favourite colour. The pressure was on as she expected a grand creation!   I hope it made the grade.  There were lots of Oohs! and WOW! so I think I might have made the grade. 🙂
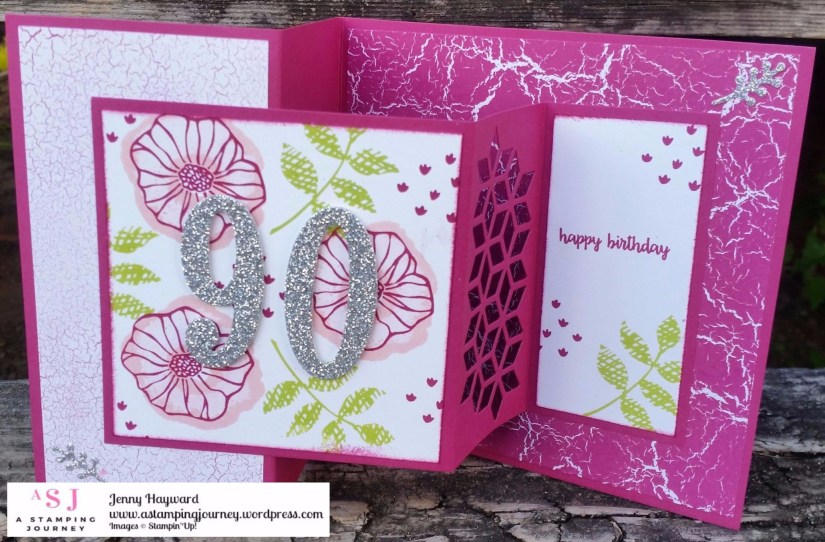
I think this is my new favourite stamp set – Oh! So Eclectic!  I have made quite a few creations with this recently which I will get to show you soon.  The sentiment is from Happy Birthday Gorgeous.

This card took me about 1/2 hour to create as I have had so much going on this week. It’s the fun Square Z-fold Cards which I have made a standard one recently.  (See that HERE).  I will share all the instructions further below.

I wasn’t sure if diecutting the diamond pattern in the side would make it too flimsy but I thought I would try it.  It worked fine and gives it a little more WOW!  The Designer Series Paper is the Color Theory Paper Stack.

SQUARE Z-FOLD CARD

Original Z-fold card is from Amanda Bates HERE.  I have slightly different measurements so thought I would share them with you.  These are in Metric.  If you are wanting Imperial measurements then rather than me converting them and ending up with lots of “sixteenth” measurements, then head to Amanda’s blog post in that link and follow those directions.

There are 2 pieces to this card.

1. Card Base:

Cut card 14.8cm x 29.7cm.  Score on the long side at 7.4cm and 14.8cm.

Designer Series Paper:

Front Panel: 7cm x 14.4cm             Back Panel:  14.4cm x 14.4cm 


2. Inner Card:

Cut card 10.5cm x 21cm.  Score on the long side at 5.2cm and 10.5cm.

Whisper White Card:

Front: 10.1cm x 10.1cm         Back: 4.8cm x 10.1cm


To Assemble your Card

1. Take your Inner Card piece and cut the Diamond pattern from the Eclectic Layers Thinlits set on your middle panel.

2. Stamp your Whisper White card pieces as you like.  I have used the Oh! So Eclectic stamp set.  Adhere these to the Inner Card piece.

3. Adhere your Designer Series Paper Pieces to the Card base.

4. Take your Inner card piece and on the front panel section (left hand end), place adhesive on ONLY HALF of the panel at the back.  Place that in position on your card base.  ** I used the Multipurpose Liquid Adhesive as this gives you a little time to wiggle the piece around in place if need be.

5. Then on the  Right Hand end of the Inner card piece, place adhesive at the back. Carefully fold up the card on the score lines as it should fold. Close the card and allow the piece to fall in to place where it should sit.  Once in position press firmly to adhere. 

Hope this is easy to follow.  Please ask if you have any further questions.

Thanks for stopping by,

Jenny