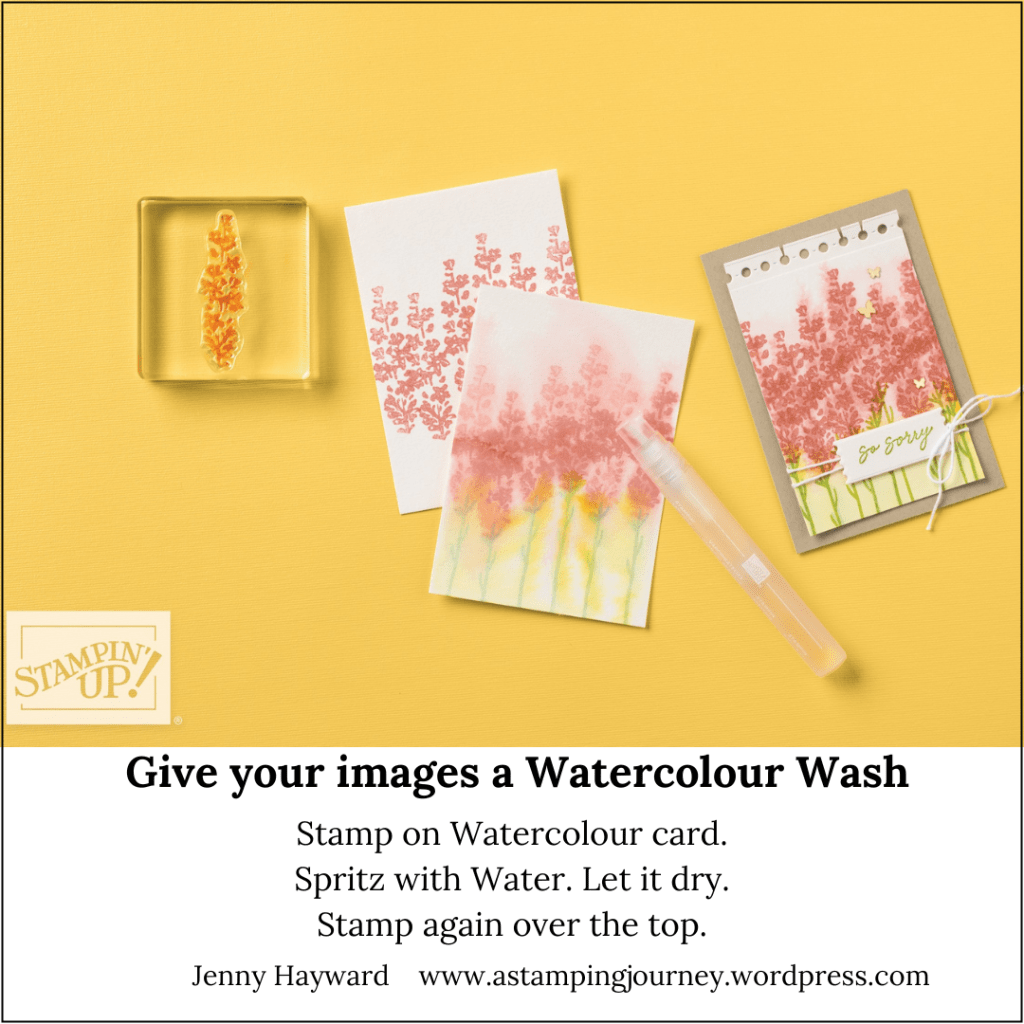
Wednesday’s WOW! #163 – A Watercolour Wash on your images.
You might have tried Watercolour Washing over your card to create a background, but have you tried giving your stamped images a wash? It creates a really soft look.
Stamp your image on to Watercolour Paper. This one uses the Painted Lavender stamp set. Spritz over the image lightly with water. Allow to dry for a short time. Then stamp over the washed area again with the same image. You will get a mottled look with a wash in the background. It looks really lovely.
Hope you get to try it out. I have added this image below so you can save it to try later.
Happy Crafting,
Jenny
In Australia and need supplies? I would love to serve you.
Head to my store -> HERE. Please use the Host Code: JTRANKN3
OR contact me and I can help you out.
Don’t forget it’s Bonus Day. When you order over $90 in one order you will receive a $9 bonus voucher to redeem in August.
I love Fun Folds. I have a cool Fun Fold card for you today AND a video to help you create it.
It’s a Front Panel Gatefold Card.
You have the Front of the card. Just like any regular looking card really. I have used the Stippled Roses Stamp Set for this one.
But lift the front and you have a Gatefold. It gives a little extra WOW! to the card. For this one I have used the Unbounded Beauty Designer Series Paper on the side panels.
Then open the 2 flaps and you have the inside. With a little stamping and a strip of the paper it adds to the specialness.
What do you think?
You can follow along with the Video to make your own.
The measurements are included in the video. Stop or pause or rewind. If you prefer the written version I’m sending that out in my newsletter next week.
If you are not a subscriber to my newsletter please consider it.
I send out a Free Tutorial each week with a bonus one when you first subscribe. You can find the tab to subscribe in the right hand column on my blog.
Hope you get to make one.
Happy Crafting,
Jenny
Need some supplies and you are in Australia?
Contact me directly
OR
Head to my store -> HERE. Please use the Host Code: R4QU9DB3
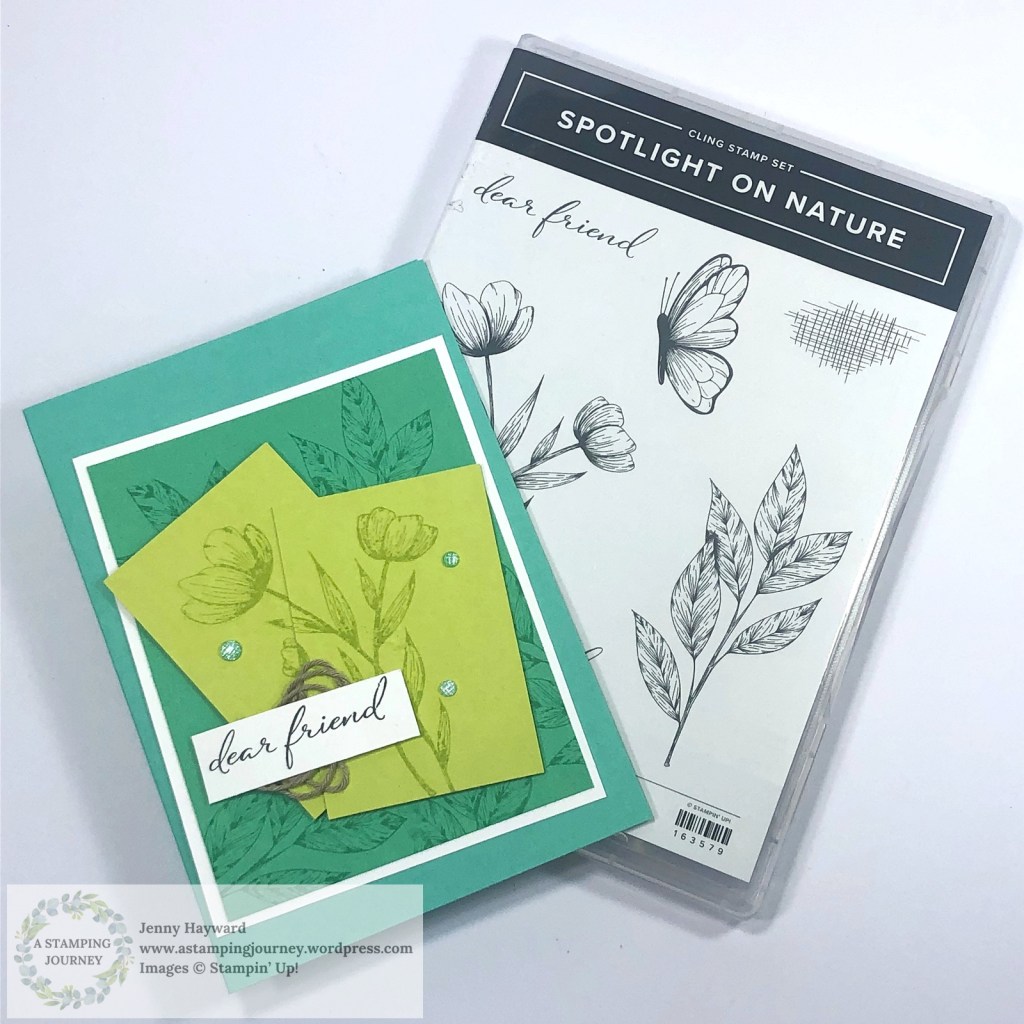
Another Spotlight on Nature card for you. This is one of the cards we created at our Extra Stamping event at Onstage back in March.
It is created with 2 of the new In Colors too. The Shy Shamrock and Summer Splash. The other green is Granny Apple Green. I do love the stamping of the leaves on the background green.
Now I do love green. It is my favourite colour BUT I needed to add an extra white card piece between some green. It was all getting lost. I think that makes it POP a little more.
For the stamped flowers position the two Granny Apple Green pieces how you would like them and then stamp the flower on both pieces at the same time while they are together. It is so much easier than trying to line it up and getting the angles of the card right.
I love with this set that you can keep it simple or step it up. It is so versatile – and so lovely!
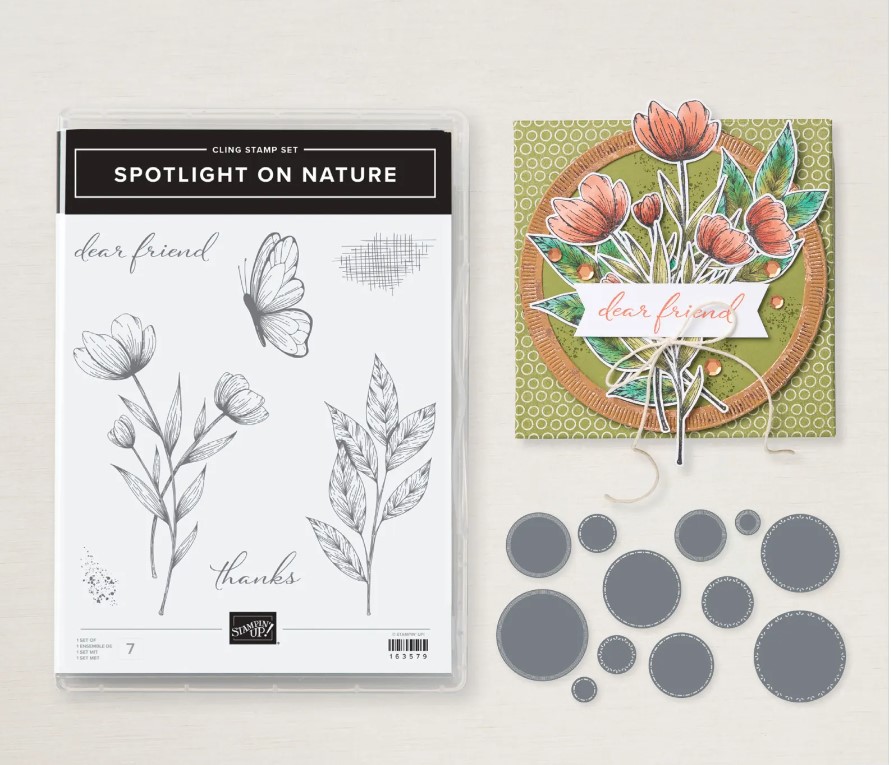
Have you seen the Spotlight on Nature Stamp set? It comes as a Bundle with the great circle dies or you can buy each of them separately. But just remember you save 10% by getting them as a bundle.
I do hope this is one on your list though. It really is pretty.
Happy Crafting,
Jenny
If you need supplies and you are in Australia I would love to serve you. You can contact me directly.
OR
Head to my store -> HERE. Please use the Host Code: R4QU9DB3.
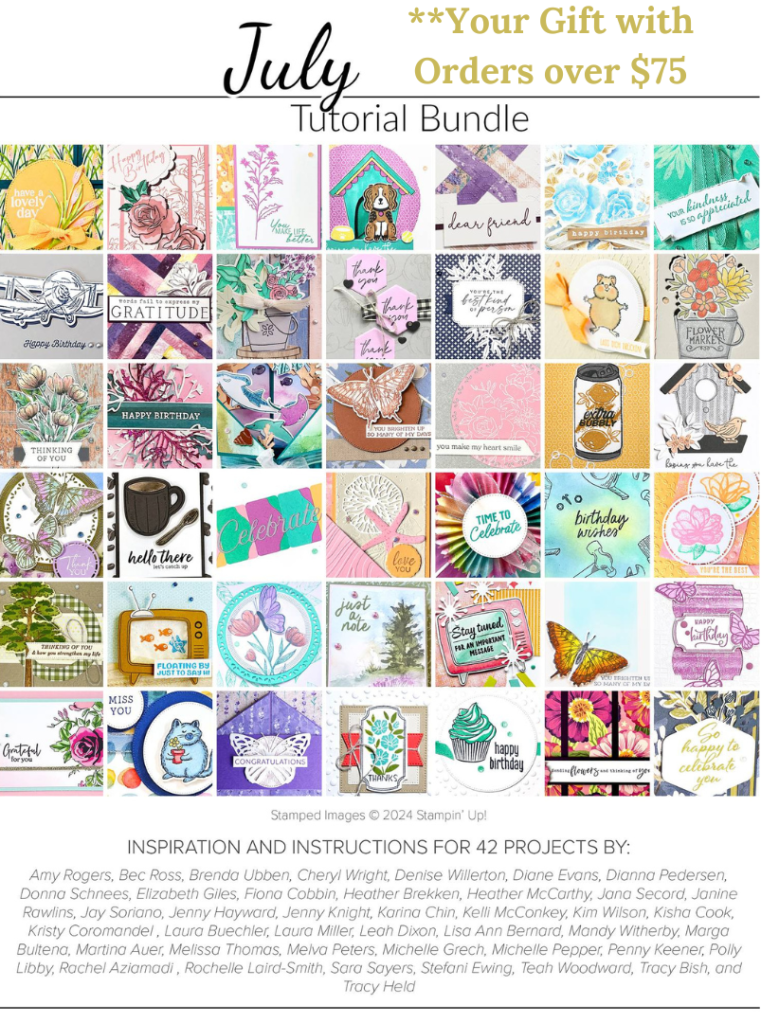
As a Thank You if your orders over $75 receive the Tutorial Bundle of over 40 projects. That will keep you inspired all month and longer.
The new catalogue began this week. Woo Hoo! Have you checked it out yet?
This week I was part of the Crafty Collaborations Beginners Stamping series. It’s a large number of videos with tips for the Beginner crafter. They may even help the “well-seasoned” stamper too.
You can follow along with these videos -> HERE. Take your time and work through them. You can come back to them anytime too. AND it’s free!
It will take you through the basics of the types of stamps, inks, adhesives. Also, Cutting and scoring your cards (which I created a video for). That’s always tricky! Then goes through some simple techniques to try.
Head over and check in on it.
As part of this series there is also a number of videos with some more Simple designs. Simple stamping can be a challenge even for the more advanced stamper.
Continue on with that video series and you will find them.
I have added my video here for you to check out. This one is Cutting and Scoring your card in Metric.
I have added the Imperial Cutting and Scoring too as I know many of my followers here are from the US.
This is the project I created for my Simple stamping card.
I will add my video below here on the Simple Stamping project you can create. This simple card is above. For the Stepped Up version check below.
I created a Stepped Up version. Adding a little more texture and elements. Of course you could go way more avid but a few additions can really add to your project already.
I have used the Spotlight on Nature Stamp set.
You can see the added texture and elements here. I think a little glitter should be added to the butterfly.
So with a few steps you can take your card to the next level.
This Spotlight on Nature stamp set is really gorgeous for any level of crafter.
It does come as a Bundle too with some gorgeous shape dies great layering.
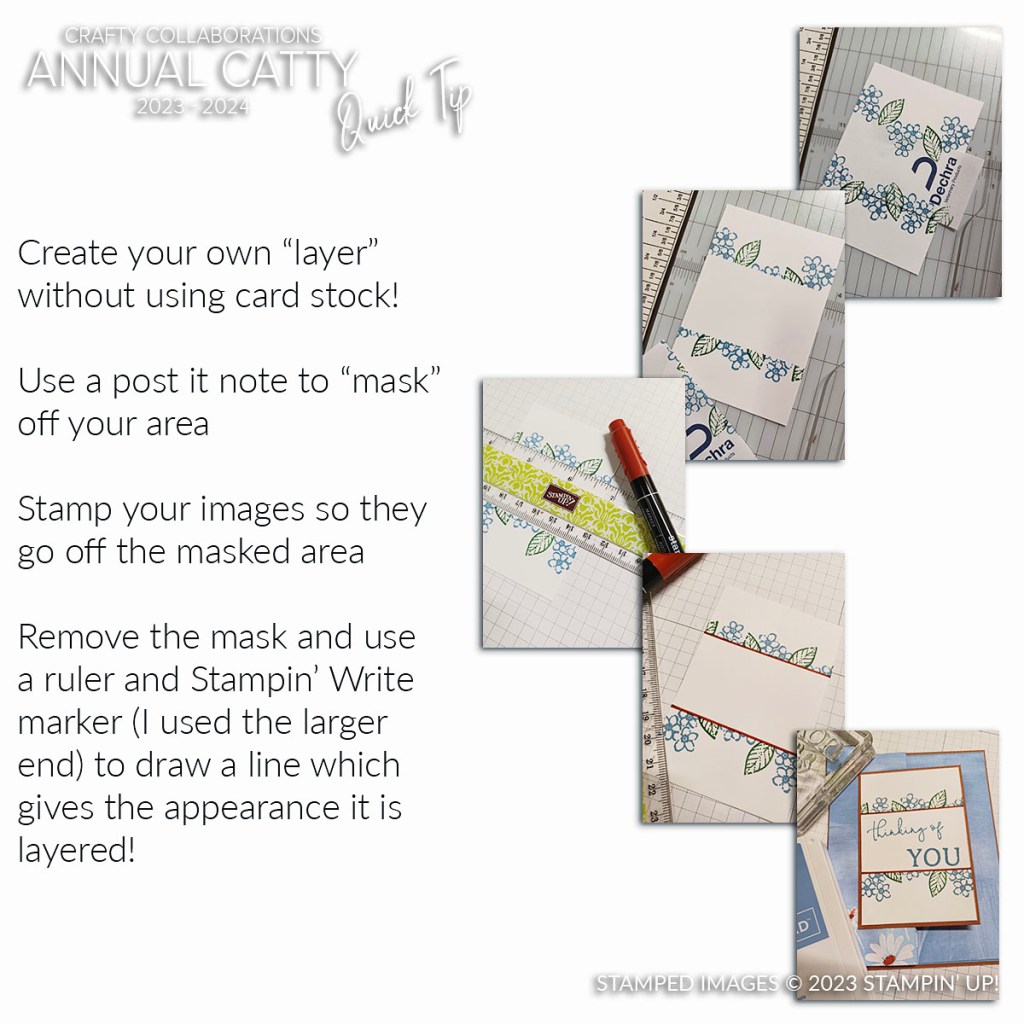
Wednesday’s WOW! #155 – Create a layered look with Masking.
Here is a way to create a great effect on your One Layer cards (as in just a card front) by giving the look of layers using a mask. See how.
To create the look firstly use a post it note to mask off an area. You can position it across ways or even at an angle.
Stamp your images so they stamp over the edge of the masked area on to the card. Remove the mask. You could leave it as it is and stamp your greeting BUT to give the look of a layer. Use a ruler and Stampin’ Write Marker (Thick Tip) and draw a line. This highlights the section.
What do you think? How about trying this on a project and see how it looks.
Happy Wednesday.
Jenny
Need some supplies and you are in Australia? I would love to serve you. You can head to my store and shop Online -> HERE. Please use the Host Code: DGASD34B
Wednesday’s WOW! #154 – How to get a crisp stamping with Photopolymer stamps.
Sometimes when you stamp with Photopolymer stamps you don’t get the crisp stamping result that you would like. Do you find that?
I have particularly recently BUT I have a couple of tips for you to be sure to get a better stamping.
Firstly when stamping give your Photopolymer stamps a clean with the Stampin’ Mist and Scrub. This will remove some of the residue from production. You could use an eraser too.
Then when you stamp be sure to have something underneath your card. The Piercing Mat or even a catalogue. It will give you a little “bounce” and your stamped image should be much more crisper.
Did you find that helpful?
Happy Stamping,
Jenny
Are you in Australia and need supplies?? I would love to serve you.
Contact me directly
Or Head to my store -> HERE and order. Please use the Host Code: 9U6Y3AFW
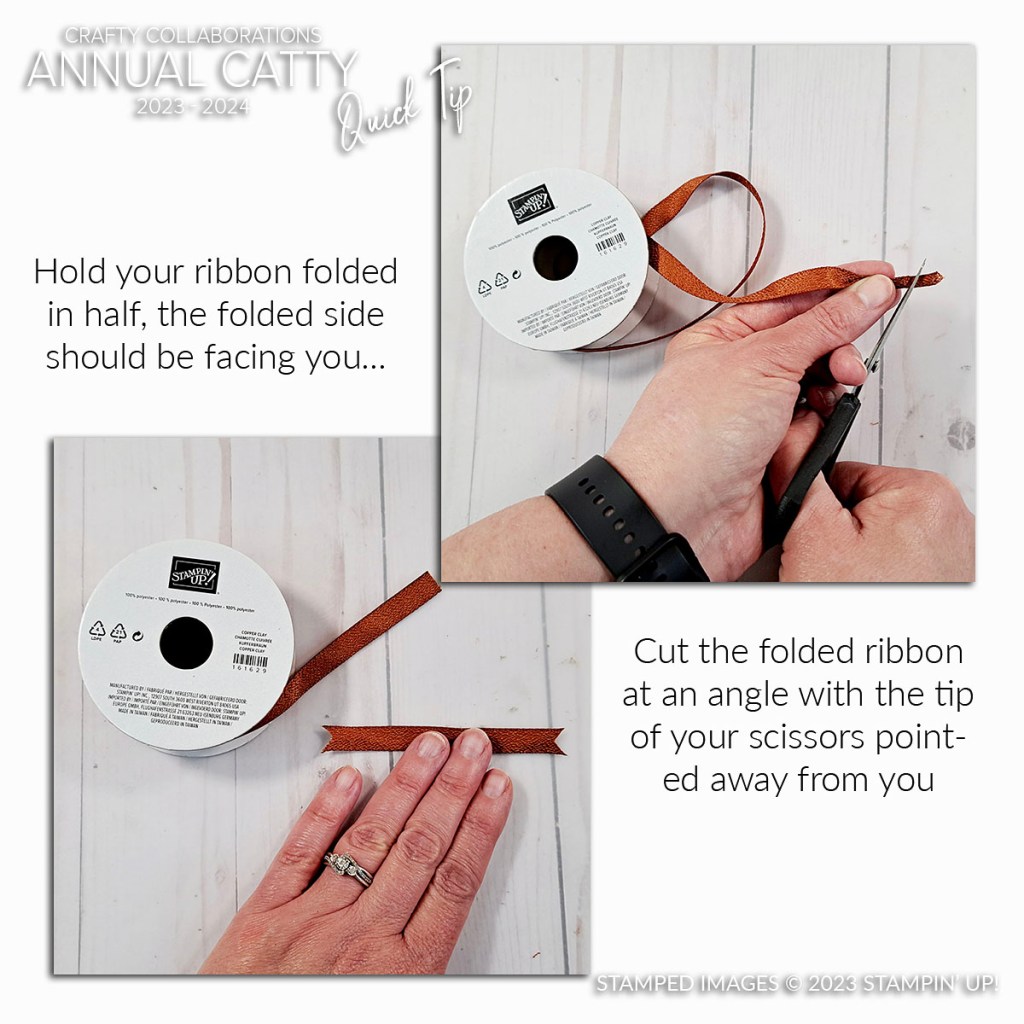
Wednesday’s WOW! #151 – Flagging your Ribbon ends.
Do you like to flag the ends of your ribbon? Flagging is cutting the ends to a ‘V’ Point. Don’t try and cut the points individually. They never turn out even…
Here is a tip for you to “flag” those ends. Fold the sides of one of the ends of the ribbon together in half and make one snip to a point. The longer part – the point is towards the end of the ribbon. It makes them cut so much easier.
Hope this helps you.
Happy Crafting,
Jenny
Need some supplies and you are in Australia?
You can head to my store -> HERE Please use the Host Code: R663PWDW.
WEDNESDAY’S WOW! #150 – Outline your dies on the card insert.
Firstly – 150 WOW’s! That’s a lot of tips and tricks with your cardmaking that I have shared over the last few years. I hope they have been helpful for you. If you have missed some you can do check the “TAGS” in the side bar on my blog for Wednesday’s WOW! and it will come up with a lot of them.
Thanks for following along with me.
For today’s tip. Do you find when you take the dies off the card sheet you can never get them back right. It’s a bit of a game of Tetris.
So BEFORE you take them off, grab a pen or pencil and trace around the dies. Then you can easily put them back in place and it will show you if any are missing. Sometimes I add a magnetic sheet to my die card so you could trace around your magnetic sheet too if you do that.
Happy Crafting,
Jenny
Do you need some crafting supplies and you are in Australia?
You can shop in my store -> HERE. Please use the Host Code: R663PWDW
OR contact me directly. I would love to help you out.
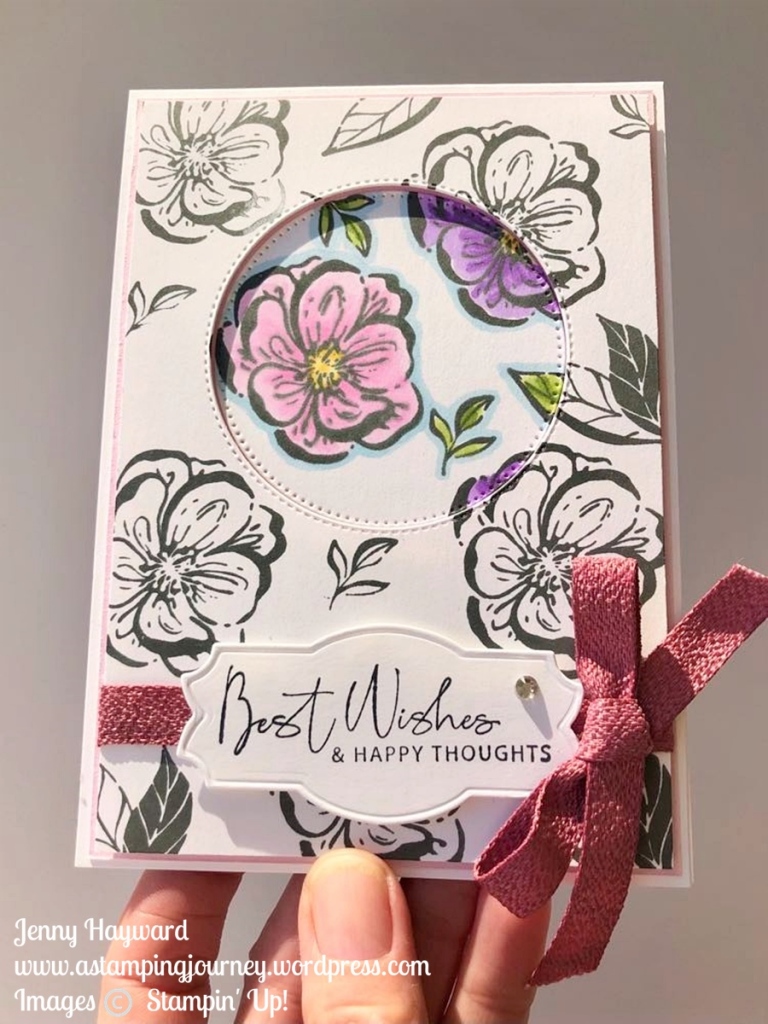
I’m back with another video for you. This one is using the Spotlighting Technique. Have you tried it?
The Spotlighting Technique is highlighting a part of an image with colour. The part highlighted can be created by diecutting any shape eg circle or square. The section can be raised up or sunk below the card mat.
You can see the video below to see how it is done. I share another version too in the video so stay tuned.
This is the card I created using the Irresistible Blooms. The sentiment is from the Nature’s Prints Stamp set and diecut with the Natural Prints dies.
It is a standard size card base. I have cut the card sheet down vertically for a different look.
The exact measurements I will send out in my newsletter this week. By the way, Are you on my newsletter?? You can head to the side bar, there is a tab there.
I will let you go and watch the video now. I hope you get to make one.
Happy Crafting,
Jenny
Are you in Australia and need some crafty supplies? You can shop in my store -> HERE. Please use the Host Code: QXJQDQ9U Or contact me directly.