3D projects, cards, Catalogues, Stampin' Up!, Techniques, Videos

BOTANICAL BUTTERFLIES WEEK BONUS – W CARD!

I have a bonus project to share with you today for Botanical Butterflies week.  It’s a ‘W’ card.  I have seen a few of them around and was wanting to try one.  We made this one at our team meeting on Wednesday night and I thought it was good timing. So you get a bonus project.

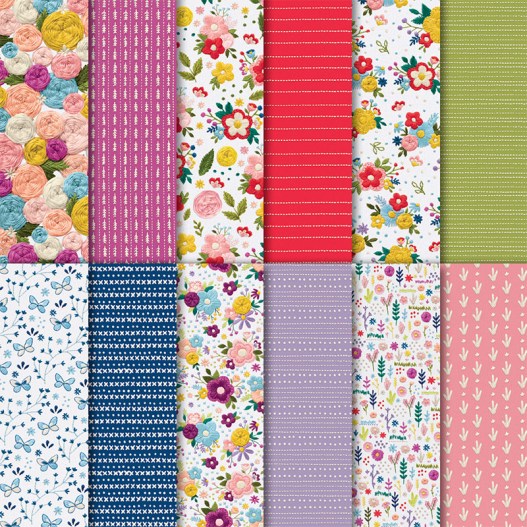
Don’t look closely.  It was made in a rush at the meeting.  There are lots of parts to this card but it will give you an idea.  And can’t beat those pretty butterflies from the gorgeous Botanical Butterflies paper.

This is the card closed.  Tied up with some of the lovely soft Lemon Lime Twist Organdy ribbon.  The sentiment is from Incredible Like You and the paper on the front is from the Gingham Gala Paper. 

This is the inside of the card with more pretty butterflies.

I won’t give you the details of how to make one as you can check it out for yourself.  The card was CASED from Jan B cards.  HERE is the link to her Youtube video.  It’s long one.  It goes for 47 minutes so be prepared with a drink in hand and take notes.  The card is very easy though once all the cutting is done and you can decorate it anyway you like.

What could you do inside? Some stamped and cut images, a baby card, maybe a 4 letter name. Endless ideas to work with.

Have fun with it.

I hope you like the Botanical Butterflies week.  The ideas I have shared could work with any paper.  This gorgeous paper is Free though.  Can’t beat that. 

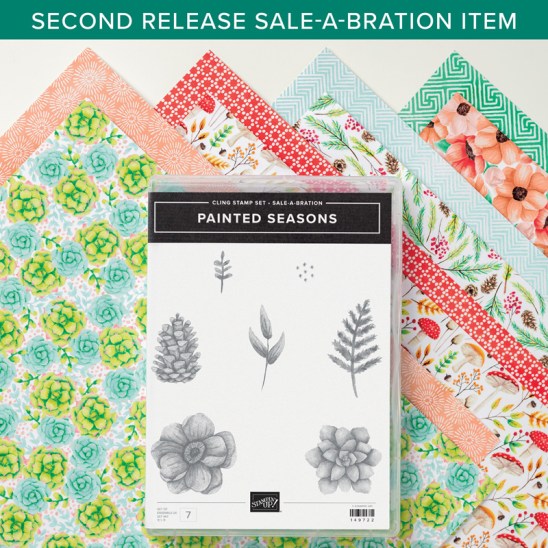
This is a Sale-A-Bration choice for orders over $90.  You could choose the gorgeous Painted Seasons paper or any of the other choices.  You only have one week left so get on it.

In Australia? You can order in my store -> HERE.  

Have a great weekend,

Jenny

 

cards, Catalogues, Stampin' Up!, Videos

WEDNESDAY’S WOW! #60 – LET’S LOOK CLOSER AT THE NEEDLEPOINT NOOK SUITE!

I don’t know about you but I am not a needlework crafter.  I will mend some pants and I have sewn curtains but when it comes to the finer points of embroidery and cross-stitch I don’t have the patience for that.  So I wasn’t taken with the Needlepoint Nook Suite in the Occasions Catalogue initially.

For Wednesday’s WOW! #60 I thought we would have a closer look at this suite.  I have to say it has me intrigued now.  You have to have a closer look at the Needlepoint Nook Designer Series Paper. It is actual photos of embroidery.  They are beautifully done.  You can see the original work in this video below.  Take the time to check it out and have a closer look a the Needlepoint Elements Framelits Dies.  

Below is the Needlepoint Nook Bundle containing the Needle and Thread stamp set and the Needlepoint Elements Framelits Dies.  The stamp set is a Distinktive style of stamp so you will be able to achieve more depth in the image when you stamp it to make it more realistic looking.  And it does do that.

If you see the dotted die in the bottom right corner you will notice with the dots it won’t cut your card but create a “stitched” effect on your cards which is great for backgrounds.  Check them in the sample cards at the bottom.

The Needlepoint Nook DSP has realistic “embroidered” images on one side and on the other side is a simple stitched print.

Samples courtesy of Stampin’ Up! Aren’t they pretty?

So now if you are like me and not in to needlework you can get the look of it with the paper and stamps.  How clever!

You can grab the Needle and Thread Suite which includes the Stamp set and the dies for $80 AUS.  Add a pack of the Needlepoint Nook DSP for $19.25 and you can grab your choice of Sale-A-Bration item.

See them all in my store now -> HERE.

Shop with me in Australia. Please use the Host Code: JQGFKFT9

Thank you for your order. I like to send a little something out when you order so be sure not to mark your order anonymous.

Have a great day,

Jenny


cards, Catalogues, Sale-A-Bration, Stampin' Up!, Videos

WEDNESDAY’S WOW! – #57 PAINTED SEASONS!

In a previous post a few days ago I told you about the new Sale-A-Bration choices now available.  I mentioned very briefly about the gorgeous new Painted Seasons Bundle. Today for Wednesday’s WOW! #57 I thought we would have a little more look at it.  I have just started playing with it.

The gorgeous Painted Seasons Designer Series Paper is so pretty.  It’s really hard to see it clearly online.  The lovely Painted Seasons stamp set has a number of flower and leaf images to build your project.  You can add any sentiment set you like to it to create a card for any occasion you like.  I think this set would be great for the pretty feminine cards, the hard-to-make masculine cards and even Christmas. What a versatile set.

Here is a video from Stampin’ Up! to give you a closer look.

What do you think?

Here are the samples she shared in this video.  It was hard to catch them clearly.

THE BIG QUESTION – HOW DO YOU GET THEM??

The Painted Seasons stamp set and the Painted Seasons Designer Series Paper is now available FREE as a Sale-A-Bration choice with orders over $180 AUS. 

Shop in my store -> HERE and then when your order is over $180 then choose this as your option.  Please use the HOST CODE: TTBQMGUT  You will also receive the Tutorial Bundle of 10 exclusive projects emailed out to you after you place your order. And of course a little Thank You card and gift.

The Four Seasons Framelits Dies will be available for you to order from 1-28th March.  They will be $48 AUS.  

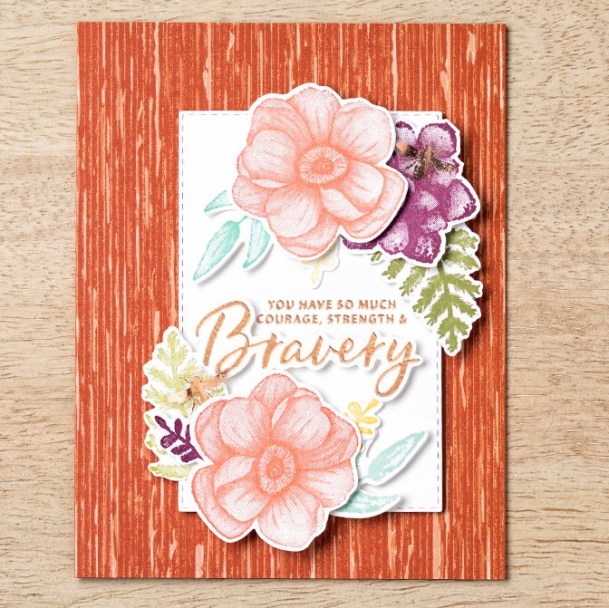
Here we have another sample with this gorgeous bundle courtesy of Stampin’ Up!

So what do you think of this gorgeous new Sale-A-Bration choice?  I think it is lovely.  I will share some projects I have made with it soon.

Thanks for visiting,

Jenny

Catalogues, Stampin' Up!, Techniques, Videos

WEDNESDAY’S WOW! #55 – TIPS WITH THE FLORENTINE FILIGREE BUNDLE!

For Wednesday’s WOW! #55 today I thought I would look at the Florentine Filigree Bundle in the 2019 Occasions Catalogue.  I have been fascinated with it every time I see it in the catalogue.

The Florentine Filigree Thinlits die is quite fancy and the Florentine Filigree stamp set has a number of different medallion style stamps.

When I looked at the samples though I was quite fascinated with them.  On the one on the left those flourish style images were stamped in the little gaps in the diecut .  How can you get them so lined up and so neat?

The smaller card on the right looked like it had Texture Paste used with the diecut.

I came across a video with some great tips and it shows you how to easily create these cards.  I thought you might like to see the video.

Here are you are below.

What do you think? Are you going to add this bundle to your wish list now? It’s a gorgeous one isn’t it.

You can shop for this in my store now -> HERE. Please use the Host Code: Q6XB6QR6  It is $69.25 AUS 

Add a little more to bump your order up to over $90 and you can choose a Sale-A-Bration item too AS WELL as receive my Tutorial Bundle for 10 exclusive projects.

Thanks for visiting me today.

Jenny

cards, Catalogues, Stampin' Up!, Videos

WEDNESDAY’S WOW! #52 – LOVELY LATTICE 3 WAYS!

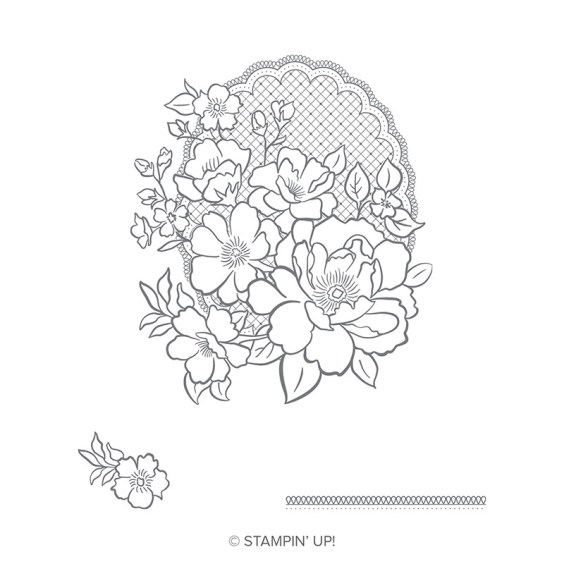
Wednesday’s WOW! #52.  Today I thought we would take a look at this gorgeous stamp, the Lovely Lattice.  This is a Sale-A-Bration choice.  It’s such a beautiful image and so nice to colour but also as I show, you can leave it white.  I know I am not great at colouring in so I like that idea.

Isn’t this pretty?  I have a video below so you can have a closer look.  And had you noticed the little scallop type line image.  I had completely missed this stamp and it would really add extra detail to your cards.  Don’t forget the little single flower image too.  See the video below.


Let’s have a closer look at the cards.

This one above is so pretty coloured with the Stampin’ Blends.  You don’t need too much more with it.  The sentiment is from Healing Hugs from the Annual Catalogue. And,look at the white card – Stitched Rectangle Dies. 🙂

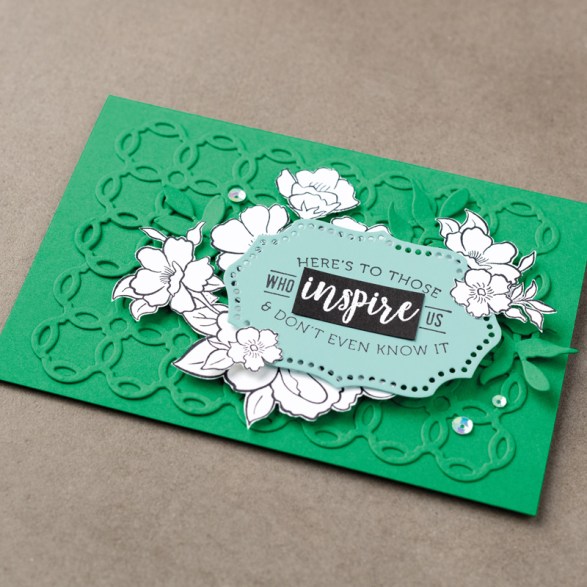
You know what I like about this card above?  I like that it isn’t coloured and looks so striking in white against the green.  On this one the flowers are fussy cut.  The diecut background and sentiment shape are from the Rose Trellis Thinlits Dies in the Occasions Catalogue.

This card above is so pretty coloured in Grapefruit Grove. See, the Scallop line stamp makes a nice background.  The sentiment is from the Well Written Framelits Dies and the Well Said stamp set.

The Lovely Lattice is a free choice for Sale-A-Bration with orders over $90.  This set could be yours. 🙂

Shop in my store now -> HERE.  It’s shipped directly to you anywhere in Australia. Once you have done your order select your Sale-A-Bration set.  These orders will also receive a Tutorial Bundle for 10 different projects FREE!

Please use the Host Code: FYQHM4CK

Thank you for your order.  Please be sure not to mark it anonymous as I can’t send your Thank You card to you.

Jenny


3D projects, cards, Catalogues, Christmas, Stampin' Up!, Tutorials, Videos

WEDNESDAY’S WOW! #50 – CREATING A PYRAMID CARD (AND MAYBE A GIVEAWAY!)

Here we are Wednesday’s WOW! #50.  I really didn’t even consider I would get to that number when I first started just this year.  How fun it has been sharing fun projects and videos with you.  Have you enjoyed them??  Today for #50 I have a special project that I have been sitting on for a few weeks waiting to share with you – and Today is the day! And since it is such a big milestone I thought I would have a little giveaway on my blog.  It’s been a while since I have done that so be sure to read all the details below.

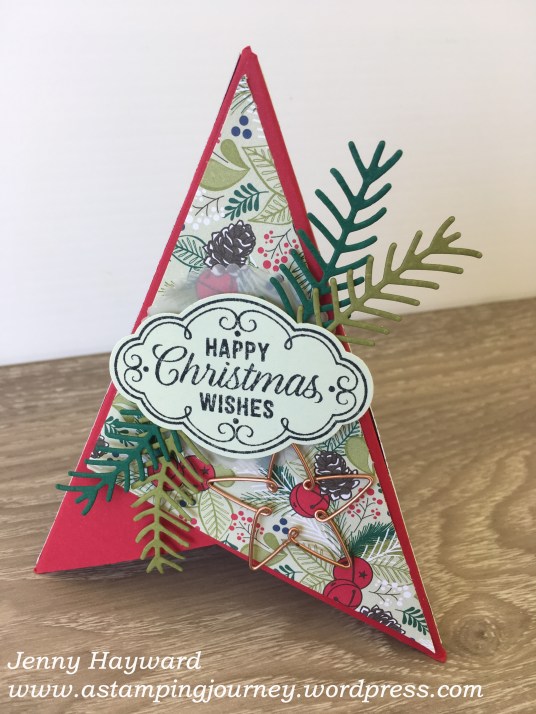
So today’s project is … A Pyramid Card.  Have you made one of these before.  I thought it would be fun to make one and share it with you.

This is the front view.

This is the back view.

I have put together a video for you and have some photos too below.

Apologies in advance for the video quality.  I am working on that. 😉

CREATE YOUR OWN PYRAMID CARD

The Pyramid card can be made to any size.  The principles to make them are the same.  Work out the approximate height you would like and the size of the card squares will be approximately three-quarters of that height.

Tutorial and measurements for the Pyramid card above.

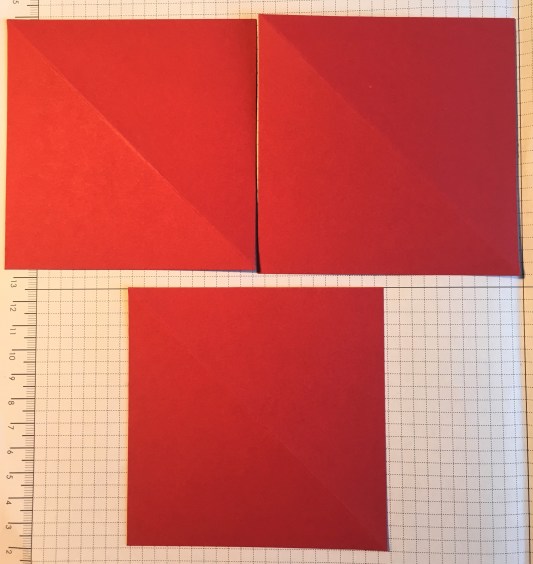
Cut 3 squares of card to 10.5 cm (Just over 4”).

Cut 2 squares of Designer Series Paper (DSP) slightly smaller than is 4mm or 1/8”.  Squares for this one would be 10.1cm or 4”).

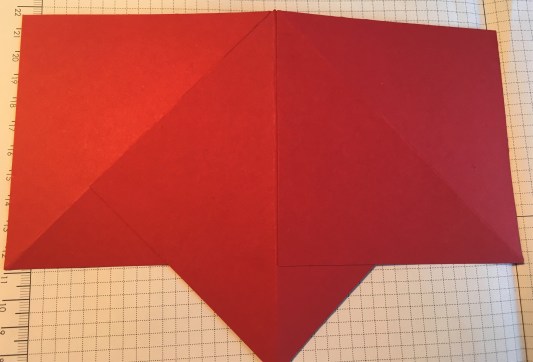
1) Score each card piece diagonally once.  Fold on the scored line.

2) Cut both squares of DSP in half diagonally.  Flip one triangle over to use the opposite pattern.  You may choose to use a completely different piece of DSP for a different pattern choice.  You may choose to have each piece the same. Adhere the DSP triangles onto one panel of each card

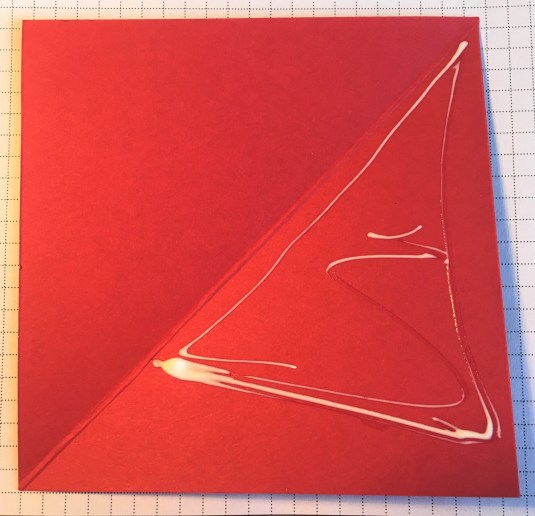
3) (NB: In these photos I didn’t adhere the Designer Series Paper before assembling). Position one of the squares behind another square underneath the other square.  Before applying adhesive, check the position so you only apply adhesive to where it is needed.  Repeat this for each card piece.

Be careful where you place the adhesive as you won’t want to place it all over your card.

4) You can choose to adhere the third square to the first square to assemble it permanently or you can add a Velcro dot to the edge piece, or add ribbon to tie it together so it can come apart to lay flat for posting.

– Decorate your Pyramid card as you like.

BLOG GIVEAWAY

OK, now for the prize.  Since it’s the 50th Wednesday’s WOW! I have a Blog Giveaway of … some BLING! We all love bling and let’s face it we can use it to cover up a multitude of mistakes.  Who does that?? 🙂

WHAT YOU NEED TO DO

I will pick a winner at random.   To enter please leave a comment on where you are from and what you love seeing when you come to visit my blog.  I will close the entries on Friday midday. AEST  The bling giveaway is only for Australian residents only sorry.  BUT if you are an international visitor please leave a comment and I will send a handmade card off to you.  I am allowed to do that. 🙂

So enter away.  And thanks for visiting me.

Jenny


cards, Catalogues, Stampin' Up!, Tutorials, Videos

VIDEO SURVEY – CAN YOU TAKE A MOMENT PLEASE?

This is a different type of post today.  I am considering classes and my direction for next year.  Videos and tutorials are becoming a big part of the way we share stamping techniques and projects with each other.  Is that how you want to see them??

I would love your views and have put together a very short survey.  It is 2 very quick questions. Would you mind taking about 20 seconds out of your day to answer the 2 questions please??

That would be really great.  I love to hear your ideas.

Here is the link to the survey -> HERE.

Thanks for taking the time to complete this for me. And Thanks for following me along on this crazy, creative journey. 🙂

Jenny


3D projects, cards, Catalogues, Christmas, Onstage, Stampin' Up!, swaps, Videos

WEDNESDAY’S WOW! #46 – CHECKING OUT MY ONSTAGE SWAPS!

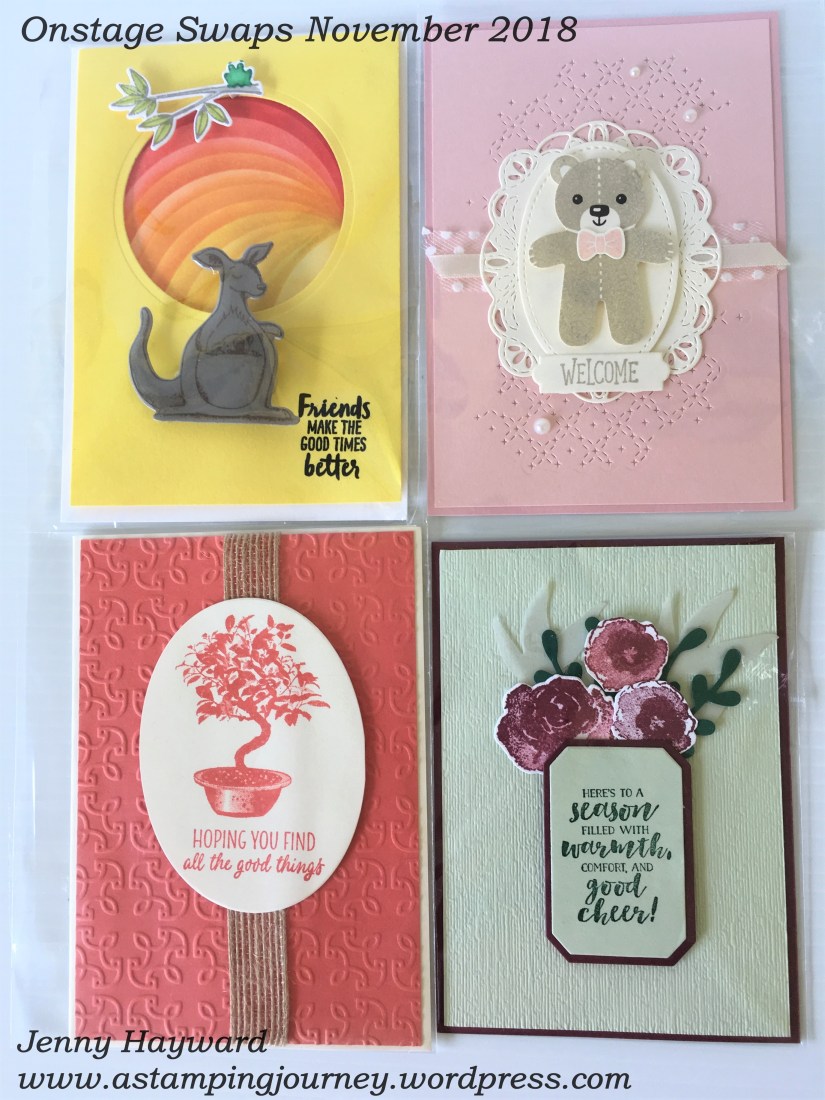
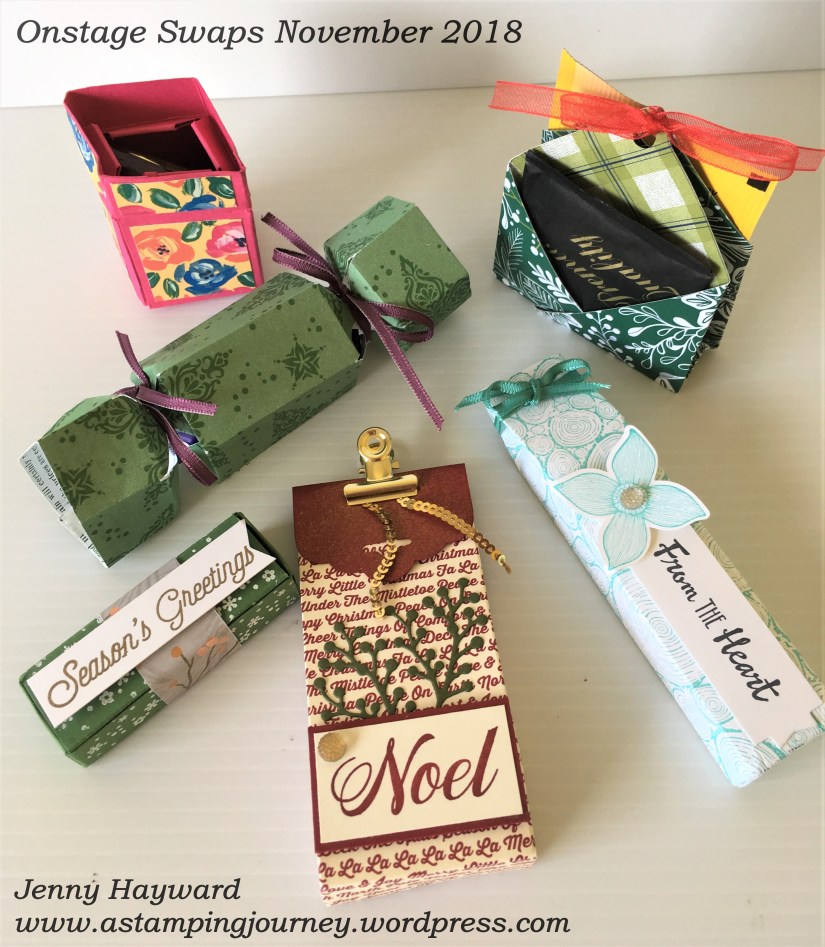
Something different for you for Wednesday’s WOW! today for #46.  Since I have just returned from Onstage in Melbourne I thought you might like to see the swaps I received.  I could show you photos – and I will but I have a video for you as sometimes you can see them a little better and especially see what the 3D ones are actually like.

So here is the video below.  Further down I have the still photos for you if you want to PIN them.

Such a selection. Aren’t they just lovely?? Thank you everyone who swapped with me.  I hope these give you some inspiration for your projects.

I will show you the swap card that I created shortly.

Thanks for visiting,

Jenny


cards, Catalogues, Christmas, Stampin' Up!, Techniques, Videos

SNOWFLAKE SHOWCASE WEEK – DAY 3 – AND A VIDEO FOR WEDNESDAY’S WOW!

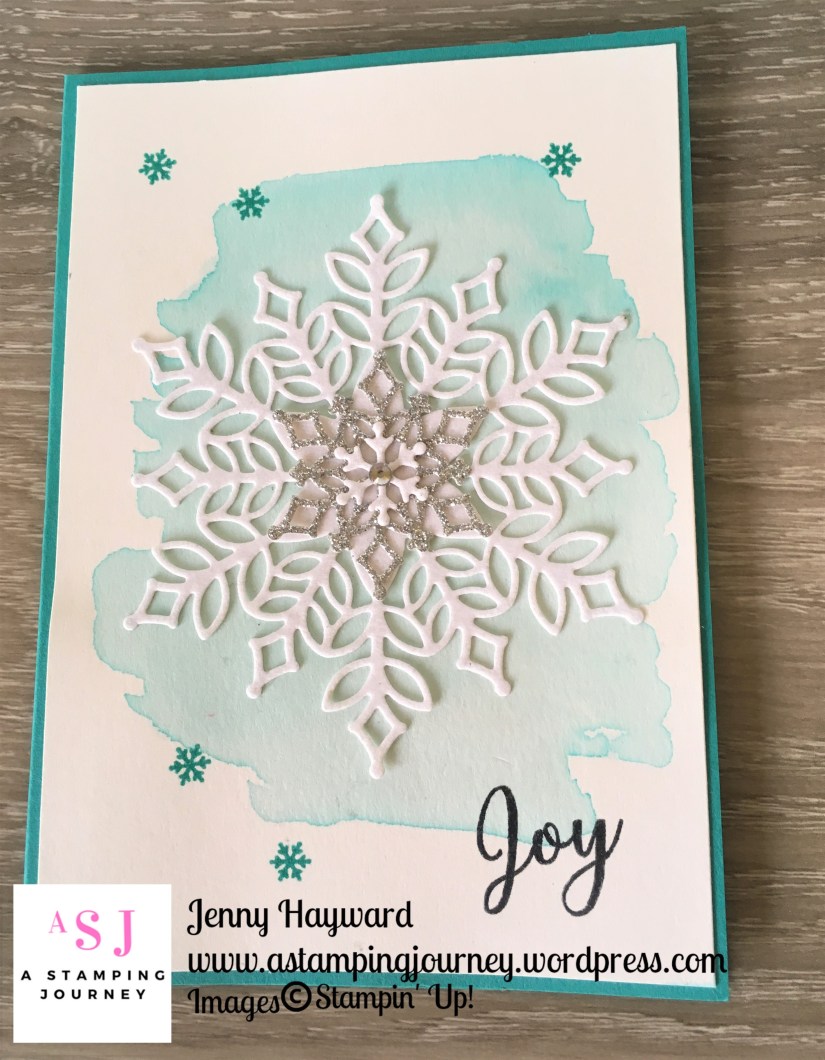
Day 3 of our Snowflake Showcase Week.  Half-way through.  Today’s card is simple really but I think effective – and they can turn out differently each time.

The background for this card is a Watercolour wash.  I have used Bermuda Bay and of course the Snow is Glistening stamp set and Snowfall Thinlits.

The large snowflake is cut from the White Velvet Paper. Have I told you how soft and furry it is?  So nice and adds such a lovely texture to your projects.  I have also used the Silver Glimmer Paper and the tiny snowflake is from the White Velvet Paper too.

Do you want to see how I have done the Watercolour Wash background?  Since it is a Wednesday and time for Wednesday’s WOW! #45 I thought I would combine the two.  How about that. 🙂

You can see the video below. (NB: If you receive the blog updates by email and the video hasn’t shown then click on the title at the top to go to the blog post and watch it there). 

I am just starting out more with videos.  They are not easy let me say … 🙂 I would love to know your thoughts and if you have any suggestions to improve them, please drop a comment and let me know.

How are you liking the Snowflake Showcase products?  Have you bought any yet?

Just a reminder what these products are as you couldn’t see them well in the video.

If you are in Australia you can order these now from me.  Remember these are only available in November AND only while supplies last, so don’t delay with them.

Order in store -> HERE.  Please use the Host Code: KGQKCBA4

OR email me to arrange an order.

Thanks for watching.  Now go and try that wash technique.

Jenny

cards, Catalogues, Stampin' Up!, Videos

WEDNESDAY’S WOW! #43 – ONE STAMP, ONE DIE = 16 TAGS!

How can you make 16 tags from One Stamp and One Die?? I have to say this intrigued me.  For Wednesday’s WOW! #43 this week I wanted to check out this Tags and Tidings Bundle and see how it worked.  I found the video from Stampin’ Up! to share with you.  Maybe you are intrigued by it yourself??  The stamps are very small so how can you use them on your projects? How can you line the stamps up so easily with the die so they cut?  So many questions.  So if you are the same check out the video below and don’t miss out on the end to see their cute projects.

Here are some of the Stampin’ Up! projects.  So these might be small but they are cute.  I like even how the background is stamped on the card with them.  I had considered cutting the stamps up as I thought it might be easier. (SHAME ON ME).  I think I will leave it as one stamp.  Much easier to use and great for that background.

What do you think now?  Have you got this bundle? I would love to see your projects with it.

You can see it in my store -> HERE now.  $71 for the bundle.

Thanks for checking this out with me today.  Have a wonderful Wednesday.

Jenny