cards, Christmas, Classes, Stampin' Up!

FAVOURITE 5 FOR 2015!

HAPPY NEW YEAR TO YOU ALL!!!

I hope 2016 is a wonderful year for you full of great health, happiness – and I hope lots of opportunities to create. 🙂

I am looking forward to another year of stamping. It always excites me at the start of the year when I think of the new discoveries in stamping and being able to share them with my lovely customers and  you my lovely readers. 🙂  I am also excited when I think of the new people I will meet to share all this creativity with.

Before I look too far forward though I thought I would look back at this past year at some of my favourite projects from the year.  I hope you will indulge me a little and enjoy recapping these – or seeing them for the first time.

I will add the link below each project to the original post so you can read about them.

P1150801

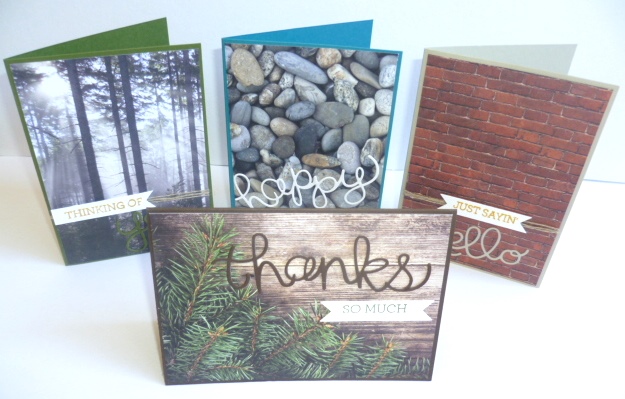
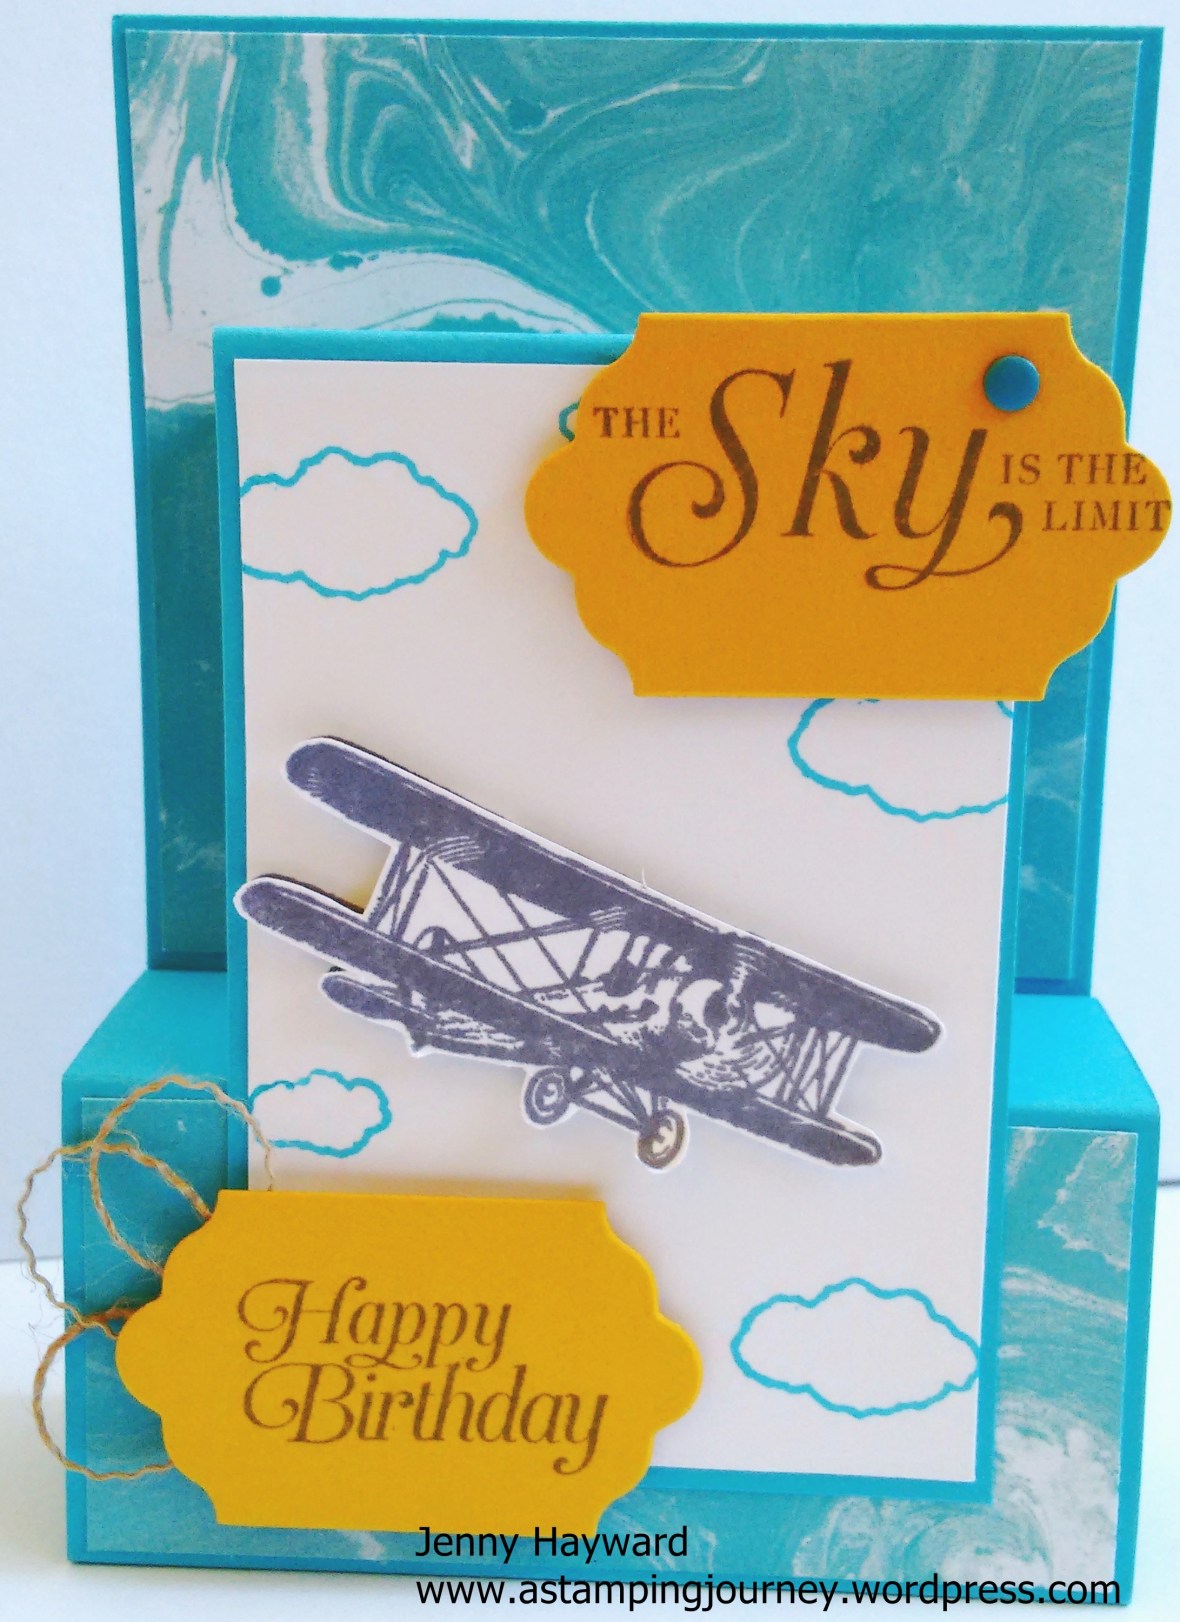
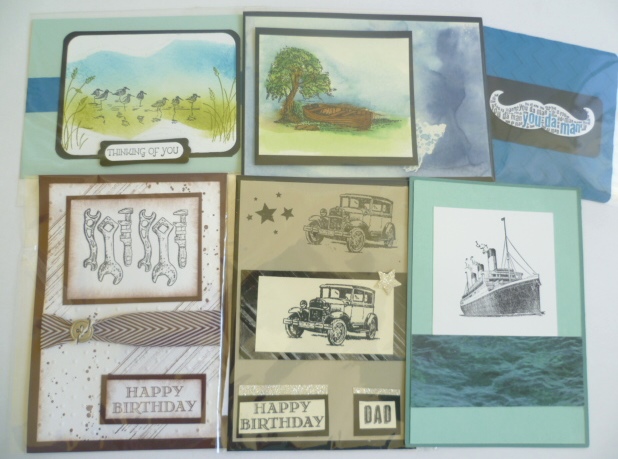
I had fun making these Masculine cards with the ‘Adventure Bound’ Paper Stack.  See about them HERE.

P1160425

A special 21st card.  Read about it HERE.

P1150979

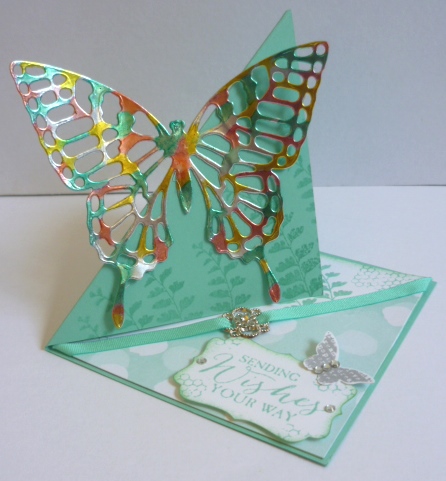
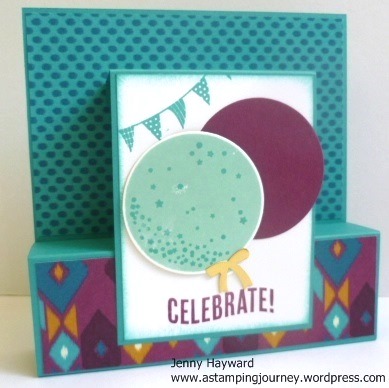
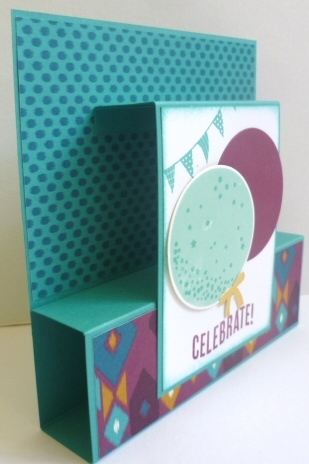
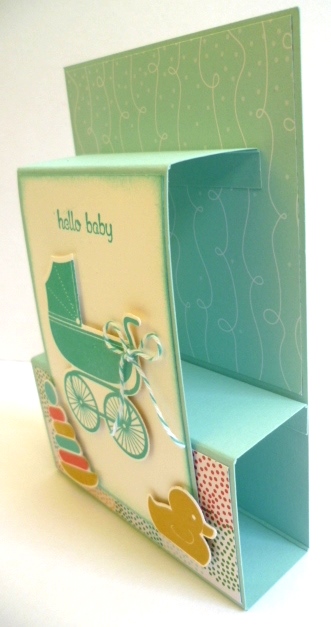
A fun Triangle Easel Card.  See the post HERE.

P1160636

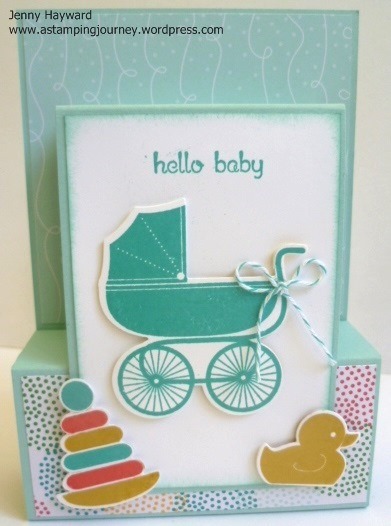
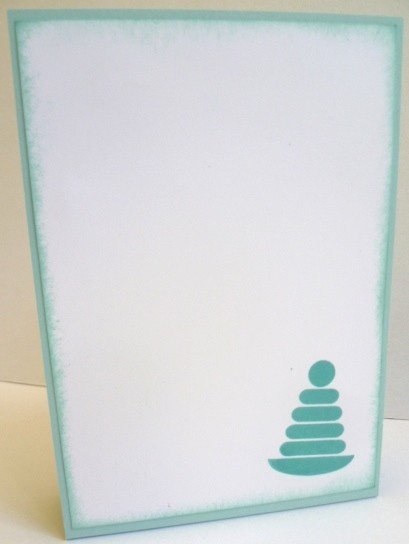
One of the first cards I made with this gorgeous set.  See about it HERE.

P1170158

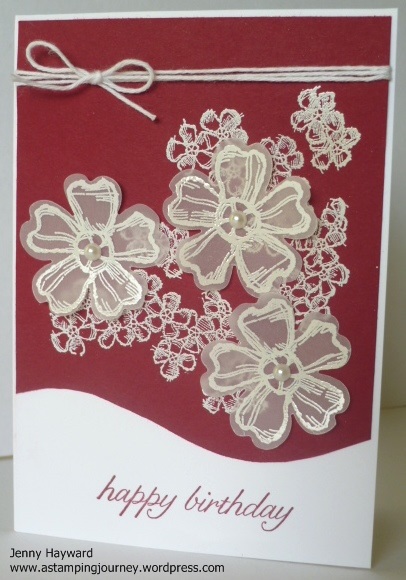
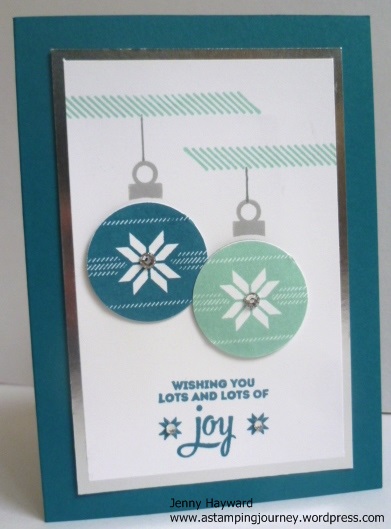
This is still one of my favourite cards. You can check it out HERE.

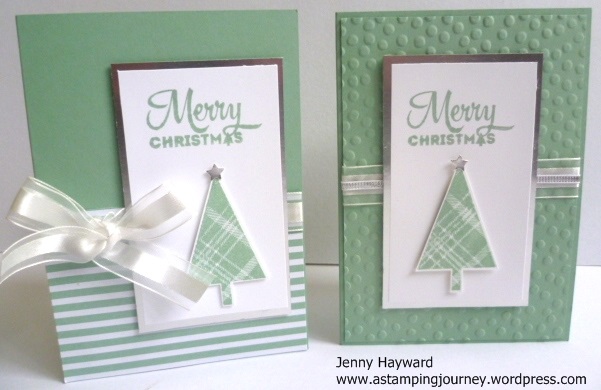
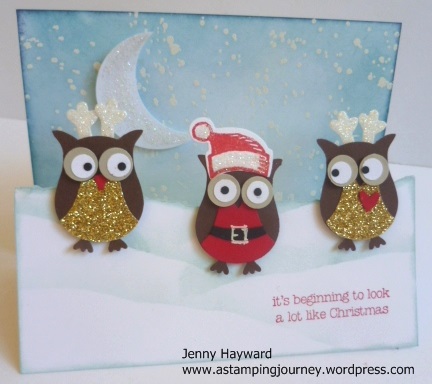
I had trouble limiting it to 5.  I have to throw in a Christmas card too. 🙂

P1170418

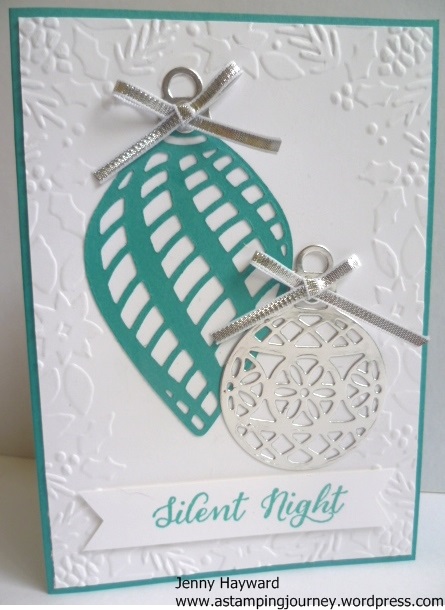
One of my favourite Christmas cards. See it HERE.

Well those are my favourites BUT what did you think?

Here are some interesting facts from WordPress that you liked this year.

The most popular post in one day was my Convention Swaps on May 9th with 486 hits.  We are always interested in swap cards I think for their inspiration.

P1160597

This is just one lot of them. You can read the full post HERE.

The most popular post continues to be my Tote bags.  These were made in 2012 but are still so popular.

P1030185

The tutorial and the link can be found HERE.

and the more recent one HERE.

Thank You for being part of my journey this year.  I love sharing what I create and I am glad you like to visit.  Feel free to drop a comment now and then.  At least I know then I am not talking to myself. 🙂

Have a great 2016,

Jenny

3D projects, cards, Classes, Stampin' Up!

SKY IS THE LIMIT 3D CARD!

I shared the Fold Flat (3D) cards the other day.  I have made one of these cards using some great Sale-A-Bration products. (Only 5 sleeps to go until Sale-A-Bration begins!).  You will love this year’s offerings for Sale-A-Bration.  There are so many fantastic products.  It will be hard to choose believe me. 🙂

Here is the card but you can see how to make them in the earlier post HERE.  

IMG_20151229_160536118

Don’t you love that swirly paper?? It makes the plane look like it is flying over the ocean!  This paper is the ‘Perfectly Artistic’ Designer Series paper and comes in 12 sheets of 12″x12″ and available in so many gorgeous colours in the pack.  This one is Tempting Turquoise.  The stamp set is ‘Sky is the Limit’  A great one for those male cards!

On the front panel I stamped the clouds on the white card and stamped the plane in Basic Gray.  I stamped the plane again on scrap white and cut it out and raised it up with Dimensionals.  The greetings which come in the set are stamped in Basic Gray on Crushed Curry card and cut with the ‘Lots of Labels’ Framelits.  They were raised up with Dimensionals too.  The little loops are from the Burlap Ribbon.  I cut off the edge of the Burlap and then pulled off a couple of threads and looped them around.  I adhered them onto the back of the label with glue dots.  These give a little wavy look rather than than using the Linen Thread this time.  I added a Turquoise Candy Dot to finish but I am still not convinced of that but it is there now. 🙂

There you have it.  Now I know you are going to want to grab this set.  This set and the paper are only available until February 15 and then some new products will be offered so be quick.

Thanks for stopping by,

Jenny

Book your Sale-A-Bration party or Private Class now.  Times are limited but contact me to book your spot.  I would love to share more creations with you and your friends!

Stampin' Up!, Weekly Deals

WEEKLY DEALS AND YEAR END SALES!

You know I just realised that it is Wednesday today – and the day is nearly over!  You lose track of time  during this Holiday period don’t you!  Well since it’s Wednesday I need to show you this weeks Weekly Deals.  Here they are for you.

Dec 30

That Baker’s Twine is so cheap – AND it is Bermuda Bay.  Nice!

While we are talking about bargains, have you checked the Year-End Sale items recently?? More items have been added at great prices.  A number of them are from the retiring Holiday Catalogue but also some catalogue products both current and retired.  Here are just some of them. Now don’t forget these are only available now until January 4th so be quick!!!

Year end 1

What about that Hip, Hip Hooray Kit at 40% OFF!!! And if you loved that gorgeous Home For Christmas paper it is 25% OFF!

Year End 2

The Beautiful ‘Wonderland’ Stamp set was very popular for Christmas and is 25% OFF!

Year end 3

The Label Card Thinlets Die is very useful and is 40% OFF!

Check out more of the items HERE.

If you would like to order any of these then contact me or order directly at my store HERE.  Please use the Hostess Code: GK7SCFV2

Grab them quickly!  🙂

3D projects, cards, Techniques

FOLD FLAT CARDS!

How was your Christmas??  Our’s was a little quiet on the day but then celebrating with different family members for the last 3 days.  It’s all done now for another year.  I have packed up my Christmas stamps and cards and ready to move on to some different creating.  I haven’t had a lot of chance to create with the new products from the upcoming Occasions and Sale-A-Bration so I am looking forward to getting them inky.

I have had these projects for a while now and with all the excitement of the Holiday Catalogue they got put aside so I thought it was time to share these before we move on.  These are called Fold-Flat (or 3D) Cards.  You might have seen them around blogland.

This one below uses ‘Celebrate Today’ we made this in a class a few months ago.  The original instructions were from HERE. You can follow along in that post.  They are available in English too. I have used the ‘Bohemian’ DSP.  Edited to add: The Measurements for this are just below this card.  The smaller version is further below.

P1170178

This is a side view.  This folds flat so you can post it.  I did find this quite large so later I made one smaller so it can fit in a standard size envelope.

P1170179


LARGE FOLD FLAT CARD TUTORIAL

Large back panel: 15cm x 27cm (6″ x 10 5/8″) Score on the long side at 15cm, 18cm, 23cm, 26cm. (6″, 7″, 9″ and 10″)
Front panel: 8.5cm x 15cm (3 3/8″ x 6″)  Score on the long side at 1cm and 4cm. (1/2″ and 1 1/2″).
Fold each of the pieces.  The card for the back panel is folded up into a box shape and the small tab adhered on to the card.  Check the photos if you are unsure what I mean.
The Front panel piece is folded up.  The small tab is adhered to the back panel about 1/3 of the way down.  Then adhere the larger section on to the “box” shape formed from the back panel.
Decorate as you like.  The Paper pieces are 4mm or 1/8″ smaller for that section.

This smaller one uses the set ‘Something For Baby’.

P1170183

A side-view for you.

P1170182

On the back you can adhere some Whisper White card so you can add the message.

P1170184

I will share my measurements for the smaller one.  Putting it together is the same as the large one so you can follow along in the above link.  It is very simple though.  Just a matter of folding on the scored lines and adhering.  There is a little trick to adhering the front piece so I will tell you that further down.

FOLD FLAT CARDS (Smaller version).

Base: Cut card 10.5cm x 27cm. (4 1/8″ x 10 5/8″).  Score at 15cm, 18cm, 23cm and 26cm.  (6″, 7 1/8″, 9″ and 10 1/4″).

Designer Series Paper strips.    TOP PIECE – 10.1 cm x 9.6cm (4″ x 3 3/4″)                     BOTTOM PIECE – 10.1 cm x 4.6cm (4″ x 1  7/8″)

Back: Cut Whisper White 10.1cm x 14.6cm (4″ x 5 3/4″)


Front Panel: Cut Card 7.5cm x 15cm (3″ x 6″).  Score at 1cm and 4cm.  (1/2″ x 1 9/16 – I hope that measurement is right?? It doesn’t seem right)  🙂

Card Mat: Whisper White – 7.1cm x 10.6cm (2 3/4″ x 4 3/16″).

ASSEMBLING (If you are having trouble following this, head to the link I added above for photos.  I didn’t think I would repeat the photo steps).

For the Base piece.  Add Adhesive to the smaller tab (on the back as it is lying down on the table) and fold up to adhere to the front.  (I added the DSP first so I could line up the fold just below the DSP).

Fold the front Panel on the score lines.  Add adhesive to the small scored section at the top.  Before sticking down the tab fold this under carefully and line up the second score line with the top edge of the base card and then press down on the small tab to adhere this to the base card lower down.  If you are not sure then check the tutorial link above to see the image. Add adhesive to the back of the front panel and then adhere to the folded section of the base card near the bottom.

++

I hope this all makes sense.  I loved making these and since I had the instructions out still to share these with you I decided to make one of these cards using some new Sale-A-Bration products.   I will post that card next post so come and visit again.

Jenny

Stampin' Up!, Weekly Deals

YEAR END SALE AND WEEKLY DEALS!!

Year End Sale

It’s Clearance Time! Stampin’ Up! have select products at discounted prices.  You have to be quick though.  These specials end January 4th or while stocks last.

Check them out Online HERE and you can order there also. Please use the Hostess Code for December: DRVPX7DB  

+++

Don’t forget the Prize Draw this month.   You only have one week to go. Here are the details.

Every order this month receives a gift to say THANKS but also Receive a ticket in the draw for every $50 spent. (AUSTRALIAN RESIDENTS ONLY)

Go in the draw to win.……

……. The ‘It’s My Party’ Enamel Dots pack and the ‘Confetti’ Embossing Folder valued at $20.

         140554_its_my_party_enamel_dots           confetti embossing folder

These fantastic new products will be available in the upcoming Occasions Catalogue.

 weekly deals

Here is this week’s Weekly Deals! What do you like?  The ‘Color Me Irresistible Specialty DSP’ is fantastic.  You can colour the paper any way you like.

Dec 23

You can order these Online too at the above link.

Contact me if you have any further questions.

cards, Christmas

MORE LOTS OF JOY!

I made these cards even earlier than the one I showed last post. These are using the set ‘Lots of Joy’ again which is found in the Annual Catalogue.  I have to say I made these in a hurry. Just simple cards but they can be done quickly.

P1170116

Both are in Mint Macaron. I have used a left-over piece  of the Envelope Paper on the left one.  On the right one I embossed a piece of Mint Macaron with the Decorative Dots Embossing Folder. The tree was stamped and punched with the Tree Punch.  The white piece is layered on some Silver Foil.  I finished them off with the Organza Ribbon.  I added some Silver Ribbon to the right hand one. Simple!!

Thanks for stopping by.

Jenny

Stampin' Up!, Weekly Deals

WEEKLY DEALS THIS WEEK!

weekly deals

Not long now until Christmas.  There is still time to do some last minute shopping.  Maybe some bargains on the Weekly Deals this week for you??

Head to my store and check them out.  I am away at the moment but every order this month receives a gift to say THANKS but also go in the draw to win……

Receive a ticket in the draw for every $50 spent to win ……..

……. The ‘It’s My Party’ Enamel Dots pack and the ‘Confetti’ Embossing Folder valued at $20.

(AUSTRALIAN RESIDENTS ONLY)

These fantastic new products will be available in the upcoming Occasions Catalogue.

confetti embossing folder                       140554_its_my_party_enamel_dots

How do you order??

Head to this link HERE.  If you haven’t ordered here before you just need to set up an account and then shop away.  Please use the Host Code: DRVPX7DB

Christmas, Classes

LOTS OF JOY FOR CHRISTMAS!

I made this card a few months ago before the Holiday Catalogue came out and I was starting to plan for Christmas.  It is probably about time I showed you.  This is using one of the stamp sets in the Annual Catalogue – ‘Lots of Joy’ and using one of my “go-to” colour combinations of Island Indigo and Pool Party.

P1170120

I first stamped the angled lines in Pool Party and then stamped the baubles firstly in Smoky Slate on a piece of Whisper White and then again on scrap card in Island Indigo and Pool Party. I punched these out with the 1 1/2″ (3.8cm) Circle Punch. They were raised up off the card and I added some Adhesive Rhinestones for the bling factor.  The white card piece was matted on to some Silver Foil sheet BUT I want to show you a little trick to save your precious Silver Foil.

I cut the Silver Foil to size and then cut a rectangle in the centre.  This can then be used for a later project.  Check out the photo below.

P1170110

Thanks for visiting me today.  Have a great day 🙂

Jenny

cards, Christmas, Tutorials

SNOWY OWLS!

I made this cute card at our stamping weekend and I haven’t shown you yet.  Well actually I half made it and I had to finish it when I got home and that is probably why you haven’t seen it yet.  I get lots of comments about this card at my classes.  I CASED this from my friend Leonie who I think CASED it from Pinterest??  I will show you it then I will tell you about it.

P1170702

Does this have the cute factor??? This is using the Owl Punch.  The owl hat is from the ‘Snow Place’ Set and the antlers are cut with the ‘Snow Friends’ Framelits.  I drew the “santa Belt” with the white gel pen.  The greeting is from ‘Christmas Cuties’. The Moon is punched from a circle punch with a “bite” punched out with the circle punch again. I wanted to tell you about the background though and the card base.

Firstly for the card base I will give you the instructions but not the exact measurements  as you can make it any size you like really. The card base width is a standard size card (so metric – 14.8cm). The length is the length of your standard card (metric is A4).  Score the card length in equal thirds.  Score the right hand end section in half again.  So it is a bit like an odd-shaped “M” ??? Makes sense?? Yes!!!  🙂  On the back panel I cut another piece of white card to that size.  On this piece I stamped the “splodges” from ‘Gorgeous Grunge’ in versamark and heat embossed in White Embossing Powder.  I sponged over Soft Sky and Marina Mist and directly on the edges I sponged Night of Navy.  I adhered that piece on to the back panel.

For the front I cut another piece of white card to the size of the front. I tore across the top edge. Then masked sections with scrap paper to sponge “hills” on to the piece with Pool Party – I think? I sponged around the whole front piece with Pool Party too.

Lots of punching but lots of fun to put together.

Thanks for stopping by now.  I am off on holidays for 2 weeks. YAY! Don’t worry you won’t miss me too much.  I have some posts scheduled.

Jenny

ORDER ONLINE 24/7 at my store HERE. (Australian Residents only)    This month please use HOST CODE: DRVPXZ7DB