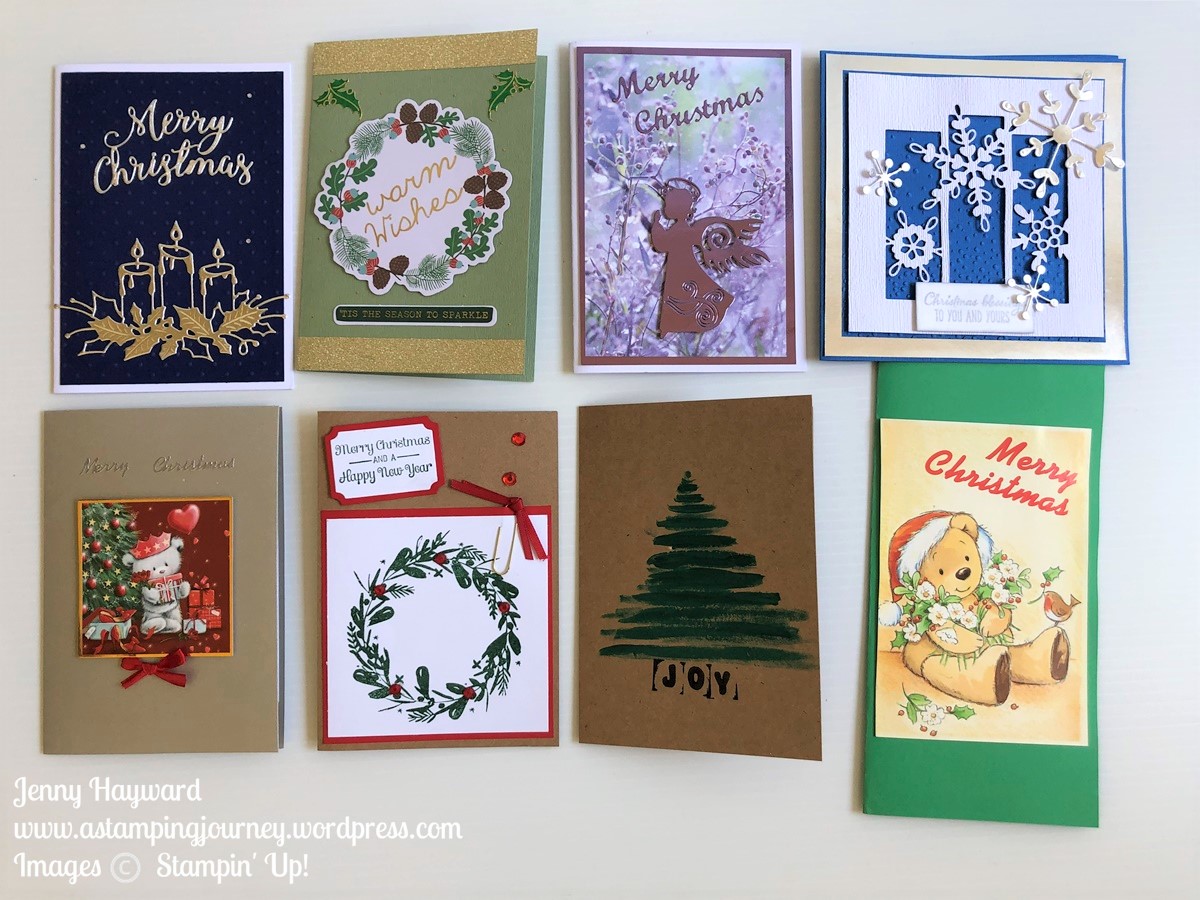
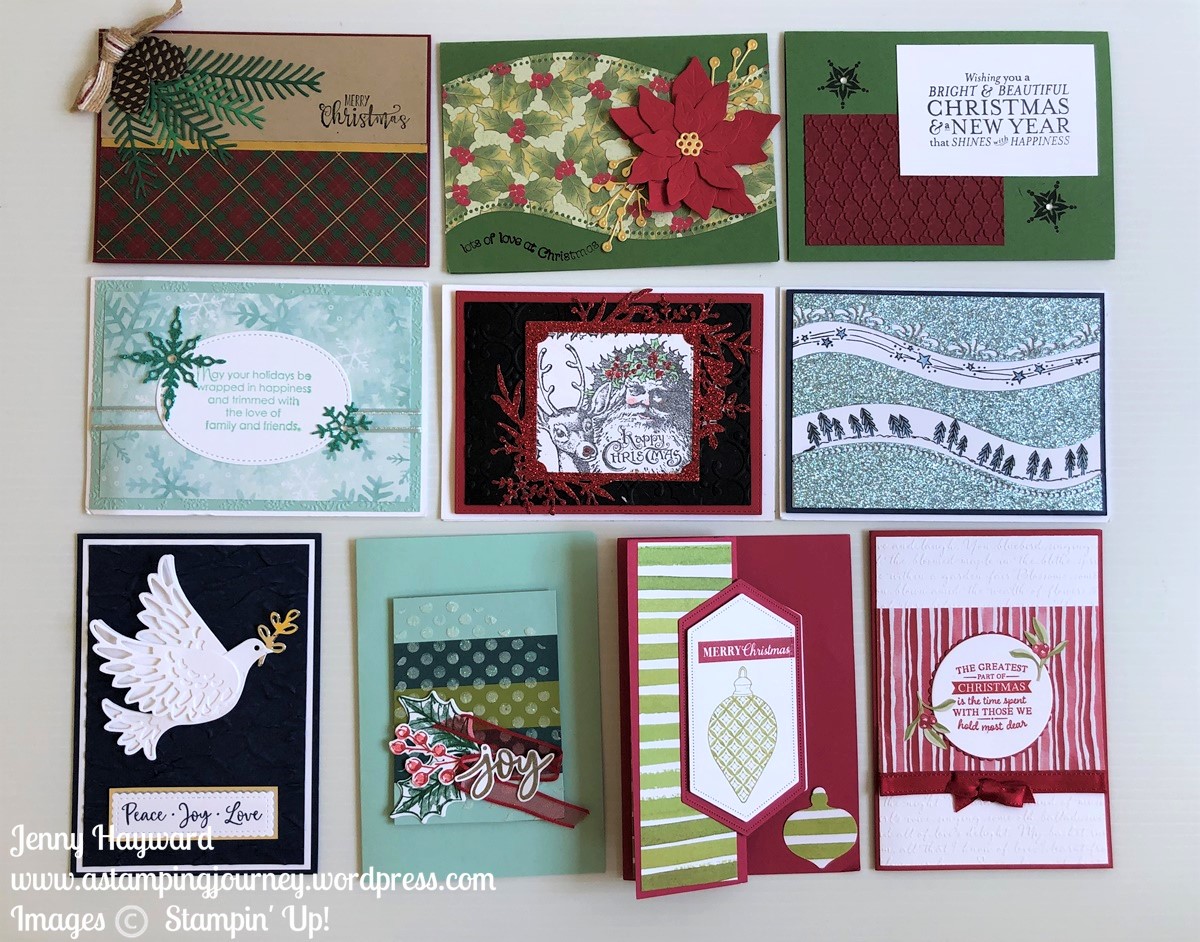
I wanted to share the Christmas cards I have received from lovely family and friends this Christmas. It’s so lovely to be thought of. Whether they are handmade or shop bought it’s so nice.
Since we are all about handmade cards here I thought I would share those ones with you.
I am sure there is some inspiration among them for you.
Hope you enjoyed your Christmas. I’m starting to play with lots of new products which is so fun. I will share soon.
Jenny
Need your stamping supplies? In Australia I would love you to consider shopping with me. You can head to my store -> HERE. Last days of the Closeout sale.
I wanted to share this project with you today. This was a bonus project for our class last week. I saw these gorgeous Christmas decorations on Pinterest -> HERE.
I changed it up a bit. Rather than using the Gold Hoops I cut 2 circles from Gold Foil cutting the centre out of them too. Then layered them back to back. It still works well. I added some Vellum behind the wings and tail to add a little softness.
I think everyone liked it. I like how it is hanging in our Christmas tree. 🙂
Happy Christmas to you. I hope you have a wonderful, festive time and remembering the wonderful gift of peace and hope we have been given.
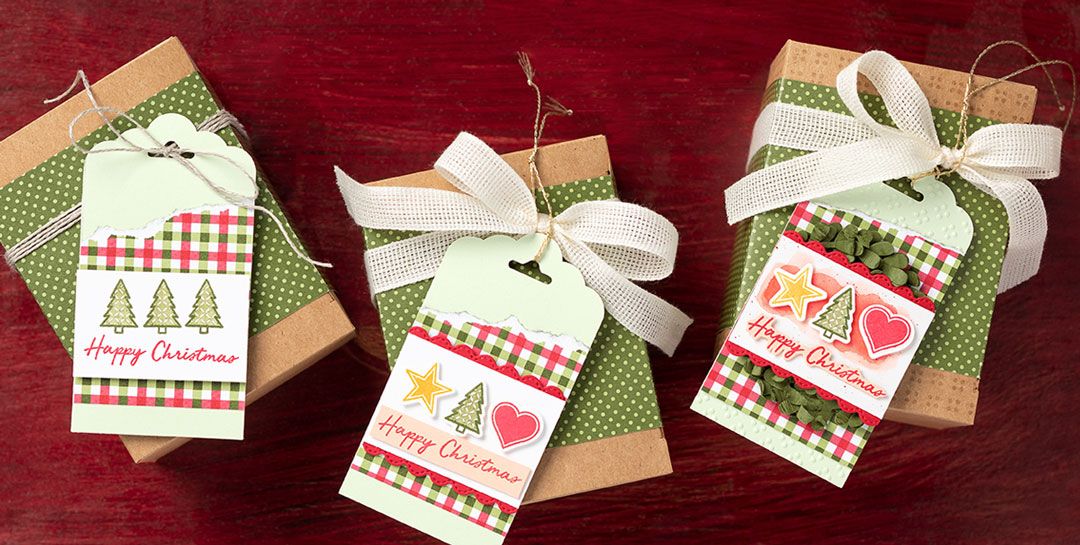
Over the weekend on my Facebook and Instagram page I held a “It’s A Wrap” Weekend. I shared a number of ideas to quick, cute gift packaging. I’m sure many of us are still scrambling for last minute Christmas gifts and packaging them. I thought I would share them here in one post.
Before the weekend of sharing started I shared this cute tag and gift bag. If you are in a hurry just grab a white handled bag and add a cute tag. I used the Peace and Joy Bundle for this one.
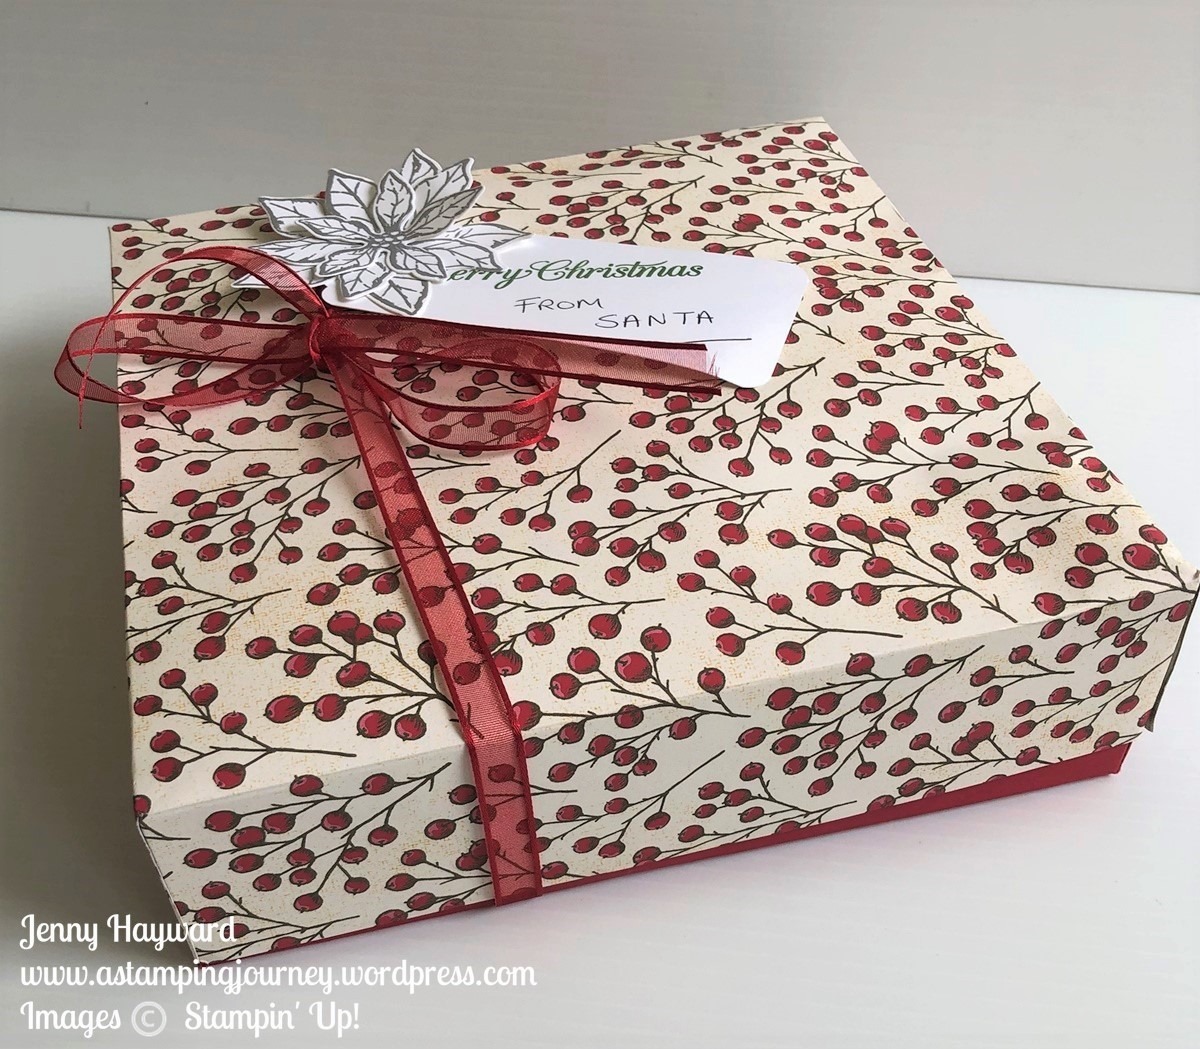
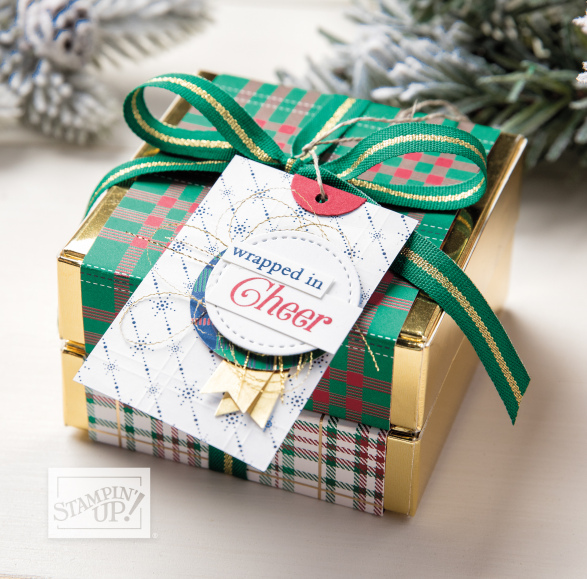
Have some gift boxes around. Wrap around some pretty Christmas paper and add a cute tag and ribbon. These ones used the Gold Pizza Boxes and the Kraft Shipping boxes.
I shared this gift box last year. It used the Christmastime is Here Designer Series Paper. It is a tall gift box so you can fill lots of little treats or a small gift inside. It is so easy to make too. Just a tip: Be generous with the ribbon. It makes it look really lush.
Like the gift boxes you can fill a little tin or a glass jar. Tie around some ribbon and small embellishment. The great thing with this one is that they can use the tin or jar later.
Lots of gift ideas I hope will help you. I have more to ideas later too.
It’s a bit late now to order the tins or boxes for Christmas but you can order them and stash them away for next year. The tins are greatly reduced too.
It’s crazy times. Hope you are doing ok.
Jenny
In Australia? Check it all out in my store -> HERE.
Today’s project I recently shared with my newsletter subscribers. I send out a tutorial for them each Tuesday. (If you don’t receive my newsletters yet – why not?? – Just click on the link in the right hand side bar to add yourself to the email list).
I wanted to share this project as my little Christmas gift to you. HAPPY CHRISTMAS. I have a video to help you create it. It’s now on Youtube too. (Be sure to subscribe to my Youtube channel too so you can get notified of videos I post).
This card is a Triangle Easel card. I have made a number of them over the years. They are really easy to make. I am using the Dove of Hope stamps and Dies. I am so sad these are leaving us.
I will add the measurements below too so you can follow along later.
DOVE OF HOPE TRIANGLE EASEL CARD
Base card: 10.5cm x 21cm Scored at 10.5cm 4 1/4″ x 8 1/2″ scored at 4 1/4″. Scored the angle on the left hand square from the bottom centre score line to the top left corner.
‘Tis The Season Designer Series Paper 10.1cm x 10.1cm 4 1/8″ x 4 1/8″
Whisper White card 10.1cm x 10.1cm 4 1/8″ x 4 1/8″
The Dove of Hope stamps and the Dove Dies are available in my store now. They are on the Year-End Closeout list so will leave very soon. TIP: Buy the stamps and the Dies separately as they work out cheaper than buying them as a bundle. 🙂
Still time to grab your Free pack of Red Rhinestones with your order in the next week. Of course it may not arrive by Christmas BUT you can enjoy opening it still shortly after.
Thanks for visiting. Now go and enjoy the video – and then shop. 🙂
I have another card to share with you today with the Curvy Christmas stamp set and the Curvy Dies. This card was a bonus project for those who bought the Curvy Celebrations bundle last month. Each person received the card kit and instructions to create this card. I thought I would share the card with you though.
I am loving the Curvy Christmas stamp set – and the dies too. This card uses the Classic Christmas paper also.
There is only a few more weeks to grab the Curvy Christmas stamp set and the Classic Christmas paper and then they go for good. Don’t miss out on them.
You can find the Curvy Christmas stamp set in my store -> HERE
Firstly the 2021 (how crazy to say that), Occasions catalogue and Sale-A-Bration starts on January 5th.
In Australia and need a paper copy?? Really you will want it. I have to say I think it is one of the best catalogues for a while.
Email me on jghayward@yahoo.com to request a catalogue. Or phone me on 0439 844574.
It will be on it’s way very soon. 🙂
FAREWELL WHISPER WHITE CARD
Stampin’ Up! quality Whisper White card and White card and envelopes and other related white card products as we know them are going. Sadly they have been impacted by the closure of the mill in the US.
Never fear though! Stampin’ Up! have been frantically researching and have now sourced a quality white card to replace these. These will be known as Basic White. At the moment there is no time as to when supplies will be available. I will keep you posted.
In the meantime, if you love the Whisper White and their products grab supplies now while there are some still in stock. There is only 2 packs per person available.
Today’s card I am sharing with you is another one we made at our Curvy Class a few weeks ago. I think this was a popular one too.
The Cherry Cobbler card mat was cut with the Curvy Dies and then embossed with the ‘dotty’ folder in the Wrapped in Texture Embossing Folders set. It was then adhered to the white card mat.
Before adhering the piece tie around some ribbon at the top. I used the Gold ribbon here. Everyone could choose the ribbon they wanted and it was interesting to see just how different they looked with the different ribbon choices. Some used the Gray Granite ribbon some the sparkly Snowflake Splendor ribbon.
The bow was stamped separately and fussy cut with scissors. It is hard to tell but we also use the Wink Of Stella Pen on it for a little sparkle. Finish the card with a Gold Faceted Gem for sparkle too.
We have one more class for the year next week and then we will be back in January 2021. If you are a Wollongong local come and join in the fun. I will post times soon.
Happy Stamping,
Jenny
Need last minute Christmas products? What about some of the amazing discounts in the Clearance Rack or the Year-end Closeout?
In Australia? I would love you to consider shopping with me. Contact me directly on 0439 844574 or shop in my store -> HERE.
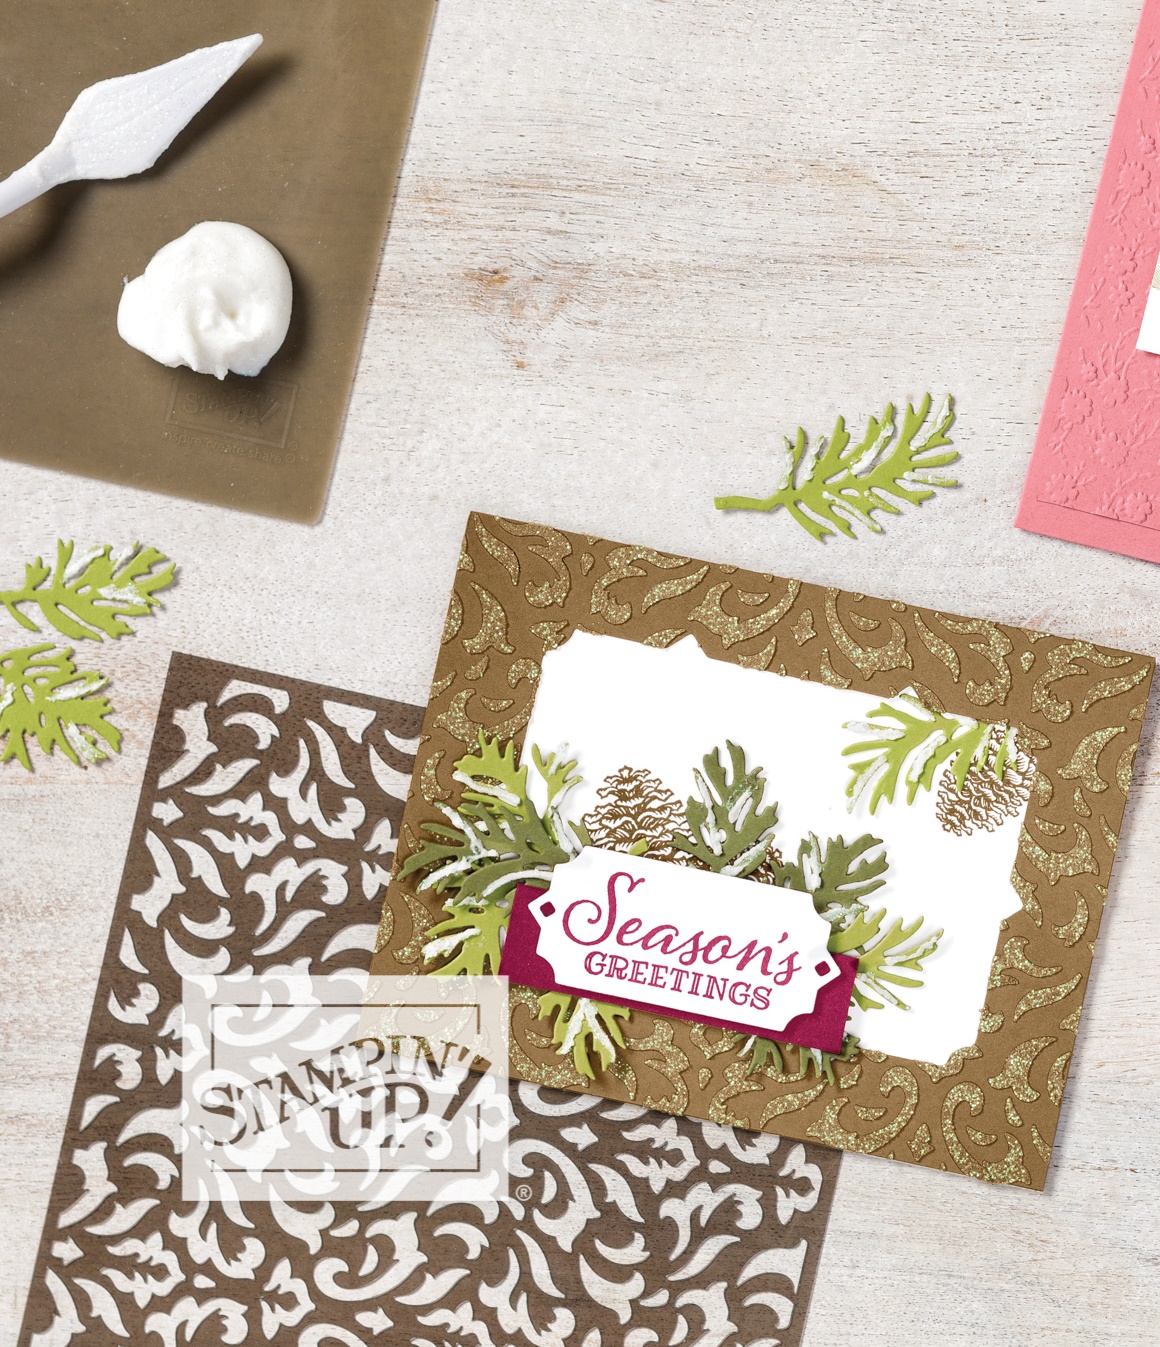
ForWednesday’s WOW! #114 I wanted to show you the effect you can create by colouring the Embossing Paste. This paste is not something I have used a lot of but it is so cool!
Embossing Paste is available in a 118ml or 4 fl. oz. container. You can use the paste to add extra texture to your projects which is fun. Use it with the Palette knives to add the paste directly by smearing it on your project or through the Decorative masks which are available.
Stampin’ Up! carries the regular White Embossing Paste as well as the Shimmery White Embossing Paste. The extra sparkle in the Shimmery White paste adds that little extra to your projects.
This one below is the Shimmery White one although it is hard to see the sparkle.
As an extra step why not add a little reinker to the paste. Simple smear some on the Silicon mat or even a block. Add one or 2 drops of reinker and mix. Then you can add it directly to your project. Be sure to rinse off the paste straight away on your mat or block that you have used.
Check out the project below. Some Soft Suede ink refill has been added to the paste and then smeared through the mask. It has been applied to the Soft Suede card so gives an textured sparkle in the same tone as the card. Pretty cool right. 🙂
This project uses the Peaceful Boughs stamps and the Beautiful Boughs Dies.
So why not grab some texture paste and not only add the paste on your projects but colour it with the reinkers for some co-ordinated colour.
These are available in my store now. In Australia? why not head along to grab some now. Head -> HERE.
Thanks for visiting for another fun tip today for Wednesday’s WOW!