cards, Classes, Stampin' Up!, Techniques

WATER SPRITZING TUTORIAL!

A few weeks ago for Onstage I didn’t have an opportunity to make swaps to share with other demonstrators.  Life has been a little busy. 🙂  I did make a card for the Display boards though where you can add your swap cards or samples.  They are always so inspiring and is a big part of why I love to go.  It’s like a live Pinterest board!!!! 😉

I thought it was time to show you the card. This is a technique I have been playing around with recentlly. I don’t really know what the name of the technique is but I call it the Water Spritzed technique. I will show you how to do this below so read on.

This is my card I made for the board.
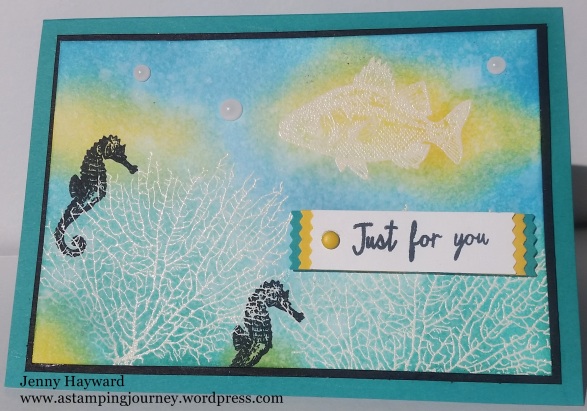
waterspritzed_Bythetide

You can see the little “splodges” in the ink where the colour has lifted. It creates a cool motley effect.  Here is how it is done.

WATER SPRITZED TECHNIQUE

1. Using Thick Whisper White or Shimmery white cardstock, heat emboss your images.  On these I embossed the coral and the fish with white Embossing powder.  I stamped the seahorse with Black Stazon.  It is important to emboss or to use the Stazon so the ink on the images don’t run when you spritz.

2. Use your first colour and sponge in patches over the card. I have used Bermuda Bay here.
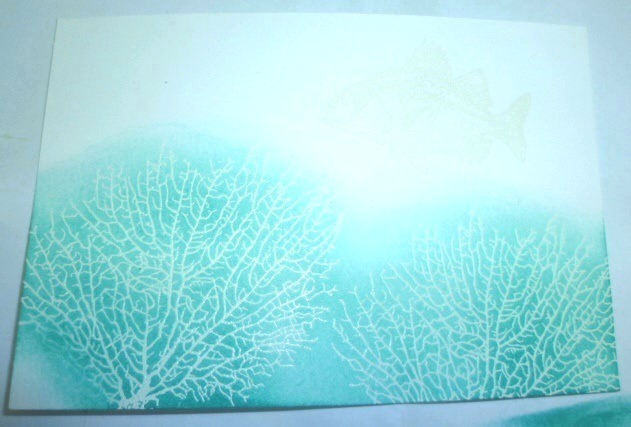
P1180329

Then add your 2nd colour.  I have used Daffodil Delight.
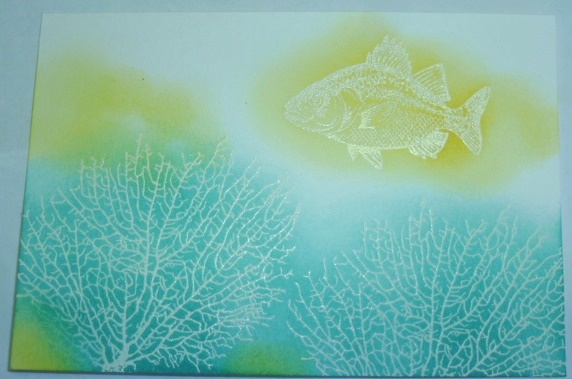
P1180331

3. Fill in with your 3rd colour.  I have used Marina Mist I think.  It’s good to have 3 co-ordinating colours. Once you have sponged the colours on, use a tissue to wipe off the ink where the images are embossed.  This makes the embossing shine.
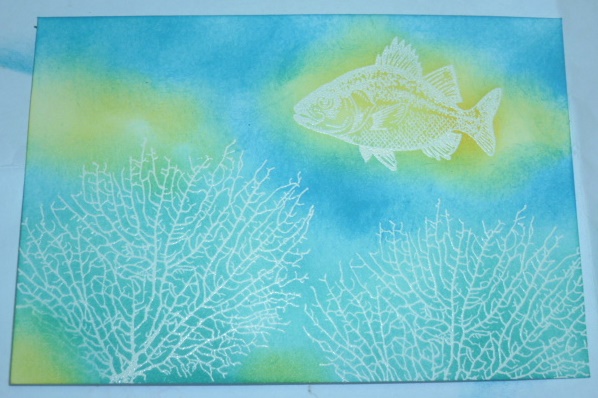
P1180332

4. With a spritzer with water or I use an old Stampin’ mist bottle, hold the bottle a little away and lightly spray the card.  You don’t want to soak the card just lightly mist.  You will see some of the colour start to lift.  Mist until you are happy with the coverage.  Keep the card level or you will start to have runs from the water running down. Leave the card aside on the table for a few minutes.  The longer you leave the card, the more effect you will get.  Finish off drying your card with the Heat Tool lightly.  You don’t want to melt your embossed images any more.
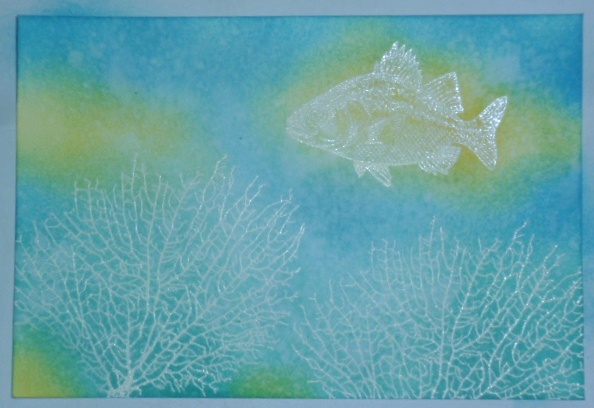
P1180334

You can now finish your card as you like.

Here is the first card I made using this effect. I have used Rose Wonder set. Thank you to my friend Leonie for showing me this technique.  We made this card at my last technique class too. I have heat embossed the images in white,  The inks I have used are Elegant Eggplant, Tempting Turquoise and Bermuda Bay.
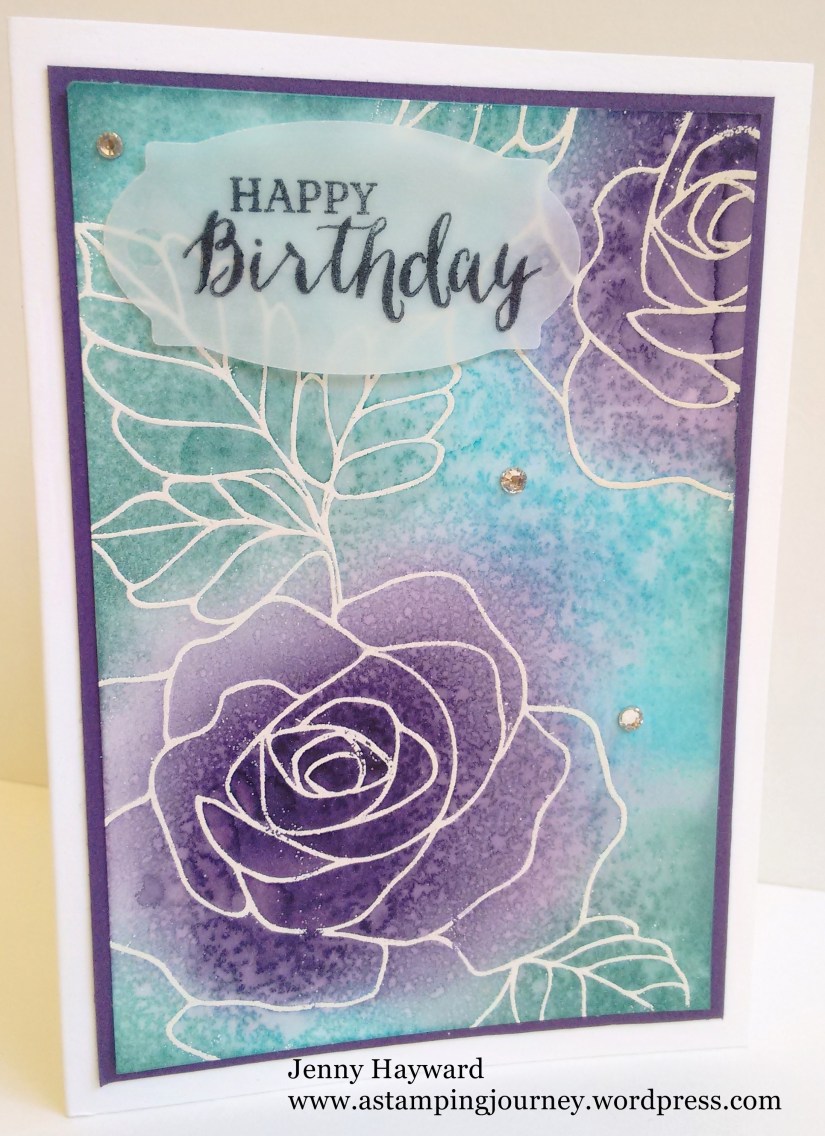
image-6194

I made another card that day but I didn’t leave the water sitting on the card for long so it doesn’t have as much mottling.  I was a little disappointed with the colour combination. I used Watermelon Wonder, Mint Macaron I think and Lavender Lace. I thought I would show you the card anyway. This is using Birthday Blossoms.

image-6191

So how about you have a try at this technique.  Each time you do one it will turn out different. It’s fun.

Thanks for visiting me today.  Have a wonderful day/night.

Jenny
3D projects, Classes, Stampin' Up!

GIFT BOX CLASS THIS COMING FRIDAY!

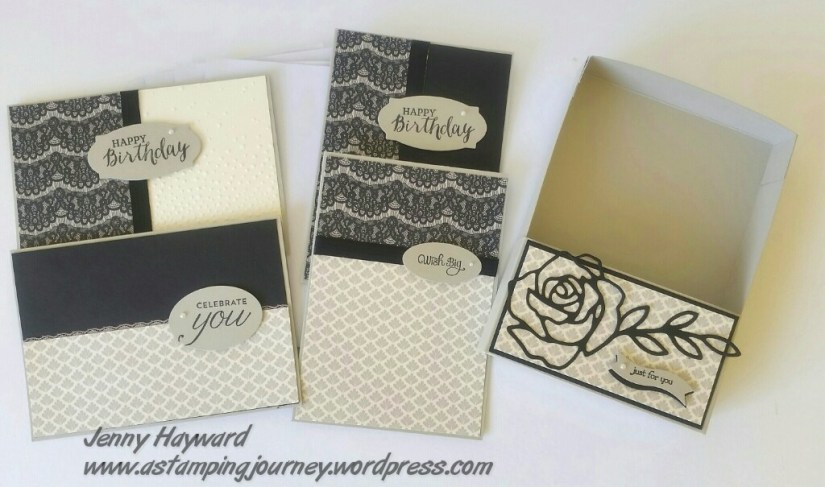
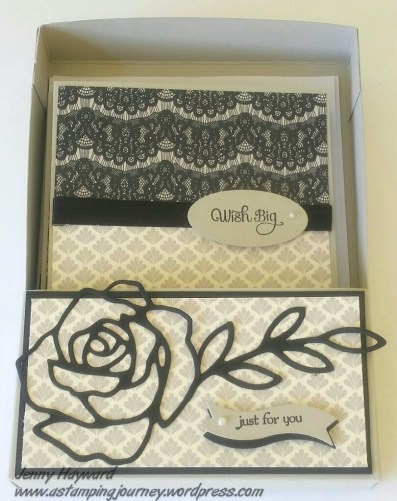
I have a special gift box and 4 cards at this week’s class.  I hope you can make it (ie if you live local!).  This box will be great with Mother’s Day coming up but would be great for any special friend.  Here are the details.

GIFT BOX CLASS

WHEN: Friday 29th April 10am or 7.3opm.

COST: $20  Please bring your scissors and adhesives.

RSVP: Wednesday 27th April.

Here is the gorgeous box and cards. (Includes envelopes as well).  You can change the greeting to suit you.

box    box and card

Don’t forget to let me know by the RSVP date.  I hope you can come.

Jenny

3D projects, cards, Sale-A-Bration, Stampin' Up!

CARD IN A BOX FOR A 2 YEAR OLD!

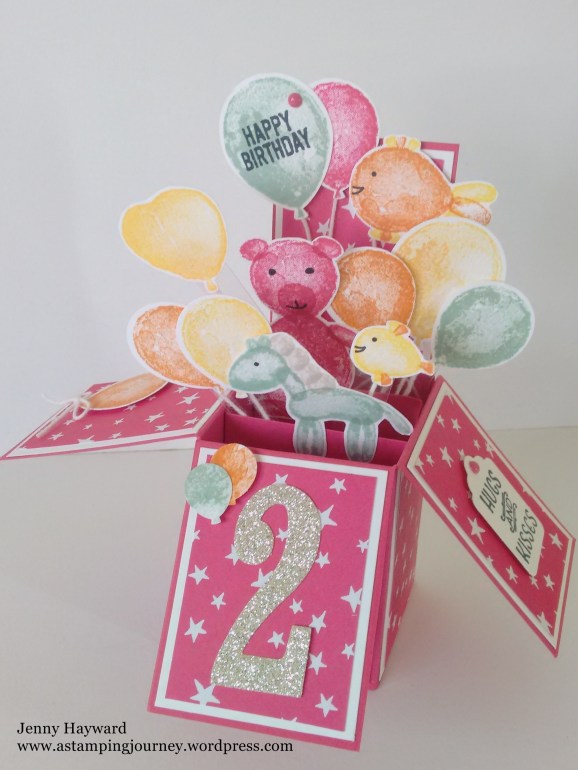
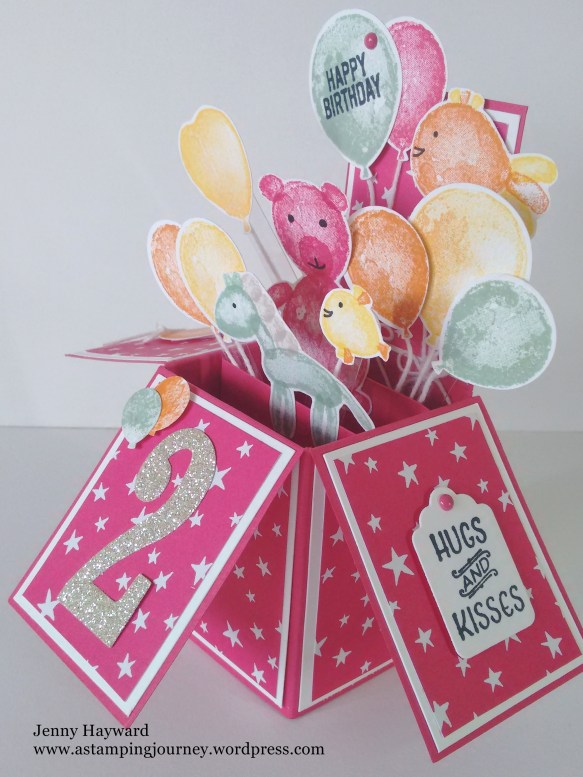
I can finally share this card with you.  I was so excited to finish this card but it had to wait. It’s kinda cute.  🙂

I was asked by a friend to make a special card for her 2 year old.  Things she liked was pink, purple and orange – and fish! How to incorporate all that??  I decided to go with the ‘Balloon Builders’ stamp set.

So, here it is for you. I have a few different angles for you.

image-6111

image-6113

The “Hugs and Kisses” sentiment is from the ‘Party Pants’ Sale-A-Bration set.  The ideas for the different balloon animals were from Pinterest. I had to incorporate a couple of fish in there somewhere. 😉  The Designer Series Paper is from ‘It’s My Party’ paper stack.

image-6110

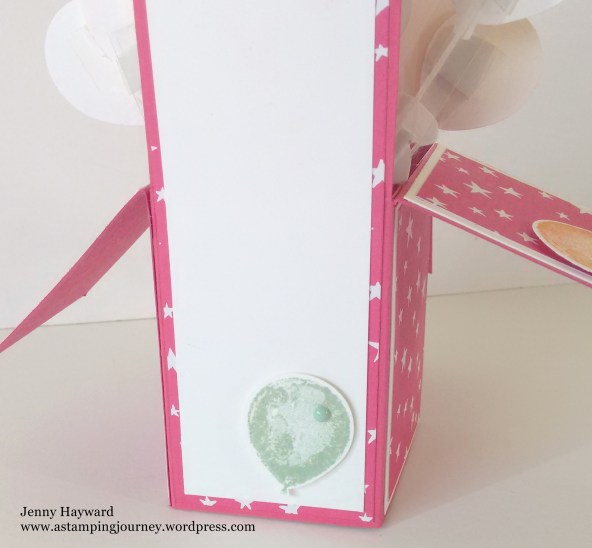
And the back gives a place to write on.

image-6108

What do you think?  This was a labour of love and I had so much fun creating and it was very well received.

Thanks for visiting me.

Jenny

Sale-A-Bration, Stampin' Up!

TICK, TOCK. TIME IS TICKING AWAY!

tick tock

Sale-A-Bration ends THIS THURSDAY!  Not long left.

Have you been sitting on the fence about joining?  Still can’t decide whether you want $126 of free products? What is there to think about!

If you think once you sign up you are there for life.  Believe me, you can leave Stampin’ Up! anytime.  You receive free products of your choice when you join Plus discounts every time you put an order in. Plus you can meet some pretty awesome people like myself at regular Stampin’ Up! events. LOL! Now if that is not an enticer I don’t know what is. 🙂

Still not convinced? Read this post HERE.

You can join my fast growing team if you are anywhere in Australia.  I help you on your way to a fun journey with Stampin’ Up! You can join directly HERE on my website.

Still not for you?  Why not shop.  For every $90 order you can pick your free products from the Sale-A-Bration catalogue.

Shop HERE at my website.  I can ship anywhere in Australia.  Receive a special gift to say thanks. So please make sure you tick the box to leave your details. 🙂

Please use the HOST CODE: UHQJKWDT

SAB reminder card

Please don’t forget your order. Friday is too late. 🙂

Thanks for shopping with me.

Jenny

3D projects, Classes, Stampin' Up!

MORE EASTER BAGS AND TREATS!

Happy Easter

Happy Easter to you all.  I hope that the weekend will be a great one with those you love and that you remember the greatest act of Love we have been given as we celebrate this time.

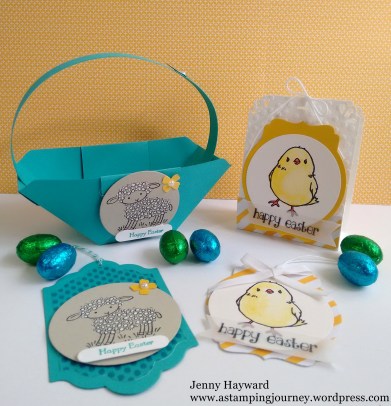
Last post I shared some cute Easter baskets.  I thought I would share another Easter bag as well as some Easter tags.  It’s not too late to whip these up right! This bag and the basket from last post plus these 2 tags are ones we made at my Easter class last week.

image-6134

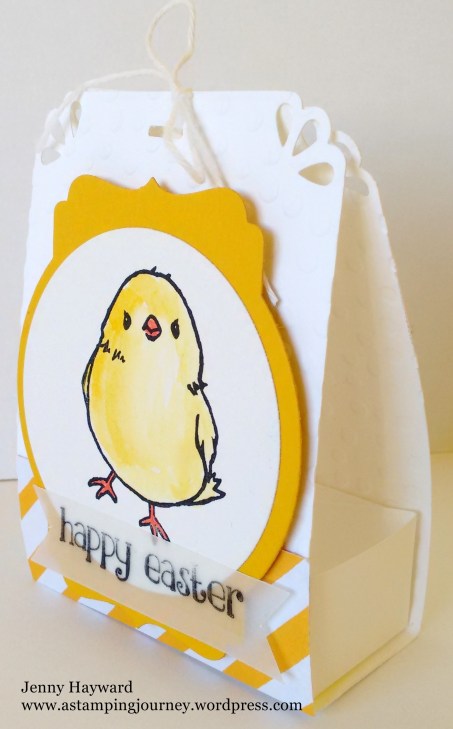
This little treat bag was inspired by a project I found on Pinterest but you can find the tutorial HERE. It’s very easy to make.  For mine I decorated it with the chick from ‘Honeycomb Happiness’.  This is such a great image for Easter don’t you think?  I stamped it on Shimmery White and coloured it with the Crushed Curry inkpad and the aquapainter. I cut the image with the Circles Framelits and layered it on a Crushed Curry card cut with the ‘Deco Labels’ Framelits.  The strip of DSP is from the ‘It’s My Party’ Paper Stack. I decided to stamp the greeting on Vellum in Black Stazon so it didn’t cover the chick too much. The greeting is from the ‘Easter Lamb’ stamp.  On the bag I punched the corners of the card with the Curvy Corner Trio Punch and added a slit with the punch too. I embossed the card with the Decorative Dots Embossing Folder too. Cute!

Inside there is a separate little box that you adhere to the inside.  It is so easy.

image-6135

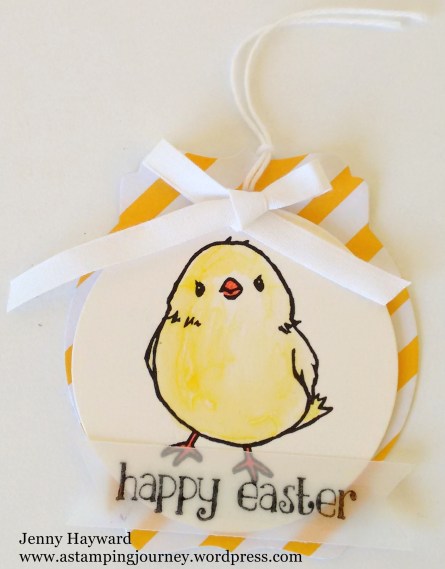
We made a similar tag.  This time I cut some of the DSP with the Deco Labels Framelits and I cut one with Whisper White as well to adhere together for added strength and also to have white card to write on the back.

I added a White Cotton Ribbon bow and some White Baker’s Twine to hang from it.

image-6138

This next tag we made was using the Easter Lamb stamp.  So cute.  The lamb was stamped on Sahara Sand and coloured with the White Gel Pen after it was  cut with the Circles Framelits. I cut some DSP from the Bohemian DSP with the ‘Lots of Labels’ Framelits and also a larger one from Bermuda Bay.  I tied through some Bermuda Bay Baker’s Twine. A little flower was added punched in Crushed Curry with the ‘Itty Bitty Accents’ Punch Pack. The greeting is from ‘Teeny Tiny Sentiments’ and I cut this one with the Bitty Banners Framelits.

image-6136

Now you can whip these up in no time – or file them away for next year 😉

Have a lovely Easter time.  Visit again soon,

Jenny


cards, Stampin' Up!, Techniques

SOMETHING FOR BABY!

I can finally show you this card.  A friend who is also one of my downlines had a baby boy back in January.  I have only got to see her recently so now I can show you the card.

baby blue

I found the idea for the window card on Pinterest but I changed it around and made it larger into a standard size card.  The window was cut with the Square Framelits. The Designer Series Paper was the ‘Perfectly Artistic’  Sale-A-Bration paper which is now no longer available.  Well it was when I made the card 😉

The cute little suit is from ‘Something For Baby’.  It is so nice to have the matching framelits too.  No cutting!!  The greeting is from ‘A Dozen Thoughts’, stamped and then punched with the Oval Punch.  I cut a red banner using the ‘Itty Bitty Framelits’.  I cut the banner in half and adhered this to the back of the oval to make it larger. The red gives it a “POP” I think.  I added the red Candy Dot to the bib.  I am still unsure, maybe it should have been a Tempting Turquoise one?? Sometimes you second guess yourself.

Here is the inside.

baby Insdie _ 2

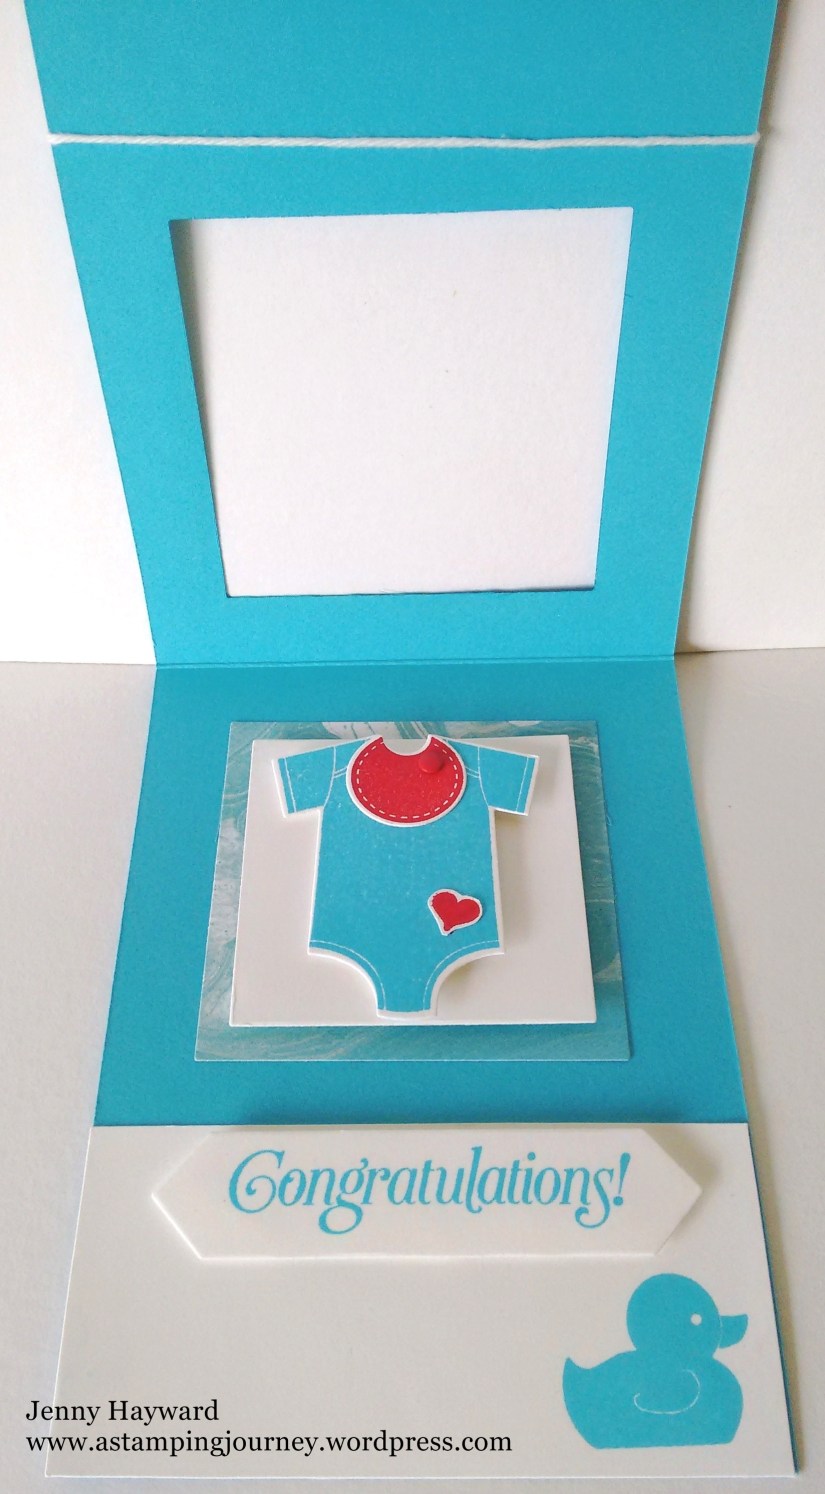
I added a piece of Whisper White to the bottom inside.  I stamped the duck in the Tempting Turquoise too. The greeting is from Sale-A-Bration set ‘Sky is the Limit’ which is no longer available either. 😦  I stamped it and then cut the greeting with the ‘Project Life Cards and Labels Framelits’

I think it has the cute factor.  What do you reckon?? 🙂

Thanks for visiting today.

Have a great day.  The weather is turning chilly now.  I am sad that Summer is leaving us but it is a relief to have cooler nights to sleep better.

Jenny

cards, Masculine, Sale-A-Bration, Stampin' Up!

PARTY PANTS 21ST!

I needed to make a 21st card for Josh to give to a friend.  It needed to be quick.  I didn’t have a lot of time.  I had just received the Large Numbers Framelits so I thought this might be just the thing.  Plus I received the Sale-A-Bration ‘Party Pants’ set.  I love these little sentiments in this set.

Here is the card for you.

21st

I have used some of ‘It’s My Party’ Paper Stack. I have used so much of these papers. There is 48 12″x12″ sheets in the pack.  Not just some bright party type papers but some neutral Sahara Sand and black and white sheets.  Very versatile I think. 🙂

I cut the 21 from the black DSP piece and then added a piece of Real Red card behind it.  I matted it all on some Whisper White and then a Black card base.  The sentiment from ‘Party Pants’ is cut from the ‘Tags and Labels’ Framelits and matted on Real Red card frame.  I looped up some Silver Cord to add behind the sentiment.  Josh thought it was cool as it looked like barbed wire!!!  🙂

So a quick masculine 21st card was made in record time!

Thanks for visiting today.

Jenny

3D projects, Classes, Stampin' Up!, Workshops

FUN PROJECTS AT MY EASTER CLASS!

Easter is fast approaching! Actually NEXT WEEK! It seems like we have just recovered from Christmas.  Although I think Easter eggs have been in the shops for a while. 🙂

Come and join in some Easter fun this Friday at my Easter Class.  Here are the details.

We will make an Easter basket, Treat Holder as well as 2 tags that you you can add to your own store bought Easter treats.

Easter 2016

WHEN: This Friday 18th March at 10am or 7.30pm.

WHERE: My studio East Corrimal.  I will give you the address when you reply. 

COST: $15. Please bring your own adhesives.

Please RSVP by Wednesday 16th March.

Jenny

cards, Classes, Stampin' Up!

PARTY POP-UP CLASS REMINDER!

There are still places left for my Party Pop-Up class this Saturday.  If you can’t make it you can buy the kit. I need to know ASAP though.

Here are all the details again.

We will be using the Party Pop-Up Thinlits in 3 different ways.

SATURDAY 12TH MARCH    2PM      

Please RSVP by Thursday 10th or Friday morning the latest.

COST:  ** NOTE DIFFERENT CLASS OPTIONS.
a) Class Only:    $20

b) Free Class with ‘Party Pop-Up Thinlits     $50

c) Kit Only: Can’t make the class? Purchase the kit which contains all card and embellishments and cut Thinlits (excludes stamped images). Also includes instructions.                                                                                              $20.

BYO scissors and adhesives.

Here is a sneak.

ATT_1455430144351_image-5251

So join in the class or buy the kit.  Let me know ASAP,

Jenny