3D projects, cards, Christmas, Classes

CRAFT FAIR MAKE AND TAKE!

Now that I have shared a lot of the projects that I have made for the markets and Fairs I thought I would show you the Make and Take I had at the last Craft Fair event.  It had to be quick and I hope impressive??  I made a quick tag. Of course with the very beautiful set ‘Wonderland’.

P1170790

This tag was inspired by one from my friend Vanessa.  Simply stamp the trees in Garden Green on a piece of White cardstock and stamp again to stamp a fainter impression.  Tear a piece of the Winter Wonderland Vellum Stack to adhere at the bottom.  Punch out a small star with the Gold Foil and add a Rhinestone.  At the top punch with the Scallop Tag Topper Punch and tie off some Garden Green Striped ribbon.

It was a simple one for even those who had never stamped before and they loved it. I don’t think you can make a bad project with this set really. Can you??

Did you realise that this set will not be available after January 4th?? You better grab it now. Don’t regret it.  Now how many times have you debated about a stamp set and then after it is gone you realised you REALLY SHOULD HAVE BOUGHT IT!!!! Don’t regret this one.

Order it at my Online Store NOW!  Head HERE.  Please use the Host Code: DRVPX7DB

Now before I leave you I thought I would show you my display at the last Fair.  We were all squashed in but that was OK right??  This set up was similar to most of the events I have done recently.

doll bear craft fair 2015

A close up of the shelves with the boxes and other of the gifts.  The Easel Calendars were on the shelf above which you can’t see.

image-3333

Thanks for stopping by.  See you again soon,

Jenny 🙂

3D projects, cards, Christmas, swaps

TEAM CHRISTMAS SWAPS!

I thought I would show you the swaps I received from last week’s team meeting.  There are some really cute ones here.  I think Tags were very common 🙂  They are great to use as tags or add them to cards.

P1170689

Sorry for the lighting.  Sigh! Must do something about this BUT you can get the idea anyway.

Now the cute little penguin card in the back does have a head.  Sorry about the photo.  The penguin is stamped on the inside of the card and a circle window is punched on the front with the hat on the front.  It is so cute.  I love all these ideas. Thank you to all the clever demonstrators in the Inky Fingers Team.  Nice to share ideas.

I will show you my swaps.  Once again – tags! Now that wasn’t the theme but funny how it works out.

P1170686

I CASED the red one from Pinterest and made up the other in Smoky Slate, Pool Party and Bermuda Bay.  These use the ‘Sleigh Ride’ Edgelits.  For the red one I punched out stars from Gold Foil using the Star Border punch.  The Smoky Slate one I have punched out one star in Silver Foil. Then I added some Dazzling Details for a sparkle but you really can’t see that well sorry.

I better get going. Our internet is being switched off soon to transfer it over to the new NBN network.  Hopefully it is not too long offline.  I think my kids are going to die!!!!! 😉

Thanks for visiting.

Jenny

3D projects, Christmas

TEAM SECRET SANTA!

We had our last ‘Inky Fingers’ team meeting for the year last week.  As usual we had swaps and also had a Secret Santa.  I will show you the Secret Santa gifts in a minute but first I will show you the swaps I made.

I had limited time but I made up some tags with a candy cane attached. These are just some of the selection.

P1150552

I used the Scallop Tag Topper Punch to punch out the top of the tags.  I stamped the background on the tags with ‘Gorgeous Grunge’ for the speckled effect and the stars from ‘Be the Star’ stamp set.  The “Merry” is from ‘Cheerful Tags’ and the “Merry Little Wish” from ‘Get Your Santa On’. I used the Nordic Noel DSP to cut the trees and the stars.

Now I will show you the Secret Santa gift I received.  This is a cute little backpack and was filled with teabags and chocolate!

P1150619

P1150614

Isn’t it sweet?? I have been wanting to make one of these for a while but now I have my own cute one.  Thank you my Secret Santa 🙂

Here is the gift bag that I made for my Secret Santa. It was a regular white gift bag with handles and then I made up the stars to hang off it. It is hard to see but I stamped the stars in Lost Lagoon and heat embossed them. The silver stars were embossed with the Big Shot using the Perfect Polka Dots Embossing Folder. I added a Rhinestone to each star and threaded Silver ribbon to hang them.  I didn’t take a photo of the whole bag.  Sorry – but I think you get an idea.

P1150586

I hope your Christmas preparations are going well.  It is hard to believe that Christmas is in just 2 days. Yikes!!

Thanks for stopping by,

Jenny 

3D projects, Blog Hops, cards, Techniques

STAMP-A-LATTE HOLIDAY BLOG HOP!!

Latte Holiday blog hop banner

Welcome to the First Stamp A Latte Holiday Blog Hop.  We all have some great projects from the Stampin’ Up! Holiday Catalogue to share with you today.  You may have just come from Narelle’s blog Here or you may be starting out here. Either way sit back and enjoy your little hop around.

Today I am focusing on the Snowflake Thinlets. I really like this Thinlets set.  They are so versatile for a number of different occasions not just Christmas.  Not only does it contain the Thinlet to create the Flip card but it has a 2 different size snowflakes, a tree, a heart, banner and 3 words (Brrr, Joy, snow).

snowflake thinlets

On to my projects.  I have made a cute little tag box and a flip card.

P1140514

Firstly, the card…

P1140516

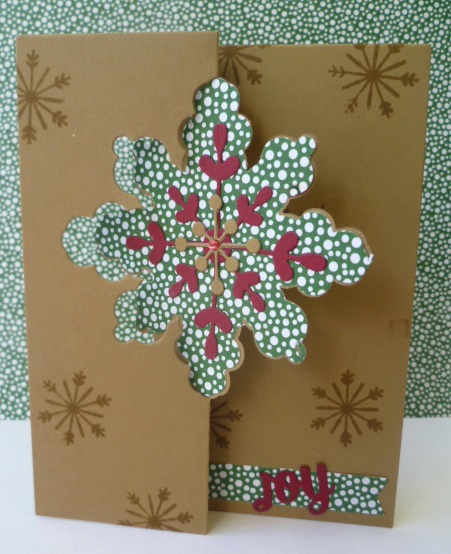
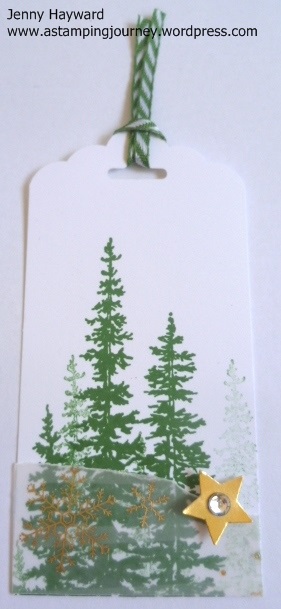
I have used the Nordic Noel DSP with Baked Brown Sugar and Cherry Cobbler cardstock. The snowflakes stamped on the card are from the ‘Cheerful Tags’ set.  They co-ordinate so well with this die I think.  I cut a large snowflake in Cherry Cobbler and a smaller one in Baked Brown Sugar to layer them together.  The Rhinestone in the centre was coloured with the Blendablilites.

What made this Thinlet die even more useful is that recently I discovered that you can cut the centre large snowflake out.  I was watching the Stampin’ Up! Snowflake Thinlet video here and they showed this little tip.  I will show you below.

Cutting a Thinlet Snowflake.

Cut a piece of DSP or cardstock larger than the shape and cut it out with your Big Shot.

P1140456 - Copy

Turn the Snowflake to line it up in the Die the other way to cut it out completely.  I found it easier to lay the Die upside down on a cutting plate and place the DSP or cardstock into the Die rather than try and line the Die over the paper. Then you can just lay the other cutting plate on top and cut it.

P1140457

This is what you end up with. How cool!

P1140458


Now on to the box.

P1140518

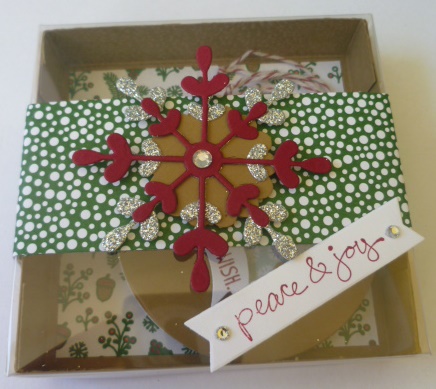
Once again layering some cut Snowflakes on the top.  The greeting is from the ‘Good Greetings’ set that you can get for free this month. Check the blog post here if you missed those details.

Now on to the inside.

P1140519

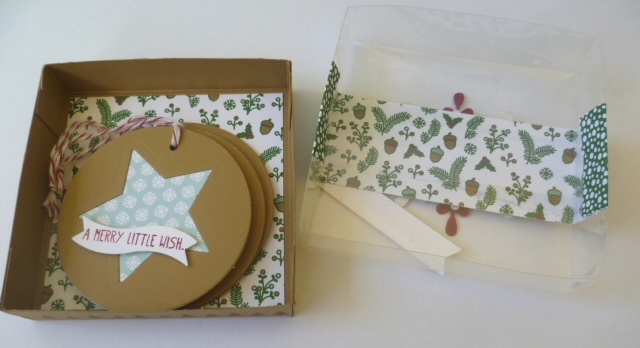
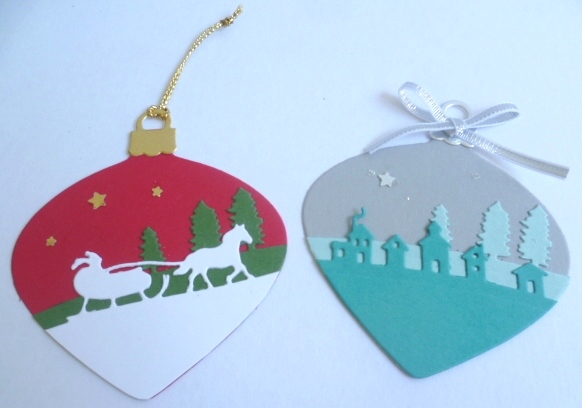
I used the Nordic Noel DSP again. I added a strip of DSP on the top of the acetate lid but it doesn’t wrap right around.  I lined the bottom of the box too.  This one was the reverse side of the DSP strip used on the lid.  It holds these cute tags I made.  I just made 3 but you could easily fit lots more in there.

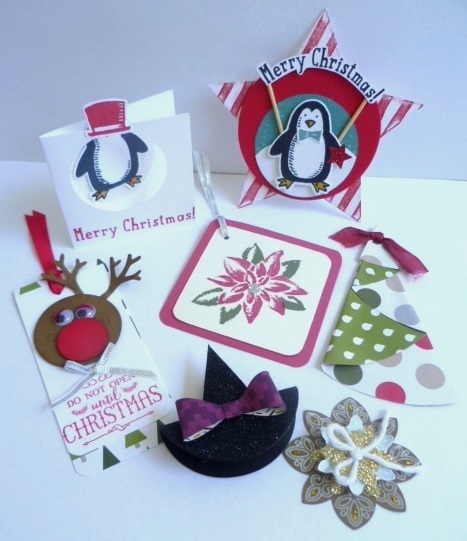
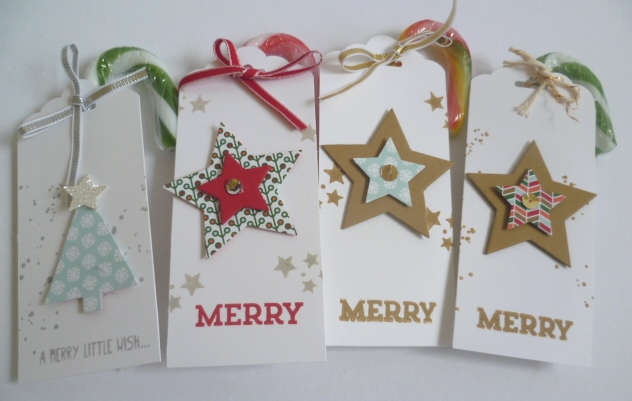
Here they are close-up.

P1140520

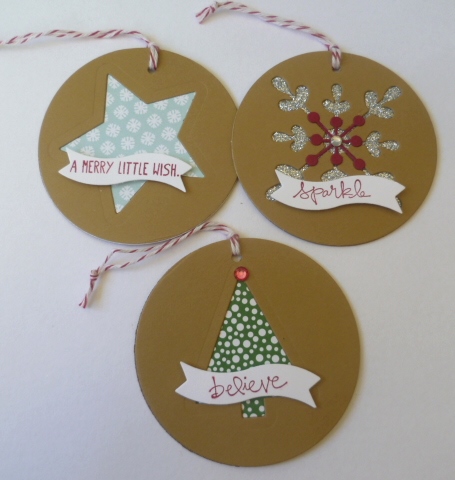
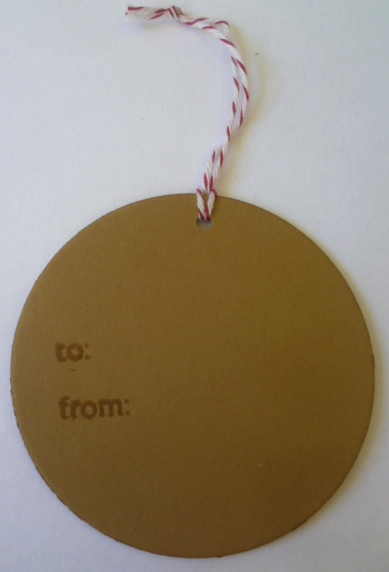
I used the 1 3/4″ circle Punch to cut the Baked Brown Sugar circles. The tree and snowflake are cut from the Thinlets.  The Star is one from the Star Framelits set.  These Banners were cut with the Bitty Banner Framelits.  Here is the back. The “to” and “from” is from the ‘Cheerful Tags’ set again.

P1140521


OK now you have had a photo overload.  I will spare you anymore so you can be on your way.  If you would like to know how I made the cute Tag Box then stop by tomorrow and I will post a tutorial.  I think I have taken up enough of your time.  You need to get on to the next blog now.  Thanks for stopping by today 🙂

Remember to stop by and comment on each blog so you can be in the running for a prize.  You will go in a draw for a Trim the Tree DSP Stack and a pack of Rhinestones (Australian Residents Only & Stampin’ Up! Demonstrators are ineligible for the Blog Candy).  Now on to Virginia’s blog Here.

If you get lost here are a list of blogs you will visit today.

  1. Leonie Schroder     http://www.stamp-a-latte.com
  2. Narelle Fasulo         http://www.simplystampingwithnarelle.com
  3. Jenny Hayward      http://www.astampingjourney.wordpress.com
  4. Virginia Hampson    http://www.stampinup.net/esuite/home/stampoutyourartwithvirginia/blog
  5. Libby Dyson           http://www.libbystampz.com

3D projects, cards, Stampin' Up!, swaps

MINI CHRISTMAS TAGS

A couple of weeks ago just before our last team meeting I realised I hadn’t done swaps yet.  These are not compulsory but I really hadn’t done any for a few months and yet another meeting comes by and I haven’t got anything to share.  What was I going to do??? It was a couple of hours before I had to leave.  I did a quick trawl on Pinterest.  Isn’t that your ‘go to’ site!!!!  I found some little Christmas tags that inspired me. So thought I would create some little simple tags similar to the ones I saw.

Here are the ones I created.  It is not the best photo as I was just dashing out the door to leave. I gave everyone a couple of them each.  I know it is only a small token BUT it was something.   I realised I didn’t even keep any for myself though!  DOH!

P1090966

I used the Chalk Talk Framelits to cut the tags from Whisper White and Crumb Cake.  I punched out little shapes using the Merry Minis punch pack.  Did you know these were still available??? They are very cute.  I adhered these to the tags and added a Rhinestone on the ones cut from coloured card. Then I added a small greeting.  These ones are from Petite Pairs and Teeny Tiny Sentiments.  I added some co-ordinating twine to finish them off.  Job done in record time.  I will just have to be a bit more organised next time.  🙂 Have a great day in your part of the world.  It’s a lovely sunny day here.  I think Summer has hit us early.

Till next time,

Jenny