I’m making up some little Thank You Cards to send out to my lovely customers when they order. For the cards recently I have been using some “left-over” bits.
This one I was playing around with the Sunflower Embossing Folder. I fussy cut one of the sunflowers. I was going to add it to a previous card and then it didn’t work out. But not to waste it. I add it to this little Mini Card.
I had a small scrap piece of the Florals in Bloom Paper and trimmed it down for the front of the card. The sentiment from Simply Said set was stamped on some Lemon Lolly card.
I will share some more of these Mini Thank You cards very soon.
Happy Crafting,
Jenny
If you need some crafting supplies I would love to help you get them. You can shop in my store -> HERE. OR Contact me directly.
The details in the Sunflower 3D Embossing Folder is amazing! I have had a lot of fun with this folder lately. And I can’t wait to show you more with what I have created with it. But today I am sharing this one with you.
When you don’t feel like colouring the whole embossed piece you can diecut a circle or other shape and colour that small area. And don’t forget to colour with the blue around the flowers. It helps them POP more.
I embossed a piece of white card with the Sunflower Embossing Folder then I diecut a circle in another piece of white card. Then embossed the card. It is better to diecut the shape first. If you do that after you have embossed the card it can flatten the detail.
I used the Daubers and inks to colour this one. And used the Balmy Blue Light Stampin’ Blend for the surrounds.
I heat embossed the sentiment on black card. This helps it POP more too. The sentiment is from the Simply Said Stamp Set.
Have you tried the Sunflower Embossing Folder? It is a large one but there are lots of different Sunflower shapes over it and you can pick the area you like depending on your project.
The Embossing Folder measures 6″ x 8-1/2″ (15.2 x 21.6 cm). I said it was a large one!
Hope you get to create with it. I will bring you more with it soon.
We will be creating with this folder in class this week. If you are a Wollongong local I would love you to join in my classes. They are lots of fun and I can share lots of tips and and techniques that are sometimes a little tricky to share through a blog post.
Jenny
If you are in Australia and need supplies I would love to help you get them. If you have any questions don’t hesitate to ask too. I love helping my crafty friends.
You can head to my store -> HERE OR Contact me directly.
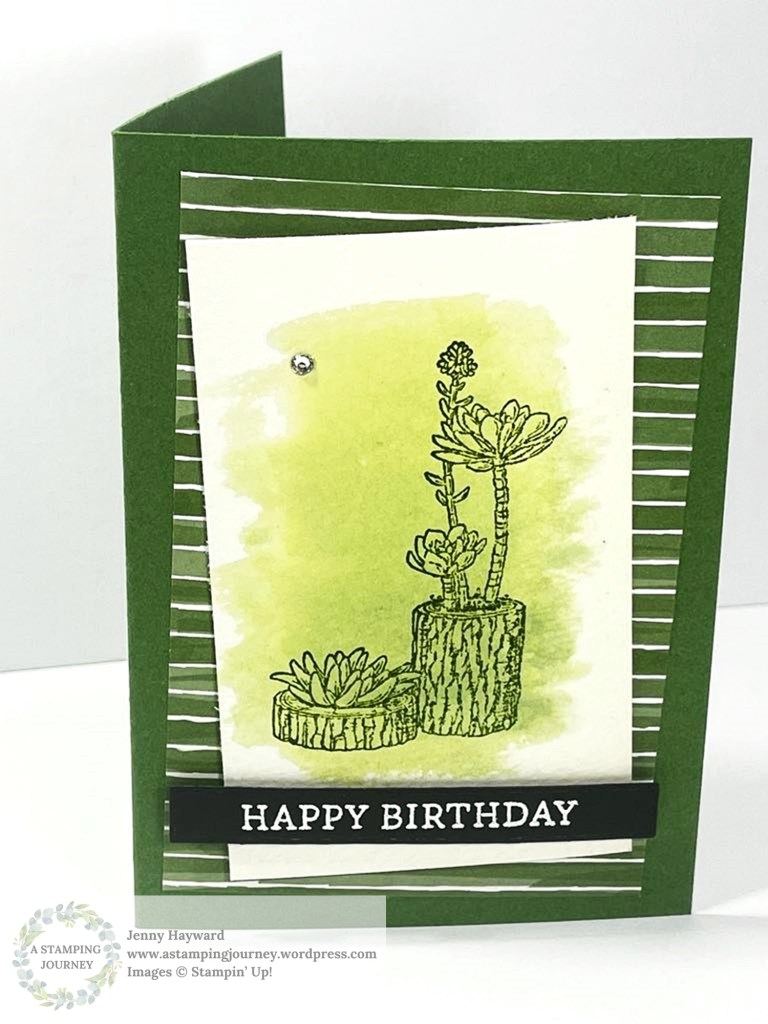
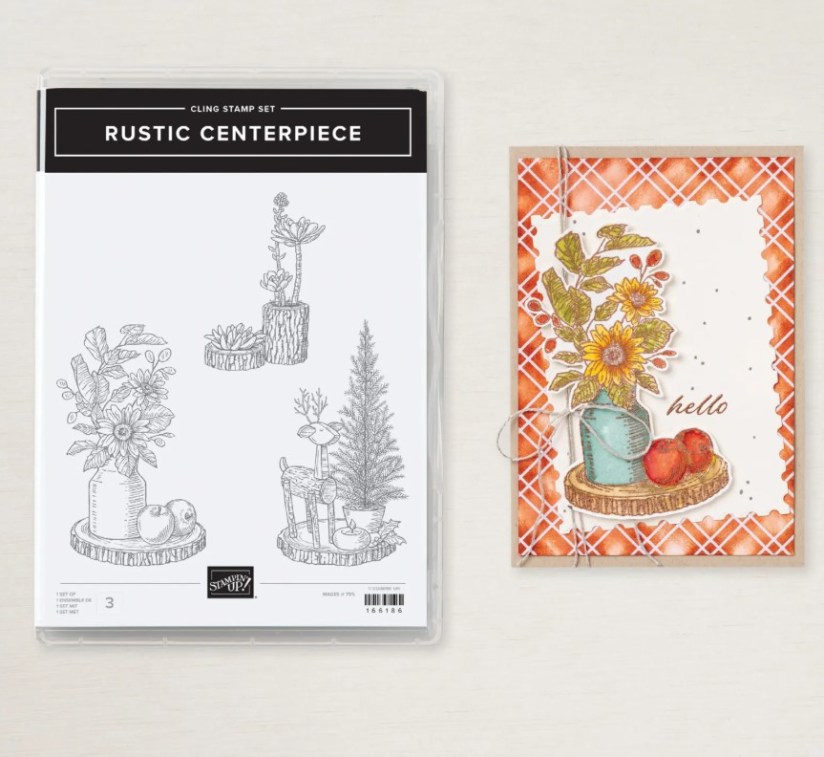
Another one with the Stampin’ Up! Rustive Centerpiece Stamp Set. I have been playing with this over the last few days. Lots of creative fun with it.
This time I created a Watercolour Wash over some Watercolour Card.
To create it I washed over some Watercolour Card with the Soft Sea Foam. I added a few drops of the Reinker in to the lid of the Ink Pad and added some water to it and swirled it around to mix it. With the Water Painter I washed over the card. Then I left it to dry before stamping on it.
When I came back to it the piece nearly went in to the bin. When it was drying I didn’t like the colours that were coming out. I picked it up to throw it and thought maybe I will just try stamping on it and see how it turns out. (To see if it works ok 😄). It was my little experiment. I actually thought it turned out passable in the end.
The succulents are stamped in Garden Green. I think the Black sentiment helps it all to POP. That was heat embossed in White on the Black card. The sentiment is from the Simply Said Stamp Set. The paper is from the Nests of Winter Designer Series Paper.
So the card lived to fight another day. Just a word of encouragement. If you don’t like how something is turning out, persevere with it. Put it aside, walk away, come back and work on it. You never know. It might just become a hero.
This is the Rustic Centerpiece Stamp Set if you missed it. It was released yesterday as an Online Exclusives.
You can find the stamp set -> HERE along with other Online Exclusives.
If you are in Australia I would love to help you get them. You can head to my store at the above link or Contact me directly.
I have been playing a lot with the Pretty Florals Bundle. I have shared some different ones already. These 2 cards are very similar. There are just some variations.
They have the same paper, the Florals in Bloom Paper, and I have created the black frames to really highlight the flowers. You might be able to tell the differences though.
The one with the Fresh Freesia flowers is using the larger diecut flower and the outline edge. I sponged over a little Fresh Freesia ink to add some extra definition. This one is on a Fresh Freesia Card Base. The sentiment is from the Simply Said Stamp Set and diecut with the Mixed Labels Dies. We made this one in our class last week using the Pretty Florals Bundle.
The other one is with the small pink flowers. The flowers are in Pretty In Pink and the little edges, (Not sure what you would call them) are in the Strawberry Slush. This one has a Pretty In Pink Card Base. The sentiment on this one is from the Stippled Roses Stamp Set I think.
So which one do you prefer?
This is a great bundle. I have had a lot of fun creating with it.
If you are in Australia need supplies for your crafting I would love to help you. You can stop by my store Online -> HERE or contact me directly.
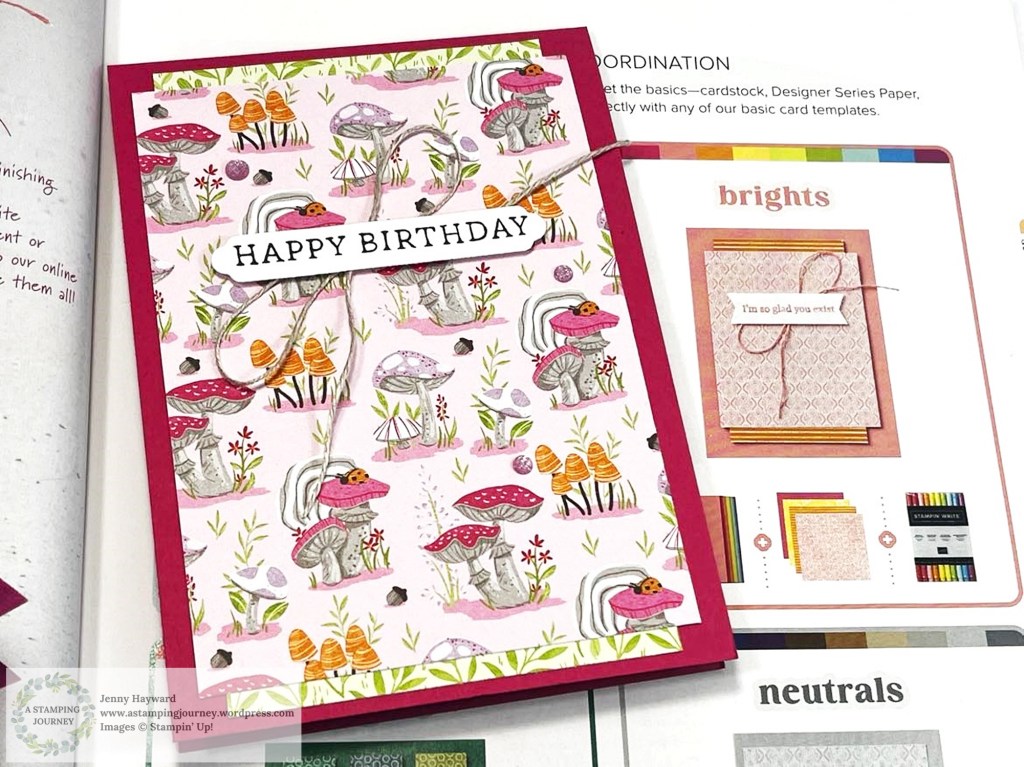
I’ve been having a little play with the Toadstool Gardens Paper. Not tell me – Does this give you Alice in Wonderland Vibes?? I’m expecting to see the Big Green Caterpillar sitting on those toadstools. What do you think?
I kept the layout simple for this one. I wanted to make the paper the highlight. I was inspired for this one by a card on Page 23 in the Annual Catalogue.
Here is a side view.
I added some gems on it for a little dazzle. The sentiment is from the Simply Said Stamp Set and was diecut with a die from the new Heart Shaped Dies Set.
The paper and the dies I used are available as Free choices for Sale-A-Bration. This all starts TOMORROW! (Tuesday). This is always an exciting time. Watch out for more news on that shortly so stay tuned.
Happy Crafting,
Jenny
Are you in Australia and need supplies? I would love to help you out.
You can contact me directly or Head to my store -> HERE. Get ready for Sale-A-Bration.
Wednesday’s WOW! #162 – Use Your Catalogue for Inspiration.
Do you struggle with creating sometimes?
You can find so much inspiration with the projects in the catalogue.
Copy them as they are.
Give them a twist in direction.
Change the colours.
Use a different stamp set or other products.
I was looking for ideas for the Unbounded Beauty Suite and came across this card on page 53 of the catalogue. Then changed it a little for my card.
I created a larger frame and added a sparkly leaf spray with the In Color Glimmer Specialty Paper. I used a piece of the Unbounded Beauty Designer Series Paper for the mat behind the white card. The sentiment is from the Simply Said Stamp set.
So next time you are stuck with inspiration, pull out your catalogue.