3D projects, Blog Hops, cards, Stampin' Up!, Tutorials

ESAD BLOG HOP WITH THE EASTERN PALACE SUITE!

Thank you for joining us on the ESAD Eastern Palace Suite Blog Hop.  I have already been sharing some cool projects with this suite this past week and I am excited to share this one with you too.

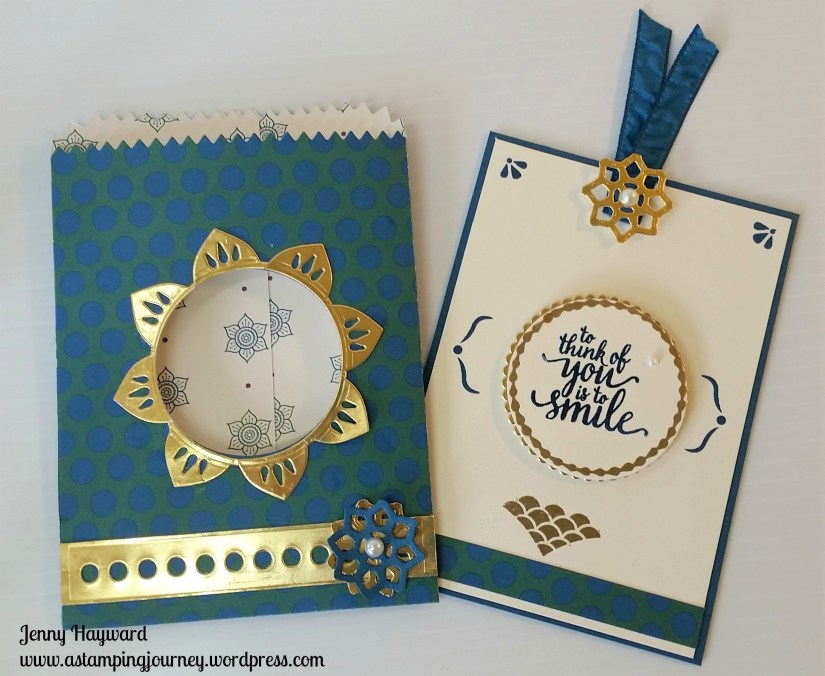
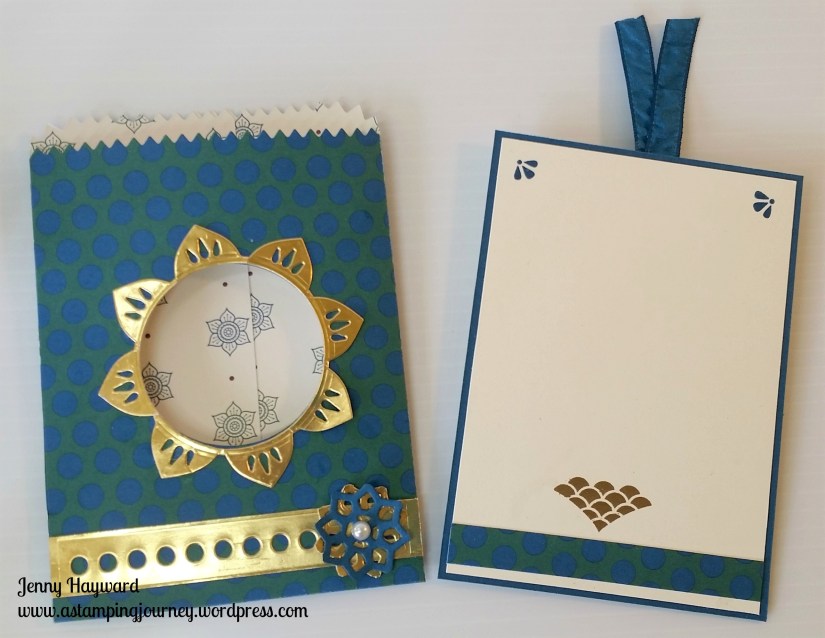
This project is a cute Tag and matching Envelope.  I will share the details on how to make it further below. It’s a bit hard to photograph with the shiny Gold Foil.  Sorry for the shine.

CREATING THE MINI TAG AND ENVELOPE.
THE ENVELOPE

1. Cut the envelope from the Mini Treat Bag Thinlits with the Eastern Palace Specialty Designer Series Paper.  Before you assemble the envelope be sure to cut the circle window in the front panel with the Layering Circles Framelits.
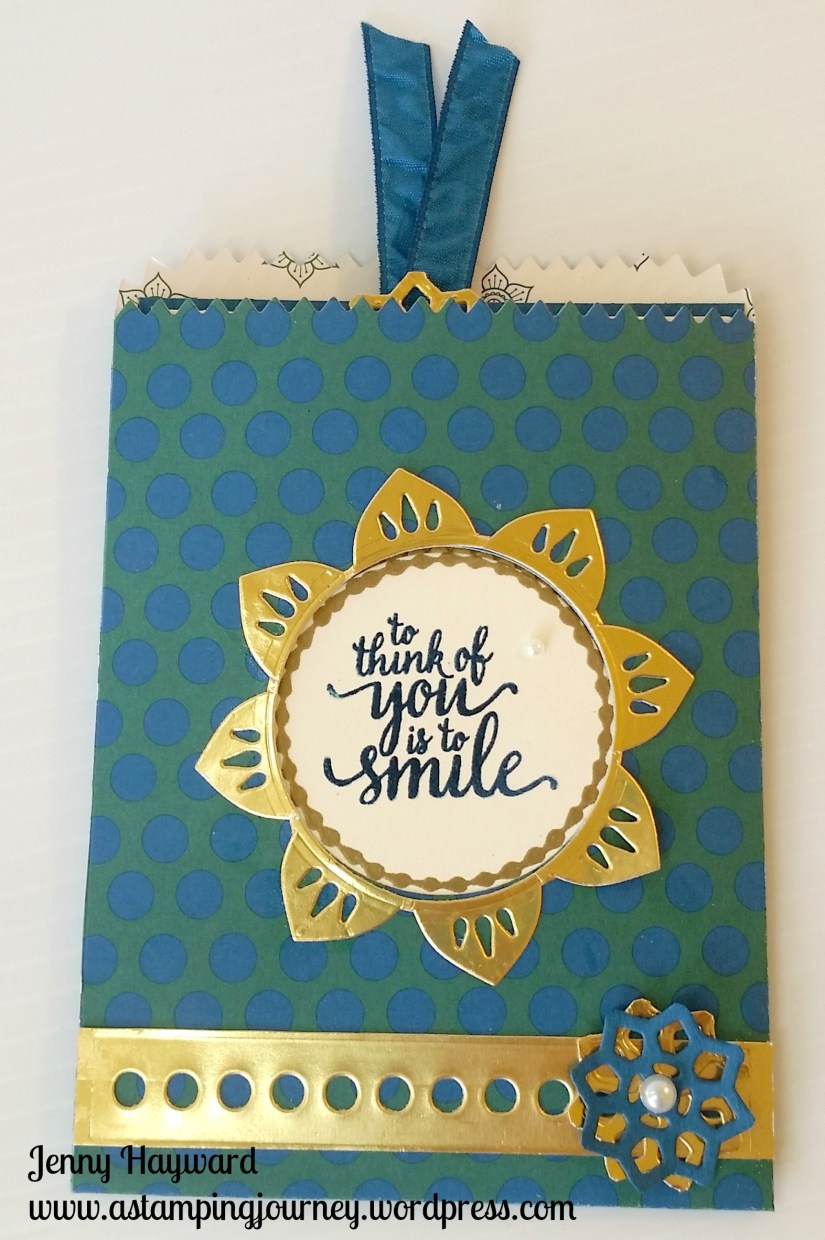
2. Cut the circled strip in Gold Foil using the Thinlits in the Mini Treat Bag Thinlits set.  The little flower on the front strip is cut from one of the small Thinlits in the Eastern Medallion Thinlits set in Gold Foil and Dapper Denim.  

3. The “flowery” diecut in the centre is from the Eastern Medallions Thinlits set.  It comes out attached to your card with the diecut outline. You can snip off the tiny sections where it is attached.  I then used one of the Layering Circle Framelits to cut out the centre of this piece and also cut the circle in the Treat Bag BEFORE  it is assembled as mentioned further above.

THE TAG

When you pull the tag out it reveals the stamped piece that you could see through the window of the bag.
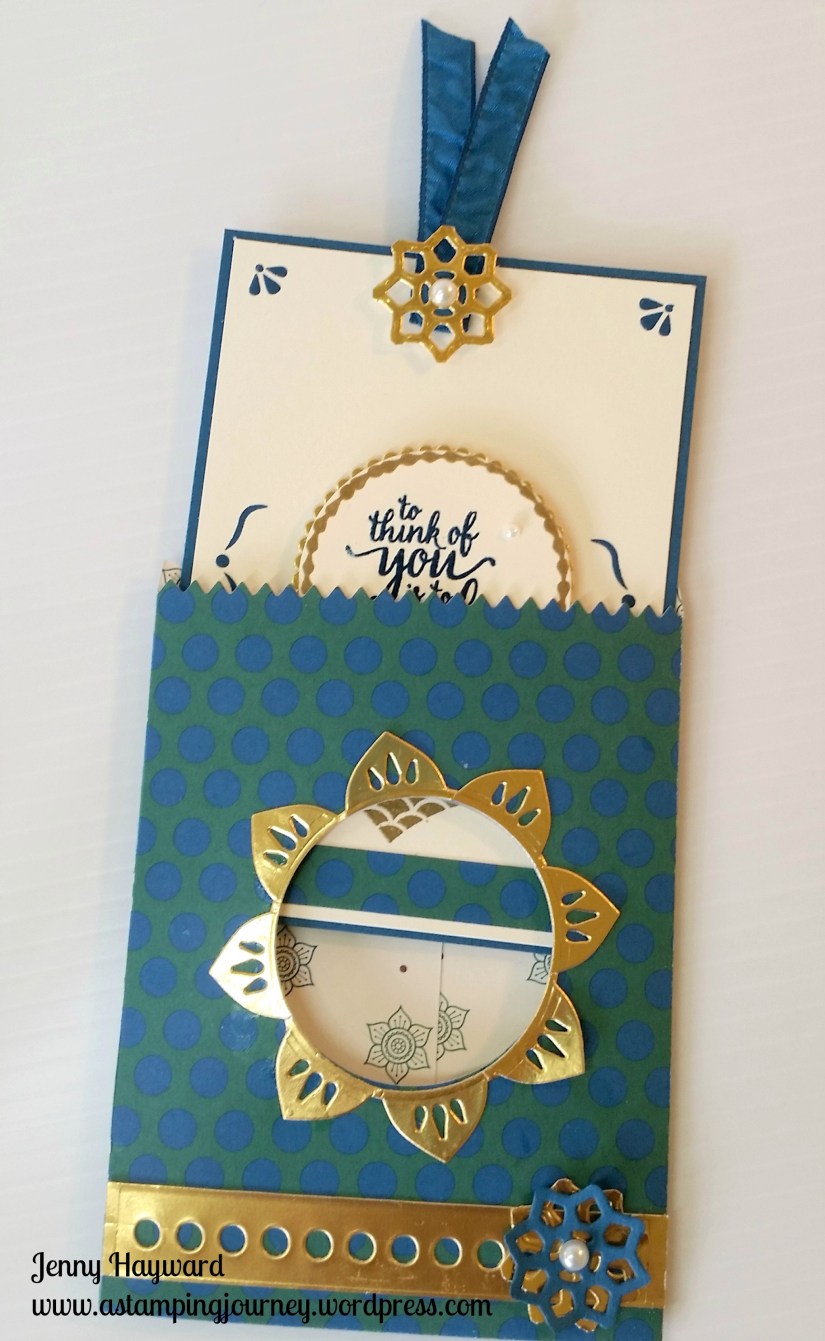
1. On a piece of Very Vanilla card [measurements are 8.4cm x 12cm – (3 3/8″ x 4 3/4″)] stamp the smaller images from the ‘Eastern Beauty’ stamp set in Dapper Denim. At the bottom heat emboss in gold the “flourishy” image. Add a matching strip of DSP along the bottom.

2.Heat emboss the circle image from the ‘Eastern Beauty’ stamp set in gold onto  a small piece of Very Vanilla card. Then heat embossed the sentiment in the centre.  To do this first ink the stamp in Versamark and then ink in Dapper Denim ink before stamping on the card. Pour over your Clear Embossing Powder and heat.

3. Cut the stamped circle with the Layering Circle Framelits.  Layer this circle on to a Gold Foil Scallop Circle which is a larger size of Scallop than the circle in the Layering Circle Framelits. Raise them up off the card with Dimensionals.  Layer this Very Vanilla tag on to a piece of Dapper Denim card [measurements are 8.8cm x 12.4cm – (3 1/2″ x 4 7/8″)]  Then add a piece of Dapper Denim Ruched Ribbon at the top and a small Gold “flowery” diecut over it. To finish add an Adhesive pearl to the centre of the flower and one on the circle sentiment.

4. For the reverse of the tag cut a piece of Very Vanilla card the same size as the piece on the front of the tag. (measurements above).  Stamp the corner images again and repeat the DSP strip at the bottom and the Gold Embossed “flourish”.
If you haven’t seen this great suite yet then below is the stamp set and the thinlits.  How many different ways can you use these Thinlits?? I will show you in a post soon.


You can see more about this suite in store HERE. 

Now you can continue on your Hop to see some more fun creations with this set.

              You will be off to Narelle’s blog now.  Click ->  HERE to continue.


Thanks for visiting.  See you again with more Eastern Suite Palace projects again soon,

Jenny


Blog Hops, Catalogues, Stampin' Up!

JOIN US FOR THE EASTERN PALACE BLOG HOP SUNDAY NIGHT!

You have probably seen lots of projects with the Eastern Palace Suite released just this week.  I have shared a few projects already.  Make sure you stop by here tomorrow night (6pm AEST on Sunday) for a HUGE Blog Hop with some amazing creations using this suite.  I think you will love it!

If you can’t join at that time then you can stop by later and “take the hop”.

See you then,

Jenny

cards, Catalogues, Stampin' Up!

EASTERN PALACE MINI CARDS!

We had our team meeting last night.  I decided that I might get some swap cards made – like decided in the middle of the day!!  So these cards had to be quick – and they were!  A little die-cutting, only a little amount of stamping and then sticking them all together.

I have just started playing with this new suite, the Eastern Palace bundle, which will be available to order from next Monday.  I really like how fancy the dies cut and there are so many ways to put them together.  I will show you more about that another day but for now here is the card.

These are little 10cm x 10cm cards (4″x 4″).  I cut a smaller piece of the new Eastern Palace Specialty Designer Series Paper and adhered that to the base and then cut a piece of Very Vanilla cardstock just a little smaller again.  From this piece of Very Vanilla I cut the circular shape using a Thinlit and then the flower petals using a different Thinlit from the Eastern Medallions Thinlits set. Voila! A fancy card with little trouble at all. 🙂

I stamped one of the sentiments at the bottom from the Eastern Beauty stamp set.  I love how the sentiment curves around. Then I stamped the small flourish in both top corners.  From a different piece of the Eastern Palace Designer Series Paper I punched a circle with the 1/2″ circle punch and raised that up with Dimensionals in the centre of the petals and then added an Adhesive Pearl.

I hope you like them.  I think they were well received.  Would you like your own?  I would love to send you some Happy Mail in the post to wherever you are.  Just send me an email/comment.

Stay tuned for some more Eastern Palace projects next week including a Blog Hop.

Have a happy day,

Jenny.


Catalogues, Stampin' Up!

TOP 5 RETIRING BUNDLES!

Have you had a chance to check out the retiring list yet?  Items are selling out way fast!  I thought I would share my TOP 5 over the next couple of days.

Today is the TOP 5 BUNDLES.  Some of these Bundle items will be available as individual items (ie stamp set and the Thinlits) but if you like them then get them as the bundle now and save yourself 10%.

These items are still available as at this time but leave it and they might not be around too much longer.

In no particular order …

Lift Me Up Bundle       W $90.25     C $78.25


Dragonfly Dreams   Photopolymer $81.25


Cool Treats Bundle  Photopolymer $82.75


Oh So Succulent Bundle  Photopolymer $83.25

The stamps or Thinlits will not be available in the 2017 Catalogue.


Jar of Love Bundle   Photopolymer  $92.50

These and other bundles are available in my store -> HERE.  Order there or contact me directly. Australian residents only.

Jenny


cards, Challenges

TOP 5 PICK FOR COLOUR INKSPIRATIONS #06!

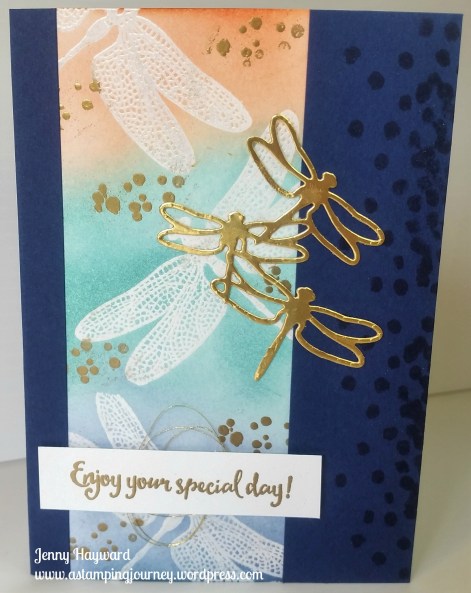
I am a little excited!  I have just been chosen as a TOP 5 Pick for this past week’s Colour INKspirations Challenge #06.  This was for my Dragonfly Dreaming card I showed recently. It’s nice to know they liked my card.  I can now proudly display the badge on my blog. 🙂

This was my card if you didn’t see it.

I am really enjoying taking part in these challenges.  It has helped me think about my stamping a bit more and to give things a go.  Life is crazy, busy but it has been good to take some time out and stamp something for myself.

If you want to join in too then head over to the Facebook Group Page HERE and check it out.

Wishing you a happy day/night.

Jenny

cards, Catalogues, Sale-A-Bration, Stampin' Up!

ANY OCCASION SITTING HERE!

Last day for Sale-A-Bration tomorrow.  Unbelievable!  I can’t believe that we are 1/4 of the way through the year either.  Crazy!

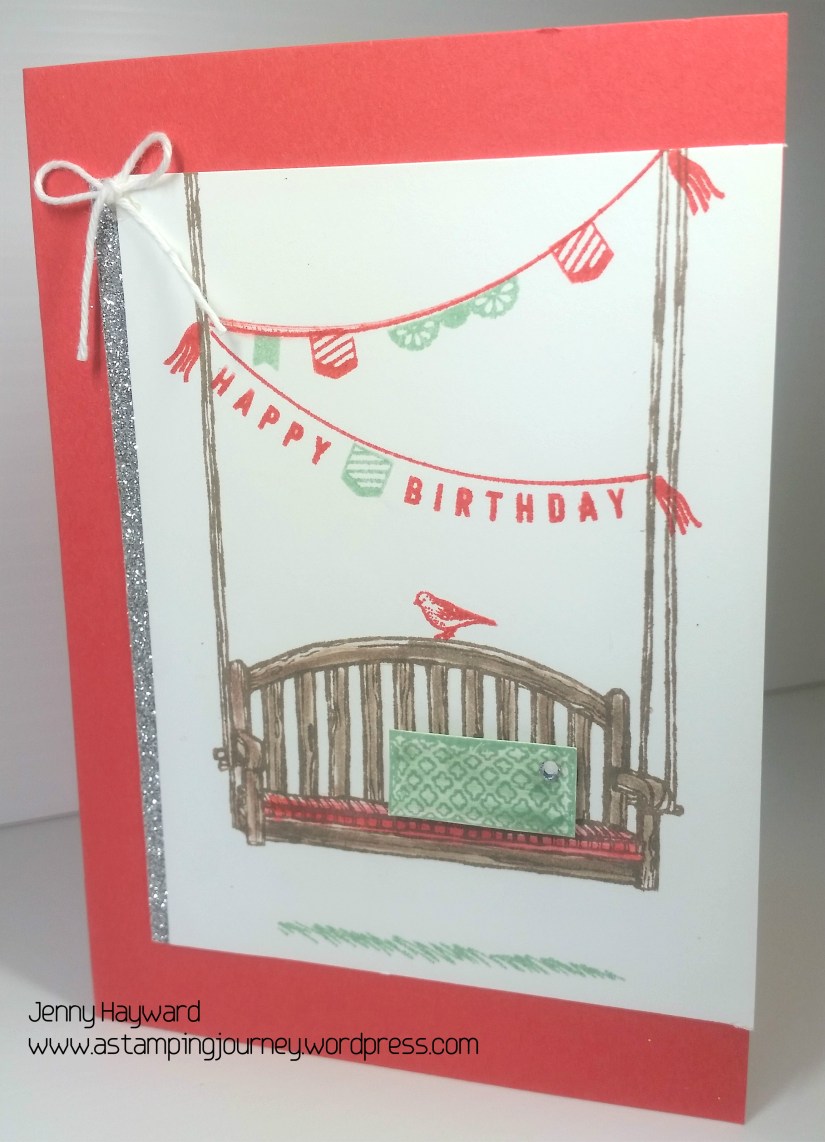
I have had in mind for a few weeks to do this card but I wasn’t sure how it was going to work.  I managed to grab a little time yesterday to put it together.

I wanted to hang the banners from the Sale-A-bration set Any Occasion across the “ropes” of the bench on the Sitting Here set.  I was pleased that they actually fit.

Colours are Watermelon Wonder, Mint Macaron and Tip Top Taupe.  Three colours that will be leaving us at the end of May.  😦  You better stock up on these colours now.

I coloured the bench seat with the Inkpad and the Blender Pen. The cushion was stamped separately and coloured, then raised up off the card with Dimensionals.  The card layout is based on a Freshly Made Sketches #179 sketch.  I added some Silver Glimmer Paper down the side but thought it still needed something.  I then added a Baker’s Twine bow and a Rhinestone on the cushion.

Hope you like it?

Last orders will go in tomorrow night for Sale-A-Bration so don’t delay.

Keep dry if you are on the East coast of Australia.  It is a little wet around these parts.

Jenny

Catalogues, Classes, Stampin' Up!

AVANT GARDEN AND SOME NEW CHOICES FOR SALE-A-BRATION!

Say What???

Yes! Stampin’ Up! are so generous.  New products choices have just been announced for Sale-A-Bration AND they are catalogue products.  How cool is that!  I will tell you about that but first I wanted to share this card for you using the Sale-A-Bration set Avant Garden.

I haven’t used this set nearly enough over the last few months.  (Maybe I was a little discouraged because I have lost the little stamen stamp).  Never mind,  there are still some gorgeous creations you can make without that little stamp.  This card is another card we are making at Card Class this Friday along with the Dragonfly card I shared last post.  Check back on the earlier posts if you want to see that.

I was inspired by a card on Pinterest to stamp the flowers as a background.  This card took a life of it’s own after that.

If you are in the Wollongong area come and join in the class this Friday 24th 10am or 7pm.  Lots of fun and creativity.

Now to those new products Stampin’ Up! are offering.

For every $90 order you can choose one of these catalogue choices as your Free option. Here they are. Which choice do you like? Paper, Embossing Folder or the Washi Tape.

Just a note:  If you are ordering Online (which is HERE by the way!) and you are choosing one of these please be sure to use the Item Codes shown below.

I need to get creating with this set more before it goes.  How about you?

Have a good rest of the week,

Jenny

cards, Stampin' Up!, Workshops

ONE LAYER LIFT ME UP BALLOON IN PASTELS!

I have a simple one-layer card to show you today using the Lift Me Up Bundle. This uses the different shaped pieces in the Up and Away Thinlits.  The idea for this card was inspired by one I had seen on Pinterest.  I thought it was a clever idea.

The different pieces were cut with Blushing Bride, Sweet Sugarplum and Soft Sky.  The basket was stamped and cut from Crumb Cake. I sponged around the edge of each piece with the matching ink.  Using the same colour inks I stamped the “splodge” from Gorgeous Grunge over the card.  The sentiment was stamped in black.

Before adhering the pieces down, place them on the card in position.  Mark the place in pencil where the “strings” for the balloon would be.  Then remove the bottom piece and stamp the basket strings in.  Then adhere the balloon pieces and the basket in to place.  Add some Blushing Bride Baker’s Twine and a Rhinestone to finish.

I am so glad I can make more of these now.  I had lost one of the Thinlit pieces for weeks.  I was feeling very sad – and then yesterday sorting out stuff in the studio I found it on the floor under a table.  YAY!!

Have a great day,

Jenny

cards, Catalogues, Stampin' Up!

SENDING SMILES WITH THE LIFT ME UP BALLOON!

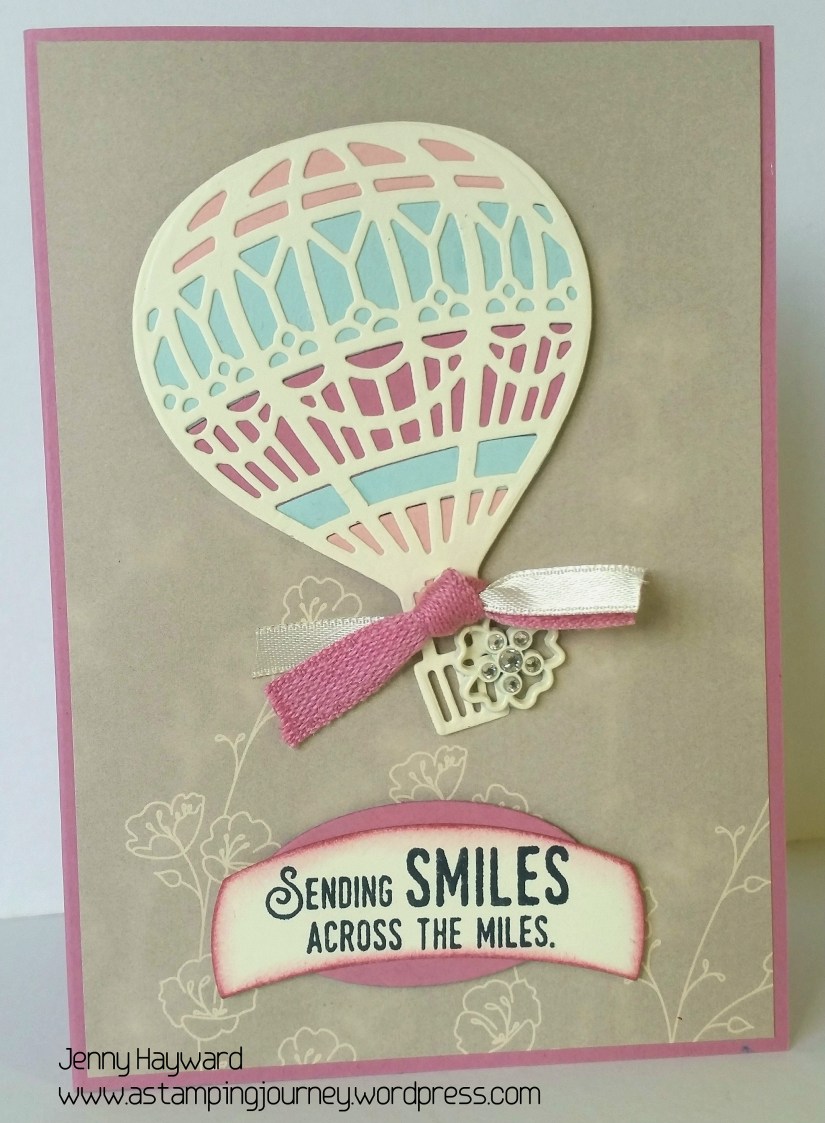
Another card to share with the Lift Me Up Bundle. This time I wanted to add some colour behind the balloon.  This is so easy to do with the shaped framelits in the Up and Away Thinlits set. This card was inspired by a card shared by a Demonstrator friend.  

sweet-sugarplum-hot-air-balloon

TO RECREATE THE CARD:

Adhere a piece of the ‘Falling in Love’ DSP to a Sweet Sugarplum card base.

Cut the large Hot Air Balloon from Very Vanilla Cardstock.  Using the shaped framelits in the Up and Away Framelits cut pieces in various colours of card.  I used Blushing Bride, Soft Sky and stick your card pieces down. Adhere the Balloon to your card.  Tie off some Sweet Sugarplum (from the Succulent Ribbon Combo) and some Very Vanilla Satin Ribbon and adhere on to the Balloon with a ‘Falling in Love’ Embellishment.

Stamp the sentiment on to Very Vanilla Card and cut that with one of the shapes. Sponge the edge with Sweet Sugarplum ink. Cut an oval from the Layering Oval Framelits from Sweet Sugarplum and layer them together.  Raise them up with Dimensionals.

A really very easy card once you put your Hot Air Balloon together.  Try it with different colour combinations perhaps?

Have a great day.

Jenny 

cards, Stampin' Up!

CARRIED AWAY DSP + HOT AIR BALLOONS = A GOOD MIX!

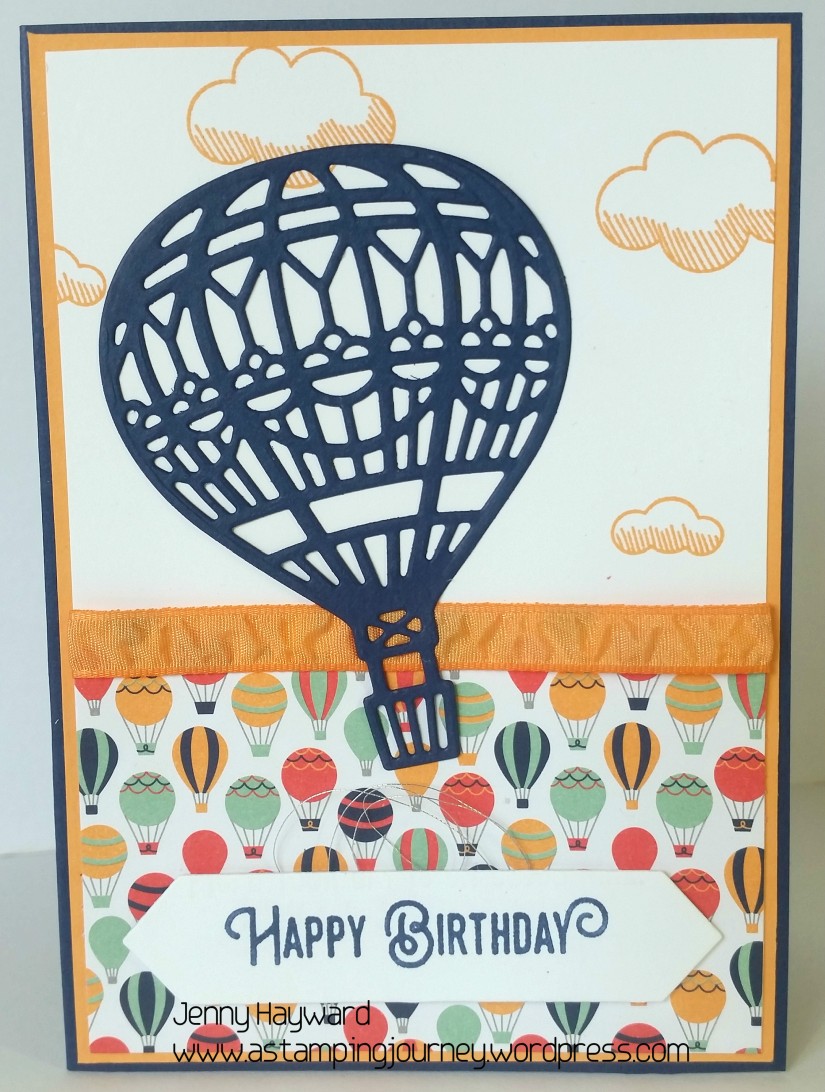
While I had everything out from making the card I showed you last post I thought I would put together another card.  This one also uses the Carried Away Designer Series Paper and Lift Me Up Bundle. It also has a similar colour scheme of the Peekaboo Peach and Night of Navy.

hot-air-balloon-_-night-of-navy

This time I stamped some small clouds on to the white card and layered over the DSP.  I added a piece of the Peekaboo Peach Ruched Ribbon before adhering it to the Peekaboo Peach card mat and then the Night of Navy Card base.

For the sentiment I inked just the “Happy Birthday” from the Lift Me Up Stamp set with the Night of Navy before stamping it and cutting it out with one of the Project Life Framelits.  You might just be able to see some silver Thread looped up behind the sentiment too??  The large Hot Air Balloon was diecut from Night of Navy with the Up and Away Thinlits.

I hope your weekend is going awesome??  Be back again soon,

Jenny