Product Share, Stampin' Up!

2016 OCCASIONS CATALOGUE RIBBON SHARE!!

Who loves ribbon??? Especially when it is lush Stampin’ Up! ribbon that matches your card AND ink and just finishes it off with that elegant touch.  I know sometimes it is hard to get through a whole roll of ribbon.  So why not share it around!

Join in my Ribbon Share and get a taste of all the different ribbons and twine in the Occasions Catalogue. Take your pick OR join them all.  Here are the details.  Just message or leave a comment that you want to take part and then I can get back to you about shipping etc.

Baker’s Twine Combo    5.7m each of Melon Mambo/Black and Mint Macaron/Black

                                                                                                                                $3.00

bakers twine

 Pool Party Glitter Ribbon    2.2m                                                               $2.50 

glitter ribbon

Watermelon Wonder Stitched Satin Ribbon       2.2m                      $3.70

watermelon wonder ribbon

Bermuda Bay Stitched Ribbon      2.2m                                                   $2.75    

bermuda bay ribbon

So you can join in as many of the ribbon shares as you like.  Join them all and receive a discount.  Total for all the shares is $11.50.

These shares already include the 5% Shipping and Handling. If you need the ribbon shipped to you there will be an additional small cost to send them on to you.

Let me know ASAP.

Jenny

Stampin' Up!

20% OFF SELECT STAMPS BUT BE QUICK…..PLUS WE ARE SAYING GOOD-BYE TO HOLIDAY CATALOGUE PRODUCTS!

20 percent off

Everybody loves a sale don’t they??? Well, Stampin’ Up! has a great sale on THIS WEEK ONLY!! Receive 20% off select stamp sets between 16-20th November.  Do you want to know what the stamp sets are??

Head to my store HERE and see them.  You can order directly from me or Online from that link. Please use the Host Code: 34RUGMSD

Among the many great sets on sale is the set ‘Celebrate Today’.  This is one of the cards I made earlier in the year with that set.  It is very versatile and great for those birthdays.

P1160425

—————————

good bye Holiday

On another note: The Holiday Catalogue will soon be coming to an end (Jan. 4th).  Many of the products you won’t see again so it’s time to grab those now while stocks are available.

Click on this link and click the link there to open the PDF so you can see what will be leaving us.  SP_HolidayRetiringList_ENG

You can order directly by contacting me or Order Online (This week please use the Host Code: 34RUGMSD)

I hope your Christmas creating is coming along. Let me know if you need help with inspiration for your Christmas cards this year. 🙂

Jenny 

cards, Stampin' Up!

A FLOWER WITH THE ENVELOPE PUNCH BOARD!!!

It has been a while since I have had a good play with my Envelope Punch Board apart from some quick envelopes and gift Card Holders.  What about you????  I came across this really cute flower that can be made with the Envelope Punch Board.  I have to try this I think but I thought I would share this with you first.  I have the video link below for you.  Have a go! If I wasn’t so busy at the moment I would give it a try but I am getting ready to head off on Friday to Melbourne for the Stampin’ Up! Onstage Event.  This was a last minute decision so things are a little crazy 🙂

Here is the card to give you an idea.  This was created by the clever creators at Stampin’ Up!

EPB flower

To make your own check out this video link.  How cool is this??

If you haven’t got the Envelope Punch Board yet then I would suggest you rectify that.  🙂 You can order directly from me or from my Online store HERE.

Have a super wonderful day.

Jenny

cards, Stampin' Up!, Weekly Deals

WEEKLY DEALS FOR NOVEMBER 11!

Check out these fun products this week!!

Nov 11


What do you like there?  Have you got the Circle Card Thinlets yet?  They are cool to use.  Check out these cards I have made previously.


P1120081

P1100623

If you NEED to order any of these or any other products, you can order directly from me or order Online HERE.

Jenny 


3D projects, Tutorials

TEA BAG HOLDERS FOR A CAUSE!!

I can finally share this project I have been working on the last 2 weeks.  They are all now sent off and reached their destination.  On a Facebook group I am on the call went out for help for a Fundraiser.  I offered to make some little gifts for the goodie bags they would have.  Then the realisation hit – What was I going to do?? I needed 65!!!  After a little pondering I decided to make some little Tea Bag Holders.  I had an abundance of teabags – and lots of retired paper. 🙂

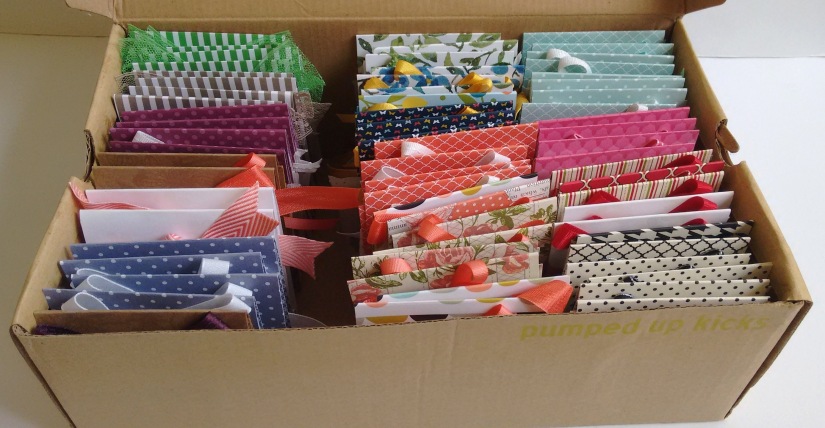
Here is just a sample of some of them.

four

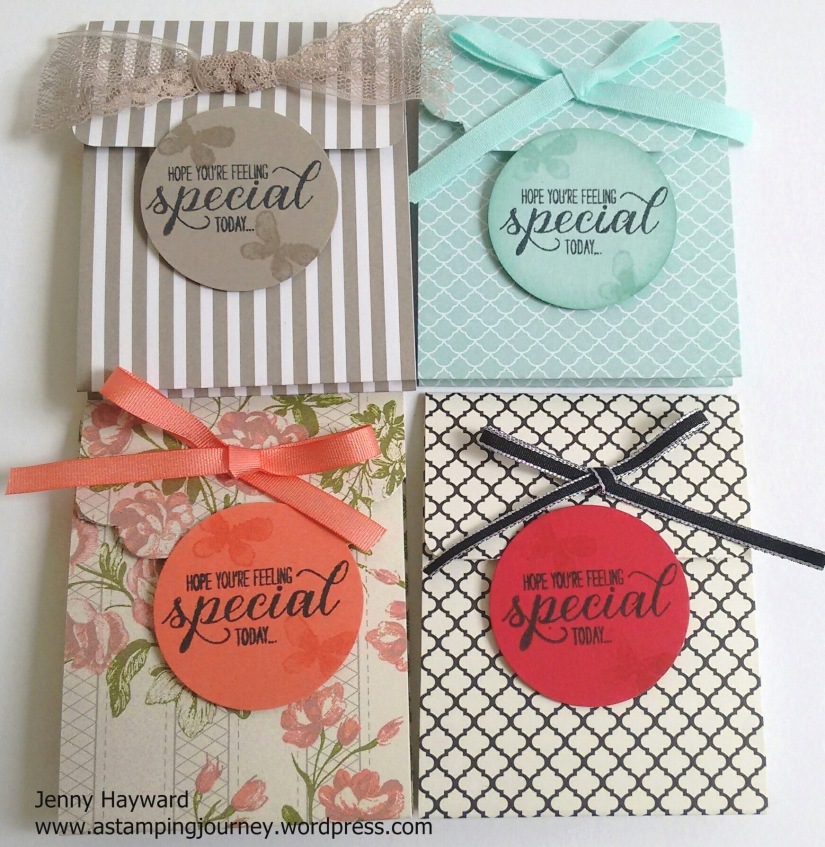
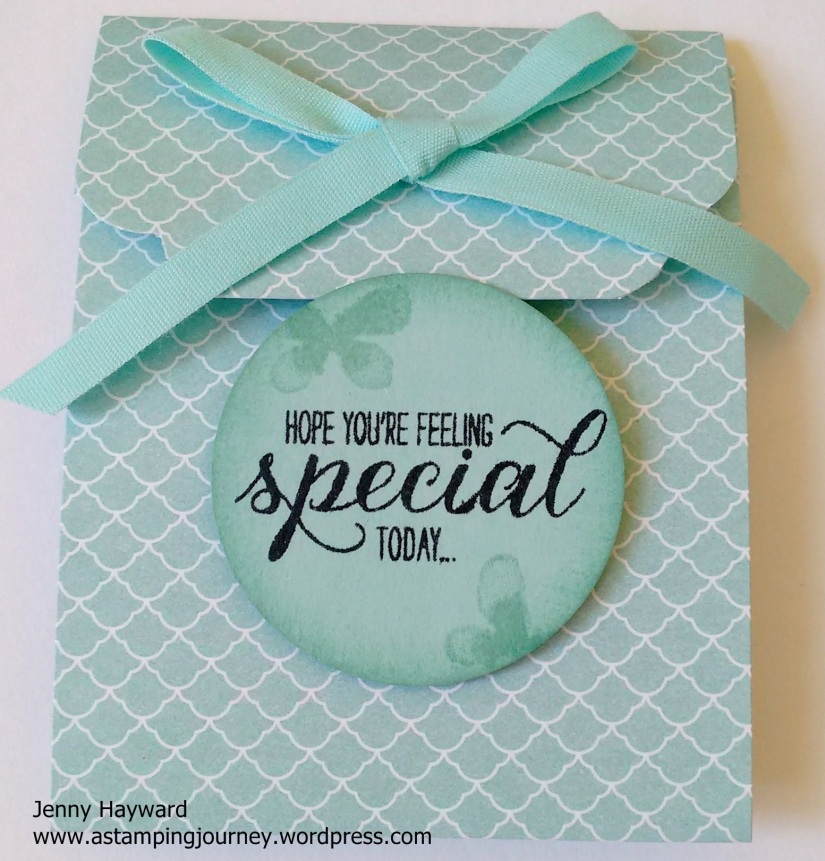
I used the set ‘Garden in Bloom’ for the little labels on the front.  I thought it was very appropriate for such an event.

Here is just one of them. I will share the ‘how to’ further below.

closed

Opened out I could fit a tea bag, a cute tea verse (see below) and my business card.

IMG_20150928_100753384

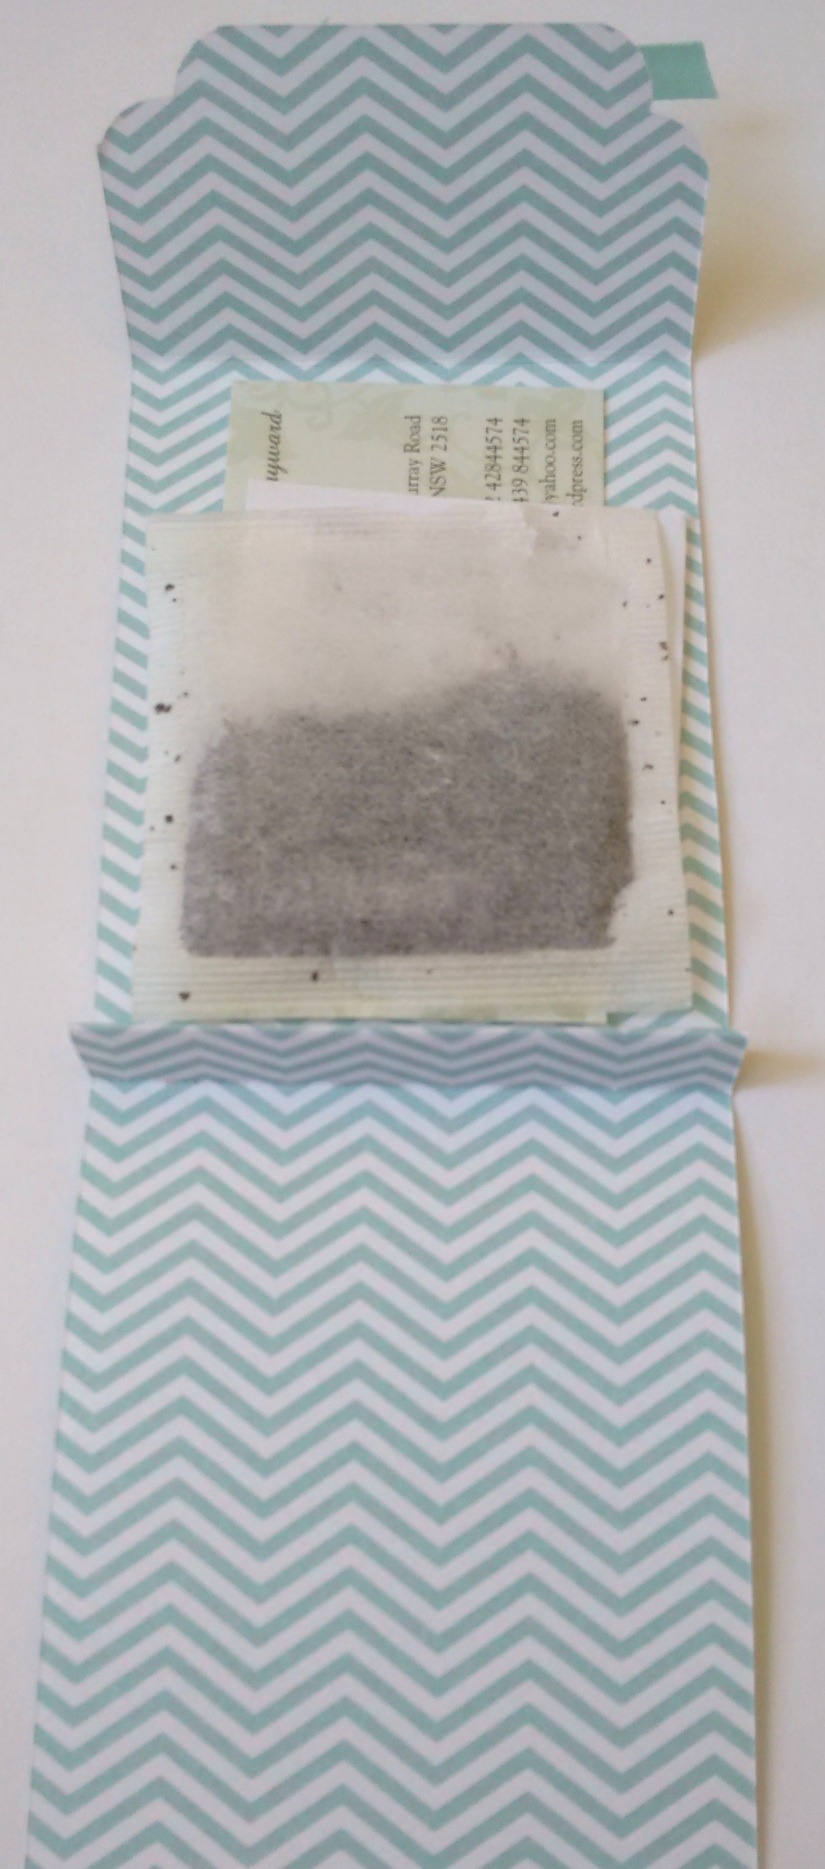
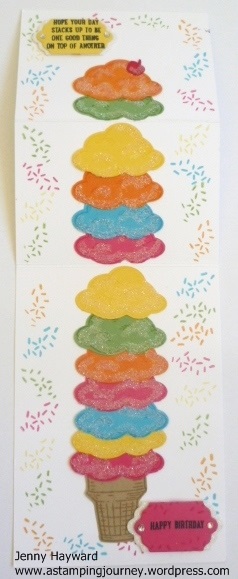
Here is the verse I put inside.  I found this on Pinterest.

“When  your  day  seems  topsy  turvy,

And as stormy  as  can  be.

There  is  nothing  quite as  tranquil,

As a nice hot  cup  of tea.”

**

So here they are all 65 of them packed and ready to go.

box

So here are the details if you would like to make your own.  There are a few different versions around the internet but these were inspired by a Convention swap I received some years ago.  I adjusted the size so I could fit my business card in and just made them a little differently.  I could get 4 to a 12″x 12″ sheet of Designer Series Paper.

TEA BAG HOLDER

Cut your paper to 7.5 cm x 25 cm     (3″ x 9 7/8″)

Score your paper at 9 cm, 10.2 cm, 11.5 cm and 21 cm.    (3 1/2″, 4″, 4 1/2″ and 8 1/4″).

Fold on your score lines creating a “W” shape. (I hope that makes sense??).  The end with the narrowest scored piece is the front flap. Corner punch the corners on this flap.  I used the new Curvy Corner Trio Punch for most of them or else I used the regular Corner punch.  Add a bow to the front flap.

Stamp your greeting and punch out with the 1 3/4″ Circle Punch.  Add Dimensionals on the back just on the lower section.  Add to the front of your holder.  You can tuck the flap under the top of the punched circle to hold it together.

I hope you like these.  They are very quick to make once you get going.

Thanks for stopping by,

Jenny

cards, Stampin' Up!

CHRISTMAS GREETINGS!!

Have you checked out the Holiday Catalogue yet??? What is on your wish list??  There are so many great products it is hard to choose.  I have the link in the right side bar for you to check out if you haven’t already. I was playing with some of the new things they other day I made up this set of cards to show you.  They are using the new ‘Christmas Greetings’ Thinlets.  I have a little trick I wanted to tell you about.

P1170299

I will show you each card close up so you can see them better.  The layouts were inspired by some cards I had seen on Pinterest.

I cut a circle from Cherry Cobbler card and then embossed it with the Woodland Embossing Folder. There is some lovely Vellum sheets in the Holiday Catalogue but I don’t have them as yet so I have used the Gold Fancy Foil Vellum from the Annual Catalogue.  I adhered some Whisper White card on to the back of the vellum. Don’t you just love the cute Reindeer clips??? I tied some Cherry Cobbler Baker’s Twine onto them.  I cut the words from the ‘Christmas Greetings’ Thinlets (p34) from Gold Foil Sheets.

P1170304

P1170307

P1170306

TIP: In this set of Thinlets there are 3 words “peace”, “merry” and “jolly”.  Now I didn’t want jolly for this so when I cut the word I then carefully snipped off the “ll’s”.  If you cut it off near to the “l” letters then you have a little tail.  I adhered the tail of the “y” over the “o” tail.  Does that make sense?  Using the new Fine Tip Glue Pen (p 43) it makes it easy to adhere the letters together and  also adhere the letters to the circle.  You only need a very little bit let me tell you.  I found that you needed to just hold the piece down for a minute to take hold.

Hope you like these cards.  I’m loving playing with this new stuff.  Go check the catalogue out if you haven’t already done so.

Have an awesome day 🙂

Jenny


cards, Stampin' Up!

STACKS ON WITH SPRINKLES OF LIFE!

This was a a fun card I made a couple of weeks ago at our stamping weekend – and using ‘Sprinkles of Life’.  I couldn’t wait to show you it.

P1170057

Do you like lots of scoops on your ice-cream?? 🙂

How about some more!

P1170059

Hehe!! The card lifts up. Look at all those colourful ice-cream scoops.  I don’t really know what you call this type of fold – Fold out top card??? I found the idea for it on Pinterest and thought the ‘Sprinkles of Life’ set would be great for this.

It is very simple to make.  Cut your sheet of card in half vertically and score in half and then on one side score in half again.  Then fold on the score lines so a “v” shape is at the top – if that makes sense. I hope I have explained it clearly. Then you can decorate the card how you like.  When assembling the card I didn’t really know how many “scoops” I would need and how many colours so I just kept adding to it.  I layed them all out without sticking them down and rearranged them several times.  I didn’t want to have 2 of the same colour when you fold it up. Once I had that sorted it gently slid them off the card and stamped around the edge with the “sprinkles” and then adhered each scoop on top of the icecream cone.

Of course we had to have the bling.  I used Dazzling Diamonds with 2 way glue on each scoop. What a sparkly mess that was!  The sentiments were stamped and then cut with the ‘Lots of Labels’ Framelits. I added a Dazzling Diamond label underneath each of the sentiment labels. Then finished it off with adhesive rhinestones.

You could try this type of card with lots of different images.  See how you go.

Have a great day,

Jenny


Stampin' Up!, Weekly Deals

WEEKLY DEALS THIS WEEK ARE FUN!!

I am liking this week’s Weekly Deals.  So many fun products to use on your cards.  Add some classy pearls or sponge on a fun design.  Check them out.

Jul 15 _ 1

July 15 _ 2


What do you like the look of??

If you are ordering Online (HERE) – please use the Hostess Code  U3MMAK6F.  That will be sweet! This one will be open until Friday.  Or you can order directly from me. (Australian Residents Only).

Jenny

3D projects, cards, Stampin' Up!

YOU’RE SO SWEET TREAT BAG AND CARD!

Recently I showed you a card made with the ‘You’re So sweet’ set.  If you missed that just pop back 2 posts.  Today I have a gift bag and card I made with the set.

P1160816

I saw the Treat Bag on Pinterest initially and just changed it a little.  The paper is from the paper stack ‘Cherry On Top’.  I made the bag with the Mini Treat Bag Thinlets.  The little star is in the set which I could cut inside the stamped star.  How neat!!  I just added a star strip cut with the star die in the set in Crushed Curry and a DSP banner.  The greeting label is cut with of the little dies in the Thinlets set too.

Then I made a card. Using some more of the ‘Cherry On Top’ Paper Stack I added a strip down the side of the Cucumber Crush base card.  I stamped the greeting banner from the ‘You’re So Sweet’ set first on Crushed Curry in Crushed Curry and then on Whisper White in Bermuda Bay.  I cut the white one out with the banner framelit in the Treat Bag Thinlets and cut the Crushed Curry one out by hand.  It needed something else under the banner so I cut a strip of Watermelon Wonder card and flagged the ends.

P1160817

See the cute balloons?? I made them with the 1″ circle punch and the owl punch.  I punched out the bottom part of the owl and trimmed it and adhered that piece under the punched circle.  I added some White Baker’s Twine underneath.  Cute hey!! Sorry I think so anyway 🙂

I think they  make a cute gift set what do you reckon?

P1160818

Here is the Mini Treat Bag Thinlets.  I like all the “extra bits” that come in the set.  They are so versatile.

mini treat bag

…and the cute ‘You’re So Sweet’ set.

     youre so sweet

Thanks for visiting my world today.  I hope your day is super awesome because you deserve it to be.  🙂

cards, Catalogues, Stampin' Up!, Workshops

2015 CATALOGUE LAUNCH MAKE AND TAKES!

I thought I would show you the Make and Takes we made at my launch last weekend.  I shared some of the fun in an earlier post.

Firstly, we made a bookmark showing the new Incolors and using the cute new set “Sprinkles of Life”.

The top of a strip of Whisper White (5cm x 21cm) was punched with the Scallop Tag Topper Punch. One of the greetings was stamped in Memento Ink at the top.  How cute is this saying?? Right at the bottom the cone was stamped in Tip Top Taupe and then each ice-cream scoop stamped in a different colour.  There is a matching punch which we could have punched out the scoops but to keep it simple and quick they were just stamped directly on to the card.  Everyone could choose their colour of the new Incolor Dotted Lace Trim.

P1160820

Now for the card. I changed my mind a few times with what we do leading up to this.  This card was inspired by a few cards I had seen on Pinterest.  Once again, each guest could choose their own colour.

This is using the set ‘I Think You’re Great’. The scallop lines were stamped in Delightful Dijon (or what they chose). The “hi” cloud was stamped in their matching base card colour and hand cut.The flowers were punched from Watermelon Wonder card using the small flower punch in the Itty Bitty Accent Punch Pack. A little bling and some white twine finished it off.  Now of course it’s nice to have a matching envelope.  So with the new Envelope paper we could make one using the Envelope Punch Board.

P1160860

For some guests who didn’t like the “hi” on their card they could make an alternative in their chosen colour with the “Happy Birthday” from ‘Remembering Your Birthday’ set.  It was nice to have a matching envelope to go with it too. 🙂

P1160813

Sorry if you missed my launch last weekend, I know for some people distance is an issue 😦  If you would like me to share some fun projects with you and your friends, why not invite me to come to your place and we can have some fun stamping together.  If you are further afield, then you can have a Catalogue Party yourself.  Collect some orders from your friends and send them to me.  I can have the orders sent back directly to you – and the bonus you still earn all the exciting little hostess benefits yourself.  You can check off some of those items on your Wish List – and get them for Free!! Do it!  🙂

Thanks for stopping by today.  It’s nice to have you visit me from near and far.  Have a wonderful day xx