Catalogues, Stampin' Up!, Videos

WEDNESDAY’S WOW! #84 – NEW PAPER TRIMMER REVIEW!

Back with another Wednesday’s WOW!  I have just received the new Stampin’ Up! Paper Trimmer and wanted to share it all with you.  So today’s WOW! is a review video of the new Paper Trimmer. You can check it out below.

Just a few of the highlights of the Paper Trimmer that I see –

  • Clearly marked measurements in both Metric and Imperial on the Trimmer base not only along the top but in the middle as well as along the bottom. This will enable you to line your  card up better to see that it is straight.
  • Measurements clearly seen in the “gap” where the arm moves out from the side. Previously they were not shown so it was a little guesswork of the measurements.  For me this is a BIG PLUS!
  • A wider cutting base to cut cardstock.
  • Blades are larger which I think will enable better cutting – and hopefully longer lasting blade wear.
  • The ability to cut tiny strips of card without any problem.

The Paper Trimmer is now available for Demonstrators.  You can include that in your Starter Kit when you join Stampin’ Up! this month.  It will be available Very Soon for customers.

I will be posting here further updates but if you would like to be notified personally then drop me a comment or email and I will advise you when it is released.

In Australia it will be available for purchase for $44 AUD.  Replacement Blades will be available to order also for $21 AUD for a pack of 4.

I will tell you more when this trimmer will be available as I know.

Thanks for visiting,

Jenny

cards, Catalogues, Christmas

SUNDAY SUITES – LET IT SNOW!

I am back with another Sunday Suite today.  Before the weather heats up too much here I thought we should look at this cute Let It Snow Suite.  We don’t usually get snow at Christmas.  Well I can’t say never because strange things have happened … 🙂

Snowmen are not usually the first thing we think about for Christmas though with the heat and we are usually making sand men rather than snowmen.  But you gotta love these cute snowmen.

This is all the products available in the Let It Snow Suite Bundle.  You can buy them all with one item code (#153386 $230.25 AUD)

You can purchase the items individually too.

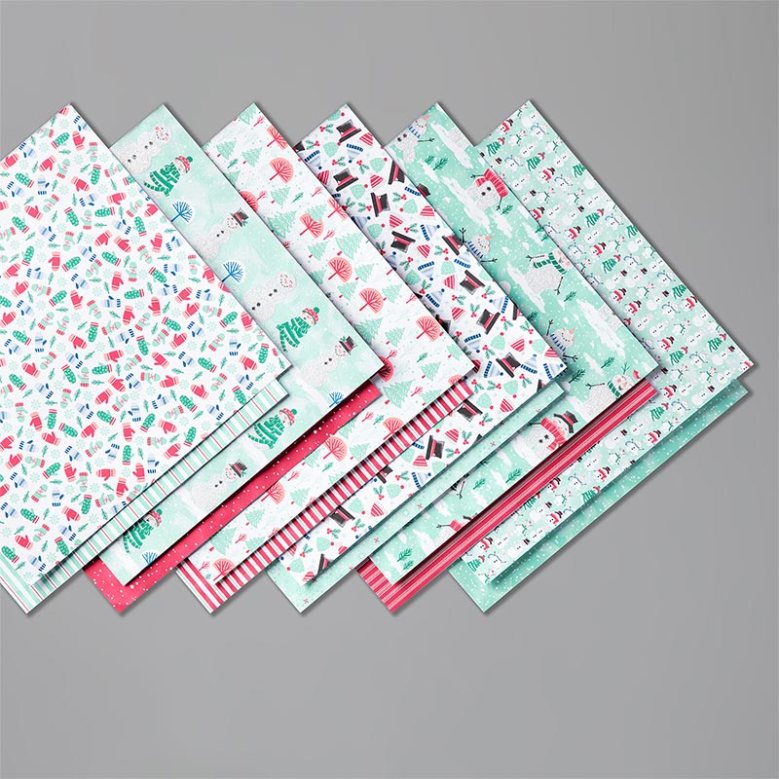
The Let It Snow Specialty Designer Series Paper.  You really need to see this paper closer (HERE).  It has glittery patterns on one side and the other side is more versatile prints you could use at any time of the year.

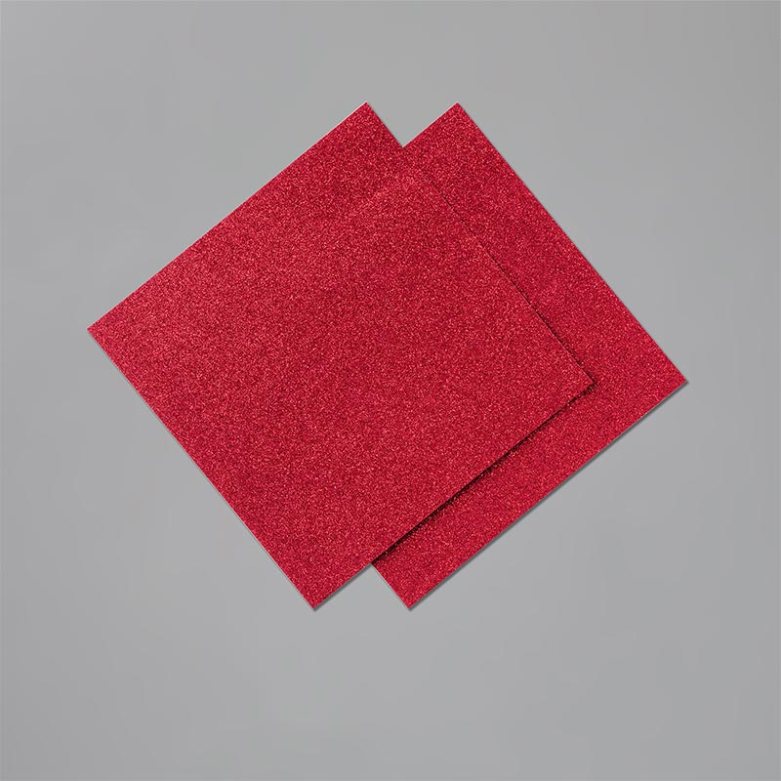
Red Glimmer Paper is back!! I am really happy this lovely shiny paper is available again.  $8.75 AUD for 2 sheets 12″x12″

Snowfall Accents Puff Paint.  This is a fun product.  Run it on to your project like a liquid glue.  Heat it up and see it puff up. You will just want to leave it a little time to let it set.

Way cool!  $7.75 AUD

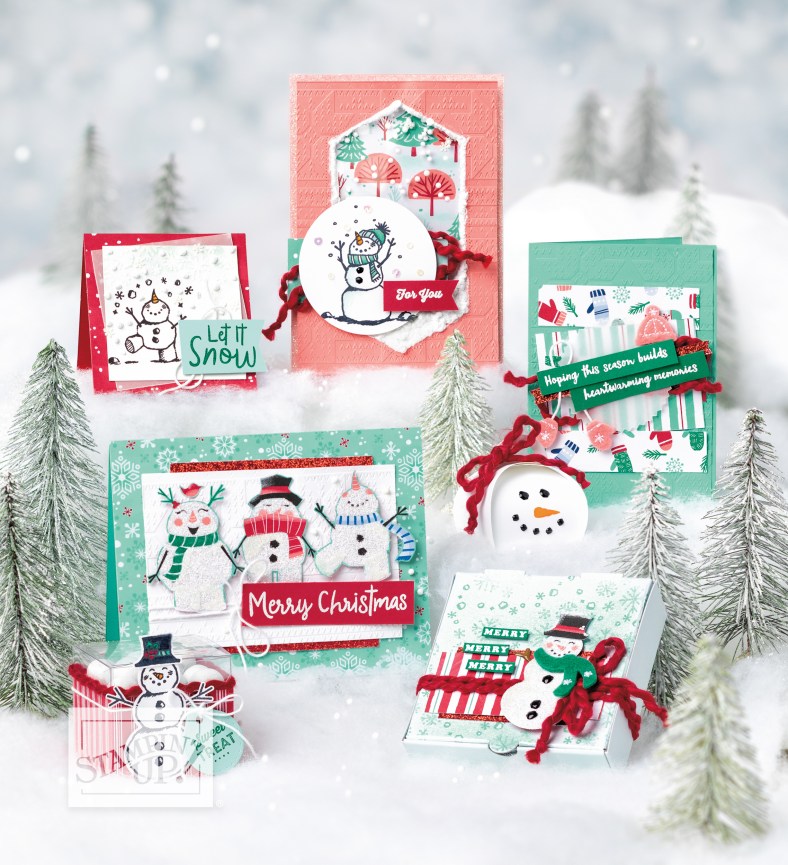
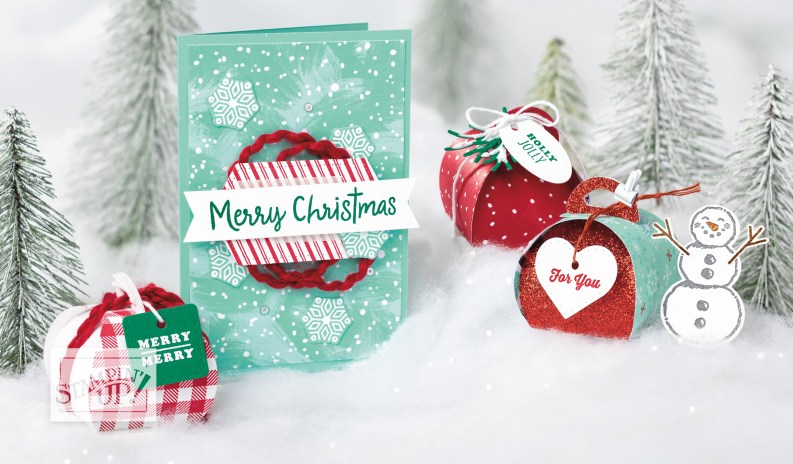
Here are some samples with this fun suite.  You just have to love those snowmen having a fun time in the snow.

The little Tiny Keepsakes boxes are really sweet.  They make little treat holders measuring (5.4 x 4.8 x 4.8 cm).  Just the size for a chocolate or 2.  These are made with the Mini Curvy Keepsakes Box dies ($59 AUD) or the bundle with the stamp set is $84.50 AUD

You can see more details about the Let It Snow Suite at my store -> HERE and order.  Please use the Host Code: 6CCRNYH6

Happy Stamping,

Jenny

Catalogues, Stampin' Up!

EVERYTHING IS ROSY IS BACK – AND IS 15% OFF!

Back in May we had the gorgeous Everything Is Rosy Product Medley available.  I loved using all these products.  I shared lots of projects at the time too.

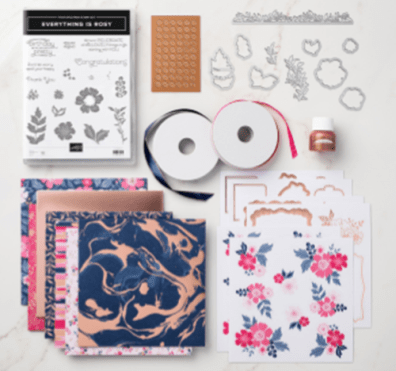
I can tell you that IT IS BACK now in Clearance at 15% off.  Pretty crazy because you get lots and lots of products at that price.

Stamp set, die set, 2 rolls of ribbon, Rose Gold Shimmer Paint, 48 sheets of 6″x6″, diecuts, embellishments.  SO much to love.

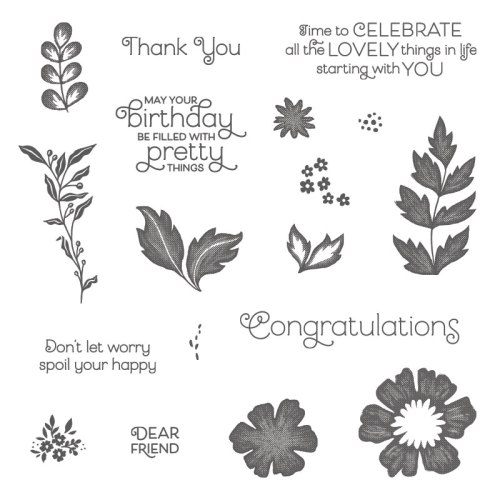
This is the Everything is Rosy stamp set.  It is very versatile.

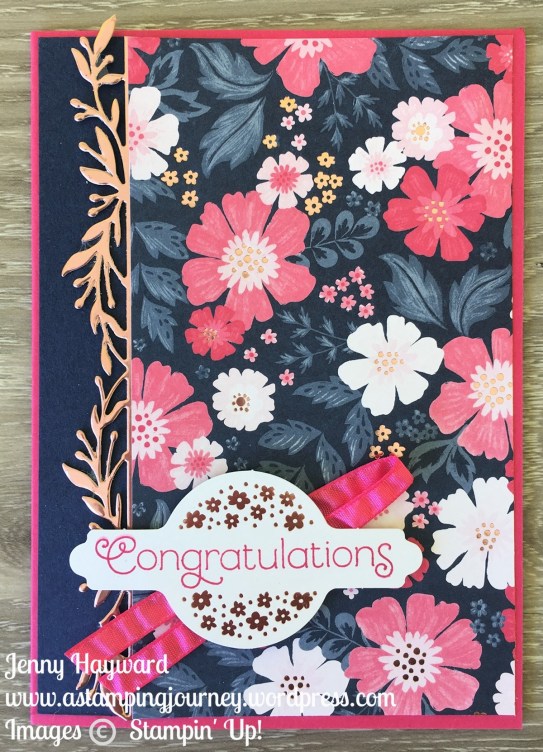
This is some of the projects I shared way back then.

You can see it in my store now -> HERE and order it. Don’t forget to use the Host Code:  6CCRNYH6  Reduced price for this gorgeous Product Medley is $118.15 AUD.

Ordering this will also qualify you for:

  • 12 Project Tutorial bundle (not including projects with this medley).
  • 2 VIS Loyalty Points.
  • a small gift and Thank You card for me. 🙂

If you can’t order online please contact me directly to place your order and it will be shipped directly to you.  Thanks for your order.

Jenny


Catalogues, Classes, Stampin' Up!

YOU HAVE TO SEE THE NEW CLEARANCE RACK UPDATES!

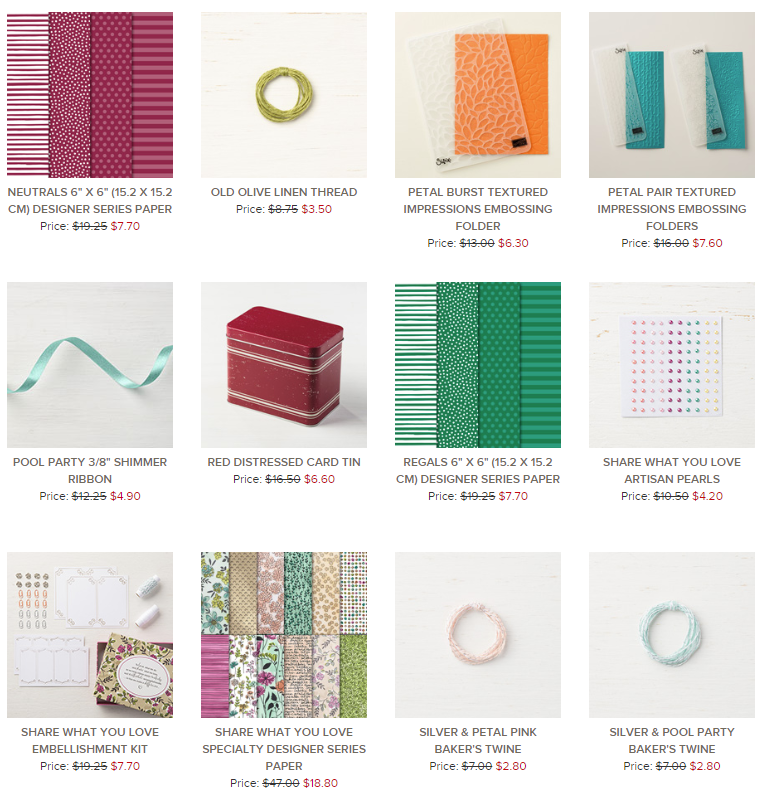
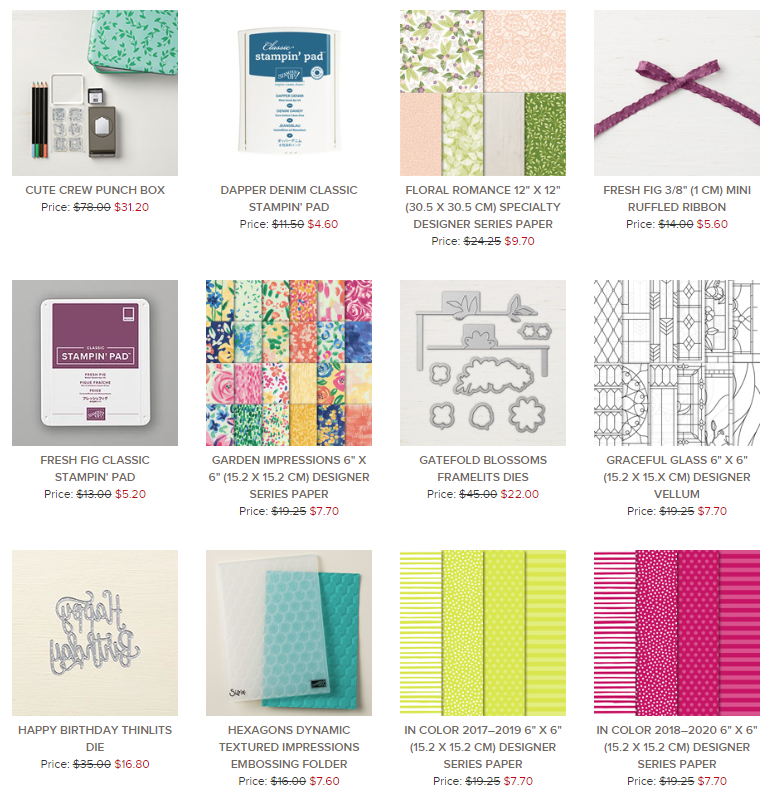
A quick one for you today.  I have just seen that the Clearance Rack has been updated.  There are some products there from the recently retired Annual Catalogue – and some are up to 60% off. 

You can grab some really great items.  Maybe stash some away for Christmas presents.  Or buy yourself a little treat – because you deserve it.

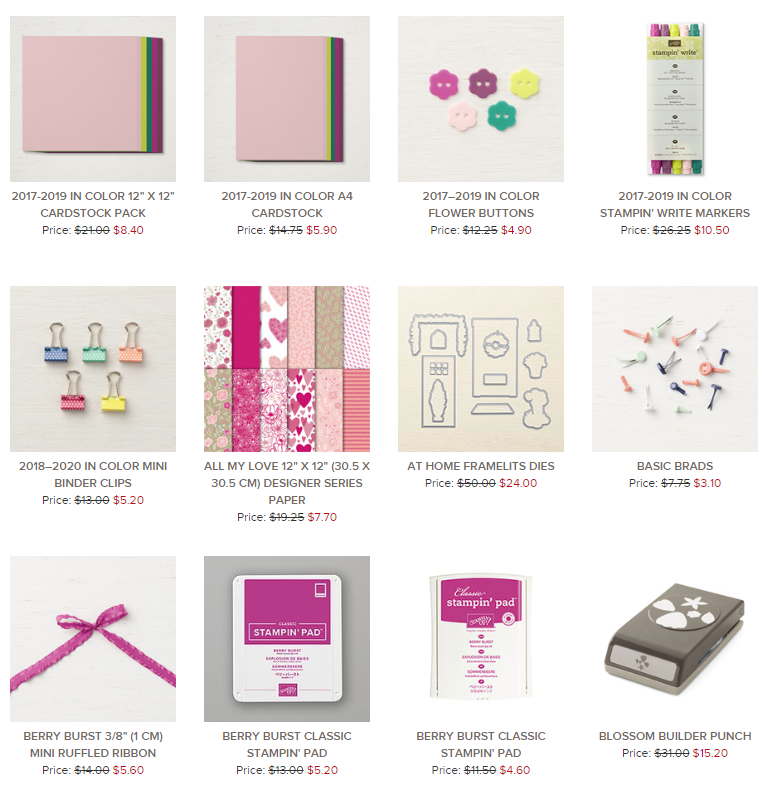
This is a snippet of just some of the great items reduced.  


MY PICKS

– 2017-2019 In Color Markers  reduced to $10.50  60% off
– Share What You Love Adhesive Pearls reduced to $4.20 60% off
– Happy Birthday Die reduced to $16.80 50% off
– Floral Romance Specialty Designer Series Paper reduced to $9.70  60% off
– Narrow Note Cards and Envelopes reduced to $5.60  60% off

There are so many more in store too.  These are ONLY WHILE SUPPLIES LAST!

WHAT DO YOU NEED TO DO

1. Check my store -> HERE for the full Clearance Rack items.

2. Want to order it?? Receive a gift to say THANKS. (Australian residents only).
– Order from that website directly there. Please use the Host Code: 3JU96AZN
– Order from me directly.  I am ordering Wednesday night 8pm.

THANKS FOR YOUR ORDER

I appreciate your orders Big or Small.  To say Thanks receive a small gift from me.  A sampler of ribbon from the Holiday Catalogue AND a project Tutorial.

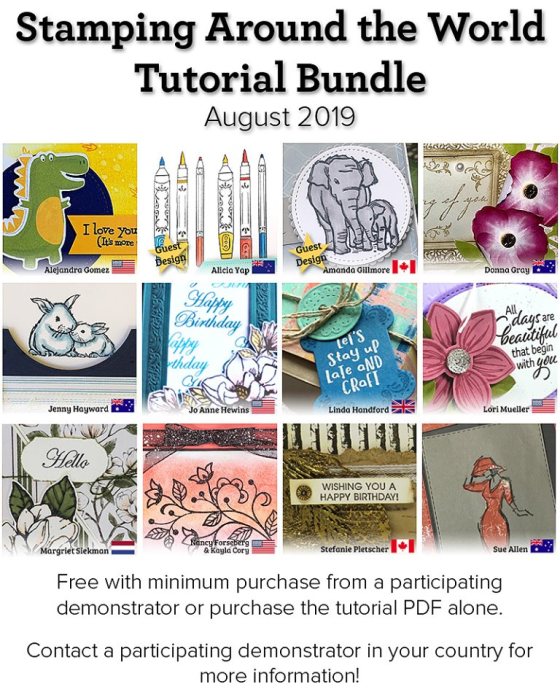
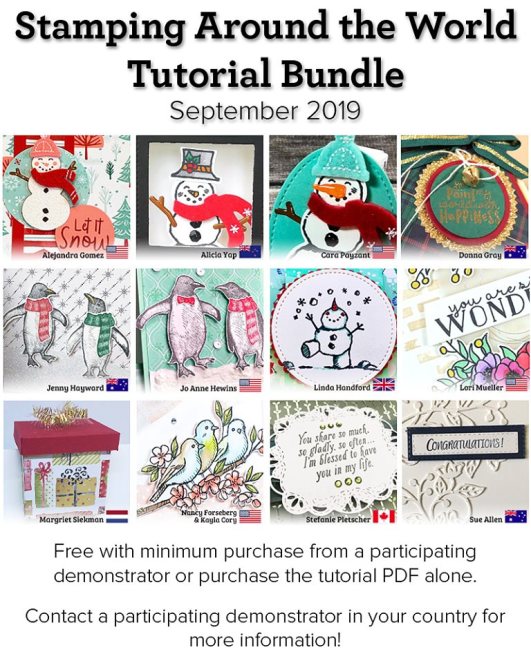
Orders over the Qualifying amount ($78 AUD) will also receive a 12 Project Tutorial Bundle of exclusive projects from demonstrators around the World.

Thanks for shopping with me,

Jenny

cards, Catalogues, Christmas, Stampin' Up!

SUNDAY SUITES – TOILE TIDINGS!

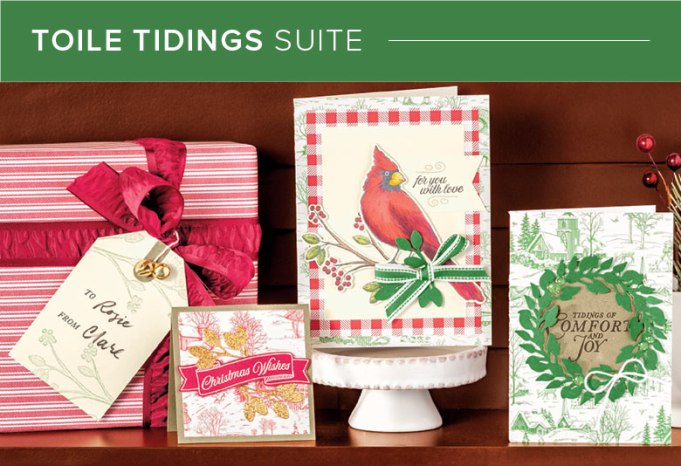
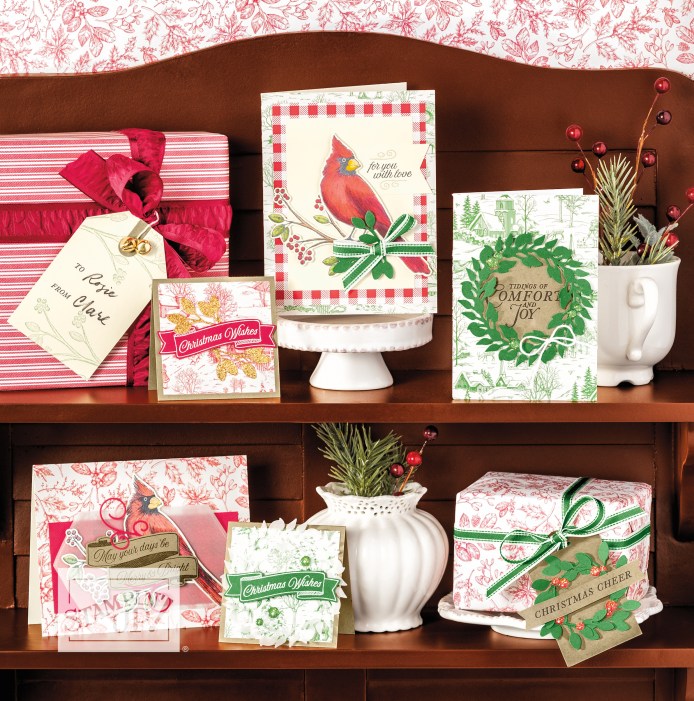
Today’s Sunday Suite is the Toile Tidings Suite in the Holiday Catalogue.  Lots of lovely products in this suite and all in the traditional red and green for Christmas.  Let’s check it out.

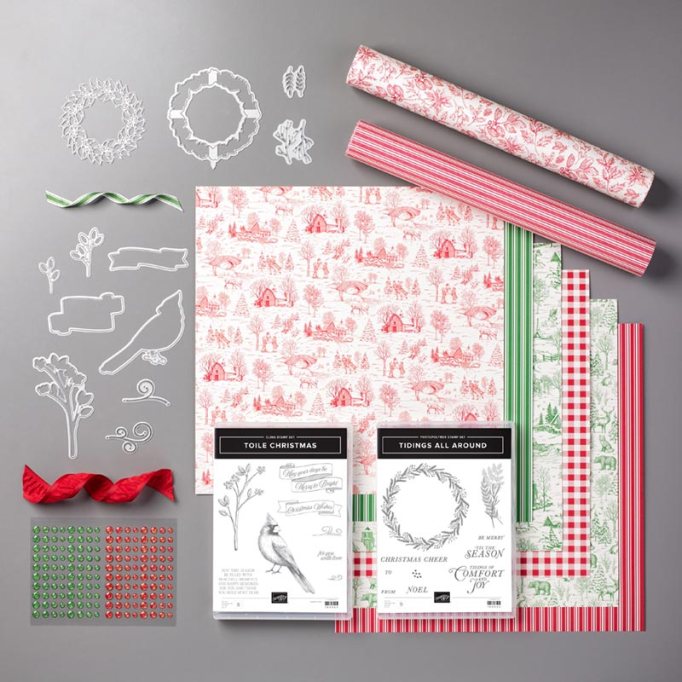
The Toile Tidings Suite Bundle. One Item code and it makes it easier than picking each item. $252 AUD It seems a lot but look at all you get.

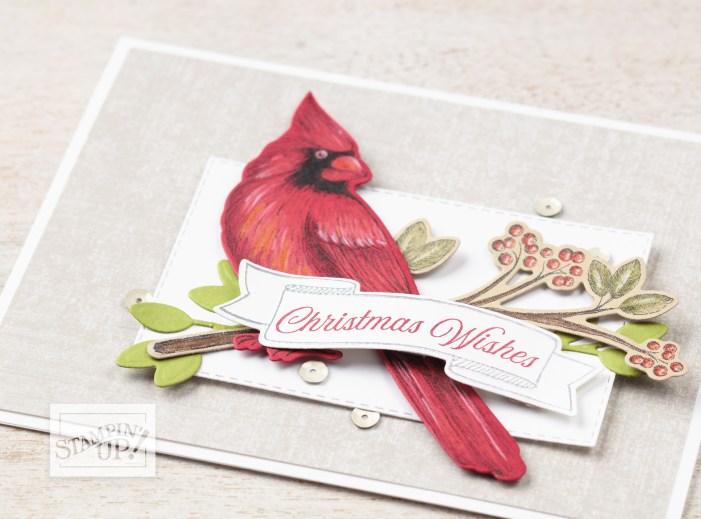
The Toile Christmas Bundle.  I have to say I wasn’t sure about the Cardinal.  It is very popular in the US and perhaps in other parts but we don’t have them in Australia.  They are apparently a very symbolic bird though.  Which is interesting.

There is also another stamp and die bundle.  The Tidings All Around Bundle. I love that wreath.  Isn’t it gorgeous?

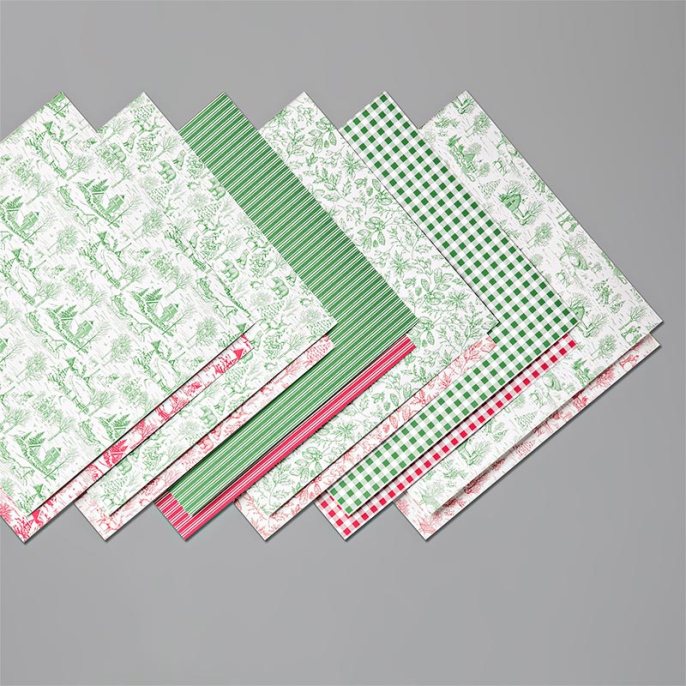
Toile Tidings Designer Series Paper in the traditional red and green – Garden Green and Real Red.

In addition to the 12″x 12″ paper there is the Toile Tidings Gift Wrap.  This is 4 sheets in total.  2 Sheets each of 2 designs.  Each sheet is 24″ x 36″ or 61cm x 91cm.  Great for those larger gifts.

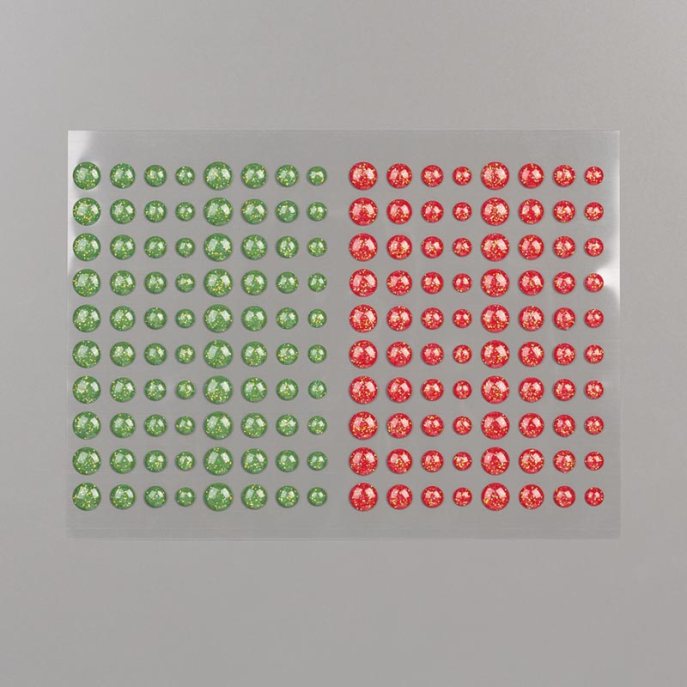
I have to say I love these Toile Tidings Glitter Enamel Dots.  So sparkly!

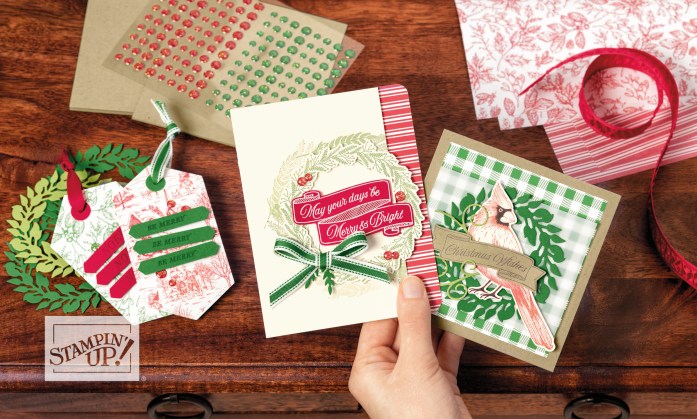
Let’s see some more projects.

Do you like the Toile Tidings Suite?  Do you have Cardinals in your area?  It would be interesting to see.

The Toile Tidings Suite is available now in my store -> HERE.  When ordering please use the Host Code: 3JU96AZN

Receive the Tutorial Bundle free of 12 projects with your qualifying orders.  (Projects not including the Toile Tidings Suite)

Thanks for visiting

Jenny

Catalogues, Stampin' Up!

ONE FREE PAPER PACK WHEN YOU BUY 3!

Everyone loves Free right? Well this month you can get FREE PAPER!  Stampin’ Up! are having a Paper Sale.

Choose 3 Packs of Designer Series Paper from the Annual Catalogue and you can choose one additional pack FOR FREE!

These are the packs. Order any 3 and pick one for free.

You can see the pretty papers above OR view them in store -> HERE.

Please use the Host Code: 3JU96AZN when you order. As a Thanks you receive a Project Tutorial.  Orders over $78 will receive a bundle of 12 Project Tutorials. 🙂

Here are just SOME of the ways to use this gorgeous paper,

Feeling inspired?  Be sure to grab some of that paper this month and have fun choosing your free pack.

Jenny

cards, Catalogues, Christmas, Classes, Stampin' Up!

WALK WITH ME THROUGH THE 2019 STAMPIN’ HOLIDAY CATALOGUE!

Today is the day.  You can now get to see all the wonderful products in the 2019 Holiday Catalogue.  I can’t wait to share it all with you.  I have been creating up a storm with these products over the past few weeks.

Today I want to share some of my favourites with you.  I have just shared a video on Youtube showing my favourites – and a few sneaks of projects that you will see coming up on my blog.

So let’s have a look.  Be sure to leave a comment to go in the draw.  If you are outside Australia and you are drawn I can’t send product but I can send a couple of handmade cards made by me. 🙂

I know I shared my favourites but I thought I would add a few here for you.

CATALOGUE FAVOURITES

Favourite Suite – Brightly Gleaming

Favourite Bundle – Itty Bitty Christmas

Favourite Dies – Ornate Frames Dies

There are great swirly frames – and some of them are stitched!!!

Favourite Stamp Set – Playful Penguins

I have been having so much fun with these little penguins.  These are just some of the cards made recently.

A VERY SPECIAL STAMP SET

There is a very special stamp set in the catalogue that you just can’t miss. Nature’s Beauty on the very last page.

Stampin’ Up! are donating $4.25 AUD from the sale of each stamp set to go Mental Health organisations in Australia.  This is really close to my heart so if you buy any stamp set PLEASE CONSIDER THIS ONE. Resources for Mental Health are very limiting so this may help just that little bit more.

This is the stamp set. Nature’s Beauty $37 AUD


Now head over and view the Catalogue PDF -> HERE.

OR View the products in my store -> HERE.

****REQUEST YOUR FREE 2019 HOLIDAY CATALOGUE****

I have started mailing the Holiday Catalogues out.  If you haven’t received one message me directly,

OR head over -> HERE and fill out the short form.

I will send one out to you very soon.

Enjoy the catalogue.  Stay tuned and I will share lots of projects with you soon,

Jenny

Ordering now?  In Australia?

Head to the store link above. Please use the Host Code: 6F6336UW

New Tutorial Bundle is out now. 

Orders over $78 AUD will receive the 12 project Tutorial Bundle sent out to them Free after they order.  

Or you can order the Tutorial for $20 AUD through paypal.  Message me for details.

Of course I had to use the Penguins for my project. 🙂

cards, Catalogues, Stampin' Up!, Tutorials

WEDNESDAY’S WOW! #81 – TIPS FOR PHOTOGRAPHING YOUR PROJECTS!

Wednesday’s WOW! #81.  I have an interesting post for you today.  Well I hope it is interesting. I have some helpful tips when photographing your projects.  

Maybe you just want to take a quick snap of your project for your own record but perhaps you want to have a little more quality in the photos you take of your projects.  In the Stamping Around the World Tutorial Group I am on, Stefanie (one of the group members) has compiled some helpful tips.  Each of us contributed in providing a tip that we use when we take our own photos to share on our blogs and other social media platforms.

This is my tip that I shared.

When I take photos of my projects I don’t have a fancy lightbox.  I use 2 pieces of the large White Core Board.  One on the bottom and one on the back.  I do use a timber look placemat on the bottom as well.  The white board on the back is good for reflecting the light.  Sometimes I do have 2 small lights that project on to the boards to lighten them more.

After I take the photo I upload it to my computer and then edit them on a program although this one above was done on my phone to get it done for this particular post.

I crop, resize the photo and adjust the lighting.  This is all done in a few minutes.  Most times too I will edit a batch of photos in one sitting to be ready for upcoming blog posts.

This photo below was the photo of this card after editing which I posted to my blog a few weeks ago.  So you can see what the final look is.  I have very little of the core board showing afterwards but it does help with the light.

The watermark is different on the card above as I had to retake the card for the post this week and edit it on my phone.

There were lots of other great tips shared too. I will give you a brief summary here but then you can head to Stefanie’s blog post to get the full details rather than me relay everything.

Tips like:

  • Use contact or wallpaper as a fun background.  (Like I have used the timber look placemat).
  • Scatter multiple pieces of the project or a number of projects around to get a different effect.
  • Use props to create interest.
  • Stand the card up to show more details.
  • Get in close to take the photo.

Do you want to see more?  Head to Stefanie’s Blog -> HERE to read her detailed tips on lighting and see more tips shared.

I hope these are helpful when taking your own photos.

Jenny

Grab your Tutorial Bundle free of 12 exclusive projects with your order over $78 AUS.  Or purchase the Tutorials for $20 AUS. There is a different Bundle each month. 

Shop in my store -> HERE.  Please use the Host Code: 6F6336UW


Catalogues, Stampin' Up!, Tutorials

WEDNESDAY’S WOW! #80 – KEEP YOUR DIES SAFE WITH THIS MAGNETIC DIE BOARD!

Wednesday’s WOW! #80.  I have a very useful tip for you today with this Magnetic Die Board.  I thought I had shown you this tip already but apparently not.

In my classes I found that the dies we were using kept going missing.  They would get buried under papers or bits.  They would drop on the floor and disappear.  We spent a lot of time in class looking for them.  Some months ago I came up with this idea.  Since then – no more missing dies.  Everyone knows when they use them they go straight back on the board.  It is such a time-saver and has reduced the stress. 🙂

You might find it useful yourself.  I have it standing near the Big Shot machine and have all the dies on it that we will use in the projects for that class.

How to make one yourself

It’s very easy to make yourself.  I picked up a cheap photo frame from a discount shop.  Opened it up and took out the glass. I cut Magnetic sheets to size and adhered them to a piece of card.  Then inserted them back in the frame without adding the glass though.

Place it near your diecut machine and put the dies on it that you are working on.  For a single project you may not need it but if you are making a large project or a couple at a time then you can store all your dies on it while you are working.

I hope you find this tip useful.

Thanks for visiting me today wherever you are in the world.  I love having you visit and I love sharing my little crafting world with you. ❤

Have a great day,

Jenny


Blog Hops, cards, Catalogues, Stampin' Up!

WILDLY HAPPY FOR STAMPING AROUND THE WORLD AUGUST BLOGHOP!

Welcome to another Stamping Around The World Blog Hop.  So nice to have you.  You might have come from Margriet’s Blog or just starting Here.  Welcome and enjoy the hop.

Today I am using the set Wildly Happy as that was the one I used in the Tutorials for this month.

I wanted to do something a little different with this set.  I was thinking about this recently and was reminded that when you see pictures of elephants they are often in herds.  I did a little research and read that they are very social especially the female of the species and will keep close together looking out for each other.

So I created a little herd of elephants with the little baby.
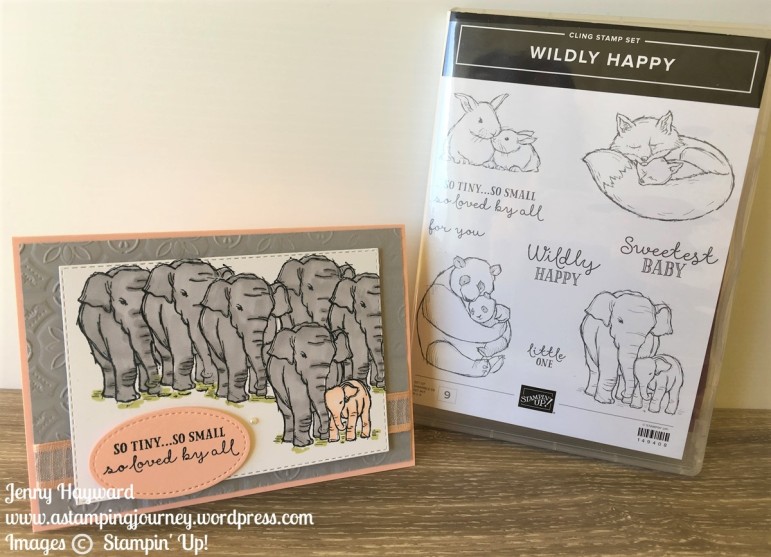
Stampin' Up! Wildly Happy

To create this I used the Masking Technique. I have explained it further below. The elephants were stamped on Thick Whisper White card and coloured with the Smoky Slate Light and Dark Stampin’ Blends and I also used the Petal Pink ones for the baby.  The grass was with the Light Granny Apple Green Stampin’ Blends.

MASKING YOUR ELEPHANTS

A piece of Thick Whisper White. Cut the card using one of the larger Rectangles Stitched dies. 

Note: I didn’t cut the card with the Rectangles Stitched Die until after I finished stamping and colouring the elephant so it is ok to leave it until then if you wish.

1. Firstly you will want to stamp your elephant on to a Sticky Note or you can use scrap paper with some removable adhesive.  Cut around the outline of the image.  For this card you will need to stamp 3 elephants in total on the Sticky Notes as you will use them all at one time in places.

2. Stamp your elephant and baby near the bottom right hand corner. Inking the stamp in Memento Ink.  Place one of your cut out Sticky Note elephants over the top of the image.  Ink up your stamp and stamp again just to the top left of the first one.  You will want to line it up so you just have the larger elephant shown.

3. Ink and stamp another elephant to the top right of the first one. The baby one should be just off the edge of the card but that is ok.

4. Place 3 of the Sticky Note elephants over each of the stamped elephants.
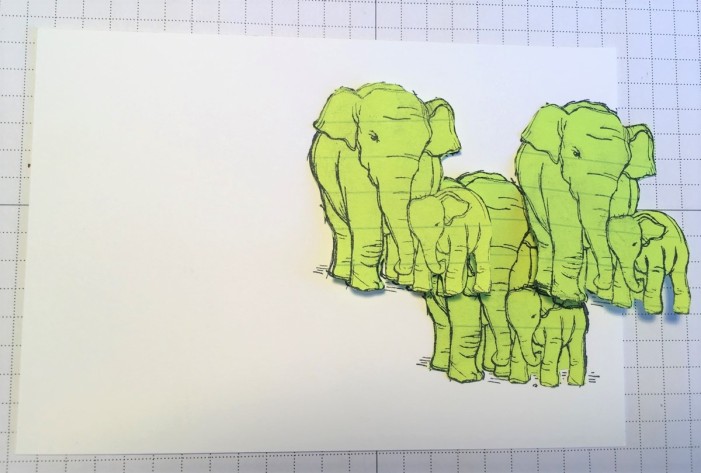
Masking Technique

5. Stamp another elephant in between the top 2 elephants.  And one elephant to the left of the left Sticky Note elephant.  Each time remember to line the elephant up to just stamp the adult one.

6. Move a Sticky Note to the last elephant stamped on the left and then ink and stamp another one to the left of this.

Once stamped you can then colour the elephants with the Smoky Slate Stampin’ Blends and colour the little baby one with Petal Pink.  I found them very easy to colour.  Using the Light Smoky Slate Blends colour the elephants completely.  Then using the Dark Blends add lines over the printed lines (wrinkles) on the elephants.

To assemble the card, emboss the Smoky Slate card, 10.1cm x 14.4cm (5⅜” x 4⅛”)  with the Tin Tile Embossing Folder and wrap around a length of the Petal Pink ribbon. Then adhere this to the Petal Pink Card base. Raise up the stamped card piece to the front.

Stamp the sentiment on Petal Pink card and cut with an oval die in the Stitched Shapes Dies.  Then raise that up off the card with Dimensionals.
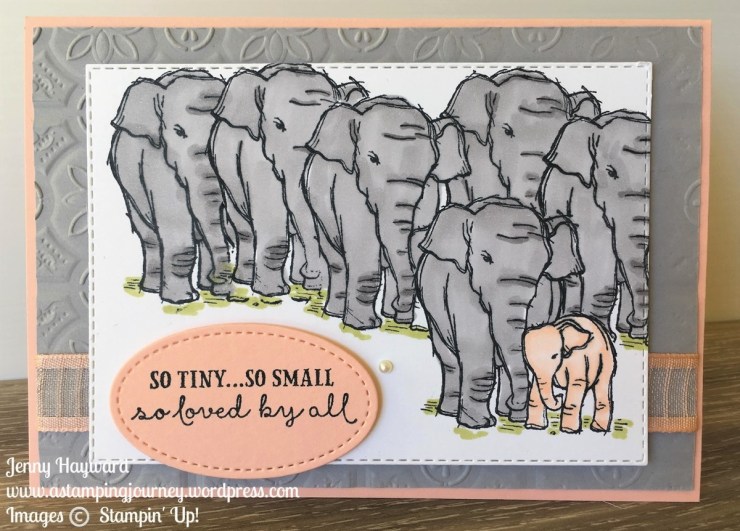
Wildly Happy _ Elephant Herd

***

Enjoy making this card.  Try the masking Technique with any stamped image.

Now continue the Blog Hop.  This time you are off to Allie’s Blog.  If you get lost the Roll Call list is below.

Roll Call List

Stefanie Pletscher (The Crafty Medic)

Sue Allen (Simply Craft)

Linda (Stampin by the Beach)

JoAnne (Luv 2 Create)

Alicia Yap (Paper Munchkin)

Amanda Gillmore (She Creates: By The Sea Shore)

Margriet Siekman (Creatief met Marsie)
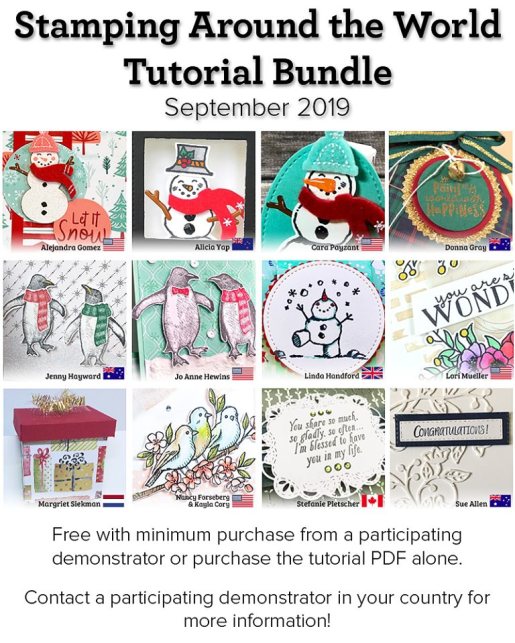
Jenny Hayward (A Stamping Journey)

Alejandra Gomez (Creating with Allie)