cards, Catalogues

SUNDAY SUITE – DINOROAR!

Dinoroar

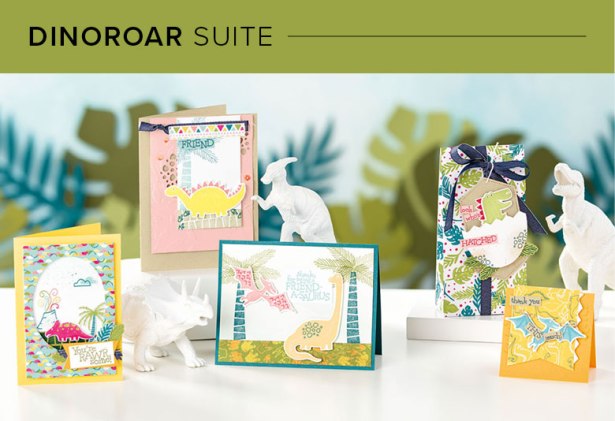
Today’s Sunday Suite we are looking at is the Dinoroar Suite.  This is such a cute set. I don’t have any young children anymore but if you have children or grandchildren this would be a great suite for you.

This is all the products you will find in the Dinoroar Suite.  Those cute little dinosaurs in the Dino Days stamp set.  I have heard too that some of the dies will cut the dinosaurs in the Dinoroar Designer Series Paper.  That’s always cool when you can do that.  No cutting with scissors.

Stampin' Up! Dinoroar Suite

If you choose to get the whole suite it is just one item code.  That makes life easy.  In Australia that is $132.50  #152194

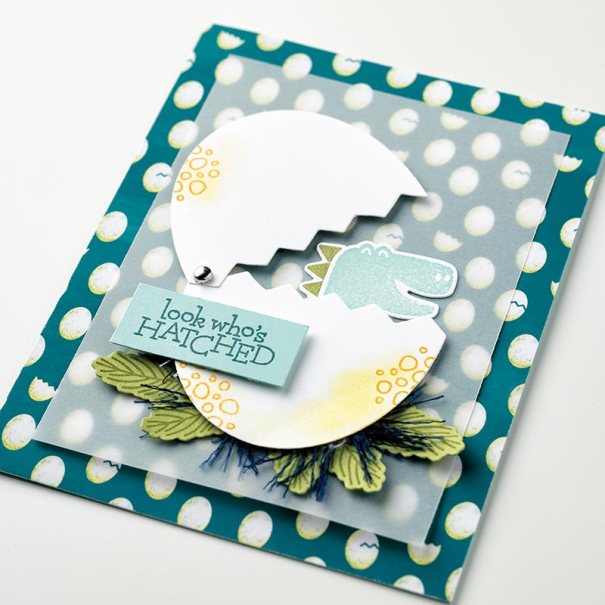
How about this for a cute card created by a Stampin’ Up! artist.  Have a close look at the threads under the hatched egg.  This is actually the Denim Ribbon that has been pulled apart to create the threads… Clever!

Dinoroar _ Hatched Egg

Another cute card below.  You know I don’t think you necessarily have to have young children to have this suite.  Many older people would be happy to have this cute dino on a card too. 🙂

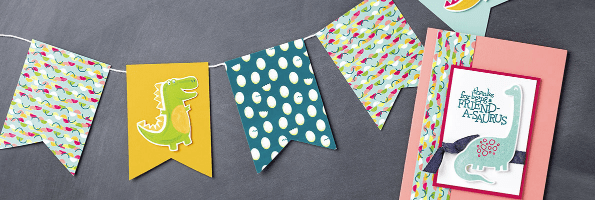
If you do have young children what about a cute banner though with the paper.  Great for their bedroom or for a birthday party.  Oh! The ideas are endless.  Such fun.

You can grab this suite or parts of it in my store now.  Head over -> HERE.

Please use the Host Code: VA9WC4CZ

Have a great day.

Jenny

Stamping Around The World Tutorials


Catalogues, Stampin' Up!, Videos

WEDNESDAY’S WOW! #79 – UNBOXING MY 2019 HOLIDAY CATALOGUE PREORDER!

A little different Wednesday’s WOW! today.  My preorder arrived on my doorstep early this morning for the upcoming 2019 Holiday Catalogue (or Autumn/Winter Catalogue for our Northern Hemisphere friends).  So hold everything – I had to make a video unboxing it.

For Wednesday’s WOW! #79 – join me as I am unboxing my Holiday Catalogue preorder.

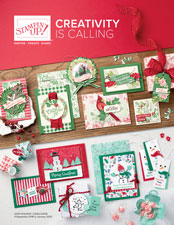
If you haven’t seen the catalogue yet then let’s check out JUST SOME of the gorgeousness.

I hope you like it.  I always like seeing what different products people order.

What is your favourite?

Stay tuned as I start to create with these products very soon.

2019 Stampin' Up! Holiday Catalogue

I will be starting to send the Holiday Catalogues our very soon so if you are in Australia you can request one by filling out the request form -> HERE

Jenny

Blog Hops

NEW TUTORIAL BUNDLE OUT FOR AUGUST!

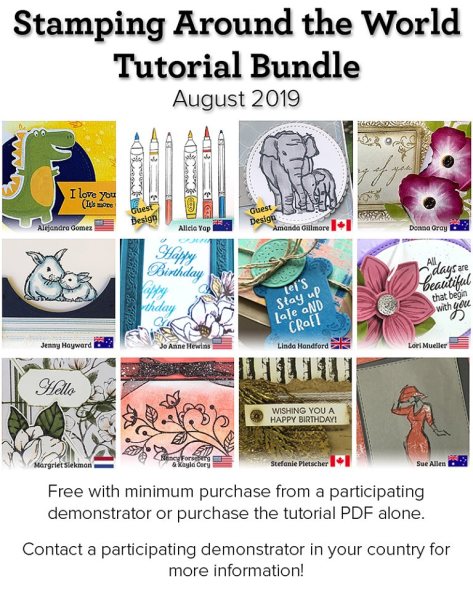
We have a new Tutorial Bundle for you for the month.  These have become very popular now.

I have teamed with a great group of Demonstrators from around the world to bring you these Tutorials each month.  There are some very talented people in this group and I am honoured to be a part of it.

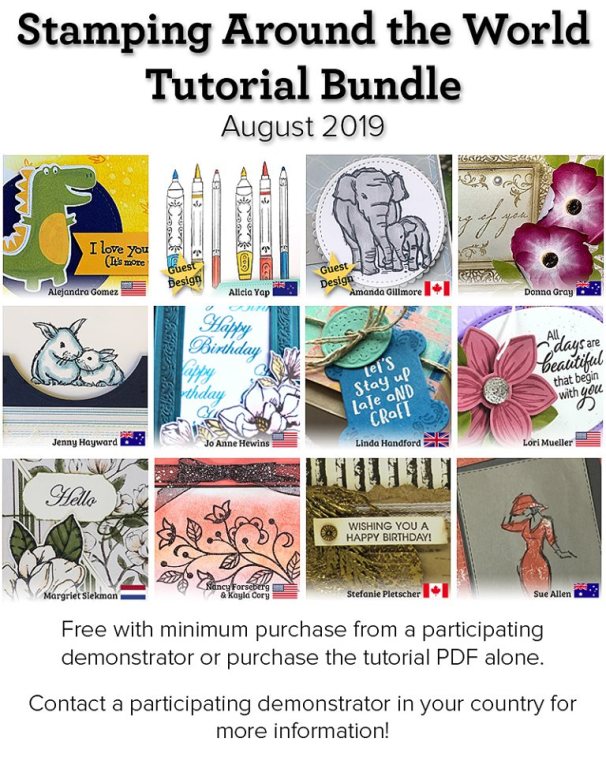
Here is a sneak peek of August’s Stamping Around The World Tutorial Bundle. 

So how can you get these?

There are 2 ways that you can get these Tutorials.

1) Place a qualifying order with me (Australia residents only).  In Australia this is $78.  Either in store or directly through me.

2) Purchase the Tutorial $20 AUD It doesn’t matter where you are in the world you can still get these Tutorials from any of the participating demonstrators.  You can do this through Paypal or direct deposit.

Each month we have a new Tutorial Bundle for you.  And in the middle of the month we all come together for a Blog Hop with more inspiration. So I hope you can check back in.

Thanks for visiting me,

Jenny

cards, Catalogues, Stampin' Up!, Videos

SUNDAY SUITES – PRESSED PETALS SUITE!

It’s Sunday Suites time.  Today we are looking at the Pressed Petals Suite.  I have seen a lot of projects with this suite recently so I thought it would be timely to look at it.

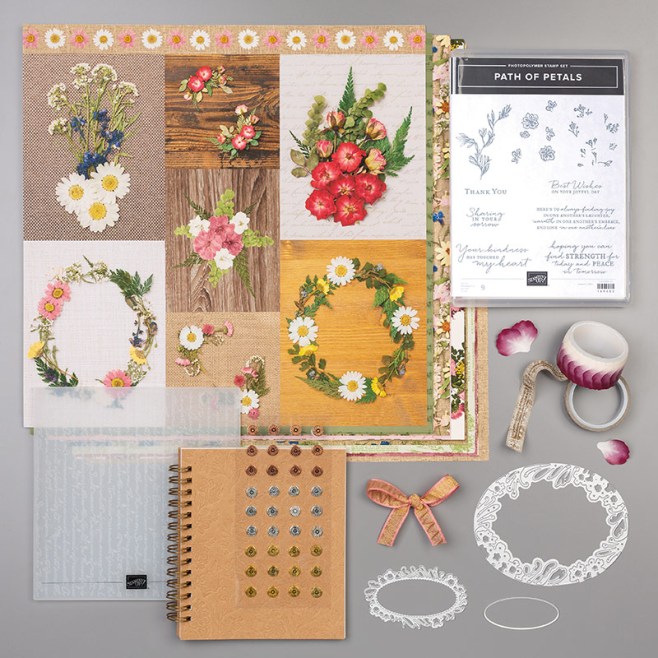
The Pressed Petals Suite includes a sweet stamp set, Path of Petals, for those special encouraging occasions. (See it closer below).  I love the Petal Labels Dies.  They create some very detailed, delicate labels for your sentiments. 

This is the Path of Petals stamp set.

With these Suites you can use just one Item code to get all of these items together. The Pressed Petals Suite is #152193 and is $167.76 AUD

In the Suite it includes the Pressed Petals Journal.  I have only just noticed the embossed cover. Isn’t that gorgeous??  You can decorate the Journal with some simple decorations.  Not too much or you cover the lovely embossing. On this one it is using the Pressed Petals Specialty Designer Series Paper.

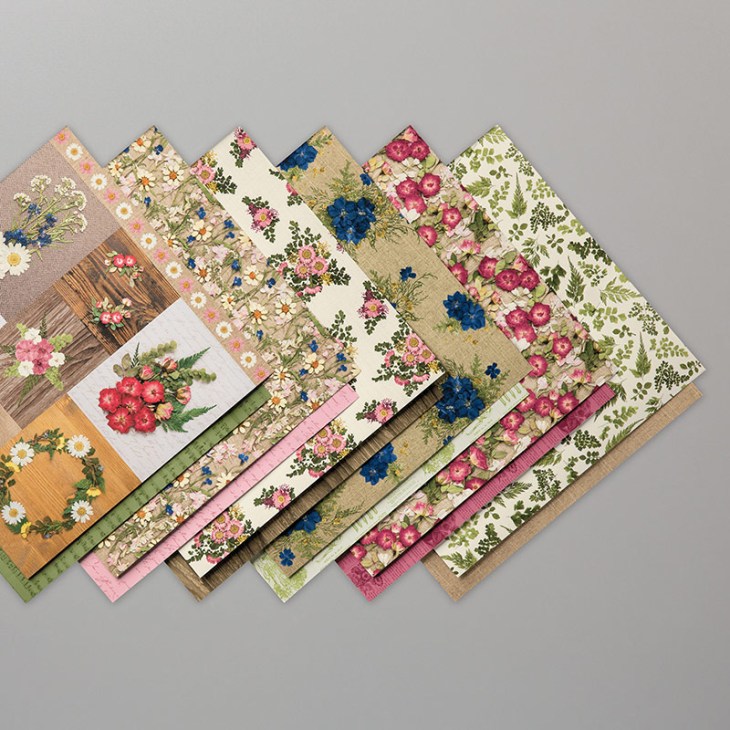
You have to have a closer look at the Pressed Petals Specialty Designer Series Paper.  It looks like pressed flowers on the paper.  Do you remember pressing flowers when you were younger?  Picking the flowers then pressing them in piles of books between paper.  It is just like it.

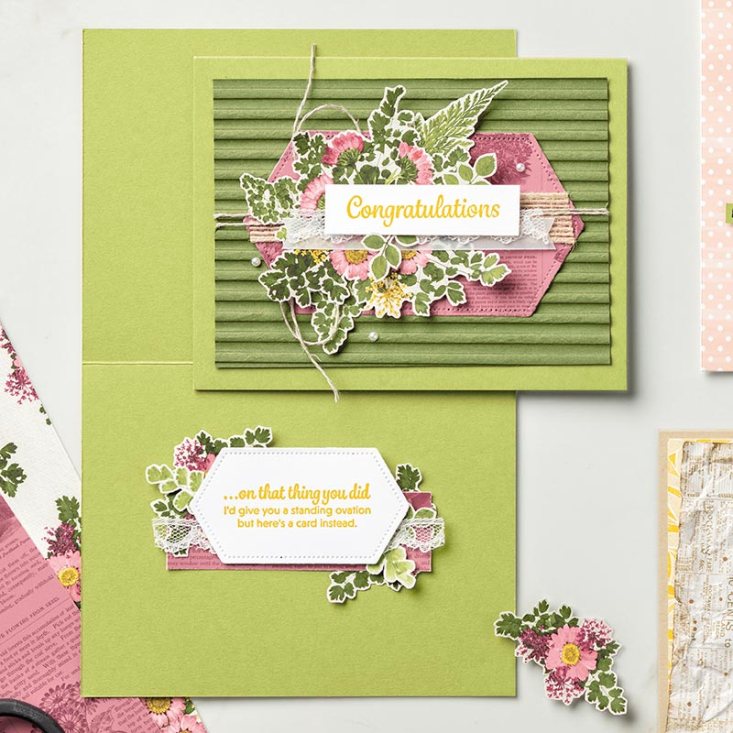
A couple more samples for you using this suite of products.

I have to show you the Pressed Petals Specialty Washi Tape.  It contains 2 rolls.  One roll is a Crumb Cake tape.  The other petal one is not your regular Washi Tape here.  The roll of tape actually contains individual petals.  You can use the petals on their own as an embellishment or you can peel one off at a time and build up your flower. It is $13 AUD  It is very clever.  I haven’t seen anything like that before have you?

If you want to have a closer look at this suite check the video out below.  It shows you in much more detail the journal and the gorgeous Washi Tape.

So there is the Pressed Petals Suite.

If you want to grab one of these products or all of them you can grab them in my store now -> HERE.  (Australian residents). Please use the Host Code: HCCFFCSU

Thanks for visiting me today on this Sunday.

Jenny


Catalogues, Stampin' Up!

LAST DAY FOR BONUS DAYS!

That’s it.  You have until tonight to get your orders in to grab your Bonus Days Voucher for 2019.  If you need anything be sure to get your order in to my store by 8pm tonight or message me for me to add your order.

What’s the deal with Bonus Days again?

Every order over $90 will receive a $9 Bonus Day Voucher that you will be able to redeem on your order in August.  That’s awesome right.  $9 free stuff!

You can shop in my store now -> HERE.  Please use the Host Code: HCCFFCSU

Also, as the order is over the qualifying amount of $78 you will receive the 12 Project Tutorial Bundle sent out to your order is placed. These 12 Tutorials are from Demonstrators from around the world including myself and I have to say you will love the projects.

Thanks for visiting today

Jenny

Catalogues

IT’S BOGO SALE TIME AGAIN!

It’s that time of year that you love. MY BOGO SALE (Buy One Get One Free). 

Of course you pick up my retired Stampin’ Up! Products but you also get the same value of free, shiny new products.

If you are a Wollongong local then here are the details. Stop on by anytime but be early to get your pick.

BOGO SALE

WHEN: Saturday 3rd August anytime between 2pm and 4pm.

Or Sunday 4th August anytime between 3pm and 4pm.

WHERE: My studio, East Corrimal.

** Please bring your own bag to put your purchases in.

THE DETAILS:

– Prices of past years catalogue products have been reduced. Recent Retired products are near catalogue price.

– For every $$ of retired products you buy you can redeem the same value of new products of your choice from the new catalogue for FREE = BOGO.

– New products are to be chosen by 18th August.

– Purchases can be made by cash and this year credit card facilities are available.

– No viewing prior to this date. If you can’t make the time we can work out a date after the weekend.

– Shipping and Handling is calculated on the new products. Bonus Days Vouchers cannot be used towards purchases.

Any questions please don’t hesitate to ask me.

I look forward to seeing you sometime. Don’t forget to tell your friends too.

Jenny

cards, Catalogues

SUNDAY SUITES – NOBLE PEACOCK!

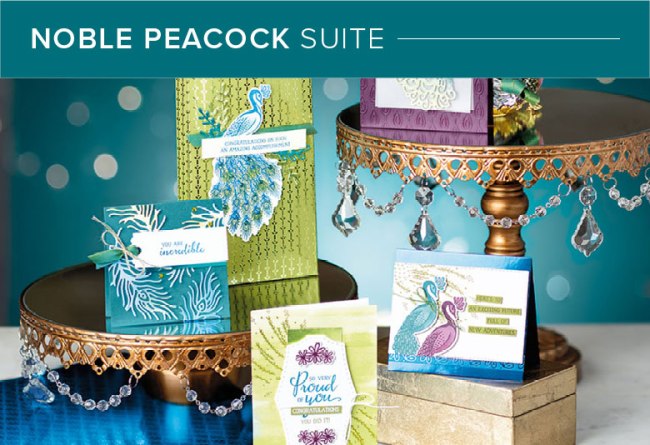
Today’s Sunday Suite I thought we would look at the very gorgeous, very regal Noble Peacock Suite.  This suite has been very popular so far.  It certainly deserves a post just to look at the gorgeousness.

Stampin' Up! Noble Peacock Suite


The Noble Peacock Suite Bundle includes:

* Royal Peacock Photopolymer Stamp Set (10% off)
* Detailed Peacock Dies (10% off)
* Beads & Baubles Embossing Folder
* Noble Peacock Specialty Designer Series Paper
* Noble Peacock Foil Sheets
* Old Olive/Pretty Peacock 3/8″ (1 cm) Reversible Ribbon
* Noble Peacock Rhinestones

If you buy all the Suite together you can use just one item code to make ordering easier #152187.  In Australia it is $161.75 for all of this lovely stuff.

Stampin' Up! Royal Peacock Bundle

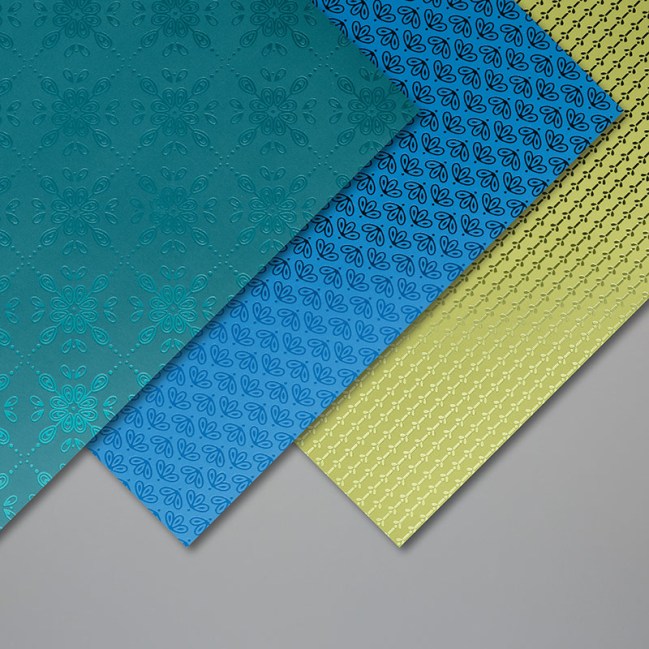
How is this gorgeous Nobel Peacock Specialty Designer Series Paper?

The Noble Peacock Specialty Designer Series Paper features foil accents on jewel-toned paper, creating an elegant beauty. It certainly is elegant – and very, very shiny. You get 12 sheets of specialty patterned paper: 4 each of 3 single-sided designs.

The colours are: Blueberry Bushel, Old Olive, Pretty Peacock

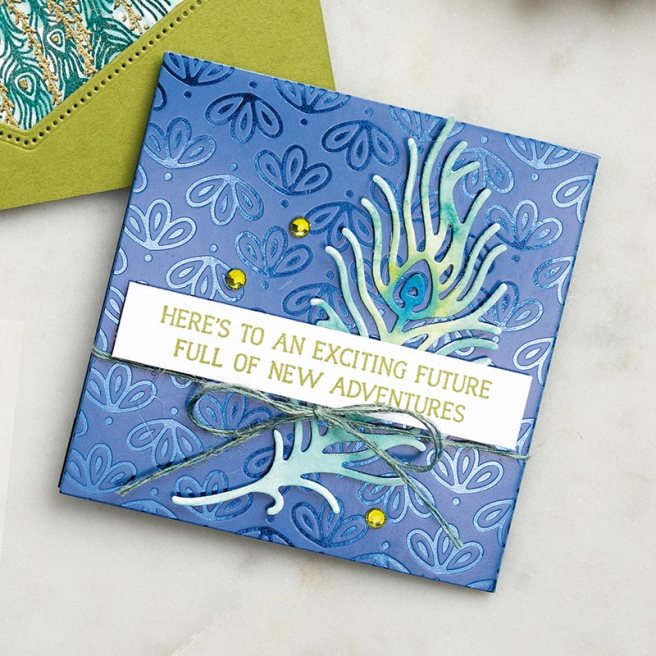
Here you can see just how beautiful and shiny it is on this card.

Stampin' Up! Noble Peacock card

The Suite also has these beautiful Shiny Noble Peacock Rhinestones.  Check below how you can receive a free pack this week.

What do you think of this suite?  It may just be THE most popular suite.

I will be going away this week so I thought I would have a special shiny gift for you.

Receive a pack of the Noble Peacock Rhinestones as your gift with orders this week, with any orders over $40.  You have got to love that!  And remember: it is Bonus Days time still so if the order is over $90 you will receive your Bonus Day Voucher for you to redeem it next month and get $9 off your order then.

In Australia? Order in my store -> HERE. Please use the Host Code: HXRVAQUA

Also, Don’t forget it’s still extra bonuses when you join this month or in August.

Have you thought about joining Stampin’ Up! But not sure about it?  Head -> HERE to have some of your questions answered.

Blog Hops, cards, Catalogues

TO A WILD ROSE FOR JULY STAMPING AROUND THE WORLD BLOG HOP!

Hello and welcome to another Stamping Around The World Tutorial Blog Hop.  I am excited to share again with this amazing, talented group.  You might have come from Jo Anne’s blog -> HERE or just starting out.  Either way, enjoy the hop.

Each month this group compiles a Bundle of Projects to send out free following orders from our customers, or people are able to purchase the tutorials regardless of where they live in the world.

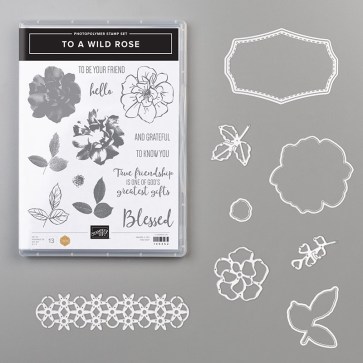
We also come together to Blog Hop this time each month.  For our projects for the Blog Hop we create a project using the same stamp set we used in our Tutorials.  This month I used To A Wild Rose.

This is the card I have to share with you today.  It is not an original design and I have seen it on a few blogs but I am not sure what it is called.  I am calling it a Topper Card. 🙂 I have the measurements below.

THE TOPPER CARD

I have used the Perennial Essence Designer Series Paper for the front of the card. Isn’t it pretty?

I stamped the large sentiment image on the first card.  It is a beautiful sentiment.  What a blessing it is to have a true friend.  I am very thankful for the blessing of a number of true friends.  I really loved the sentiment and wanted to use it.  The sentiment was diecut with the stitched label shape in the Wild Rose dies.  I backed it with some Silver Glimmer Paper which I had punched out with the Tailored Tag punch and cut in half.

When I finished the card the sentiment seemed to be too large and out of proportion or so I thought.    What do you think?  I re-stamped a smaller sentiment to go on the front.  The smaller sentiment was diecut with the Stitched Labels dies.
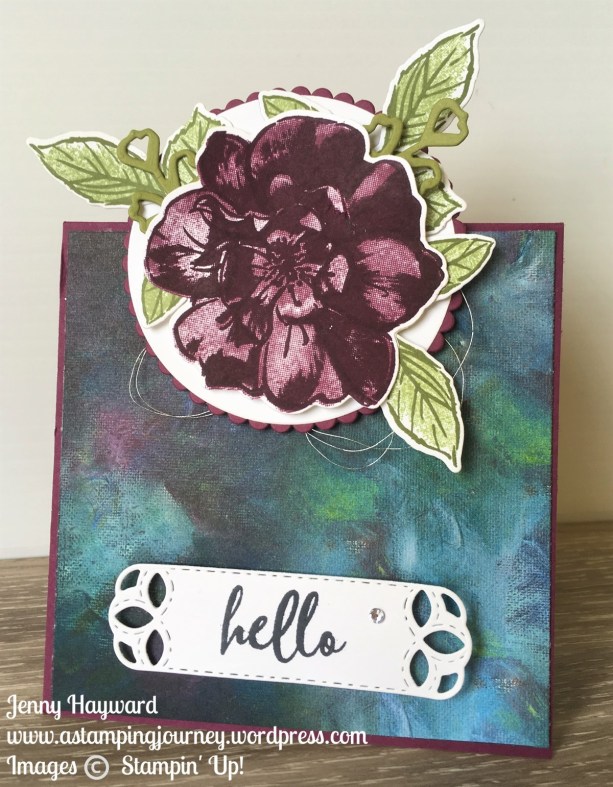
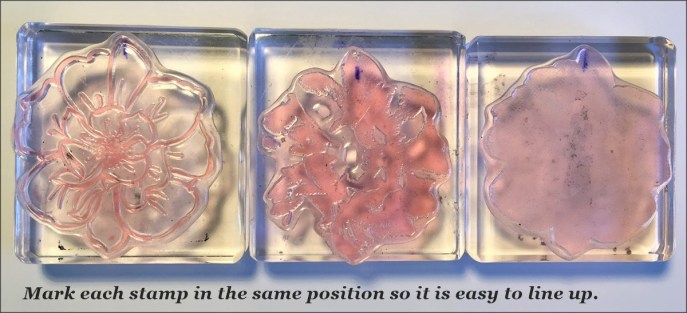
The rose in this set is created with 3 stamps.  You can use one, two or all three stamps together. I used all 3 in this one. The rose was stamped on scrap white paper.  Firstly stamp the outline rose image in Blackberry Bliss, the sparser filler image was stamped in Blackberry Bliss and the more detailed centre stamp was stamped in Rich Razzleberry.  I love how you get the depth to the flower with the multiple images.

I will say it can be a little tricky lining up the 3 images for the rose.  I will share a tip with you.

TIP FOR STAMPING THE ROSE: On each of the stamps I made a mark in pen on the back of each stamp in the same position.  When you stamp you can position the stamp in the same orientation each time.  It saves so much time and frustration – let me tell you.  Here is a photo showing the marks on the stamp. I hope this tip helps.
THE INSIDE OF THE TOPPER CARD

Of course, don’t miss the inside.  I had a strip of designer series paper over so I adhered that on to a piece of white card.  I had stamped an extra rose as I wasn’t sure which one to use for the front.  So I adhered that to the bottom right corner and trimmed off the overhang.  (This rose was stamped in blackberry Bliss for the outline image and Rich Razzleberry for the centre).

MAKE YOUR OWN TOPPER CARD

For the base card, cut card to 10.5cm x 21cm, score at 10.5cm.   (4 1/4″ x 8 1/2″, score at 4 1/4″).

Cut Designer Series Paper to 10.1cm x 10.1cm (4 1/8″ x 4 1/8″)

Cut White card for inside to 10.1cm x 10.1cm (4 1/8″ x 4 1/8).

To create the Topper part.  Make this any shape you desire.  I have used the Layering Circles Framelits. 

The topper is placed on the base card on the fold line with half of the topper overhanging. Remember when you add the topper to the top of the card only place your dimensionals to the lower half of the Topper shape so you don’t see them at the back. 

SEE IN STORE

You can see the To A Wild Rose Bundle in my store now -> HERE.  $93.50 AUS.

Now if you grab this bundle this month you will get a Bonus Day Voucher to get $9 off to go towards next month’s order,  AND you will receive the Tutorial Bundle of 12 exclusive Projects including my different project with the To A Wild Rose bundle.
GRAB A TUTORIAL FREE

Don’t want to miss anything?  Sign up for my Newsletter and receive one Tutorial as a Thank You.  This will be a project from a previous Tutorial Bundle.  Check the Right Hand Column.


CONTINUE THE HOP

Thanks for hopping with me today.

Now you are ready to move on to the next blog in the hop.  Now head off to Sue’s Blog -> HERE.  There is a list below if you get lost.


Eva Pottsova (Crafting with Angels)

Stefanie Pletscher (The Crafty Medic)

Margriet Siekman (Creatief met Marsie)

Jo Anne Hewins (Luv 2 Create)

Jenny Hayward (A Stamping Journey)

Sue Allen (Sue Allen Simply Craft)

Linda Handford (Stampin by the Beach)

Lori Mueller (Stampin’ Dreams)



Catalogues, Stampin' Up!

BONUS DAYS AND EXTRA BONUS!

Two important, exciting, amazing promotions to tell you about today.

  • Bonus Days – $9 voucher with your $90 order this month.
  • Extra, Extra – More free products when you join the Stampin’ Up! Family during July or August.

BONUS DAYS

Bonus days are back!

Order $90 in products during July and receive a $9 voucher that you can redeem on your next order in August.

Who doesn’t love free!  This applies whether you order directly through me or through my store.

NB: Following your order you will receive an email with a code.  Be sure to save this email and you will add this when you place your order in August.  (Bonus vouchers expire on 31st August).

So start shopping.  I am sure there is lots you love from the new catalogue and how great is it to get $90 off the following month.

TO ORDER:

Have your order (over $90) ready to go and head to my store -> HERE.

Please use the Host Code: HXRVAQUA

Thank You 🙂

In addition, you will also receive the Free Tutorial Bundle of 12 exclusive projects as a little way to say Thank You for you.

***

EXTRA, EXTRA!


Do you have a long wish list from the catalogue?  Is it more than $169?  I am sure it is.  Why pay more than $169 right even if your wish list adds up to $280 …

During July or August come and join the Stampin’ Up! family. Come and join the JEN’s INK team and get so much extra products PLUS an extra $16 voucher to use the following month. So in total you are getting $127 of free products. Seriously! are you going to knock that back??

When you join the Stampin’ Up! family you are not just getting LOTS of extra free products.  You make so many great new friends,  You are inspired by amazing projects in Demonstrator groups and the quarterly magazine, you get to travel to different events throughout the year and even get free products along the way.  Are you up for it??

You can find out more -> HERE.

If you have any questions then email me at jghayward@yahoo.com

OR, you can join Stampin’ Up! and my JEN’s INK team by heading to the link -> HERE.  Have your $280 of products worked out already and click Join Now. No matter where you are in Australia.

Happy Shopping,

Jenny

Blog Hops, cards, Catalogues

STAMPING AROUND THE WORLD JUNE BLOG HOP – DAISY LANE!

It’s time for another exciting Blog Hop with Stamping Around the World Team.  You might have come from Linda’s Blog HERE or starting on my blog.  Either way.  Enjoy seeing all the amazing projects from Demonstrators around the World. 

Each month the team all contribute tutorials to send out as a Thank You for  when you order with any one of us.  That’s pretty exciting – and I can tell you these projects have been pretty amazing AND they are exclusive too so you won’t see them anywhere else.  I am honoured to be a part of it.  

The idea with these Blog Hops is to share a project with you with products we have used in our Tutorial for the month.  I have used the new Daisy Lane Bundle.  

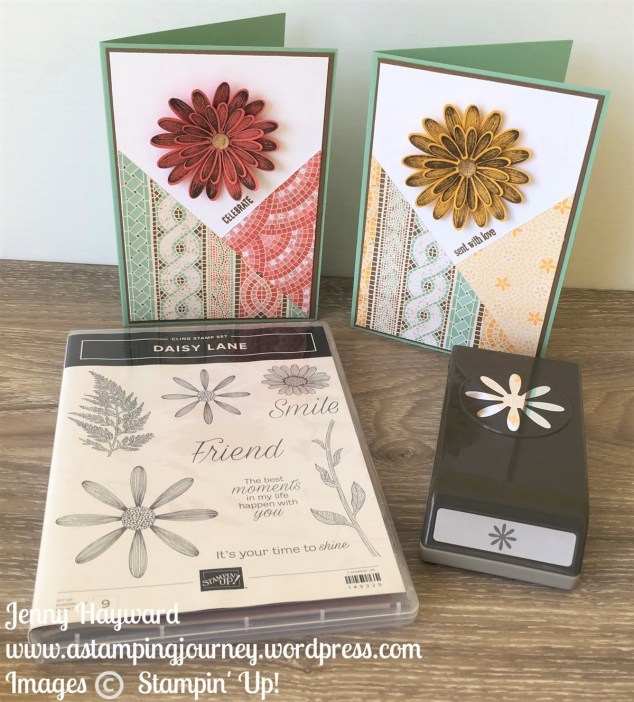
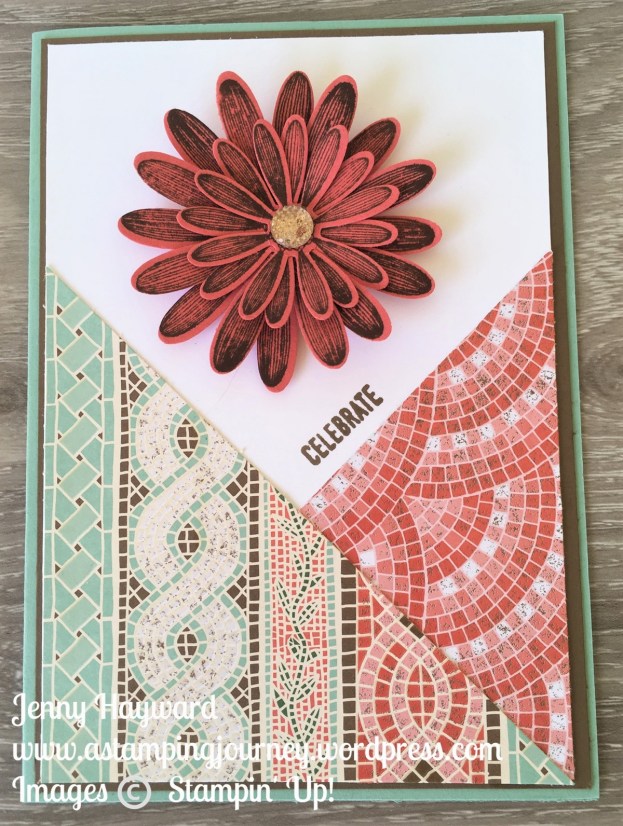
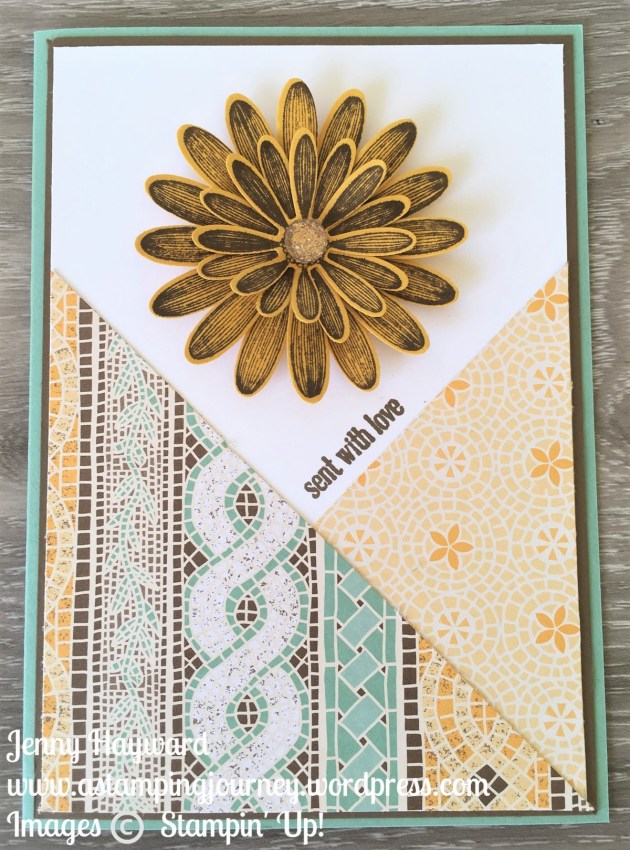
Today I have 2 cards using the Daisy Lane stamp set and the Medium Daisy Punch.  I have also used the larger Daisy Punch.

The layout for the cards was based on the Freshly Made Sketches #339.  I thought it was a great way to use the paper. On these cards I used the Mosaic Mood Specialty Designer Series Paper.

It’s great way to show off the both side of the paper.  The Designer Series Paper needs to be square and to be the width of the white card mat whatever size you choose to make the card in.  These are standard card sizes.  See the measurements below.

Card Measurements:

Card Base: Mint Macaron 14.8cm x 21cm Scored at 10.5cm (5 1/2″ x 8 1/2″ Scored at 4 1/4″)

Soft Suede Card Mat: 10.1cm x 14.4cm (4 1/8″x 5 3/8″)

Whisper White Card Mat:  9.7cm x 14cm (4”x 5 1/4″)

Designer Series Paper:  9.7cm x 9.7cm (4″x 4″).

Cut the DSP diagonally and flip one side.  For these cards I used 2 different prints in the pack and actually swapped one half with the other as I thought the colours worked better together.

See the cards close up

I have punched 2 flowers of each size and layered them together.  The flowers were stamped in Soft Suede. and I used the Gold Faceted Gems in the centre of the flowers.

The sentiments are from the Itty Bitty Greetings stamp set.

Now the Daisy Lane Bundle is in store now -> HERE for $61 AUS When shopping in store please use the Host Code: H2BBRFTE

If you have the Daisy Delight set and the larger Daisy Punch then this is a great compliment to them and will really extend your creating so you can make the layered daisies in both sizes.  You can grab those in my store too if you haven’t already got them. With your qualifying orders you will get the Tutorial bundle with 12 projects that I will send out to you.

Now you can head off on the hop again and head to Jo Anne’s blog HERE or follow the arrows.  If you get lost follow the list below.


Eva Pottsova (Crafting with Angels)

Rebecca-Jo Unwin (Rebecca-Jo Unwin)

Stefanie Pletscher (The Crafty Medic)

Donna Gray (Stamping with Donna G)

Sue Allen (Sue Allen Simply Craft)

Linda Handford (Stampin by the Beach)

Jenny Hayward (A Stamping Journey)

Jo Anne Hewins (Luv 2 Create)

Lori Mueller (Stampin’ Dreams)
Margriet Siekman (Creatief met Marsie)


Thanks for visiting. Enjoy hopping! 🙂

Jenny