Catalogues, Stampin' Up!

STAMPIN’ UP! EXTRAVAGANZA IS GO!

IT’S HERE AND IT’S BIG!

For the next 6 days Stampin’ Up! have a HUGE Extravaganza Sale.  10% off Select items from the current Annual Catalogue.  They are spread out over the time so every second day there are different items reduced.

Are YOU ready for it?

It’s time for DAY 1 and DAY 2 with select papers and Embellishments reduced including Cardstock, Designer Series Paper, Buttons, Glitter, Ribbon and Twine AND lots more.

Head to my website (see below) to check the items for this sale.

THINGS TO REMEMBER:

  • These items are only available  for the 23rd and 24th and while the supplies last.
  • Order directly to me or in my store -> HERE.  Please use the Host Code: AE4KW4PM
  • Orders over $50 in total for the whole Extravaganza Week will receive a $10 Gift Voucher to use later in December.  This is only available through me.

SO GO NOW AND SHOP  

Any questions please don’t hesitate to email me at jghayward@yahoo.com

Thanks for shopping with me,

Jenny


cards, Catalogues, Stampin' Up!, Tutorials, Videos

VIDEO SURVEY – CAN YOU TAKE A MOMENT PLEASE?

This is a different type of post today.  I am considering classes and my direction for next year.  Videos and tutorials are becoming a big part of the way we share stamping techniques and projects with each other.  Is that how you want to see them??

I would love your views and have put together a very short survey.  It is 2 very quick questions. Would you mind taking about 20 seconds out of your day to answer the 2 questions please??

That would be really great.  I love to hear your ideas.

Here is the link to the survey -> HERE.

Thanks for taking the time to complete this for me. And Thanks for following me along on this crazy, creative journey. 🙂

Jenny


cards, Classes, Onstage, Personal Ramblings, Stampin' Up!, swaps

ONSTAGE – BUDDY GIFTS AND SWAPS!

Did you catch the video in yesterday’s post with the swaps I received from Onstage?  If not, head back to the last post. I have the still photos there too.

Today I wanted to share with you my buddy gifts and the swaps I made to share.

BUDDY GIFT PACKS

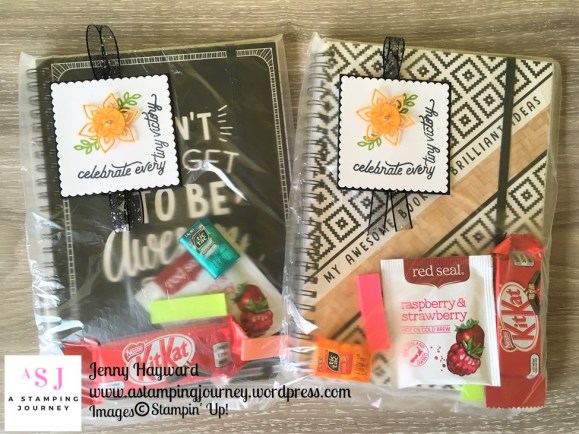
I made up little Gift Packs – or Onstage survival kits. 😉 I made up 4 of them.

These packs contained a notebook.  I loved these notebooks.  Two had on the front “Don’t Forget To Be Awesome” and the other two were “My Awesome Book of Brilliant Ideas”.  I thought these would be great to write notes in at the Onstage sessions.  In the packs there was some mini Tic Tacs, Tea Bag, Kit Kat Chocolate and of course Mini Post-It notes for the new catalogues.  I will show you a close up of the tags I made.

THE TAGS

A scallop square was cut with the Layering Square Framelits and also a larger black square.  On the white card I stamped the sentiment from the Around The Corner stamp set.  Then stamped the small “flowery” centre shape on to Mango Melody Card and punched it out with the 3/4″ circle punch.  Then I diecut a flower in Mango Melody Card from the Flourish Thinlits and layered them together.  Before adhering the flower to the card with Dimensionals I stamped the leaf from the Around The Corner set in Granny Apple Green.  The Black Glittered Organdy Ribbon was adhered between the white scallop square card and the black card.  They are simple but I loved how they turned out.

MY SWAP

I didn’t have a lot of time to make swaps but I really wanted to and I knew I wasn’t going to have a lot of time to swap on the Saturday as I was helping with registration in the morning. So I kept the card simple and only ended up making 15 of them.

This was my swap card.

I have used the Rooted in Nature Bundle.  The tree and the leaf were heat embossed in Copper and diecut out. The sentiment is from Wood Words stamp set.  I wanted to go for an angle look so angled the paper from the Love What You Do Specialty Paper.  Underneath the paper there was a strip of the Copper Foil Paper. To finish I tied a knot using the Copper Trim.

Now since I hadn’t made many swaps I had a few doubles of cards from recent classes so thought I would add those to the swap mix.  These are the group of cards.  I had 2-3 of each card. These were received well too.

Thanks everyone for swapping with me.  I hope you liked your card you received from me.

A SPECIAL THANK YOU CARD

Earlier I mentioned that I was helping on the Saturday.  This was the special card I received from Stampin’ Up! to say Thanks.  Totally unexpected.  It was signed by all the staff that were there.  How lovely.

This uses the Tropical Escape Designer Series Paper.

Thanks for visiting me.  I hope you like them.

Tomorrow is another 12 Weeks of Christmas Edition so see you then.

Jenny

Onstage, Personal Ramblings, Stampin' Up!

BACK FROM MELBOURNE STAMPIN’ UP! ONSTAGE!

It’s been a big weekend.  I have just returned from the Stampin’ Up! Onstage event in Melbourne.  This is a fantastic time for Demonstrators as we meet up with old and new friends and see lots of inspiring projects … and see new products. 🙂  I can’t wait to share those with you soon.

While I sort out photos and swaps I thought I would just share a couple of personal highlights with you because you have followed me and cheered me on and on many occasions kept me creating. So THANK YOU each and every one of you. xx

You probably know that it is Stampin’ Up!’s 30th Birthday this year so this event was a big one celebrating the occasion.

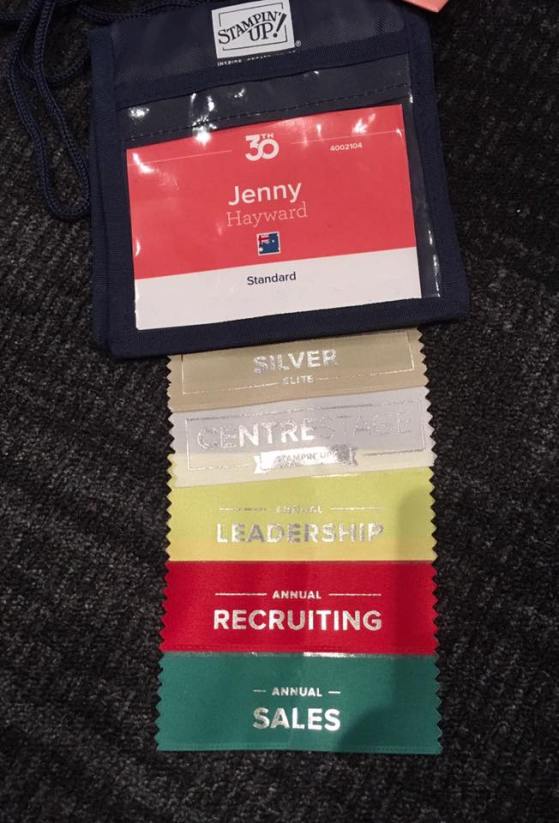
Firstly, I got to attend Centrestage this time.  This event is for those demonstrators who are at Silver Elite title and above. I am so Thankful to have promoted to Silver Elite just a few months ago and I have been so excited to be able to attend it.

It was a fantastic night of lovely food and great conversations and some business discussions.  And of course treats. 🙂

At Onstage on the Saturday there was some amazing presentations shown from the Onstage Live event in Orlando as well as some from our event in person.  They were all so clever and lots of new ideas.  (PS If you love butterflies and flowers you will love the new Occasions catalogue. Just sayin’!). 😉

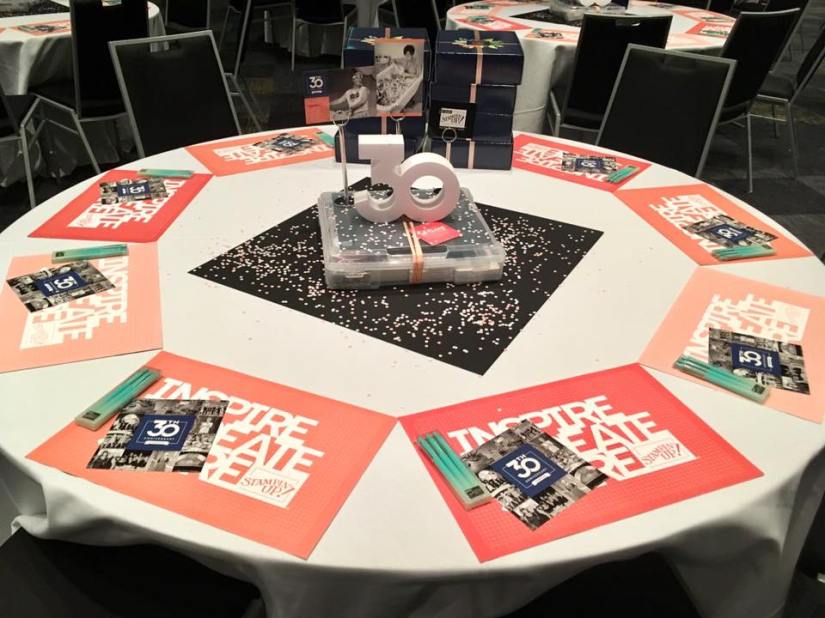
This is the table set up all neat and tidy before the masses enter and take over. Isn’t it a lovely presentation.  The box in the middle under the ’30’ had secret products in that we couldn’t open until we started making the projects.

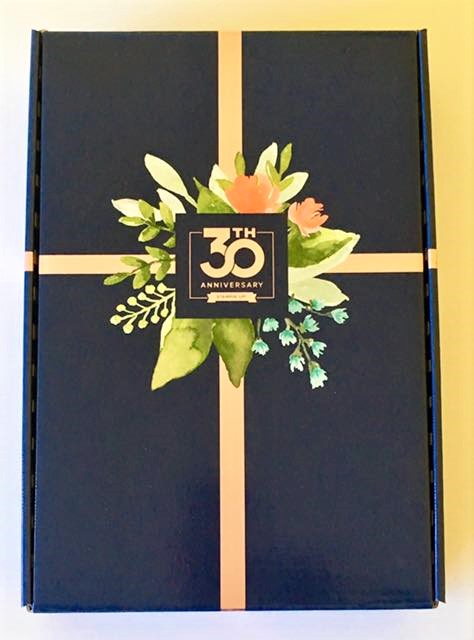
The blue stack of boxes at the back held the gifts for each person.  It held the bag and some notebooks and a few other gifts. It is such a lovely gift box.

I was so excited to celebrate some milestones too this year so thought I would share some photos.

Thank you to my team and my customers for helping me get there.

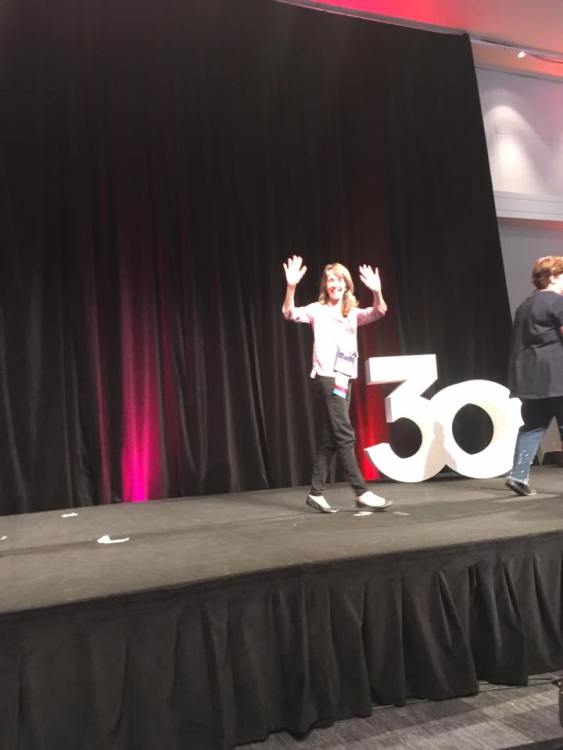
I got to do 2 stage walks this year first celebrating my promotion to Silver Elite and the 2nd for my 10 year Anniversary.  It is always a special time so I was pretty excited.

It was a privilege to have 3 of my JEN’s INK team with me in Melbourne.  Of course we had to have the team photo around the big ’30’.

Thanks for indulging me with these.  Thanks for your part in my journey.  Even your visits to my blog keeps me creating and sharing with you.  SO THANKS AGAIN.  I am excited for more creating and sharing with you.

I will be back to share swaps and other projects shortly.

Jenny

cards, Catalogues

SNOWFLAKE SHOWCASE WEEK – BONUS DAY WITH AN ALL OCCASIONS CARD!

I have been sharing projects all this week with the Snowflake Showcase products.  Today while I am in Melbourne for the Stampin’ Up! Onstage event I thought I could squeeze in a little bonus project for you.

I shared a card a few days back that was for any occasion.  I love that these products can be used not just for Christmas and not just to make snowflakes.  So I thought today’s bonus card needed to be another all occasion card.

The Snowfall Thinlits can be used to make some pretty flowers.  I kept the flower simple on this card.  The “snowfall” image was stamped on the Rich Razzleberry card base for some background. It doesn’t have to be snow. 🙂 The paper strip is from the Share What You Love Specialty Designer Series Paper.  The Old Olive card strip was embossed with the Basket Weave Embossing Folder.  I love how this layout turned out.  It was loosely based on a Freshly Made Sketches #310 sketch. 

You still have time to order these products.  BUT – this is a BIG BUT!  They are only available during November AND ONLY WHILE SUPPLIES LAST.

Here they are again and ordering details for you if you are in Australia.  Now my Aussie friends,  I know that being snowflakes it puts you off these as we don’t have a snowy, wintry Christmas BUT look what else you can make with them.

Here is all the details.

SNOWFLAKE SHOWCASE PRODUCTS

ORDER ANY OF THE SNOWFLAKE SHOWCASE PRODUCTS NOW AND RECEIVE A FREE GIFT.

Grab the Tutorial AND card kit to create 2 gorgeous projects when you order these items with me PLUS receive 1 sheet 6″x12″ velvet paper FREE.

  • Order the Snow Is Falling Stamp set and the Snowfall Thinlits.

COST:      $98 plus shipping.

  • Add the Happiness Surrounds stamp set for an additional $30 and you will also receive the Snowflake Trinkets for free.

You can view the products closer and order in my store now -> HERE. 

Please use the Host Code: KGQKCBA4  Australian residents only sorry.

Your Free items with a Thank You card will be sent out to you separately so be sure to not mark your order anonymous.  Thanks for your order.

——-

I will share more projects with you of these soon.  I hope you have enjoyed them.

Jenny


cards, Christmas, Classes

SNOWFLAKE SHOWCASE WEEK – DAY 4!

Today I have another card for our Snowflake Showcase Week.  I realised that it is using Bermuda Bay again.  Sorry about that but isn’t it a nice snowflake-y colour.

This is a card we made in our class last week.  I wasn’t sure about it.  I thought it might be too simple but everyone loved it.  So I thought I would include this in our Showcase week.  Really it might be simple but with the gorgeous detail there doesn’t have to be much on a card.

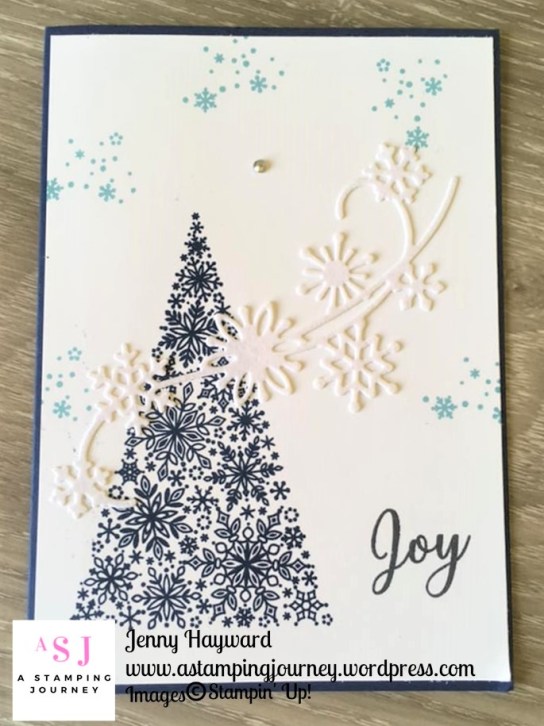
The lovely swirly snowflake is cut with the White Velvet Paper and the large snowflake with the Silver Glimmer Paper.  I added a Silver Adhesive Rhinestone to the centre of it.  I added a couple of stamped snowflakes.  The sentiment is stamped in Basic Gray.  It’s a sweet sentiment but I wouldn’t wish a blizzard on anyone. 🙂

** DON’T FORGET: ORDER ANY OF THE SNOWFLAKE SHOWCASE PRODUCTS NOW AND RECEIVE A FREE GIFT.

Get the Tutorial AND card kits to create 2 gorgeous projects when you order these Snowflake Showcase items with me PLUS receive 1 sheet 6″x12″ velvet paper FREE.

  • Order the Snow Is Falling Stamp set and the Snowfall Thinlits.

COST:      $98 plus shipping.

  • Add the Happiness Surrounds stamp set for an additional $30 and you will also receive the Snowflake Trinkets for free.

You can view the products closer and order in my store now -> HERE. 

Please use the Host Code: KGQKCBA4  Australian residents only sorry.

Your Free items with a Thank You card will be sent out to you separately so be sure to not mark your order anonymous.  Thanks for your order.

———

Thanks for visiting.  I have a special project for you tomorrow.  I hope that you like it so be sure to stop by.

Jenny


cards, Christmas, Stampin' Up!

SNOWFLAKE SHOWCASE WEEK – DAY 1!

This week I am featuring the Snowflake Showcase Suite.  I have had so much fun creating with these products.  They are absolutely gorgeous.  All the details and the delicate little snowflakes. are so pretty even if we don’t have snow here at Christmas.  You can create so much more with them though not just for Christmas.  I will be showing these ideas too.  So each day this week watch out for the projects in my Snowflake Showcase Week. 

Here is today’s projects.  Well it’s actually 2 cards for you in different colours.

This one is in Bermuda Bay.  I actually made this one a few weeks ago and we used it as the make in my team meeting.  You can’t tell but that gorgeous swirl is cut in the White Velvet Paper.  So soft and furry.  I do love it. The sentiment is stamped in Basic Gray.  I find that a little softer sometimes than stamping in the black.  The tiny snowflakes are stamped in Pool Party.

This version below is in Night of Navy with the small snowflakes stamped in Balmy Blue.  The sentiment on this one is stamped in the Memento Black.

Which colour do you like better?

This is the lovely products in the suite if you haven’t seen them yet.

——–

ORDER ANY OF THE SNOWFLAKE SHOWCASE PRODUCTS NOW AND RECEIVE A FREE GIFT.

Grab the Tutorial AND card kit to create 2 gorgeous projects when you order these items with me PLUS receive 1 sheet 6″x12″ velvet paper FREE.

Order the Snow Is Falling Stamp set and the Snowfall Thinlits.

COST:      $98 plus shipping.

Add the Happiness Surrounds stamp set for an additional $30 and you will also receive the Snowflake Trinkets for free.

You can view the products closer and order in my store now -> HERE. 

Please use the Host Code: KGQKCBA4  Australian residents only sorry.

Your Free items with a Thank You card will be sent out to you separately so be sure to not mark your order anonymous.  Thanks for your order.

——–

Be back tomorrow for Day 2

Jenny


cards, Catalogues, Christmas

12 WEEKS OF CHRISTMAS – WEEK 1 – ALL IS BRIGHT CHRISTMAS!

I am excited!  Today starts a special series on my blog.  Every Friday I will share projects with you for 12 Weeks of Christmas.  Yes, it is getting that close. Eek!

My plan for this series is to bring you reasonably quick cards and projects to help you in your Christmas creating.  So stay tuned for them.

My first project is a very quick card.  How much quicker can it get with the beautiful papers that Stampin’ Up! offer.

Add a piece of the lovely paper on a standard card mat.  This paper is from the All is Bright Designer Series Paper from the Holiday Catalogue.

The sentiment is from the Farmhouse Christmas set.  Firstly stamped on Whisper White which is cut with one of the circles from the Layering Circles Framelits and then layered on a Scalloped Circle from Gold Foil.  The sentiment is stamped again on Real Red and then cut with one of the framelits from the Farmhouse Framelits.  Before adhering that to the card with Dimensionals I punched out some leaves from Old Olive with the Sprig Punch.   

With one sheet of Designer Series Paper you will be able to get 6 cards.  They won’t take long at all to put together.

Thanks for stopping by.  Remember each Friday to check in with our 12 Weeks of Christmas countdown.  Of course, check in before that as I will be sharing lots of other projects too. 🙂

Jenny

cards, Catalogues, Stampin' Up!

CELEBRATE WORLD CARDMAKING DAY!

To celebrate all week Stampin’ Up! have announced some select products at 10% off. 

These are just some of the reduced products.  Check the full list below

OR see them in store now -> HERE.

148266 Notes of Kindness Card Kit  $61.00  = $54.90
145466 Soft Sayings Card Kit $61.00 = $54.90
146388 Lots of Happy Card Kit $61.00 = $54.90
146857 Calligraphy Essentials Project Kit  $31.00 = $27.90
146582 Ready to Layer Photopolymer  $30.00 = $27.00
147464 Around the Corner Photopolymer  $28.00 = $25.20
145785 Petal Palette Wood  $82.00 =  $73.80
145788 Petal Palette Clear  $61.00 =  $54.90
146513 P.S. You’re the Best Wood $49.00 = $44.10
146516 P.S. You’re the Best Clear $35.00 = $31.50
146780 Calligraphy Essentials Wood-Mount  $47.00 =  $42.30
146783 Calligraphy Essentials Clear-Mount $33.00 =  $29.70
144239 12×12 Very Vanilla Cardstock  $13.50 =  $12.15
124302 12×12 Whisper White Cardstock  $13.50 = $12.15
144236 Very Vanilla Note Cards and Envelopes $11.25 =  $10.13
131527 Whisper White Note Cards and Envelopes  $11.25 =  $10.13
145583 Whisper White Narrow Note Cards And Envelopes $14.00 = $12.60
146911 Delightfully Detailed Note Cards And Envelopes  $16.50 = $14.85
104430 Stampin’ Dimensionals  $6.00=  $5.40
144108 Mini Stampin’ Dimensionals  $6.00 = $5.40
141825 Foam Adhesive Strips  $6.00 = $5.40
138995 Tear & Tape Adhesive  $14.00 = $12.60

TO ORDER:

Email/Phone me directly with your orders.

OR

Order Online -> HERE.  Please use the Host Code this week: SGXSEFMS

Be sure to not mark your online Orders Anonymous as I won’t be able to send you a Thank You Gift. 😦

Thanks in advance,

Jenny

Blog Hops, cards, Techniques, Tutorials

STAMPIN’ DREAMS BLOG HOP – FAVOURITE TECHNIQUE – SALT BACKGROUND!

I am joining in with the Stampin’ Dreams Blog Hop this month and we are sharing Favourite Techniques.  I always love to try different techniques.  Before we start you might be starting here or you have just come from Jenny Hall’s Blog -> HERE.

As for my Favourite Technique.  That’s a hard one to choose one.  What I am sharing though today is a technique that I have wanted to try for a very long time so it was a good chance to play with it to create some, hopefully fun cards with you.

The technique I am sharing with you is the Salt Background Technique.  Have you tried this before?

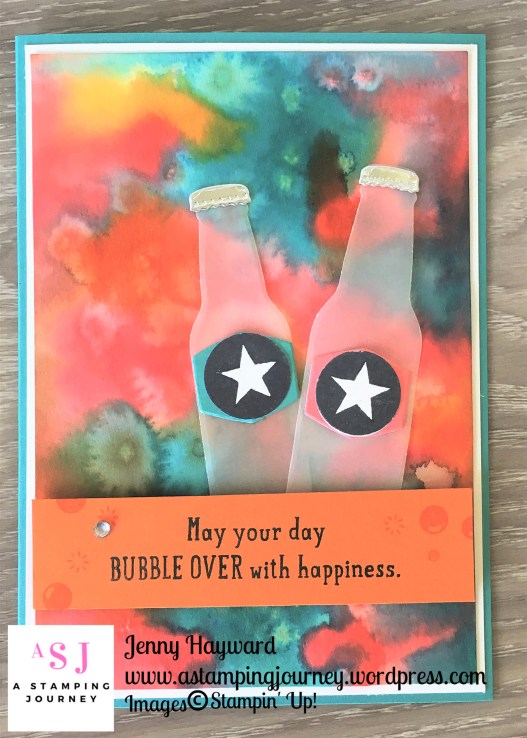
Using the salt on a wet background creates a type of “bleaching” of dots on your card as the card dries.  I will show you the cards and then show you how to create your own.  (You might want to continue to Blog Hop and stop by again later to take in all the details).
HOW TO CREATE YOUR OWN SALT BACKGROUND

For this technique you can use any type of salt but the result will differ.  The larger Rock Salt will result in larger “bleached” patterns (like the first example above) whereas the regular fine Table Salt will give a speckled type of “bleached” pattern, (like the 2nd example).

As you need to add water to your card you will need a good quality card to take the water. Either the Stampin’ Up! Watercolour Paper or the Shimmer Paper works very well.

NB: The steps below are for the first card sample above.

1. Wash over your card with the Aquapainter and water.  Add drops of chosen reinker colour(s) over your card.

For this sample below I added drops of Pumpkin Pie Reinker first over different areas on the card.

I added other colours too.  Daffodil Delight and Bermuda Bay.
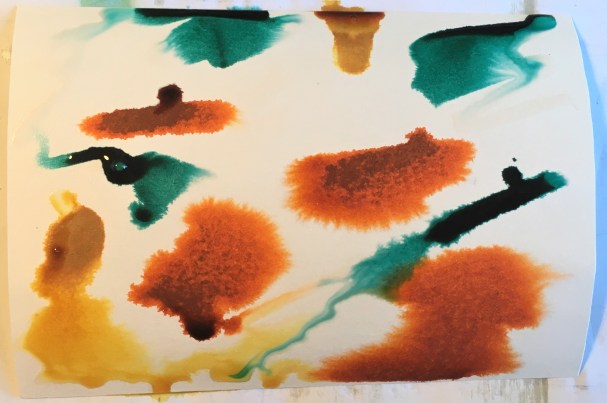
2. Using the Aquapainter wash over the colours to spread it over the card.  Try not to mix the colours too much though. It does look a bit messy.  The colours lighten as they dry too. Each time you do it, it will work out different.  You can just use one colour reinker too as I did in the Night of Navy card.

While the card is still wet sprinkle over your salt.  I forgot to take a photo of this sample with the salt on it but I will show a different card below.

3.  Allow the card to dry. You could use the Heat Tool but I found it just spread the colours more which I didn’t want so leave the card for several hours or even overnight.

Once it is dried lightly brush off the salt.  You will see little “bleached” spots where the salt was.  It is a great effect and you can use that directly on your cards.

Here is a different sample in Rich Razzleberry showing the salt over the card.  I will share the finished card for this one at a later time.  For these cards I used the Rock Salt which are larger grains of salt.

For this Night Of Navy one below I used the finer Table Salt. Which I didn’t take a photo of at the time. I did add a lot more salt to the card too. I like this effect how it turned out.
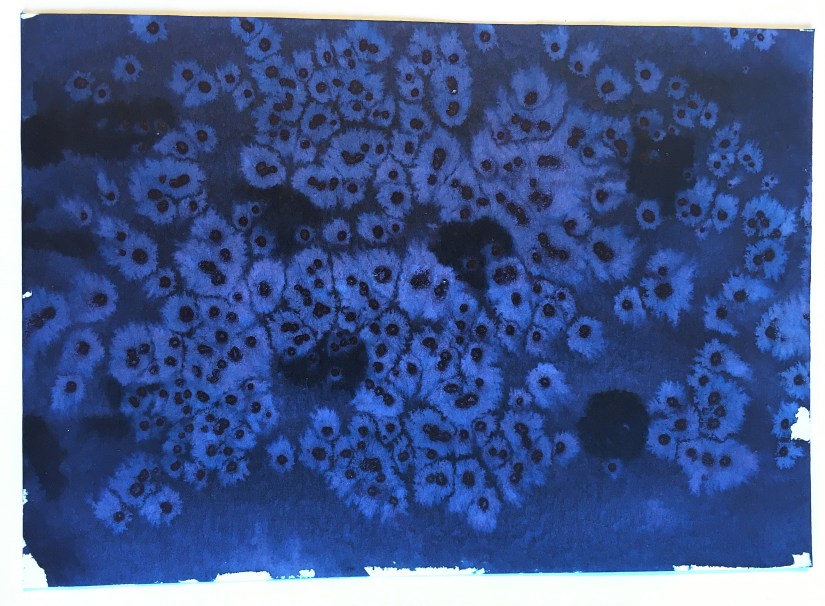
I will say my hands were very inky by the time I finished with all the different colours.  But that’s part of the fun. 🙂

Thanks for stopping by.  Now you are off on the next blog and can see what technique they have to share with you today.

Click on the ‘NEXT’ image below to head to Narelle’s Blog.

Jenny