cards

SPRINKLES OF LIFE TENT CARD!!

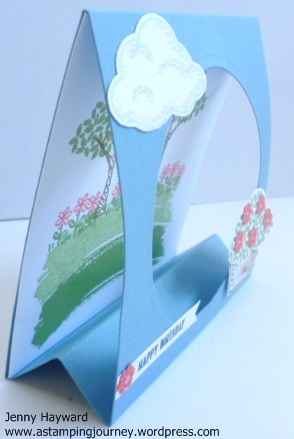
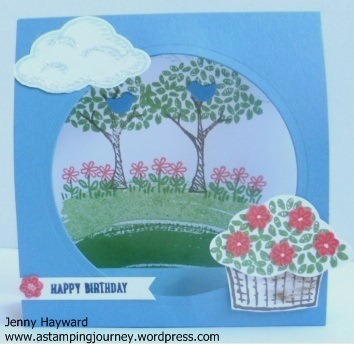
Are you ready for another Sprinkles of Life card?? I hope you are not getting sick of them yet.  Here is another fun card I made yesterday. (lighting is not the best – sorry!)
P1170148

P1170150

This is called a Tent card.  I will explain how to make it below.  I found the original idea of the card on Stampin’ Connection which is a Demonstrator site and has THOUSANDS of samples (and I am not lying about that!!).  I don’t visit it often but it is always full of inspirational ideas.  Anyway, this style of card was on there that I found a couple of years ago I think and I filed it away. I thought it would be great to try it out with this stamp set.

The base is Marina Mist (lighting is not the best).  Inside the card I created a sweet scene using a number of images in the set. Then I added the basket and a cloud on the front. You have to have sparkle on that cloud!

P1170152

So how do you make it??

Here are the instructions for you to make your own TENT CARD.

1. Cut your base card to measure 10.5cm x 29.5cm.    (4 1/4″ x 11 5/8″)

2. Score on the long side at 2.5cm, 5cm, 7.5cm, 18.5cm. (1″, 2″, 3″, 7 1/4″).  Fold on the score lines.

3. Cut your window from the front using your Framelit of your choice.

4. Add adhesive onto the small tab and adhere to the inside of your folded card at the back. (Just fold up the card first to work out the best place for your adhesive).  I had the tab to attach to the back of the card so you can’t see it inside the front).

5. Cut a piece of Whisper White 11cm x 10.5cm. (4 1/4″ x 4  5/16″).  Decorate this piece as you like. Adhere to the back of the card on the inside.

I hope these measurements make sense???  🙂

Enjoy making one of these.  What stamp sets can you make this with??

Have a good day,

Jenny


cards, Stampin' Up!

SPRINKLES OF LIFE WEEK!

I thought it would be fun to share some ‘Sprinkles of Life’ cards leading up to my Ronald McDonald House Fundraiser on the weekend.  I have been having a play with this set and the punch to make some samples. I have to say this is such a great set.  It is so versatile.  I hope to show lots of ways you can use this set.

Firstly,  this card I am sharing is a version of one shown at the South Pacific Convention back in late April.

P1170062

Now I have to say when I made this card I didn’t look closely at the colours used in the original.  I was looking at it today and I think I missed the point.  Every cloud has a silver lining …… but I stamped my clouds in Tip Top Taupe ???????  Seriously, what was I thinking!!! I think I was so excited to use the new Incolors and new products then that I just went ahead and made it.  When I stamped the greeting I stamped it once in the Tip Top Taupe and then in Smoky Slate and cut the “silver” out and adhered it over the top. That’s my silver!!! I embossed the Mint Macaron mat with the Fluttering Embossing Folder.  I think now I see this card again I will go and add some Dazzling Diamonds to the bottom of the clouds.  That will give it a “silvery” glow right?? 🙂

I have some more cards to share so stop by again soon,

Jenny

cards, Stampin' Up!, Techniques

BIRTHDAY BLOSSOMS TRI-FOLD CARD!

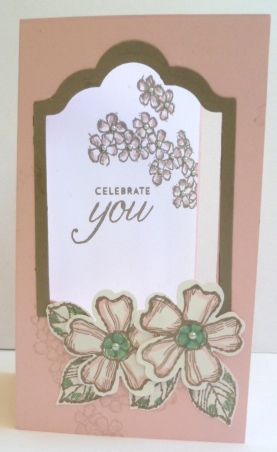
Here is one of the cards we made at our stamping weekend.  I like the way this turned out. Andrea first made it and had CASED it from Pinterest. (Sorry I don’t know who the original creator was). Of course, we all really liked it and had to copy. 🙂

P1170032

The base card is Pink Pirouette and the frame is Tip Top Taupe.  To make the frame I used the ‘Lots of Labels’ Framelits using 2 framelits together.  I used the smaller framelit that I used for the frame to cut a window in the front of the card.  I stamped the flowers and leaves in Tip Top Taupe in scrap white card. The great thing is the flower matches the Pansy Punch – no cutting!!! You do have to cut the leaves out but that is OK. I went around the outlines on the flowers and leaves with the Markers (Pink Pirouette and Mint Macaron) and I coloured the centres in. I added some pearls for some glam.  The small flowers were inked in Pink Pirouette and then stamped off before stamping on the base card in the bottom left corner.

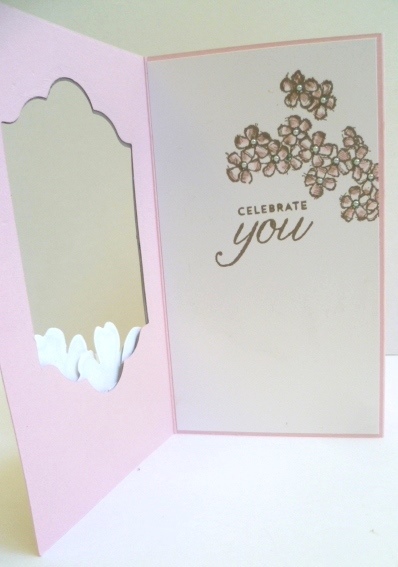
Now open wide …..

P1170034

The smaller flowers were stamped on a piece of Whisper White in Tip Top Taupe and coloured with the markers again.  The greeting was stamped in Soft Suede.  You can’t quite see but I added tiny pearls to all the centres.

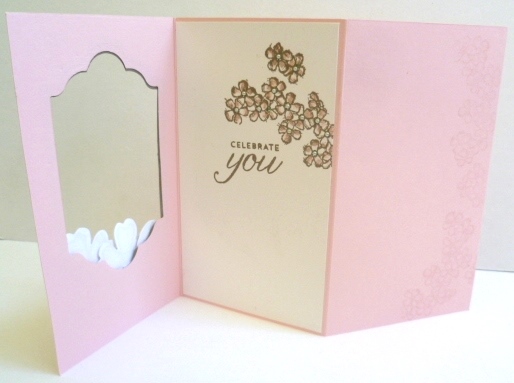
Now open it out….

P1170035

I inked up the small flowers again in Pink Pirouette and stamped them off on scrap paper. Then I stamped them on the next flap along the edge on the right side. I repeated this a few times of inking, stamping off  and stamping on the card.

Do you want to know the dimensions???  It is basically a standard base card and score the card in 1/3rd’s.  If that makes sense??  I did make this card a little taller though (15.4cm x 21cm).  It is easy to make your own and just a little different to the standard card.

Thanks for visiting me today.  Have a super wonderful day today 🙂

Jenny

cards, Techniques

A FUN STAMPING WEEKEND!

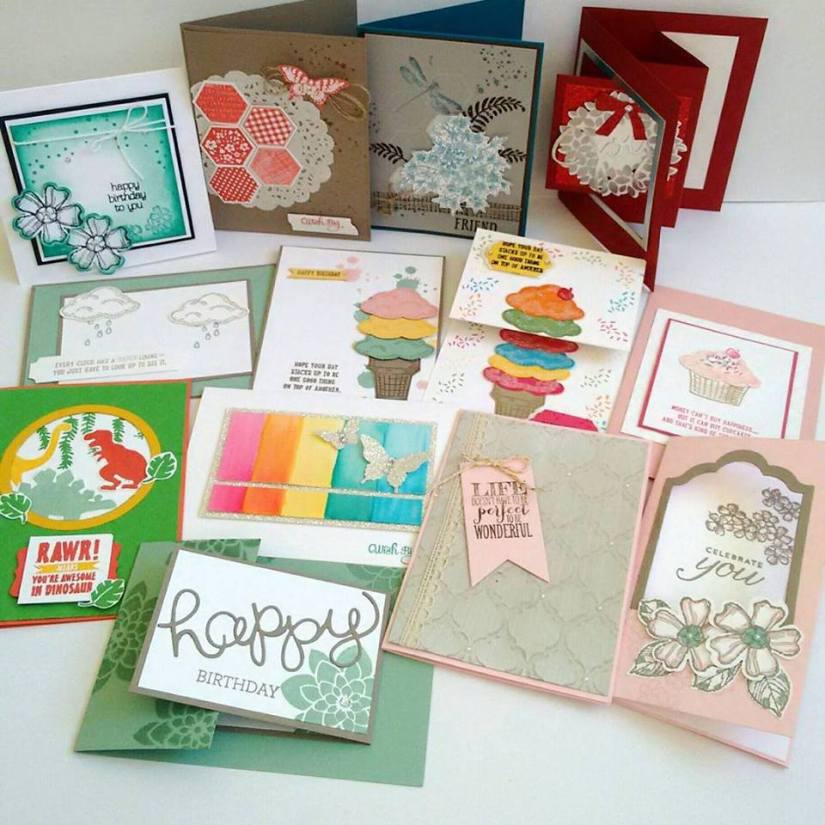
Don’t you love it when you can get away with your stamping buddies and stamp to your heart’s content.  Bliss!!!  So fun to share ideas and inspire each other and laugh and have fun.  I thought I would show you the results of my weekend of stamping.  Well actually it was a little less than a weekend as I arrived mid Saturday morning.  I am showing you them all in a group now but over the next couple of weeks I will show you them individually.

card weekend

Such a variety! It was good fun to try some new techniques and play with some new sets.  I do hope you like them.  Stay tuned for some upcoming posts on these ones.

Have a great day and I hope you can get creative today,

Jenny


cards

BLACKBERRY BOUNTIFUL BORDER

At our South Pacific Convention back in May I had a play with this set ‘Bountiful Border’ in our Product Playground Area.  Now I will say I think this set can get overlooked in the Catalogue (p120 $30). I think it is a bit hard to work out all the parts of the stamps.  I had a play and stamped the images and brought the piece home – and then it sat on my table. I finally put it together last week and thought I would show you.

P1160927

I first stamped the stem in Mossy Meadow and then inked up the petals in Blackberry Bliss.  Being a photopolymer set you can easily see to line up the petals on to the stem.  It might take a little playing around to get used to it.  When inking the dots in the set I found it easier to leave the stamp on the desk face up and very lightly touch the stamp with the inkpad.  I gently stamped it off first before stamping on the card.  I repeated this a couple of times around the flower stem.  I added some Burlap Ribbon and the Razzleberry Cotton Ribbon.  It matches in quite well I think.  The greeting is from ‘Wetlands’ and was punched out with the Large Oval punch.  I added some gold sequins around the card to finish.  I find glue dots the easiest way to adhere these to card.

So what do you think??  I am pleased with the final result.

Thanks for stopping by.

I am getting excited. I am going away for the weekend for some fun stamping time with my buddies.  Stamping 24/7!!! Well maybe we have to have a “little” sleep and there will be lots of chatter.  I can’t wait to show you some of the projects we made next week.

Have a great weekend.

Jenny

Classes, Stampin' Up!, Weekly Deals

MORE SAVINGS WITH STAMPIN’ UP! WEEKLY DEALS AND CLEARANCE RACK!!

Clearance rack Bonus Deals _ July

Starting today there are some BIG BARGAINS FOR YOU!!  Stampin’ Up! have added even more items to their Weekly Deals AND to their Clearance Rack.  Do you want to save some money?

weekly deals

Here are the Weekly Deals. These are available until Tuesday 7th July. These items are up to 30% off. 

I’m liking a lot of these items especially the cardstock. Great price for the Framelits too! What is your favourite??

Jul 1

   June 1 _ 2

HEAD HERE TO CHECK OUT THE WEEKLY DEALS.

Clearance rack_ July

CLEARANCE RACK Items up to 60% off. ALL these items and Weekly Deals are while supplies last.

HEAD HERE TO CHECK OUT THE CLEARANCE RACK.

You have to be quick to want any of these items.

TO ORDER:

Contact me directly

OR

Order Online HERE and please use the Hostess Code – AU9PMWHQ

cards, Stampin' Up!

‘YOU’RE SO SWEET LOVE!’

A quick one for you today.  I recently got the set ‘You’re So Sweet’ which teams nicely with the Mini Treat Bag Thinlets.  I did a little perusing on Pinterest – and I will say I CASED this card from Candy at sweetstamper.com.  I love the simplicity of it.  I do like the Mint Macaron too. 🙂

P1160809

The base card is Tip Top Taupe, the mat is Early Espresso and the top card piece is Very Vanilla.  Now that is a colour I haven’t used in a while.  I tend to just grab the old Whisper White.  This is tied up with some Mint Macaron Dotted Lace Trim and some pearls.  The heart image in this set is so sweet.  HAHA! That’s why they named it this!!!

Thanks for stopping by.  Have a super awesome day.  🙂

Stampin' Up!

DO YOU HAVE WHAT IT TAKES TO BE A STAMPIN’ UP! DEMONSTRATOR??

I have a quick quiz for you today.  Don’t stress I am not going to check your answers. 🙂 Just a simple YES/NO answer.

Now all I ask is that you do the answers in your head or write them on paper.  Do not use a marker on your computer screen.  That might not be a good thing.

Now take a deep breath. Ready??

———–

Do you love Stampin’ Up! products?                     YES  /  NO

Have you read the current Stampin’ Up! Catalogue?              YES  /  NO

Do you have a long Wish List from the Current Stampin’ Up! Catalogue?             YES  /  NO

Would that Wish List total be more than $169AUS?           YES  /  NO

Do you love getting together with others to share projects and inspiration whether face-to-face or online?             YES  /  NO

Do you love a bargain?                YES  /  NO

DO you love Free products?        YES  /  NO

Do you love to make a difference in other people’s lives?            YES  /  NO

————-

OK, so how did you go??  Did you get mostly YES’s??

What does that mean??  I think you have what it takes to be a Stampin’ Up! Demonstrator.  Now there is a fantastic offer from Stampin’ Up! at the moment but there is only 3 days left.  Have you read about it??  What another YES!  Join Stampin’ Up! before June 3oth and you receive 2 extra stamp sets for Free! YES, Free!!!

Now you can be from anywhere in Australia.  Find out more about it HERE.   No more questions and you don’t want to waste any more time, then head over HERE to my website and join up now. Do it before June 30th though so you can grab those extra 2 free stamp sets.

I look forward to welcoming you to my JEN’s INK. Team.

Join in June

join bonuses - Copy

cards, Classes, Stampin' Up!

A SHELTERING TREE SESSION!

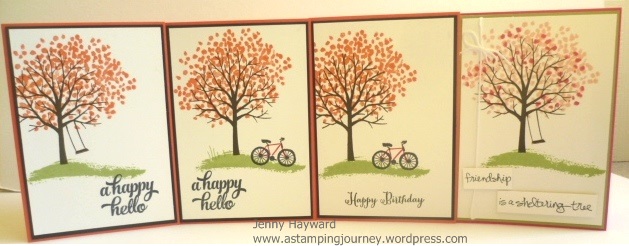
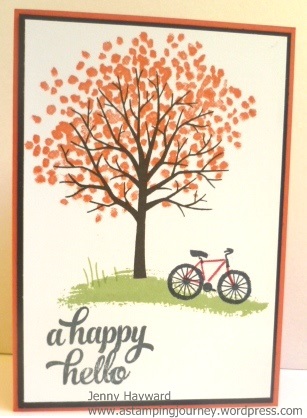
One day last week I pulled out my ‘Sheltering Tree’ stamp set.  I cut up some Whisper White card front pieces to size and stamped away.  It was such fun.  I haven’t had a stamping session like that for a long time and with the way my cardmaking endeavours were going for days before that I was pleased how they worked out.

It was fun to put together all the little images in the set.  There were so many different combinations.  I could have stamped for hours but there was some thing called dinner and housework that stopped me! Who do they have eat!!

I then assembled them all into cards the other day. Here is the finished result.  I made a few of each so I had some cards on hand although I will say that a number of them have already been sent on their way to some special people.

P1160899

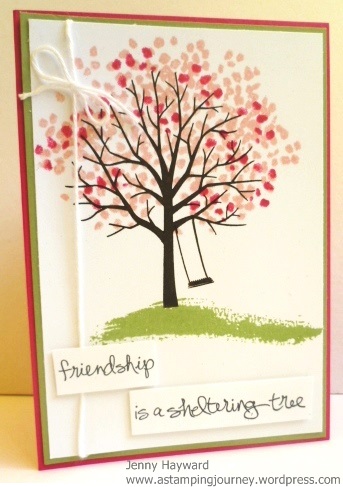
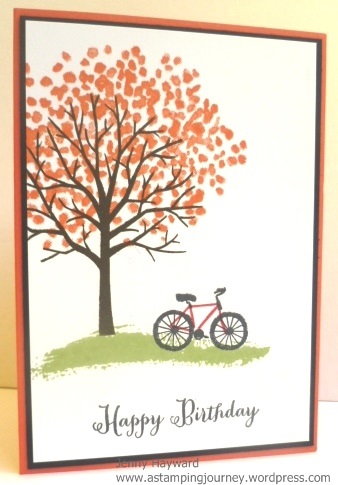
I will show you them individually.

P1160903

P1160904

P1160905

P1160906

Card bases were Tangerine Tango or Melon Mambo with a Basic Black or Pear Pizzazz card mat. Greetings were from ‘Remembering Your Birthday’ or ‘Tin of Cards’ if the greeting wasn’t from the ‘Sheltering Tree’ set.

Thanks for stopping by today. I hope your day is a happy one.  🙂 🙂 🙂

cards, Classes, Stamp A Stack At Home, Stamp At Home Kits, Workshops

WATERCOLOR WINGS STAMP A STACK BY MAIL!

This Friday is my next Stamp A Stack Class.  If you are local I would love to see you.  Here are the details.  But if you can’t be here then read on further.

STAMP A STACK CLASS THIS FRIDAY

Friday 26th June Stamp A Stack.  10am or 7.30pm

RSVP Thurs. 25th  Cost: $15  BYO: Scissors and Adhesives.

*****THIS WEEK IS “BRING A FRIEND” WEEK *****

Bring a Friend I haven’t met and you get 2 FOR THE PRICE OF 1!

Of course you can come without a friend. 🙂

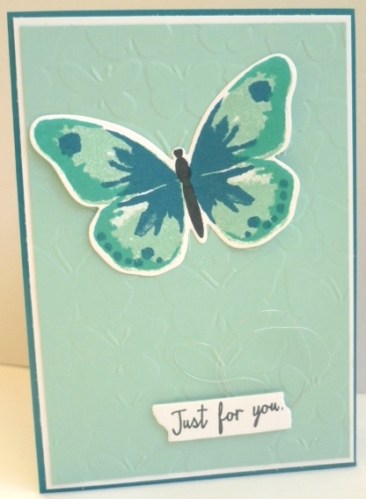
Here are the cards we will make.

P1160913      P1160916

I know that life is busy for many people or because of distance some people can’t make it so I have now made the class available by mail FOR YOU!!

STAMP A STACK CLASSES AVAILABLE BY MAIL  (Australian residents only)  

$15  + SHIPPING

Receive card kits for class cards to make in your own time.  Includes card pieces to make 6 cards (3 each of 2 different designs).  Card cut to size and includes ribbon/thread. You provide the stamps, inks and adhesives.  Embossed pieces can be done on request. Stamped images cannot be included as per Stampin’ Up! policy.

Stamps  – Substitute your own or order the stamps in addition + SHIPPING.

Stamps used:

Watercolor Wings – Photopolymer set (139424) $45

OR    Buy the Bundle which includes the Bold Butterfly Framelits (140232)  $62.75

The 2nd card uses the set ‘Birthday Blossoms’ ( W) (139167) $47.00 OR (C) (139471) $33.00

So now you don’t have to feel you miss out.

Please RSVP for the class ASAP or comment that you will like to join the Stamp A Stack by Mail.