Uncategorized

SHAKE IT UP WITH SHAKER CARDS!

Just a reminder: Saturday Stampers is on THIS Saturday 25th October at 2pm.  

WHAT ARE WE DOING????

‘Let’s Shake it up!’ (It’s funny that I am writing this just after I have heard Taylor Swift’s Shake it up!!).  Anyway,….

Come and find out how to make Shaker Cards. These are fun, interactive cards. Check them out!

P1140684

WHERE: My studio in East Corrimal  If you are local please come along.

COST: $20 BYO: Scissors and Adhesives. PLEASE RSVP: Thursday 23rd October.

I look forward to seeing you there!

Catalogues, Christmas

STAMPIN’ UP! CHRISTMAS SUPPLEMENT!

Do you love creating for Christmas??? Do you just  create cards or like to decorate the house and send cute projects as gifts for your friends??? It really starts getting you in the Christmas mood when the creating begins – or is that just me!!!

Well, as if the Holiday Catalogue wasn’t enough for you Stampin’ Up! have released a Christmas supplement.  Starting October 20th, 2 days time!!!  Here is a sneak peek of the cover just to get your started.

20141020TH_HolidaySupplement_en-SP

There are stars and kits and Project Life.  

You will be able to check it out Online from Monday BUT if you want your very own “starry” catalogue then drop me a comment and I will get one to you ASAP.

“It’s beginning to look a lot like Christmas”    HAHA! Now I have got that song in your head I will sign off.  🙂  (sorry!)

Stop by again soon,

Jenny

3D projects, Christmas

12 WEEKS OF CHRISTMAS – WEEK 3!

Latte 12 weeks Header

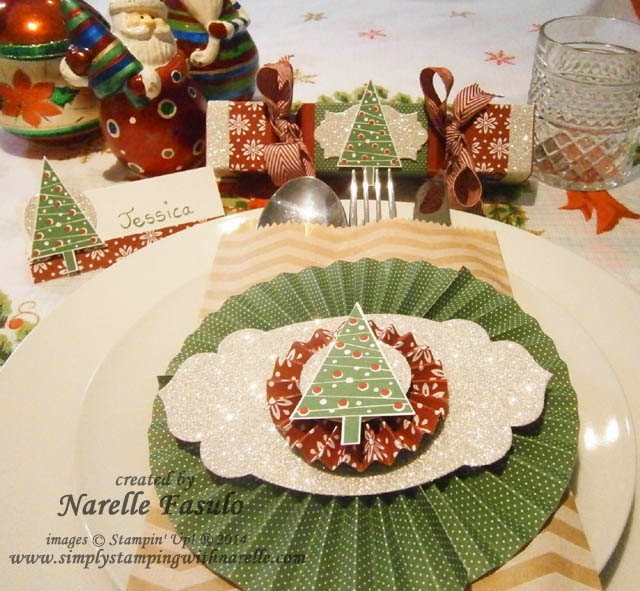
We have another project in our 12 Weeks of Christmas series today. This project is brought to you by Narelle.   Check this project out for your Christmas entertaining.  This is a lovely Table Setting.

christmas setting

This table setting consists of a cutlery bag, a bonbon and a name place card.  I think these would really dress up your Christmas table and make it something special.
Here are some photos of the individual items and also some videos showing how to make the key components. For full instructions and a complete list of supplies, please email me for a detailed pdf.

CUTLERY BAG

cutlery bag

I just love this Cutlery Bag. I know you could just put the cutlery on the table next to the plates, but that would be boring, right ? Making this bag gives you a reason to create and show off a little to your guests. I am sure they will be appreciative of the effort you went to and the table will look so festive and special.

Here are a couple of videos showing you how to make the rosettes.

BON BON

bon bon

Bon Bons are a fun thing to have at Christmas time aren’t they?? The cute hat and funny jokes and the little novelty inside. But once they are pulled apart they are thrown away. With these Bon Bons not only are they a lot of fun but they will look pretty having them on the table. The bonus of these is that you can fill them with wrapped chocolates or something as an extra treat, and the guests get to keep them as a memento of a wonderful gathering with family and friends.

Here is a video how you can make them.

NAME PLACE CARD

name place card

Can you see this on your Christmas Table this year?? It would make all your guests feel pretty special.

The full materials you need for these projects are in the PDF that I can send you but here is some special products put together for the Bundle this week.

products _ table setting

We have these 4 products on offer in our Latte Girls’ 12 Week of Christmas Bundle Three(3). You can get all these products for the fantastic price of $77. That’s a saving of 10% . Gotta love that !

Contact me with  your order. This deal is not available online.

Don’t forget if you want the detailed instructions and a complete list of supplies used, please email me to get the pdf.

You can purchase everything you need to make these items and more, from my online shop.

I hope this helps you with your Christmas preparations.

Thanks for dropping by today.

cards

EVERYTHING ELEANOR FOR A WEDDING CARD!

Yesterday we went to a wedding for a work colleague of Glenn’s.  It’s always interesting when you don’t even know the bride and groom!! It was a lovely wedding though.  The wedding invitation was in a Crumb Cake colour with black swirls. I knew for the wedding card I wanted to replicate this.  The stamp set ‘Everything Eleanor’ was dusted off. I have hardly used this set but it was one I loved when it first came out.  Here is the card.

P1140587

It is hard to tell in the photo but I Heat Embossed the swirl, the flower and the greeting so it had a nice shine to it. The greeting is from ‘Petite Pairs’ and punched with the large oval punch.  I used the Crumb Cake Taffeta ribbon (retired) and some pearls to finish it off.  I thought it would be a bit heavy to have a Black card base so I matted the stamped piece in black cardstock and layered it on a crumb cake base.

I think the Bride and Groom will like it???

Have a good week this week.  I hope it is a creative week for you.  🙂

3D projects

12 WEEKS OF CHRISTMAS – WEEK 2!


Latte 12 weeks Header

It’s Thursday and today I bring you the second week of our “12 Weeks of Christmas”.  Today it is Virginia’s turn to bring you the project that I am sharing.  Check this out!

Box

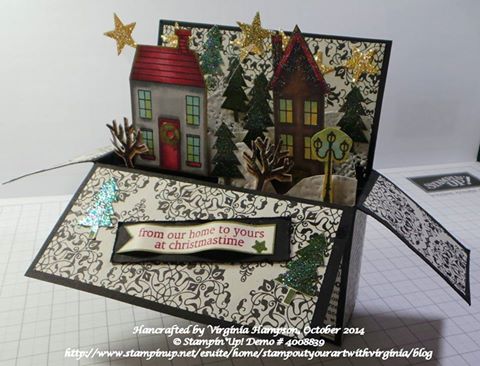
It is a cute little Christmas Village scene in a Card in a Box.  How sweet is it??? These are great too as they fold flat to fit in a standard size envelope.

Virginia has used Basic Black and Very Vanilla A4  cardstock. The Designer Series Paper used is the ‘Typeset’ pack from the Annual Catalogue.  The cute houses are from the set ‘Holiday Home’ from the Holiday Catalogue.  They have been stamped in Memento Tuxedo Black Ink and coloured with Blendabilities. The gold stars have been punched from Gold Glimmer Paper and some have been ‘suspended’ by gluing them to strips of the Window Sheet.  The Christmas trees are from the same Holiday Home stamp set, stamped in Mossy Meadow while the brown trees were double stamped in Baked Brown Sugar and Crumb Cake inks.  Virginia added some accents on the trees by dabbing on Versamark ink and sprinkling Iridescent Ice Embossing Powder and heat setting with a heat gun. Here is a close-up so you can see them.

10660138_10153300088546494_739784900140170368_n

You can create any scene in these little “Card in a Box” type cards.

Now how would you like to get all the goodies to make this card in a box and pay a special Latte Girls 12 Weeks of Christmas Bundle price?  Here’s what you’ll get …

Latte Girl’s 12 Weeks of Christmas Bundle Two (2)
Purchase this bundle for $85.90 and you will get the Glimmer paper for Free!

You can drop me an email (or add a comment and I will get back to you) with your order OR shop Online at my store HERE.

Want to know how I made the base for this?  You can get the instructions by dropping me an email or a comment.

Thanks for stopping by to see this week’s project.


cards

BLACKBERRY BLISS SNOWFLAKE THINLETS!

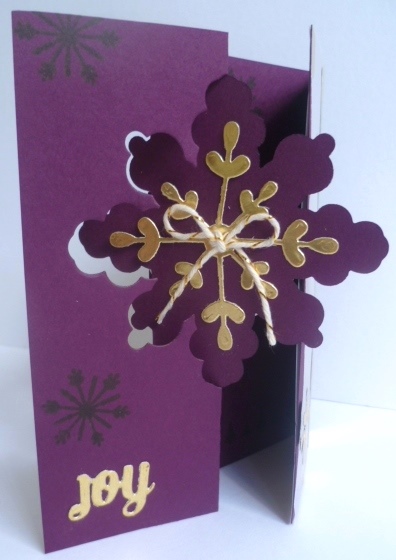
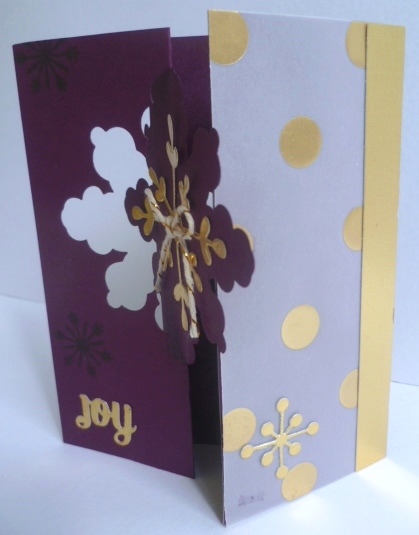
I made this card a few weeks ago and realised I hadn’t shown you.  I think I shared it on my Facebook page but forgot here.  SO, here it is! This is one of the first cards I made using the Snowflake Thinlets from the Holiday Catalogue.

P1140334                      P1140335

These cards are a bit hard to photograph but I hope you get the idea.  I extended the card so it has a little fold out flap. On this flap I adhered some Gold Vellum and a strip of the Gold Foil Sheet.  I cut the snowflakes and the joy word out from Gold Foil sheet also and adhered them on the card.  I stamped the snowflakes from the set ‘Cheerful Tags’ over the Blackberry Bliss card.  I think they co-ordinate so well with this Thinlet.  I finished it off with a Gold Twine bow on the front snowflake. Hope you like???

Thanks for stopping by today.  Do say Hello.  I love to hear from you.  🙂

Stampin' Up!

GET FREE DESIGNER SERIES PAPER FOR 6 MONTHS WHEN YOU JOIN STAMPIN’ UP!

 Header_Recruiting_demo_10.1-31.2014_SP

Yes, you read that right.  When you join Stampin’ Up! during October you will receive one pack of Designer Series Paper Free (your choice) every month for 6 months.  That is on top of the already fantastic value in your starter Kit.  So order up to $234 of products and Pay only $169, then each month pick your pack of Designer Series Papers. If you are not sure what is involved when you join Stampin’ Up! then head to my JOIN MY STAMPIN’ UP! PAGE Here to read 10 reasons why you should join.

So what are you waiting for????

Stampin' Up!

STOCK UP ON YOUR STAMPING SUPPLIES THIS WEEK TO CELEBRATE WORLD CARDMAKING DAY!!!

From 1-6 October, receive 15% off select cardstock, adhesives and Inkpads.  Plus receive 20% off Select stamp sets.  Check out the details below and email or phone me the order. Or you shop directly at my store HERE  You have to be quick though!

stock up and save image


Here are the stamp set to give you a closer look. (in order as listed).

big news        playful pennants   choose happiness    petite pairs    so very happy


Great bargains to build up on your stamping supplies.  Remember only available until 6th October.

3D projects

TAG BOX TUTORIAL!

Yesterday I showed you the projects I made for the Stamp-A-Latte Blog Hop using the Snowflake Thinlets.  If you missed it just head back to the post before.  I didn’t have time in that post to show you how I made the Tag Box so I thought I would show you that today.

Here is the cute box to show you again.

P1140518

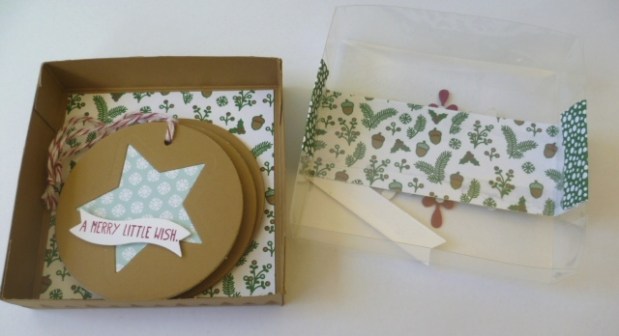
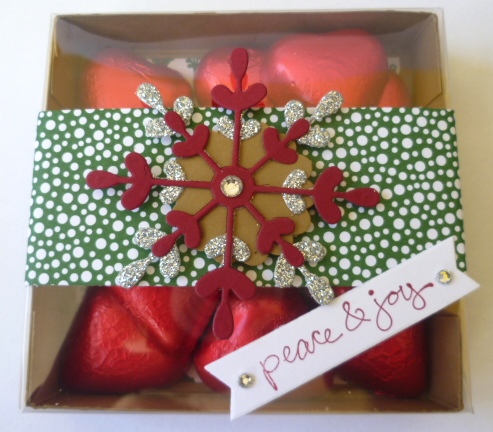
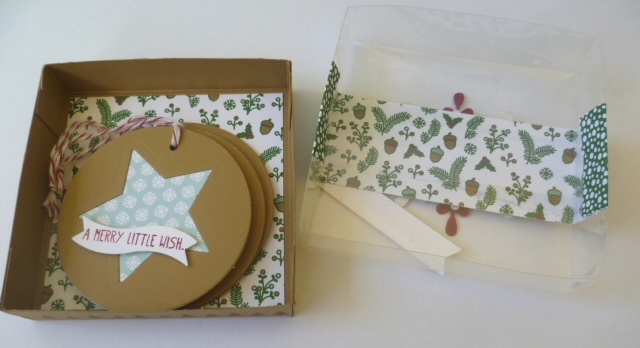
Here is inside the box showing the tags I made too.  The green strip of DSP from the Nordic Noel DSP is not a Belly Band.  I just added it to the top of the acetate and adhered the ends inside the lid.

P1140519

You can decorate this however you want to.  The finished size is 9cm x 9cm x 2cm (3 1/2″ x 3 1/2″ x 3/4″). But how did I make it?? Here is the Tutorial for you.

TAG BOX

For the Base

NB: If you intend to stamp your box then do so before you assemble the box!!

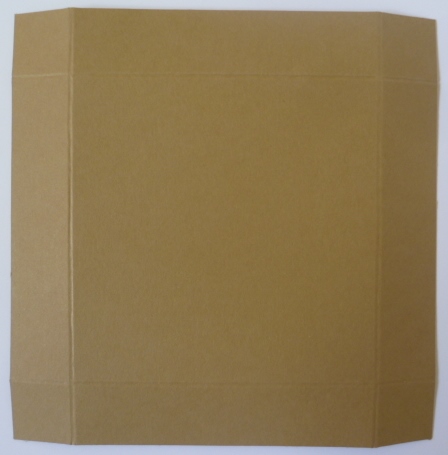
Cut your card to 13cm x 13cm ( 5 1/8″ x 5 1/8″).  Score on each side at 2cm (3/4″).  

Fold on all score lines and cut up the 2 tabs on one side and again on the opposite side.

P1140461

Place adhesive on the small tabs and assemble the box.

For the Lid

Cut your Acetate to 13.4cm x 13.4cm (5 1/4″ x 5 1/4″) and score at 2.2cm (7/8″). 

Fold on all the score lines.  You may want to use the Bone Folder to burnish (press down) the score lines more.

Cut up on the 2 tabs on one side and then again on the opposite side.  Place adhesive on the tabs and adhere together.  I used Fast Fuse or you could use Sticky Strip.

This lid is a little snug.  You just need to jiggle it in but it works fine.

Decorate your box as you like.  I lined the base of this box.  The paper size I used was 8.5cm x 8.5cm (3 3/8″ x 3 3/8″).

These fit the tags in just nicely.  The tags are punched with the 1 3/4″ circle punch.

Don’t just think of them for tags though.  Why not add some chocolates???

P1140522

Enjoy making them. 🙂

Jenny 

3D projects, Blog Hops, cards, Techniques

STAMP-A-LATTE HOLIDAY BLOG HOP!!

Latte Holiday blog hop banner

Welcome to the First Stamp A Latte Holiday Blog Hop.  We all have some great projects from the Stampin’ Up! Holiday Catalogue to share with you today.  You may have just come from Narelle’s blog Here or you may be starting out here. Either way sit back and enjoy your little hop around.

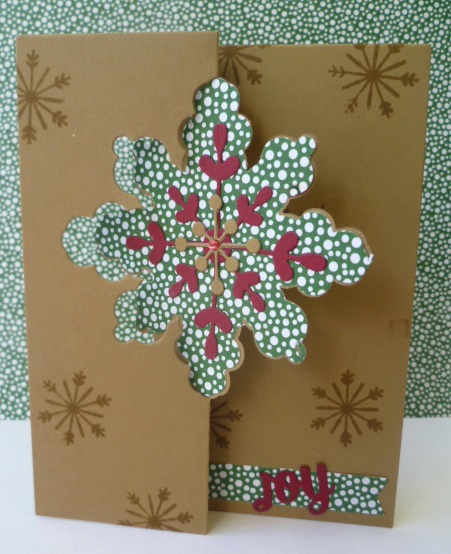
Today I am focusing on the Snowflake Thinlets. I really like this Thinlets set.  They are so versatile for a number of different occasions not just Christmas.  Not only does it contain the Thinlet to create the Flip card but it has a 2 different size snowflakes, a tree, a heart, banner and 3 words (Brrr, Joy, snow).

snowflake thinlets

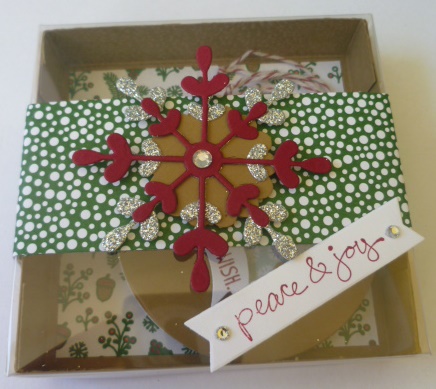
On to my projects.  I have made a cute little tag box and a flip card.

P1140514

Firstly, the card…

P1140516

I have used the Nordic Noel DSP with Baked Brown Sugar and Cherry Cobbler cardstock. The snowflakes stamped on the card are from the ‘Cheerful Tags’ set.  They co-ordinate so well with this die I think.  I cut a large snowflake in Cherry Cobbler and a smaller one in Baked Brown Sugar to layer them together.  The Rhinestone in the centre was coloured with the Blendablilites.

What made this Thinlet die even more useful is that recently I discovered that you can cut the centre large snowflake out.  I was watching the Stampin’ Up! Snowflake Thinlet video here and they showed this little tip.  I will show you below.

Cutting a Thinlet Snowflake.

Cut a piece of DSP or cardstock larger than the shape and cut it out with your Big Shot.
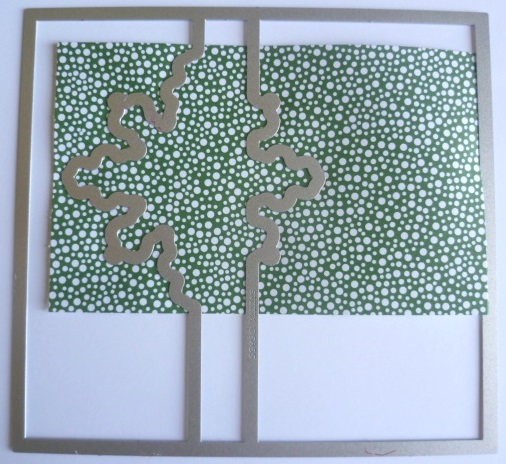
P1140456 - Copy

Turn the Snowflake to line it up in the Die the other way to cut it out completely.  I found it easier to lay the Die upside down on a cutting plate and place the DSP or cardstock into the Die rather than try and line the Die over the paper. Then you can just lay the other cutting plate on top and cut it.
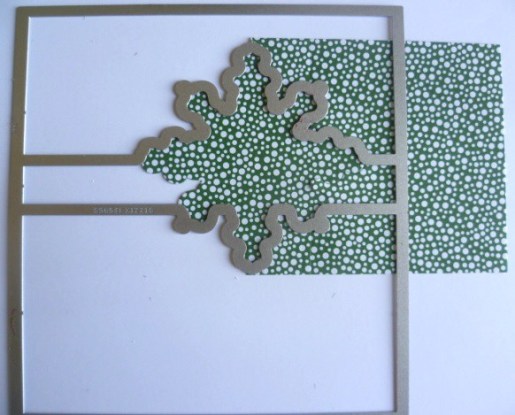
P1140457

This is what you end up with. How cool!
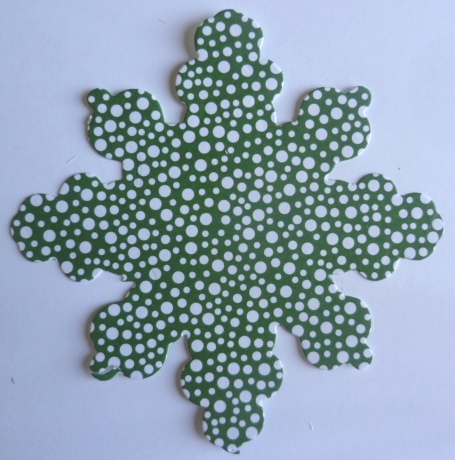
P1140458


Now on to the box.

P1140518

Once again layering some cut Snowflakes on the top.  The greeting is from the ‘Good Greetings’ set that you can get for free this month. Check the blog post here if you missed those details.

Now on to the inside.
P1140519

I used the Nordic Noel DSP again. I added a strip of DSP on the top of the acetate lid but it doesn’t wrap right around.  I lined the bottom of the box too.  This one was the reverse side of the DSP strip used on the lid.  It holds these cute tags I made.  I just made 3 but you could easily fit lots more in there.

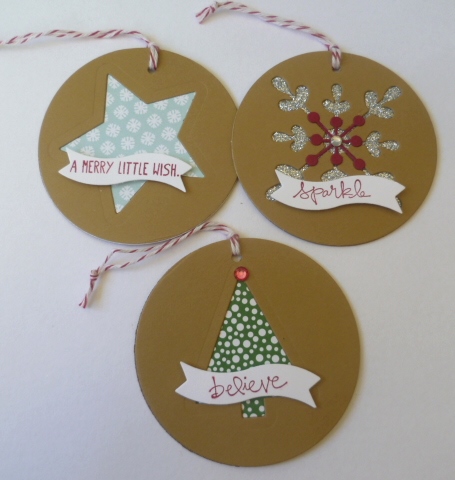
Here they are close-up.
P1140520

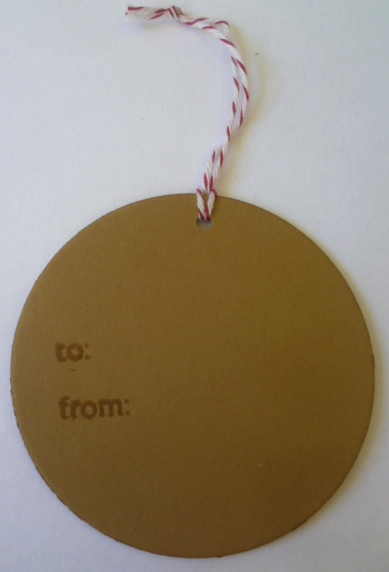
I used the 1 3/4″ circle Punch to cut the Baked Brown Sugar circles. The tree and snowflake are cut from the Thinlets.  The Star is one from the Star Framelits set.  These Banners were cut with the Bitty Banner Framelits.  Here is the back. The “to” and “from” is from the ‘Cheerful Tags’ set again.
P1140521


OK now you have had a photo overload.  I will spare you anymore so you can be on your way.  If you would like to know how I made the cute Tag Box then stop by tomorrow and I will post a tutorial.  I think I have taken up enough of your time.  You need to get on to the next blog now.  Thanks for stopping by today 🙂

Remember to stop by and comment on each blog so you can be in the running for a prize.  You will go in a draw for a Trim the Tree DSP Stack and a pack of Rhinestones (Australian Residents Only & Stampin’ Up! Demonstrators are ineligible for the Blog Candy).  Now on to Virginia’s blog Here.

If you get lost here are a list of blogs you will visit today.

  1. Leonie Schroder     http://www.stamp-a-latte.com
  2. Narelle Fasulo         http://www.simplystampingwithnarelle.com
  3. Jenny Hayward      http://www.astampingjourney.wordpress.com
  4. Virginia Hampson    http://www.stampinup.net/esuite/home/stampoutyourartwithvirginia/blog
  5. Libby Dyson           http://www.libbystampz.com