cards, Online Exclusives, Product of the Month, Stampin' Up!

STAMPIN’ UP! CUTEST CREW ON A BANNER – BUT SHOULD I??

I really struggled with this card.

I had the little puppies coloured for a few weeks. Then to put the card together I couldn’t get it to work where I was happy with it. I probably redid this card 4 times.

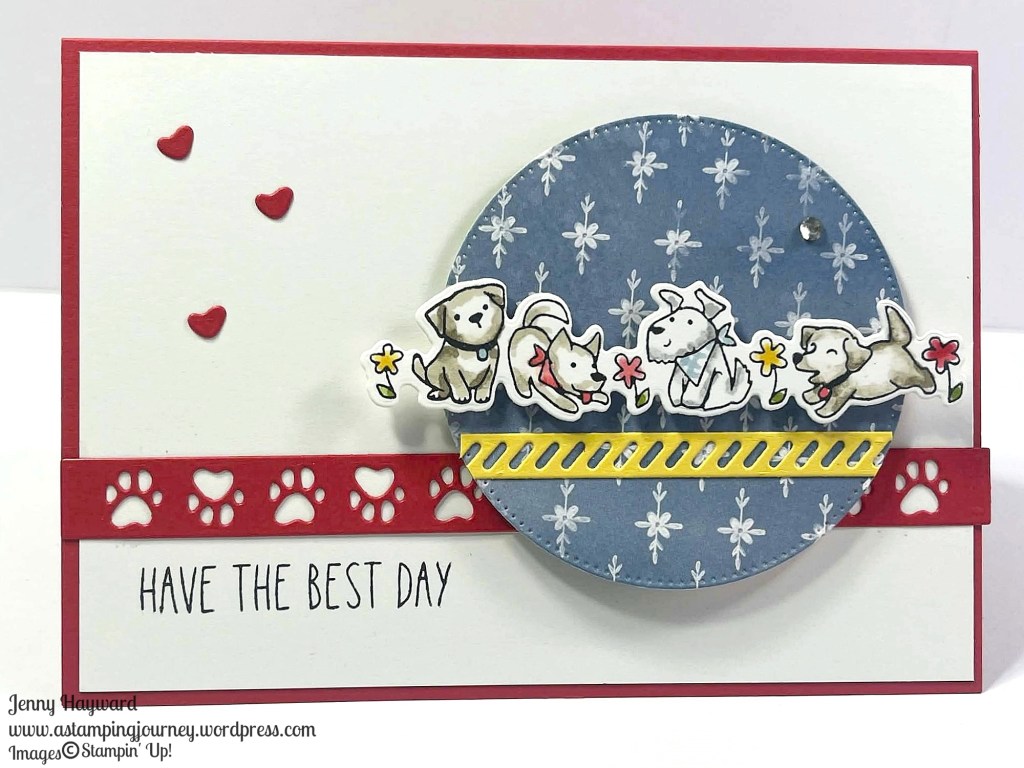
Here it is though. Because we can share the good, the bad and the ugly.

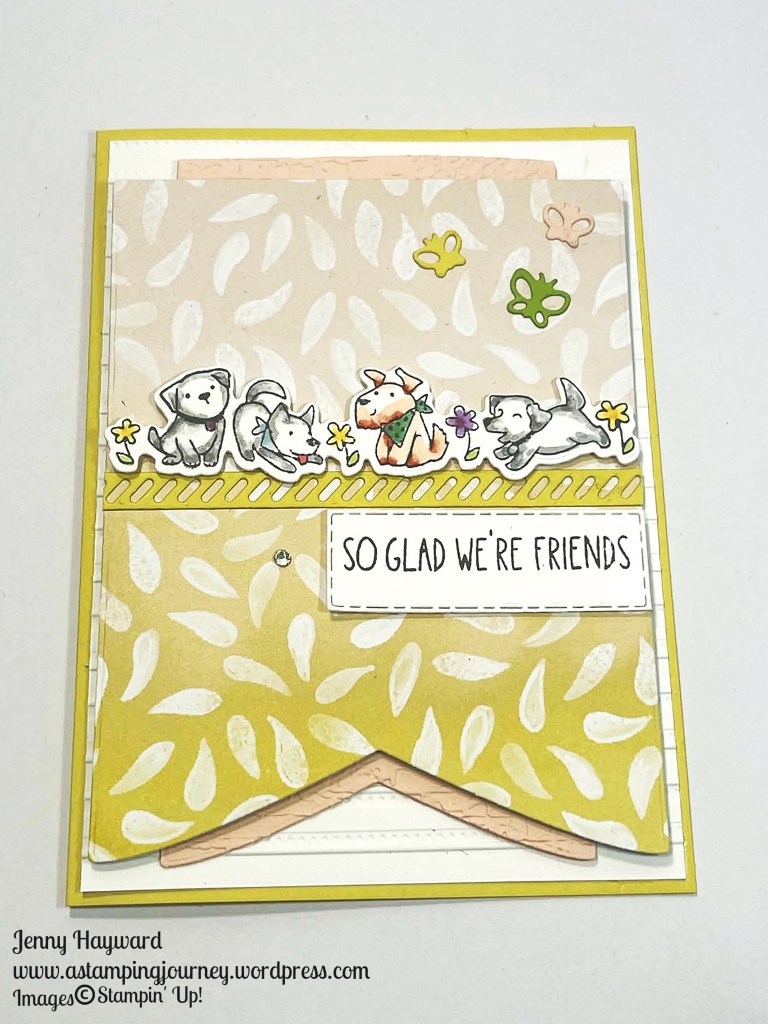
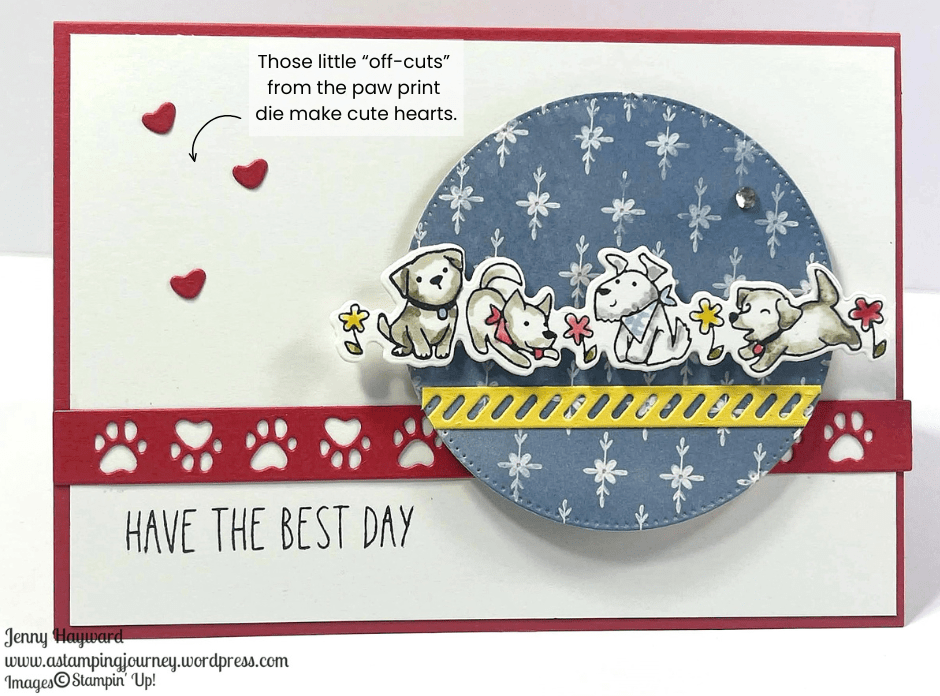
I diecut the banner from the Painted Illusions Paper but the background… Do I add a strip of card? The colours weren’t working. I diecut the strip? Still not great. Do I emboss the white card mat. One time the embossing just wouldn’t work with the paper. It seemed too busy for the pattern on the paper. Maybe I was overthinking it all.

So I settled on this. I’m still not sure about it but I think it is the better option. 😁

What are your thoughts? Should I change the colour? Maybe file it in the bin? HAHA! At the end of the day the puppies are cute. 😊

Oh! And if you hadn’t seen the stamps and dies bundle before it’s the Cutest Crew Bundle.

The diecut banner is from the Party Banners Dies. And another one I have had for a while and this was the first time using it … The White card is embossed with the Lovely Stripes Embossing Folder.

If you need the cute little puppies and kittens in your crafting life you can see them more -> HERE.

You can shop there if you are in Australia OR Contact me directly and I would love to help you out.

Happy Crafting,

Jenny

cards, Product of the Month, Stampin' Up!, Techniques, Tutorials, Videos

DIAGONAL GATEFOLD CARD + A VIDEO

This card might look complicated but it’s really not. It’s called a Diagonal Gatefold Card. You can create it with the card and paper you like. For this one I have used the Painted Illusions Designer Series Paper.

You open it out. This is the inside. I love the angled look.

Here is another one using the same paper pack, but just doing that that can change it up a lot by using different colours.

It really is easy and I can show you. I share the measurements in Metric and Inches for you.

Follow along with the Video -> HERE.

Hope you get to try one yourself.

The Painted Illusions Paper is this month’s Product of the Month.

Happy Crafting,

Jenny

cards, Online Exclusives, Product of the Month, Stampin' Up!

DON’T DITCH THOSE HEARTS FROM THE STAMPIN’ UP! CUTEST CREW SET ~

I have just received the Cutest Crew Bundle that will be starting in March. It is very cute. And I discovered something fun when I was using it.

Firstly, the card and I will tell you about it.

I’m not much for colouring but I am trying to work on it. I coloured the cute dogs with Stampin’ Blends. The paper circle is from the Painted Illusions pack.

The Cutest Crew has a row of dogs like this, a row of cats and then 3 birds. It has some cute dies for them all. It will be available as an Online Exclusives starting in March. I think it is going to be popular.

Something I discovered though. When I diecut the red paw print strip those larger “bits” looked like hearts. So I added them to the card. It just adds to the cuteness. Don’t waste those little hearts.

You can see the Cutest Crew Bundle in March. I will play with it more very soon too. So much to play with not enough time. Do you find that?

If you need supplies and you are in Australia head to my store and you can grab your goodies. Head -> HERE. OR contact me directly and I can help you out.

If you would like the Painted Illusions Paper. That is this month’s Product of the Month. You can receive that when your order reaches the qualified amount. In Australia that is $125 and purchase the paper for $9. Check your market for your own amount.

Happy Crafting,

Jenny

cards, Catalogues, Product of the Month

PAINTED ILLUSIONS PAPER + WITH YOU IN MIND!

More with the Painted Illusions Designer Series Paper. I kept it simple again highlighting the wavy paper and bold colours.

The Happy Birthday is from the ‘With You In Mind’ Stamp Set. I stamped it on white card (it is white…) and then diecut it with one of the Textured Notes Dies. It was wider than the width of the card so I trimmed it down. Having the edging top and bottom of that piece adds some extra detail and texture.

Take a closer look at the “flowery” shape in the circle. Rather than just simply stamping it I added extra colour. Firstly, it was inked in Granny Apple Green and then I used a dauber to add some Pretty in Peacock in areas over it. You only need a little dab of ink. Then it was diecut with one of the small circles in the Stylish Shapes Dies.

Then I added some Rhinestones for the finish. You could add more to this card if you like to but I just kept it simple for the paper.

The Painted Illusions Paper is February Product of the Month.

With Product of the Month you can receive this with your qualifying order. In Australia when your order reaches $125 then you can purchase the Product for $9. There is only One per person. And While Supplies Last. Check your market for the qualifying amount.

You can see the Paper more -> HERE.

If you need supplies and you are in Australia stop on by my store and order there. OR you can contact me directly and I can help you out.

Happy Crafting,

Jenny

cards, Catalogues

PAINTED ILLUSIONS PAPER FOR FEBRUARY PRODUCT OF THE MONTH!

It’s a new month which means a new Product of the Month.

February Product of the Month is the gorgeous Painted Illusions Paper. I love the colours and the wavy patterns. Here it is.

The pack of paper consists of 12 – 12″x12″ sheets. There are 3 sheets of 4 Double sided patterns. One side has more simple prints and the other side the waves of colour.

The colours in this paper are Darling Duckling, Flirty Flamingo, Granny Apple Green, Lost Lagoon, Misty Moonlight, Petal Pink, Pretty Peacock.

I have actually been playing with this paper the last few weeks. I received this early as part of the Product of the Month Demonstrator Coucil I am on. It has been fun to play with. I will share those projects I created soon.

Here are some projects that Stampin’ Up! have created with this paper.

With Product of the Month you can receive this with your qualifying order. In Australia when your order reaches $125 then you can purchase the Product for $9. There is only One per person. And While Supplies Last. Check your market for the qualifying amount.

If you order another qualifying amount later in the month you can still select a different month if you haven’t already chosen this.

I hope you can get this great Paper. You will enjoy it.

Happy Crafting,

Jenny

cards, Catalogues, Stampin' Up!

STAMPIN’ UP! PRODUCT OF THE MONTH IS HERE~


The NEW Stampin’ Up!® Product of the Month has begun.

With the Product of the Month program you can grab a special, exclusive item each month for just $9 AUD when you place a $125+ order!
(Check your market for your own value amount).

Here’s what you need to know:

✨ Product of the Month is brand-new Exclusive product releases near the start of each month.
✨ There wil be a different product each month.
✨ You must have a Stampin’ Up!® online account to participate.
✨ Add the Product of the Month after your cart reaches $125+.
✨ Limit 1 per Stampin’ Up! account each month.
✨ Available only while supplies last—once it’s gone, it’s gone!
✨ If you order one month and you missed a previous month Product of the Month you can have the opportunity to choose that product option instead if there are supplies available.

December Product of the Month has just been released. This is the gorgeous True Blue Florals 12″x12″ Designer Series Paper.

What do you think??

Here are some projects with this paper. I will be back later to share more with you.

With this one below the lined flowers were fussy cut from one of the papers. It looks so great. The other smaller flowers were cut from another pattern and the centres coloured in yellow.

Use your paper as the card base as a different option.

This one below uses 3 patterns from the paper. And those lovely flowers from the Pretty Florals Bundle but you could use any stamps/dies.

That about a patchwork design. It’s a great way of showing off the different patterns. For this one diecut a number of squares. Having the “dotted” edge from the Stylish Shapes gives a good effect but you could cut your squares with a Paper Trimmer. With the paper squares and some of the white square cut them in half diagonally. I would suggest then laying the pieces out in your patchwork look pattern before you adhere them down. And a TIP: maybe cut a piece of card the same size as your finished piece and adhere the white triangles and paper triangles directly to them to make it easier.

Don’t miss out on your Product of the Month this month. But remember these are WHILE SUPPLIES LAST.

If you need to shop for your supplies and you are in Australia then I would love to help you get them. You can head to my store -> HERE OR Contact me directly.

Jenny