This card I shared creating it as an Instagram Reel last week. Did you catch it?
I thought I would share the card with you here.
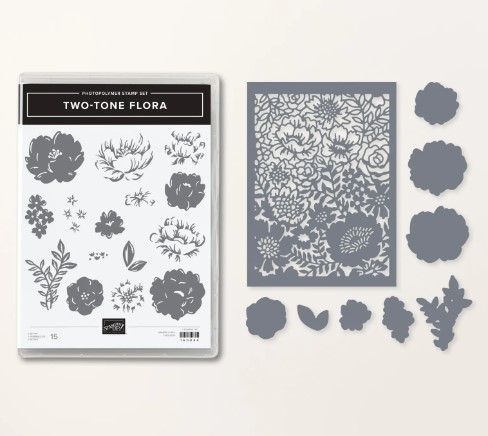
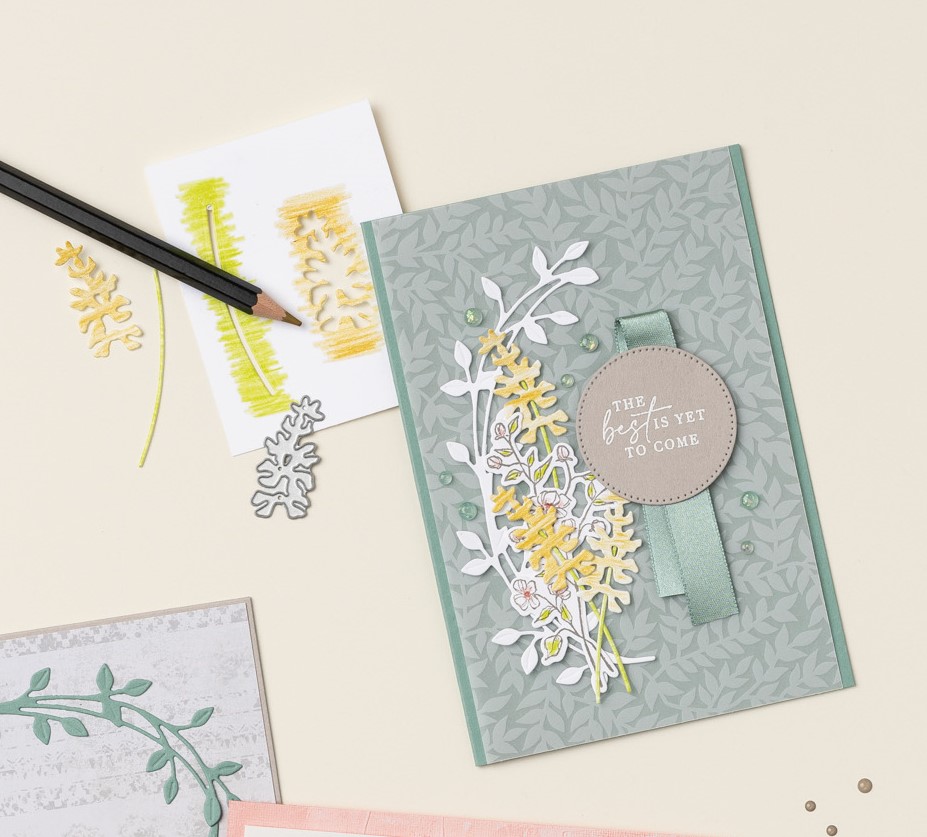
I have used the Two-Tone Flora Bundle but what about those new Elegant Borders Dies? They are so detailed and gorgeous. The Two-Tone Flora Bundle works so well with them.
The Fancy Flora Designer Series Paper is so pretty too.
These are the Elegant Borders Dies. They are so lovely aren’t they with all the delicate details on them.
This is the Two-Tone Flora Bundle. It’s a 2-Step Stamp set which I love. So easy to work with and includes different flower sizes with the solid image and more detail. There are different leaves too.
I think you will love to get these beautiful dies in your crafting stash. They are part of the Online Exclusives release so they are only around for a limited time.
Are you in Australia and need to order?
Head to my store -> HERE. Please use the Host code: B47Q7JP2
Or contact me directly and I can help you out with them.
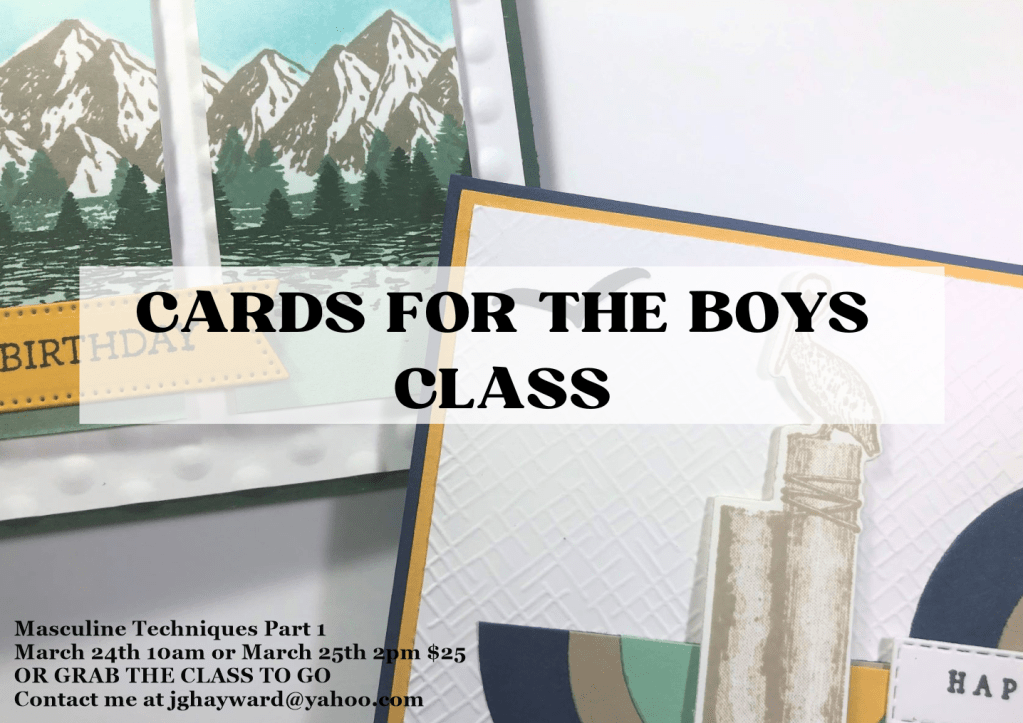
In this class discover some fun techniques you can use on those hard to make Cards for the boys. This is Part 1 of some fun techniques we will be trying out. Later parts will happen in the coming months in my Technique Series.
This class will look at 2 different techniques. Create a sampler to test it out and then create a card with each technique.
The sampler and instructions you can keep and build up in a notebook or folder to refer back to regularly.
Class includes card kits and basic instructions.
Can’t make it? Grab the Class to Go. (See below).
WHEN: Friday 24th March 10am or Saturday 25th March 2pm in the studio
COST: $25.
BYO: Scissors and adhesives and Paper Trimmer if you have one.
RSVP: Wednesday 22nd
CLASS TO GO
Can’t make the class or at a distance? No problem. Grab the Class to Go.
Includes card kits for the cards and samplers and Basic instructions.
Stamped images are not included but you can substitute with what you have for the images. The important part is the techniques to try.
COST: $25 includes postage
RSVP: Friday 24th March.
Payment can be made by Cash (in class) or Paypal or Bank Transfer.
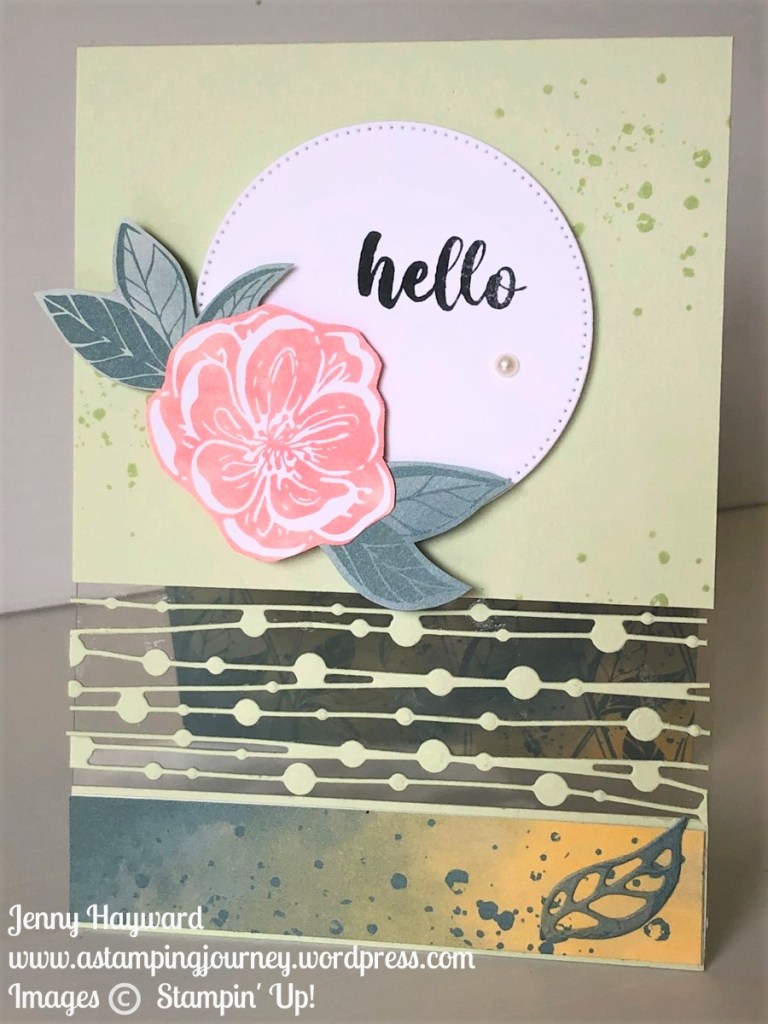
Today is a great Fold card with a little interesting window. It makes such a fun addition. And I have a video to share some tips when you create it.
I have used the Irresistible Blooms Bundle and Hello Irresistible Designer Series Paper.
This is the card.
Don’t you just love that “dotty” strip. It’s so cool!
And for the inside of the card.
Just a tip with this paper. The Paper colours include Pretty Peacock and Lost Lagoon. These were current as In Colors a few years back.
Why have they included these now???
Well they are coming back. Yes! They will be part of the Regular Colour Collections starting in the new catalogue in May.
Watch out! It looks like a little Colour Refresh is happening. More on that in the coming weeks. It will be all revealed on the 29th March.
I share a tip in this video. If you don’t have the those colours as yet. I found using the Evening Evergreen and stamping off one time. It matched so close. But Evening Evergreen will be going at the end of this current catalogue. It’s a good short term fix for now.
So watch the video below. (If you are catching this in an email post and the video doesn’t show, head to my blog directly Or head to my Youtube Channel (HERE) and view the video there.
If you haven’t subscribed already to my Youtube Channel I would love for you to. You will keep up with all those crafty videos that you can go back to anytime. Thanks for that.
Happy Crafting,
Jenny
Need some supplies and you are in Australia? I would love to serve you.
Head to my store -> HERE. Please use the Host code: B47Q7JP2
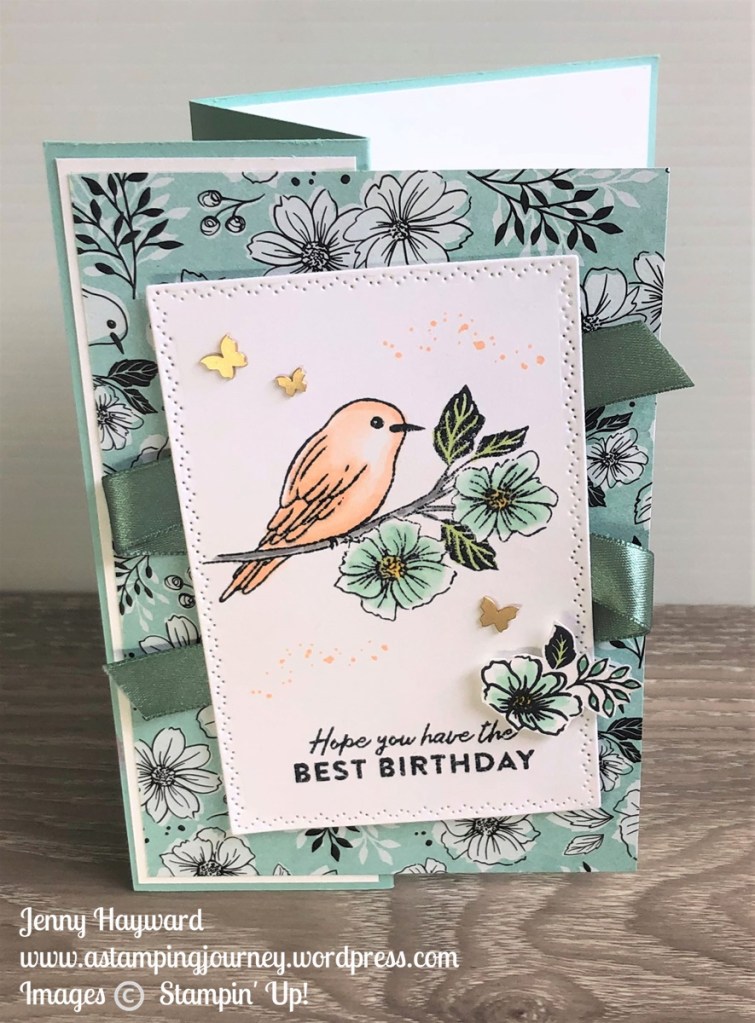
I have a card to share with you that I shared creating on an Instagram Reel just recently. I thought I would share it with you here today.
This card uses the Irresistible Blooms Stamps and Dies and the Hello Irresistible Designer Series Paper. I have shared lots already with it. It is so gorgeous.
You can get a look of blending in the background of the circle using one of the prints in the Hello Irresistible Paper. You don’t have the mess with it.
What I particularly wanted to point out to you is the Scored lines. See them better in this image below top and bottom of the words.
To create the scored lines:
Stamp the sentiment. Measure the distance below the sentiment and above giving a little space either side.
Flip the card over. Using the Paper Trimmer and the Scoring Blade score a line near the bottom which would be below the sentiment.
Score higher up which should be just above the sentiment. Score another line just above that.
You can try a scored line vertically. Try a frame around the card. There are so many options. I hope you get to try one yourself.
The Irresistible Blooms Bundle and the Hello Irresistible Paper are part of the Online Exclusives available now.
There are so many lovely exclusive products.
The Online Exclusives can be viewed Online but can beordered through my store or directly through me as with any of the other lovely products.
Back with our Wednesday’s WOW for the year. These are little tips, techniques, ideas to help your crafting.
Wednesday’s WOW! #144 – A fun way to add colour to your diecut pieces.
I came across this idea and thought it was so cool. Want to add some colour?
Grab a small piece of card and your colouring pencils. Scribble some colour in patches on the card in different areas just a little larger than the die you want to use. No need to add water to blend the colour. When you diecut it the piece will have “lines” or different colourings which add some lovely colour contrasts.
Hope you get to try it out yourself.
Have a Happy Wednesday,
Jenny
In Australia and need some supplies? I would love to serve you.
Head to my store -> HERE. Please use the Host Code: 73TFR9BD.
Or contact me directly by email or phone. Don’t forget to pick your Sale-A-Bration choice with your order.
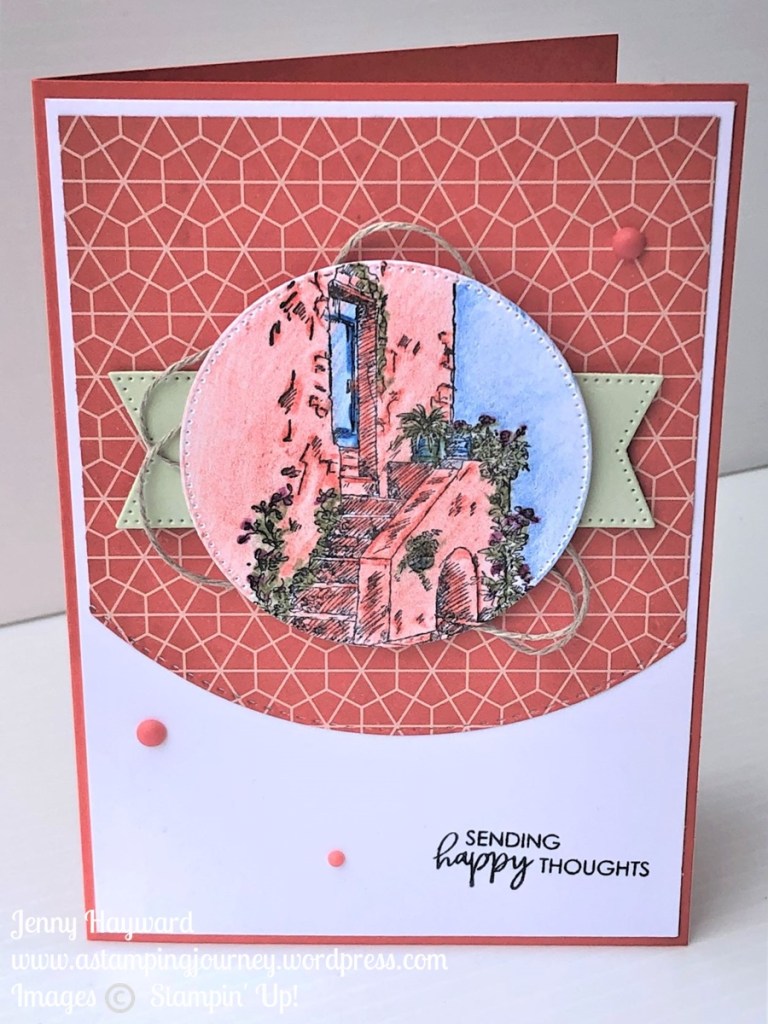
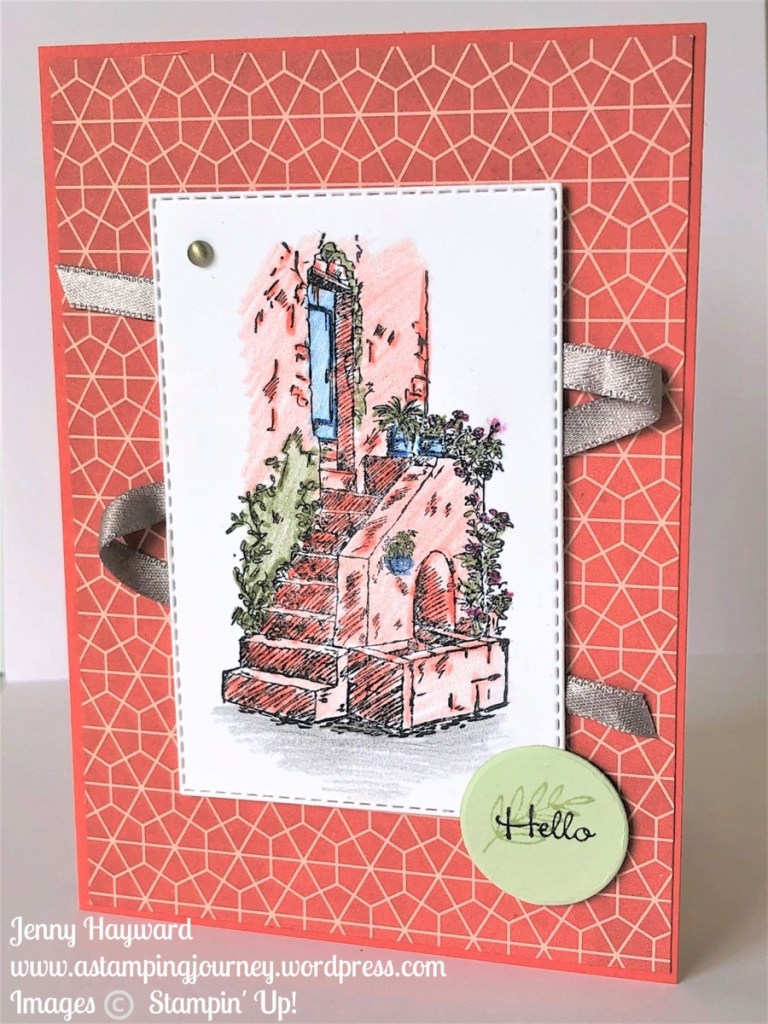
I have another card from my recent play with the InTheCountrystampset that is available as one of the Sale-A-Bration choices with your orders over $90 AUD.
I coloured this with the Watercolour Pencils like the last one I shared. If you missed that card just head back a couple of posts.
I wanted to go for a different layout with this card and diecut the image with a large circle from the StylishShapesDies. And also cut the piece of DSP with the curved die from the AroundTheBendDies.
I will share another card with this set so watch out for that soon.
Do you need some of these new products? I would love to serve you.
Head to my store -> HERE. Please use the Host Code: RCWF4TJP.
OR contact me directly and I would love to help you.
I have been playing around with colouring in the past week. I will say it’s not my favourite thing to do. I really need to work at it. I did have fun just playing and colouring with the new In The Country stamp set.
I have several cards to share with you but I will spread them out.
Here is the first card.
The In The Country stamp set is a free bonus choice available for Sale-A-Bration with orders over $90 AUD.
I like with the stamp sets to colour you have the shading areas so it helps to “highlight” these areas when you are colouring. Certainly helpful when you are not so strong at colouring.
The paper is from the Favored Flowers paper pack also as a Free Sale-A-Bration choice with orders over $90 AUD order. It is very gorgeous paper.
Sale-A-Bration starts on January 5th until 28th February. There are so many additional choices too you can make so I hope you check those out and add those in when you order.
Hope you get some time to create and maybe even colour soon. I will be back shortly to share more colouring with you shortly.
Jenny
Start making your list ready to shop on the 5th. In Australia? I would love to serve you with your crafting supplies.
Head to my store -> HERE. Please use the Host Code: RCWF4TJP
OR contact me directly by email or phone and I can help you with ordering.
It’s been another busy year of crafting here. Thanks for following me along.
I thought I would take a few minutes and share my favourite projects from the past year. So come on a little journey with me. And click on the heading of the project to take you back to the original post and read more about them. Even catch the video of many of them.
I loved this gorgeous Friendly Hello Paper available for Sale-A-Bration in January. And this is great fold to show both sides of the gorgeous paper. (Must try that again).
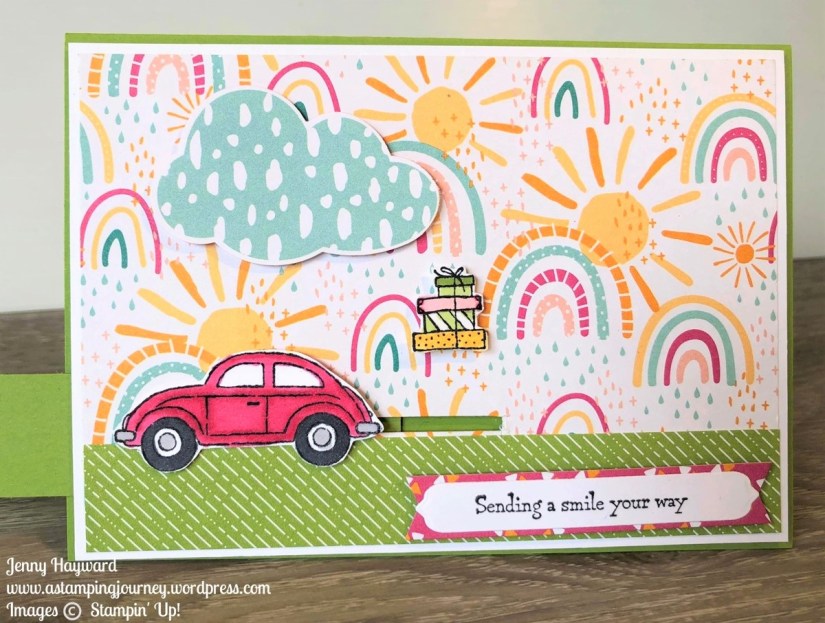
This was a great stamp set to create a Slider card. But you can try this with any of your stamps. What about that Sunshine and Rainbows paper. So bright and Happy. 🙂
Let’s face it – Male cards are hard to make aren’t they?? We had a great Masculine Cards Class earlier in the year. The Let’s Set Sail stamps and punch were fun to use.
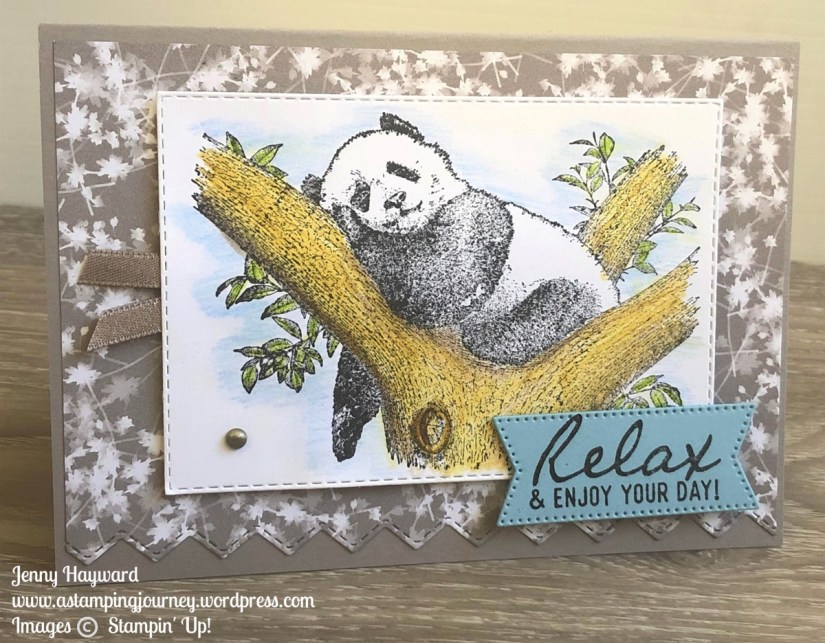
The Wild and Sweet Stamp set was one of my top picks from the new catalogue in May. I don’t do a lot of colouring but I loved colouring this cute Koala. I shared some tips colouring this image in the video for this card.
The Hues of Happiness was another of my top picks from the catalogue. I think many people also loved this suite. The Tunnel cards I created with this has been very popular.
The most popular event this year with the Winter Crafternoon. It was such a fun time crafting together followed by a Devonshire Tea. Watch out for more events in the new year.
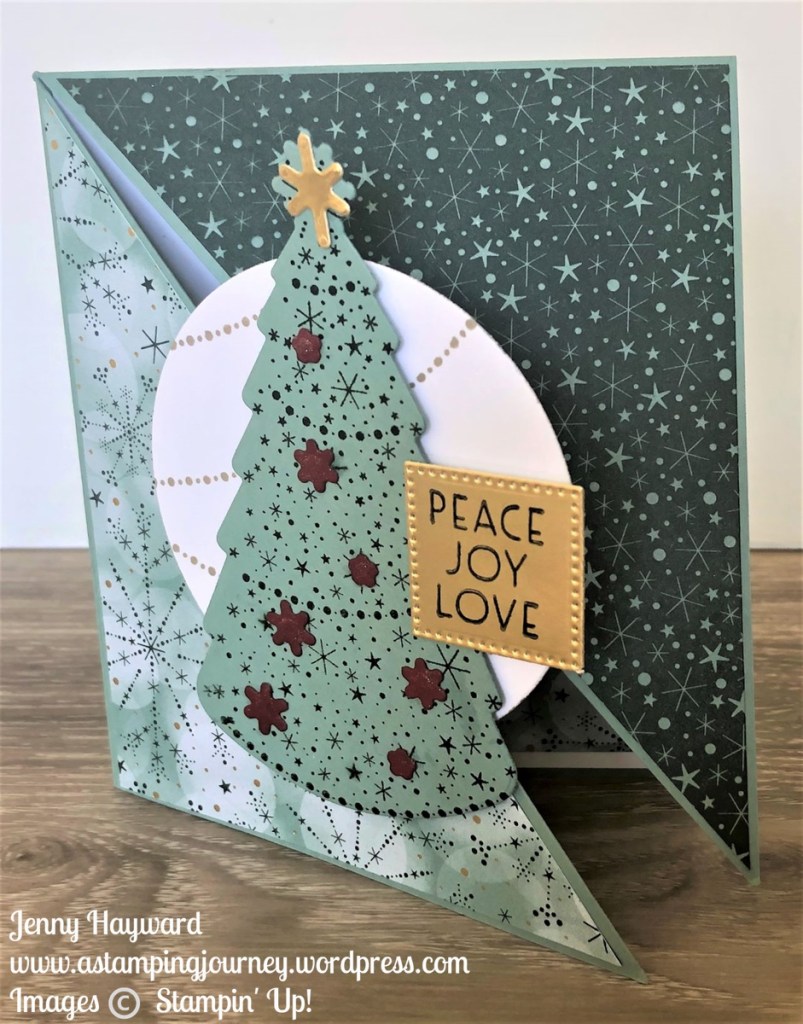
Another very popular Fun Fold from this year was the Diagonal Fold Card with the Christmas Lights Bundle. Lots of people have shared their versions with me which has been so great.
Is there a theme here with Fun Folds that are my favourite projects for the year. I do love a Fun Fold card. This one was the Half Fold Easel Card with the Hippest Hippos Stamp set for Sale-A-Bration.
It was great to be part of a collaboration to share you some fantastic Christmas projects. I kicked the 12 days series off with my project, A candle with the Merriest Moments stamps and dies. You just have to go back to that post and start the 12 Days of Christmas to check out all the projects.
I hope you have enjoyed looking back at these projects. I can’t wait to share more with you in the coming year.
To lots of creating in 2022. Come and join in with me and follow along.