Melt and Move. Not the chocolate variety. Although that would be nice right now …
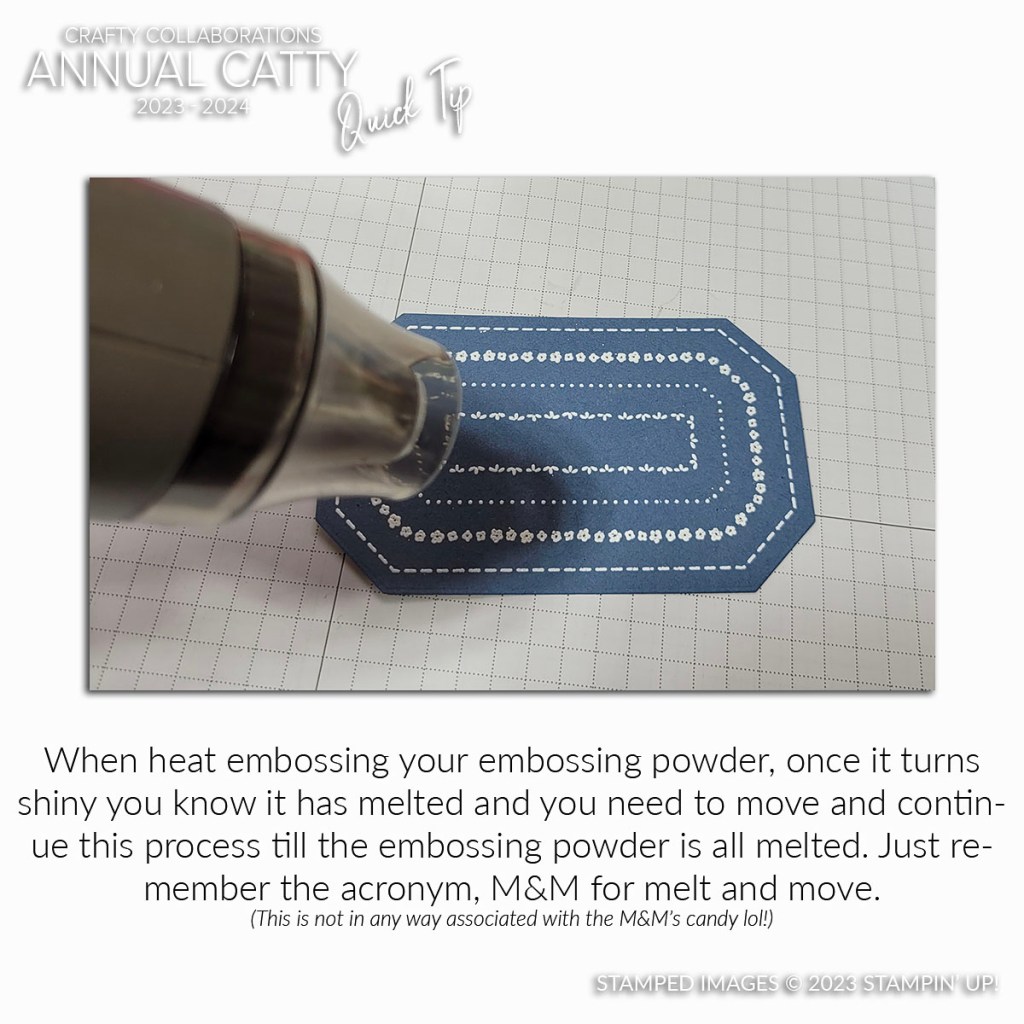
Think M&M when you are Heat Embossing. That is Melt and Move.
Once your Embossing Powder turns shiny when heating you know that it has melted. Don’t stay heating there or it will burn. Keep on moving along to the next section.
So next time you are Heat Embossing think M&M.
Now I think I need some M&M’s. Some Crunchy Peanut ones. 🙂
Happy Crafting,
Jenny
Need some Crafty supplies and you are in Australia? I would love to serve you.
Head to my store ->HERE. Please use the Host Code: PGECWEG9
Wednesday’s WOW! #151 – Flagging your Ribbon ends.
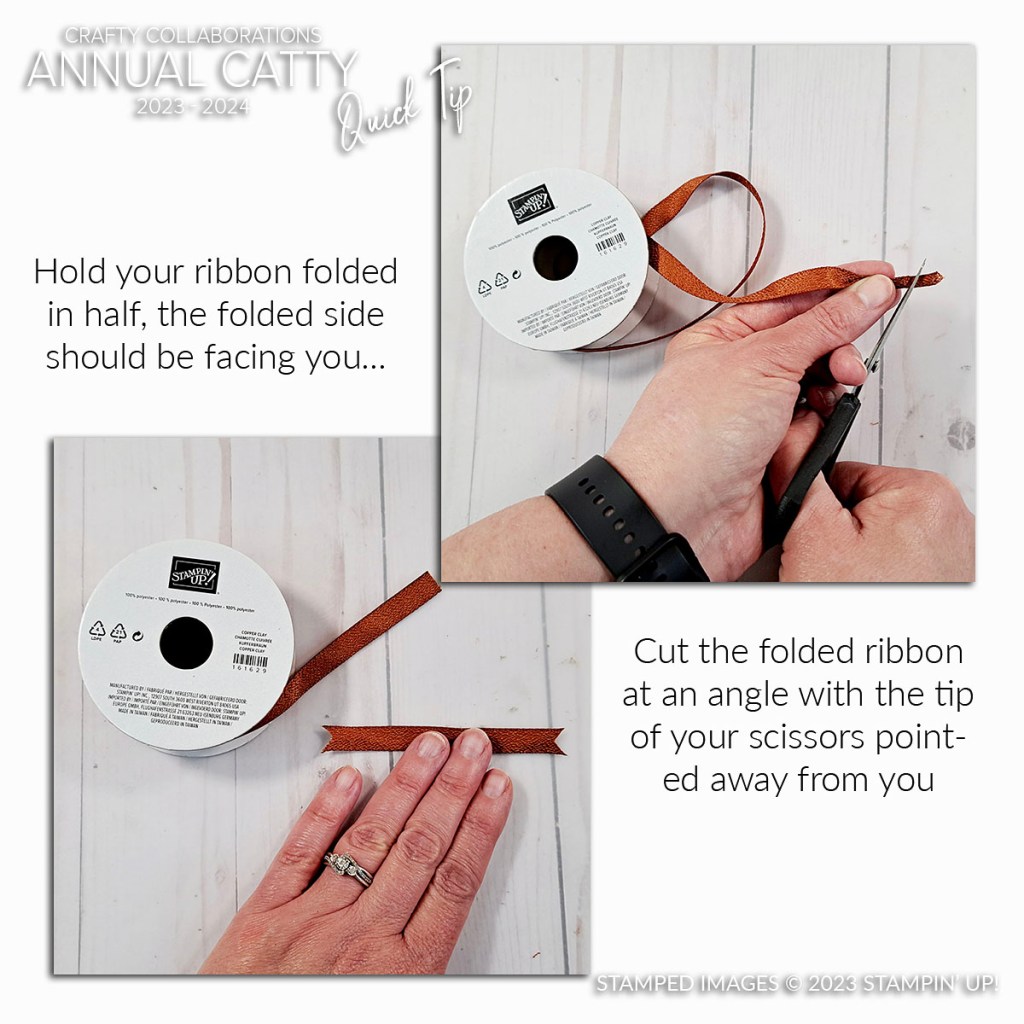
Do you like to flag the ends of your ribbon? Flagging is cutting the ends to a ‘V’ Point. Don’t try and cut the points individually. They never turn out even…
Here is a tip for you to “flag” those ends. Fold the sides of one of the ends of the ribbon together in half and make one snip to a point. The longer part – the point is towards the end of the ribbon. It makes them cut so much easier.
Hope this helps you.
Happy Crafting,
Jenny
Need some supplies and you are in Australia?
You can head to my store -> HERE Please use the Host Code: R663PWDW.
This is an easy card when you don’t want to fuss with colouring or creating backgrounds. I shared how to on my Instagram Reel last week if you caught it there.
You can use your Patterned paper. This one uses the Hello Irresistible Paper. It is a really cool effect. The flower from Everlasting Beauty is stamped in black. It comes together quickly.
The white card is embossed with the Cane Weave 3D Embossing Folder. The sentiment is from the Sending Smiles Stamp set and cut with the co-ordinating dies. I have used a little Bubble Bath Sheer Ribbon under.
Why not try that idea yourself. Grab some patterned paper and create.
Happy Stamping,
Jenny
In Australia and need to order some crafting supplies?
Head on over to my store -> HERE. Please use the Host Code: R663PWDW
Or Contact me directly. I would love to help you out.
WEDNESDAY’S WOW! #150 – Outline your dies on the card insert.
Firstly – 150 WOW’s! That’s a lot of tips and tricks with your cardmaking that I have shared over the last few years. I hope they have been helpful for you. If you have missed some you can do check the “TAGS” in the side bar on my blog for Wednesday’s WOW! and it will come up with a lot of them.
Thanks for following along with me.
For today’s tip. Do you find when you take the dies off the card sheet you can never get them back right. It’s a bit of a game of Tetris.
So BEFORE you take them off, grab a pen or pencil and trace around the dies. Then you can easily put them back in place and it will show you if any are missing. Sometimes I add a magnetic sheet to my die card so you could trace around your magnetic sheet too if you do that.
Happy Crafting,
Jenny
Do you need some crafting supplies and you are in Australia?
You can shop in my store -> HERE. Please use the Host Code: R663PWDW
OR contact me directly. I would love to help you out.
I’m back with another video for you. This one is using the Spotlighting Technique. Have you tried it?
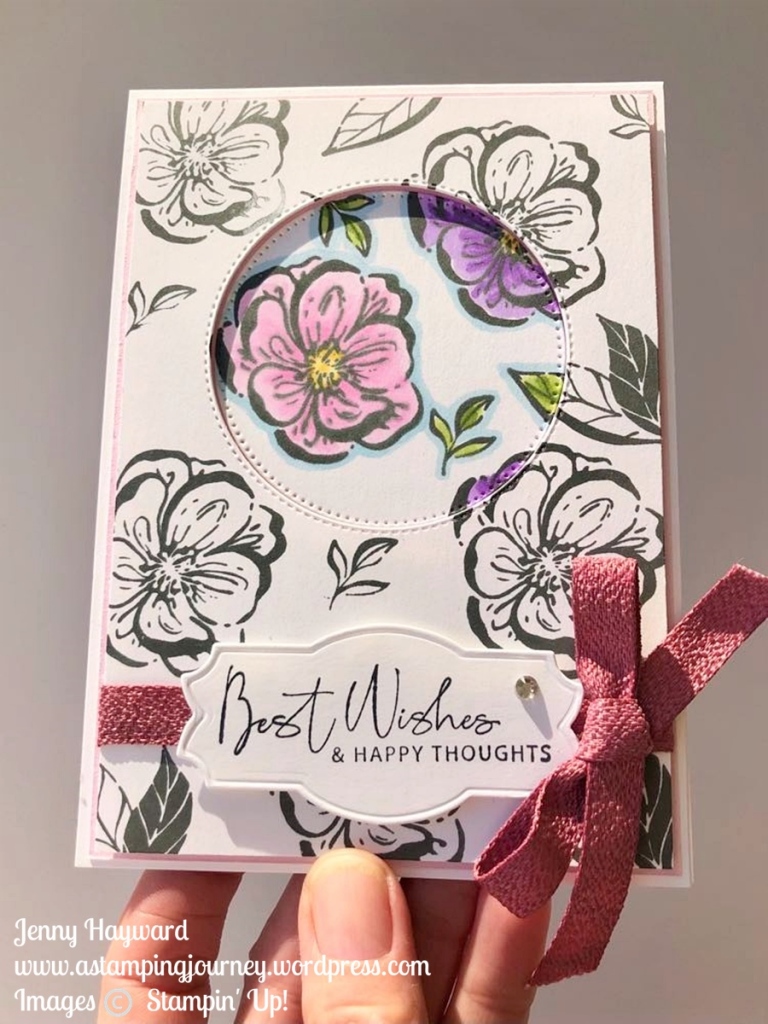
The Spotlighting Technique is highlighting a part of an image with colour. The part highlighted can be created by diecutting any shape eg circle or square. The section can be raised up or sunk below the card mat.
You can see the video below to see how it is done. I share another version too in the video so stay tuned.
This is the card I created using the Irresistible Blooms. The sentiment is from the Nature’s Prints Stamp set and diecut with the Natural Prints dies.
It is a standard size card base. I have cut the card sheet down vertically for a different look.
The exact measurements I will send out in my newsletter this week. By the way, Are you on my newsletter?? You can head to the side bar, there is a tab there.
I will let you go and watch the video now. I hope you get to make one.
Happy Crafting,
Jenny
Are you in Australia and need some crafty supplies? You can shop in my store -> HERE. Please use the Host Code: QXJQDQ9U Or contact me directly.
Do you find your dies wriggle around and slip when you cut them?
Here’s a tip. Add a little Washi Tape to them. Or you could add a little tape. If you use tape you may want to dab it on your clothes or something to take off some of the sticky.
Check it out below.
Do you do this already? It’s a good idea.
Hope it helps you out if you didn’t know.
Happy Crafting,
Jenny
Are you in Australia and need some supplies?
Pop on by my store -> HERE. Please use the Host Code: QXJQDQ9U
I had a little play this week – just because. I played along with the Colour Inkspirations Challenge #CI144.
I have to say I found it hard colours to put together. They are beautiful colours but just being so many it was hard to work them in.
I first pulled out a few stamp sets that I thought may work and then ended up choosing the Artistically Inked Stamp set. It’s nice to play with “older” stamp sets.
This is what I came up with. The colours were Bubble Bath, Crushed Curry, Lemon Lolly, Parakeet Party and Azure Afternoon.
I stamped a number of different flowers in the different colours and then played around with the placement. Eventually I got something together. 🙂
What would you do with these colours?
There is still time to play if you want to join in too. You can follow along on the Colour Inkspirations Facebook group ->HERE.
Happy Stamping,
Jenny
In Australia and need to order some fun Stampin’ Up! Products?
Head to my store -> HERE. Please use the Host Code: EVJ4EJYC
Or contact me directly on 0439844574. I would love to serve you.
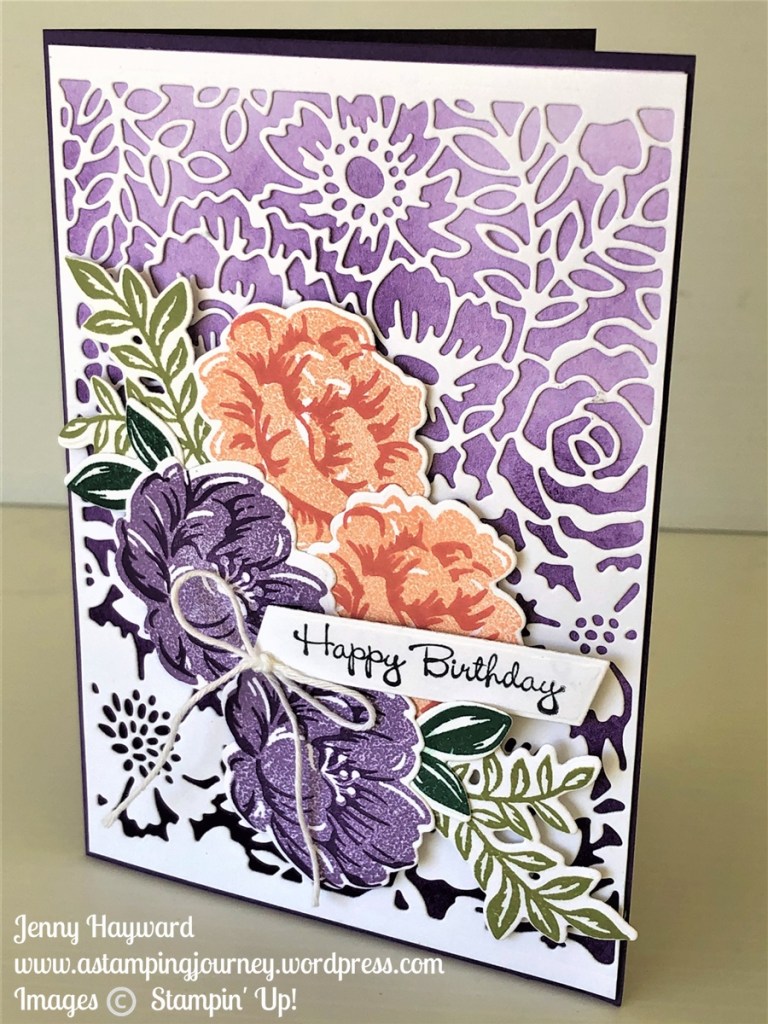
I have been loving the Two-Tone Flora Bundle recently. It’s such a gorgeous set. For this card I sponged a background under the delicate diecut.
For the colours on the flowers I used Highland Heather and Gorgeous Grape. And Petal Pink and Calypso Coral. The sentiment is from the Go-To Greetings set.
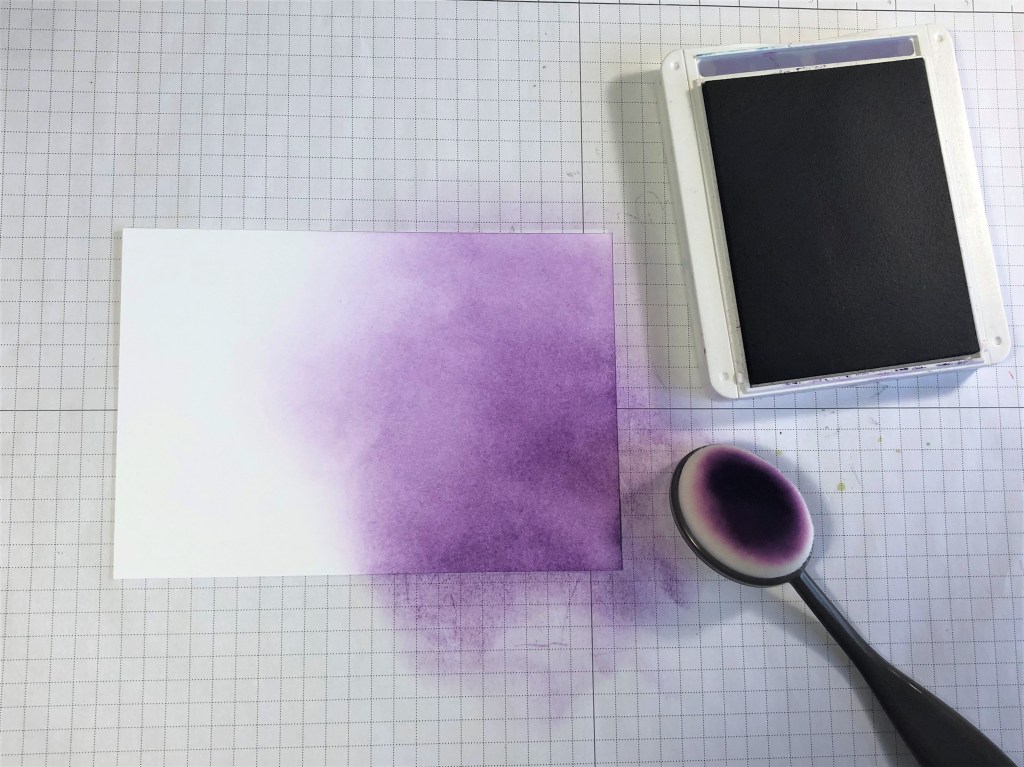
See how I have done the background. I used the Blending Brush to build up the colour on the white card. It was darker on the bottom and built up lighter towards the top.
This is the blending in progress. TIP: Start off your card and gradually move up the card as you blend in a circular motion.
Isn’t the detailed background die so gorgeous? It is so delicate.
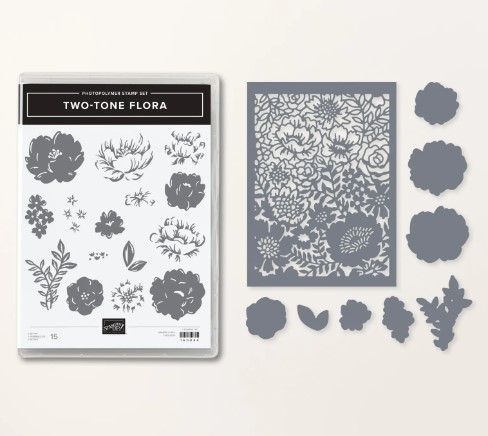
The Two-Tone Flora is not available as a Bundle now but you can buy the stamp set and the Dies individually.
In Australia and need supplies? I would love to serve you.
Head to my store to order -> HERE. Please use the Host Code: EVJ4EJYC
Or contact me directly. Thanks for choosing to shop with me.
Wednesday’s WOW! #147 – Comparing the 2023-2025 In Colors.
You are probably quite familiar with the 2023-2025 In Colors by now. So I won’t go in to detail about each colour but today I thought I would share some comparisons with you to other Stampin’ Up! Colours.
I have 2 great resources for you.
IN COLOR COMPARISON CHART
As in past years I have put together a Colour Comparison Chart so you can see how they look with similar colours.
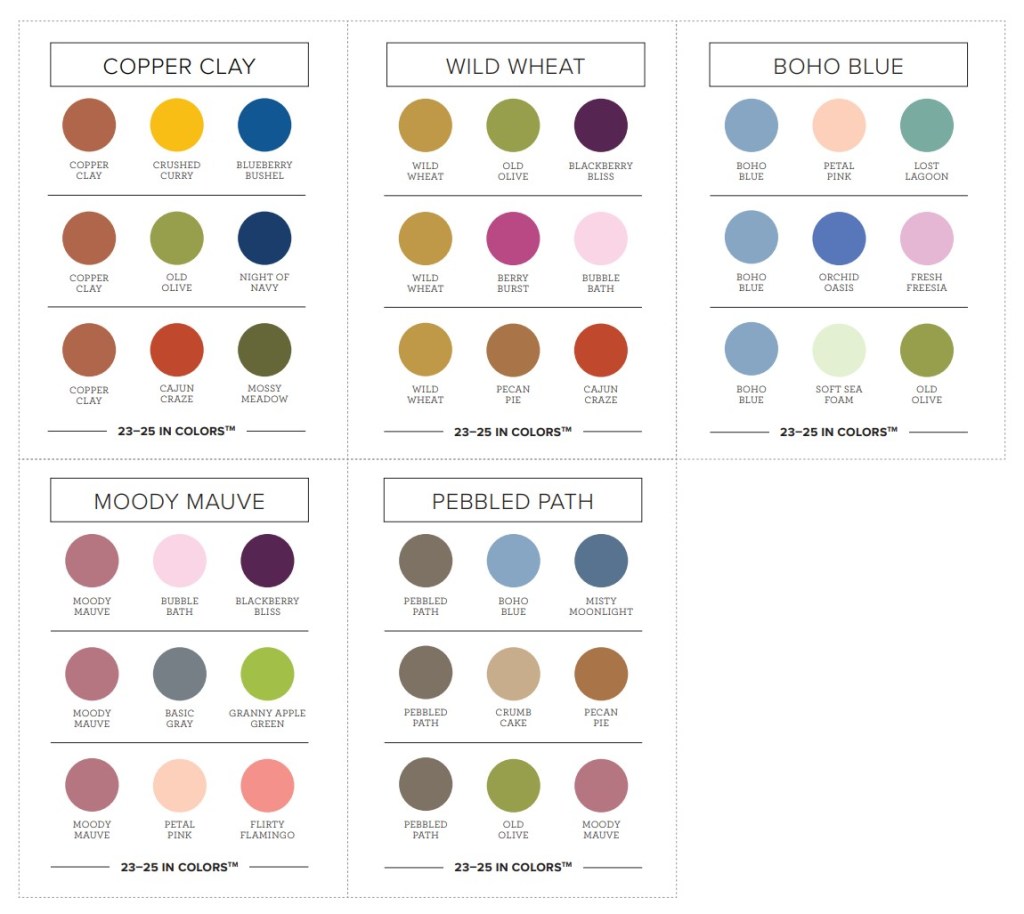
Here are the 2023-2025 In Colors.
I have to say I wasn’t sure about them. But I am slowly warming up to some. When I had my Catalogue Launch a few weeks ago everyone loved Wild Wheat. I must say it is a great shade that goes with so many other colours.
Here is the 2023-2025 In Color Comparison Chart.
It’s always interesting to see how they compare. Sometimes ever so slightly.
Be sure to save the In Color Chart image that is above so you have it for reference later.
COLOR COACH CHART
Now if you would like a Color Coach Chart for the In Colors to help you when creating with them then you can download a chart. This chart helps you create with other colours using them.
You can Download it as a Photo version below or as a PDF further below.
Playing more with the Cheerful Daisies Bundle I created a Split Easel Card.
I used the Fresh as a Daisy Paper with it too.
It folds up flat so you can post it.
You will want to decorate the inside for this one.
Do you want to make one too?
I have the video below. If it doesn’t show you can go straight to Youtube ->HERE.
I have the basic measurements further below for you in both Metric and Imperial.
MAKE A SPLIT EASEL CARD
Card Base: Lemon Lolly – 1 cm x 14.8 cm. Score at 10.5cm. 5 1/2” x 8 ½” . Score at 4 ¼” Centre piece – 8.8cm x 10.5cm 3 ¼” x 4 ¼” Early Espresso Cardstock Side strips – 2 @ 10.1cm x 2.6cm 2 @ 4 ⅛” x 1” Front Panel mat – 8.4cm x 10.1cm 3 ⅛” x 4 ⅛” Designer series paper Side Strips – 2 @ 9.7cm x 2.2cm 2 @ 4” x ⅞” Front Panel – 8cm x 9.7cm 3” x 4” Inside – 10.1cm x 5cm 4 ¼” x 2 ⅛” Whisper White card stock Inside – 10.1cm x 10.1cm 4 ¼” x 4 ¼”
This is the lovely Cheerful Daisies Bundle.
But what about the Fresh as a Daisy Designer Series Paper.
Do you need any of the lovely Stampin’ Up! Supplies for your creating and you are in Australia?
You can head to my store and order -> HERE. Please use the Host Code: 4RY72TBP
Or contact me directly and I can help you with your order.