cards, Stampin' Up!, Techniques

SCALLOP EDGE BORDER WITH THE BEST BADGE PUNCH!

I have just posted about my tags I made for team swaps and then I realised I hadn’t told you about the scallop edge on the tags.  Never mind you get a second post from me. 🙂

Just to show you the tags again and have a look at the scallop edge at the bottom.

swirly tags

It’s a bit hard to see in this photo but maybe this photo is a little clearer.

swirly tags _2

I recently discovered that you could create a scallop edge using the Best Badge punch.  I loved that idea and maybe I bought the punch just for that reason. 😉

This is the punch if you haven’t noticed it in the catalogue.

best badge punch

So how do you create the scallop edge with it??  Well, I haven’t got a video for you but I have some photos to help you.

Firstly, with the scallop edge of the badge punch line the bottom curves of the scallops up with the bottom edge of the cardstock and then punch.

Scallop edge

Move the punch along the cardstock so you line up the last scallop you punched with the scallop on the punch.  Then line up the bottom of the curve on the next scallop with the bottom edge of the cardstock like you have done previously.  Then punch.

scallop edge 1

Continue moving along the length of your piece of card.  This particular one was only narrow so there are not too many scallops to punch but it gives you an idea.

scallop edge 2

Does that help?? I hope so.  It’s great when you can get more use from your punch than what you originally thought.

Thanks for visiting me again.

Jenny

cards, Stampin' Up!, Techniques

BEST BIRDS IN ROSE RED!

Yesterday was my Mother-in-Law’s birthday.  As she makes cards herself the pressure is always on when I make a card for her.  I thought for the card I would ink up the ‘Best Birds’ set that I have had for a few weeks and have not been able to use yet. I played around with watercolouring it.  I will show you the card and then share a few tips in making this.

Rose Red Birds

I chose Rose Red as the base card as that is my Mother-in-Law’s favourite Stampin’ Up! colour.  Well any of the reds!  (TIP#1) I used a piece of Watercolor paper and firstly washed over the card in the centre area with the aquapainter to lightly dampen the card  I have discovered recently by wetting the card it allows the ink to spread much easier creating a more washed look.  I used Blushing Bride on the left, then Rose Red in the middle section and Cherry Cobbler towards the right end.

(TIP#2) For regular watercolouring you can use the Thick Whisper White card or Shimmery White but if you are creating a washed look you MUST use the Stampin’ Up! Watercolor paper. (TIP #3) You need to be patient and let it dry.  Either you can use a Heat Tool or leave it for a few hours.

I stamped the bird, the branch and the flowers on watercolour paper too Black StazOn and watercoloured them.  (TIP #4) When colouring the bird I gave a light watercolour with the Rose Red and added highlights of Cherry Cobbler.  On the wing I washed over it with Crumb Cake and then highlighted it with Soft Suede.  The branch was coloured with Soft Suede for the branch and Old Olive for the leaves. The flowers were coloured with Rose Red and then darker highlights added in the centre with more concentrated Rose Red.

These were all then cut with the matching ‘Birds and Blooms’ Thinlits.  Too easy with that. No hand cutting necessary!! 🙂

I was going to cut the washed piece with the ‘Lots of Labels’ Framelits. I left the framelit on the card ready to cut in the morning but when I looked at it then I thought it might look OK to have a frame over it.  I cut the frame from Crumb Cake with the 2 largest ‘Lots of Labels Framelits’.  I am really pleased I went that way with it. I stamped the hatch pattern from the stamp set in Rose Red in the middle of the piece and stamped the sentiment in Memento Black.  Then it was all put together and a couple of flowers stamped around the edge to finish.  I was pleased with the finished result – and I think it received approval when I gave it to her today. 🙂

I hope you found these tips helpful when you create your next watercoloured card.  Let me know how you go.

Have a great day,

Jenny

cards, Stampin' Up!, Techniques

WETLANDS DIRECT TO PAPER TECHNIQUE!

We made this card at our team meeting earlier this month. Thanks Barbara for sharing it. I thought I would show you how you can make it too.  First let me show you the card.

Wetlands

I have used the ‘Wetlands’ stamp set.  I am glad this is still around.  I haven’t had a lot of time to play with this set.  I have used the Direct to Paper technique to create the background.

 DIRECT TO PAPER TUTORIAL

1. Choose your ink, I have used Crumb Cake and Soft Sky.  You can use regular Whisper White cardstock for this technique. With the Crumb Cake ink place it over your cardstock near the edge.  With the inkpad tilted very slightly upwards swipe the cardstock across the card starting at just off the edge of your card just in the lower half of the card.  You may want to repeat the swiping a couple of times until you are happy with it. Always starting off the cardstock each time.  It is fine to have white patches showing.

?

2. Now using the Soft Sky repeat the swiping in the top half of the card.  Repeat the swiping a couple of times until you are happy with the coverage.

?

?

3.  When you are finished stamp the image and the greeting from the ‘Wetlands’ set using Black ink.

?

Each time you do this technique it will be different – which is the fun part.  You never know what you are going to get.  Try it with different stamps and see what you get.  I can’t wait to try this again.

Thanks for visiting me,

Jenny


cards, Classes, Stampin' Up!, Techniques

WATER SPRITZING TUTORIAL!

A few weeks ago for Onstage I didn’t have an opportunity to make swaps to share with other demonstrators.  Life has been a little busy. 🙂  I did make a card for the Display boards though where you can add your swap cards or samples.  They are always so inspiring and is a big part of why I love to go.  It’s like a live Pinterest board!!!! 😉

I thought it was time to show you the card. This is a technique I have been playing around with recentlly. I don’t really know what the name of the technique is but I call it the Water Spritzed technique. I will show you how to do this below so read on.

This is my card I made for the board.

waterspritzed_Bythetide

You can see the little “splodges” in the ink where the colour has lifted. It creates a cool motley effect.  Here is how it is done.

WATER SPRITZED TECHNIQUE

1. Using Thick Whisper White or Shimmery white cardstock, heat emboss your images.  On these I embossed the coral and the fish with white Embossing powder.  I stamped the seahorse with Black Stazon.  It is important to emboss or to use the Stazon so the ink on the images don’t run when you spritz.

2. Use your first colour and sponge in patches over the card. I have used Bermuda Bay here.

P1180329

Then add your 2nd colour.  I have used Daffodil Delight.

P1180331

3. Fill in with your 3rd colour.  I have used Marina Mist I think.  It’s good to have 3 co-ordinating colours. Once you have sponged the colours on, use a tissue to wipe off the ink where the images are embossed.  This makes the embossing shine.

P1180332

4. With a spritzer with water or I use an old Stampin’ mist bottle, hold the bottle a little away and lightly spray the card.  You don’t want to soak the card just lightly mist.  You will see some of the colour start to lift.  Mist until you are happy with the coverage.  Keep the card level or you will start to have runs from the water running down. Leave the card aside on the table for a few minutes.  The longer you leave the card, the more effect you will get.  Finish off drying your card with the Heat Tool lightly.  You don’t want to melt your embossed images any more.

P1180334

You can now finish your card as you like.

Here is the first card I made using this effect. I have used Rose Wonder set. Thank you to my friend Leonie for showing me this technique.  We made this card at my last technique class too. I have heat embossed the images in white,  The inks I have used are Elegant Eggplant, Tempting Turquoise and Bermuda Bay.

image-6194

I made another card that day but I didn’t leave the water sitting on the card for long so it doesn’t have as much mottling.  I was a little disappointed with the colour combination. I used Watermelon Wonder, Mint Macaron I think and Lavender Lace. I thought I would show you the card anyway. This is using Birthday Blossoms.

image-6191

So how about you have a try at this technique.  Each time you do one it will turn out different. It’s fun.

Thanks for visiting me today.  Have a wonderful day/night.

Jenny

cards, Techniques

CRAZY ABOUT YOU JOY FOLD!

Just a quick post for you. Back to more projects from our Crafty Weekend. It has been some time since I have done this type of card. Here is this one for you.

P1170040

P1170041

I have used ‘Crazy About You’ stamp set and ‘Hello You’ Thinlets to make this card in Mint Macaron and Soft Suede.  This is a JOY FOLD card.  It is very easy to make.  It is a basic size card but cut your card vertically and score halfway. The front flap is cut in half.  Then a smaller folded card is adhered to the inside and they overlap when folding.  If that all makes sense??? You can find a tutorial to make your own on Splitcoaststampers HERE.  It was fun to make.  I must make another one again very soon.

Today I have been playing with some new toys from the upcoming Holiday Catalogue.  I will share them very soon.

Enjoy your day whatever you may do.

Come and visit again soon,

Jenny

cards, Techniques

A FUN STAMPING WEEKEND!

Don’t you love it when you can get away with your stamping buddies and stamp to your heart’s content.  Bliss!!!  So fun to share ideas and inspire each other and laugh and have fun.  I thought I would show you the results of my weekend of stamping.  Well actually it was a little less than a weekend as I arrived mid Saturday morning.  I am showing you them all in a group now but over the next couple of weeks I will show you them individually.

card weekend

Such a variety! It was good fun to try some new techniques and play with some new sets.  I do hope you like them.  Stay tuned for some upcoming posts on these ones.

Have a great day and I hope you can get creative today,

Jenny


cards, Stampin' Up!, Techniques

FAUX SHAVING CREAM BUTTERFLY!

A little while ago I shared the Faux Shaving Cream technique with you.  I showed everyone at our team meeting this week so beforehand I played around with a few other stamps using this technique.  I thought I would show you the card I made.

2nd faux shaving cream

There is quite a few new products on this card. Can you spot them??

I have used the set ‘Watercolor Wings’ and the butterfly was cut with the new Framelits, Bold Butterfly.  I have used 2 of the new Incolors Watermelon Wonder and Cucumber Crush.  (I also used Pacific Point for this technique too).  The other stamp I used to create the honeycomb effect was from Butterfly Basics. The White card is embossed with the lovely new embossing folder ‘Fluttering’.  How gorgeous is this folder??  The greeting I have used here is from ‘Butterfly Basics’ which continued from our recent Occasions Catalogue.  See the centre of the butterfly?  I cut the smaller butterfly with the Bold Butterfly Framelits from regular old baking paper! How cool!  In the centre of the butterfly I added a Watermelon Wonder In Color Blossom Accents. I was really happy how this turned out.  You really have to play with a few different ink colours and different stamps to see what effect you get.

If you missed the post showing the Faux Shaving Cream Technique and want to have a go yourself, you can find that tutorial post HERE on my blog.

Thanks for visiting today.  I hope you have a wonderful weekend. 🙂

Jenny

Stampin' Up!, swaps, Techniques

FAUX SHAVING CREAM FLOWER!!

I have always been fascinated in the Shaving Cream technique but I haven’t got around to trying it. I think it is the mess!  The shaving cream and reinkers and ….. Just too hard!  SO, when I came across THIS technique on Splitcoaststampers a few weeks ago when I was looking for a different technique for a class, I thought I could really try this one.  Here is the card I made.

P1160643

The layout for the card was INSPIRED from Deb Currier from artfeltcreations.com.  I changed a few things around and I created the Shaving Cream flower.  I loved the effect.  Here is a close-up. (OK a little blurry!)

P1160646

I don’t usually share a tutorial for the Technique Classes I do but this technique is so cool I just wanted to share this with you my lovely readers. Of course, you can read about it at the Splitcoaststampers link above too.  It is a bit like the Kissing technique if you have tried that.

SHAVING CREAM TECHNIQUE

1. Choose 3 co-ordinating ink colours. I have used Daffodil Delight, Tempting Turquoise and Melon Mambo.  I found the darker colours didn’t blend well and just looked messy 🙂

You will also need 2 stamps: One solid image stamp and one patterned stamp.  I have used the flower from ‘Crazy About You’ and the honeycomb pattern from ‘Butterfly Basics’.

2.  Ink up your solid image stamp with the lightest colour. Don’t stamp it on your card yet.

3. Ink up your patterned stamp with one of the other ink colours. Press it on to your solid image stamp and give it a slight twist.  Clean your patterned stamp and ink again in the same colour.  Press on to your solid stamp on the other part of your stamp and give a little twist.  See the photo below.

P1160660

4. Clean your stamp again and ink your patterned stamp with the other ink colour.  Turn your solid image stamp 1/4 turn.  Then press your inked patterned stamp on to the stamp and give a little twist. Clean your stamp.  Ink it again in the same colour and stamp on the other part of your solid image stamp and give a twist.

P1160663

5. Now give your solid image stamp a little huff to re-moisten the stamp and then press on to your piece of card.

P1160667

It gives a really cool effect.  Don’t you think???

I really loved the effect so I made some tags up using this technique for our team swaps last week.

P1160671

Here is a close-up.

P1160727

So why not give this technique a try.  It is so cool and each time will work out different.

Have a happy, stampy weekend 🙂

Jenny

cards, Classes, Techniques

GLITTER WINDOW CLASS!

This month’s Technique class we are going to make ‘Glitter Window’ cards.  Lots of sparkle with this technique and it can be used for any occasion.

Come and try it.

WHEN: Saturday 14th March at 2pm.

WHERE: My place, East Corrimal.

COST: $15 or Free with a minimum order.

BYO: Adhesives and Scissors.

PLEASE RSVP BY THURSDAY 12TH BY EMAIL OR COMMENT HERE.


Here are the cards we will make plus a sample for you to keep.

P1160217

Look forward to seeing you.  🙂


cards, Techniques, Tutorials

“SPARKLY TREE”

This post has been a while in the making.  I can explain and you might understand!!  A couple of weeks ago I had my ‘Christmas Bling Class’ and we did some fun cards using bling in different ways.  Christmas is a great time to go overboard with the ‘bling’.  I might show you some of the cards we did later, but this particular card got some attention.  This is a card I had as a sample but everyone wanted to know how I did it.  As time is running out to fit in another class, I promised them all I would do a tutorial on my blog AND now you can all benefit too.  So, finally here it is.  Now what has taken so long is that I needed to recreate the card to get some step-by-step photos.  Well, as what normally happens, it just wasn’t coming together right.  So I have had to redo the card AGAIN.  So ladies, I hope you appreciate this 😉

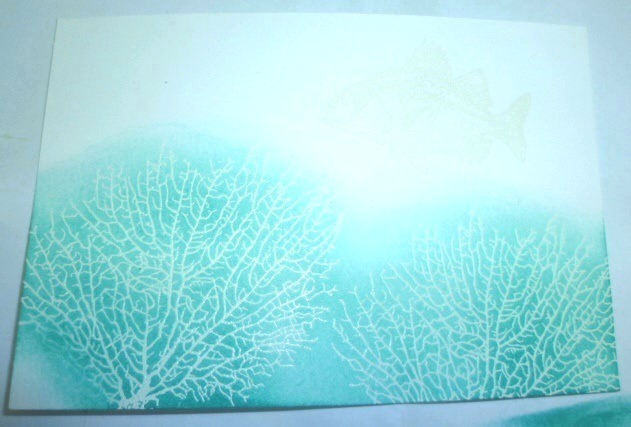
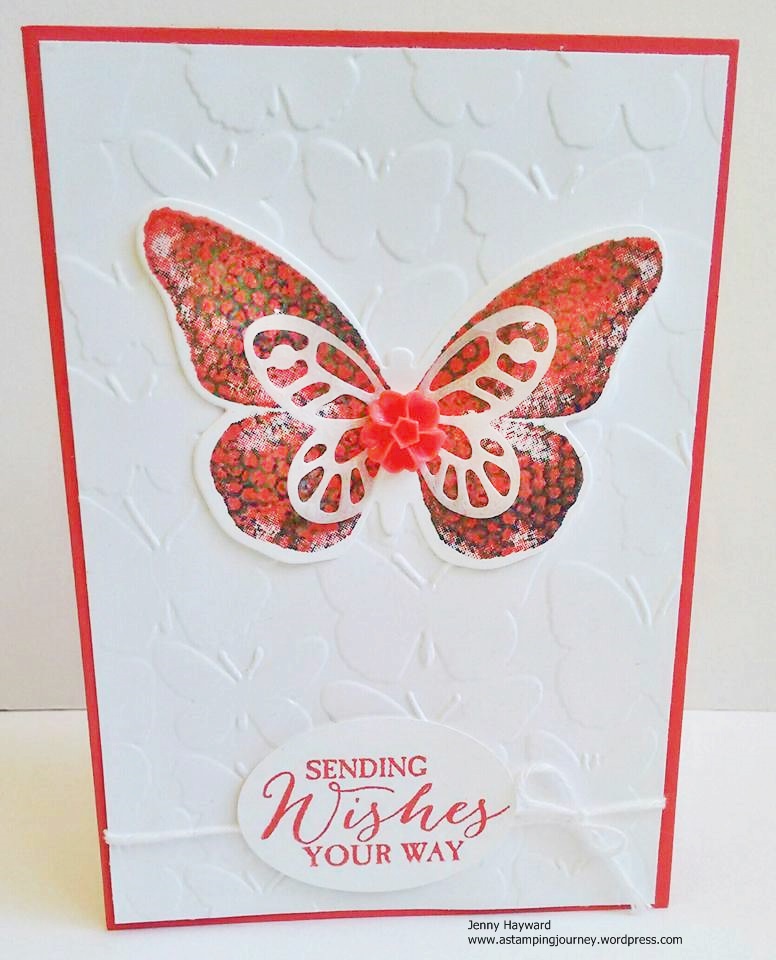
This is the original card. It is hard to see the sparkle in this photo but the whole tree panel is all sparkly!  Read on to find out more.

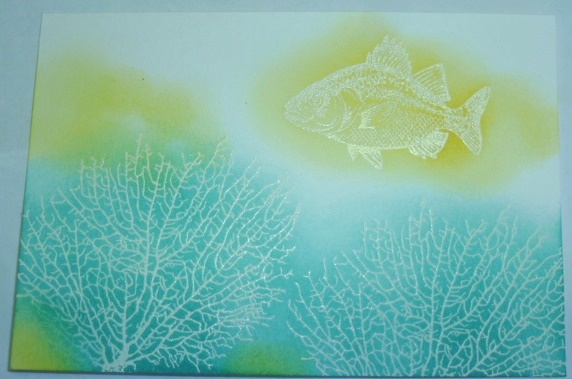
This glitter panel is created with Heat and Stick Powder and Dazzling Diamonds.  This really adds an impact – I think!  I am going to outline how to do this technique if you are not familiar with this.   Now I am a bit of a lazy stamper so I will also let you know a cheat step at the end.

Before you start here are some helpful tips:

Make sure you have a sticky versamark pad.  It really makes a difference.  That was where I went wrong when I first recreated this card.  I realised I was using an old Versamark pad and it was a bit dry.  Also, have your powder and Dazzling Diamonds ready to go so you can apply them straight away.

So, here you go:

GLITTER PANEL TUTORIAL

You will need:  Your stamped image, A versamark stamp pad, Heat and Stick Powder, Dazzling Diamonds, Heat tool.

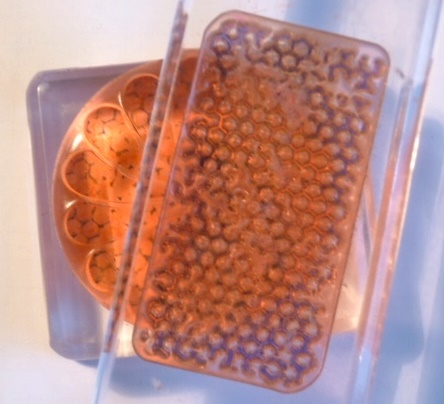
1. Swipe your card firmly with your stamped image with the Versamark Pad.  Be careful to just touch the sides of your card with your fingers so you don’t wipe off any versamark from the card.

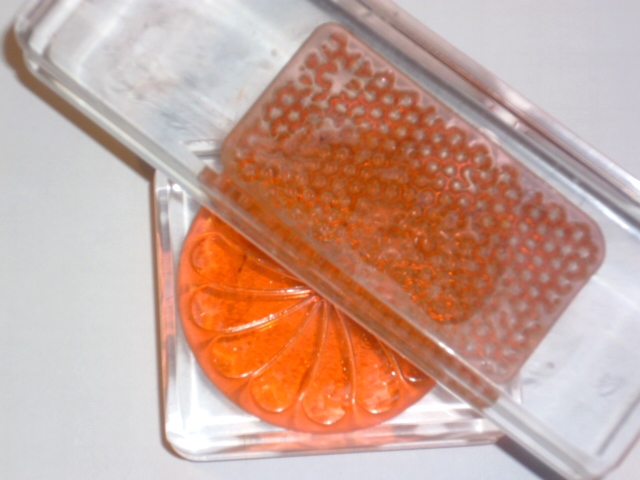
2. Pour over your Heat and Stick.  Yes, you want a good coverage!

Tip off the excess and tip the extra back into your container.  Heat the Heat and Stick with the Heating Tool to melt the powder.

3. While the Heat and Stick is still hot and melted pour over your Dazzling Diamonds.

Pour off the excess back into the container and Heat set again with the Heat Tool.

4.  The glittery panel is done.

CHEAT TIME:

Sometimes I cheat a bit to save time.  You can combine the Heat and Stick and Dazzling Diamonds in a container about equal amounts.  After you swipe your card with versamark then tip the mix over your card and heat it all in one go.  It does work although it may not be as sparkly!

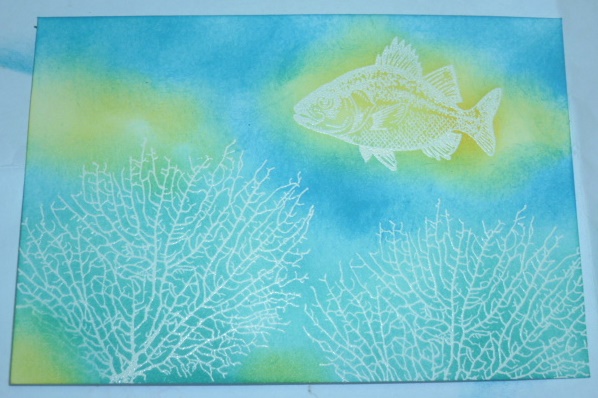
And so for the finished card:

Psst! See the dark green behind the card.  That is my wall in my craft room.  It is a bit darker than in real life.  I have just taken photos of my craft room when I tidied up recently so I am going to post those soon.  We all like to spy on other stamping areas don’t we? So stay tuned for those very soon!

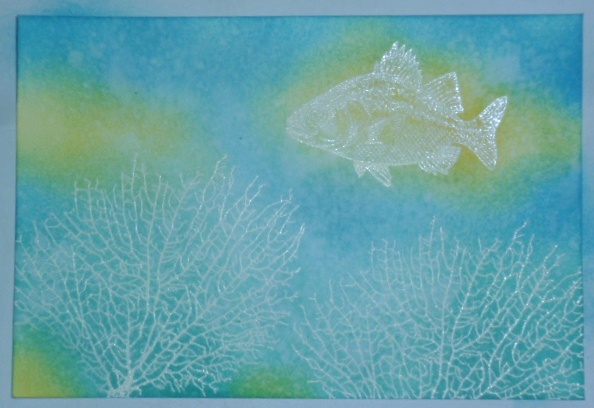
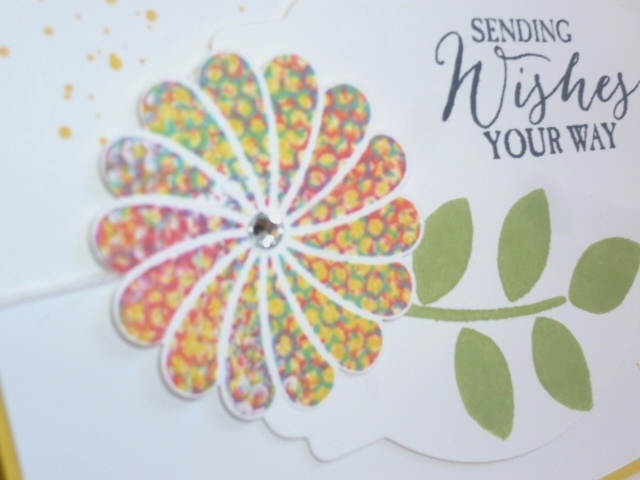
Anyway, here is a close up of the finished card.

Oooh! Sparkly!!!!

Now it is your turn.  Why not have a go at this technique yourself.  Send me a photo of your card.  I might show them off here.  I look forward to seeing them.  Maybe I will have to dig up some blog candy!! 🙂

See you soon,

Jenny x