cards, Catalogues, Videos

MERRY AND BRIGHT CURVY CHRISTMAS + A VIDEO!

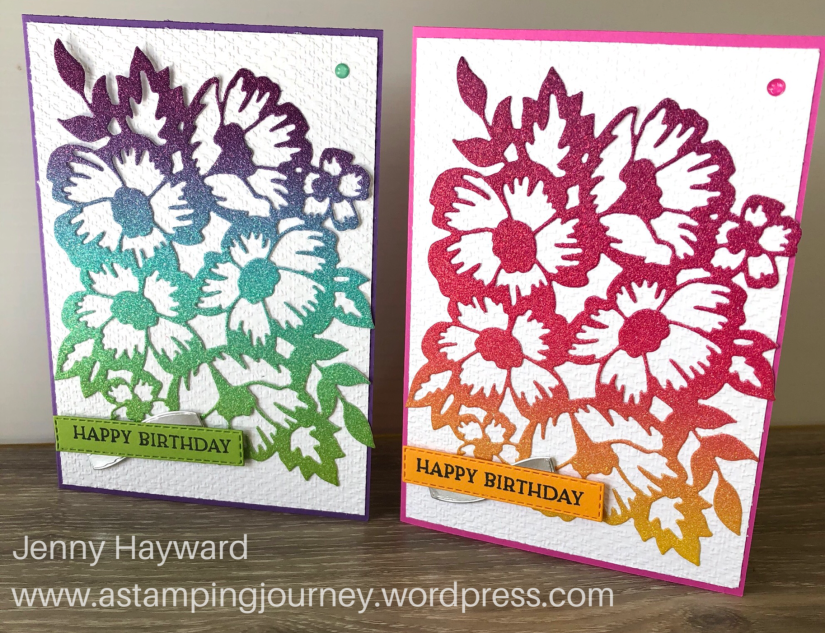
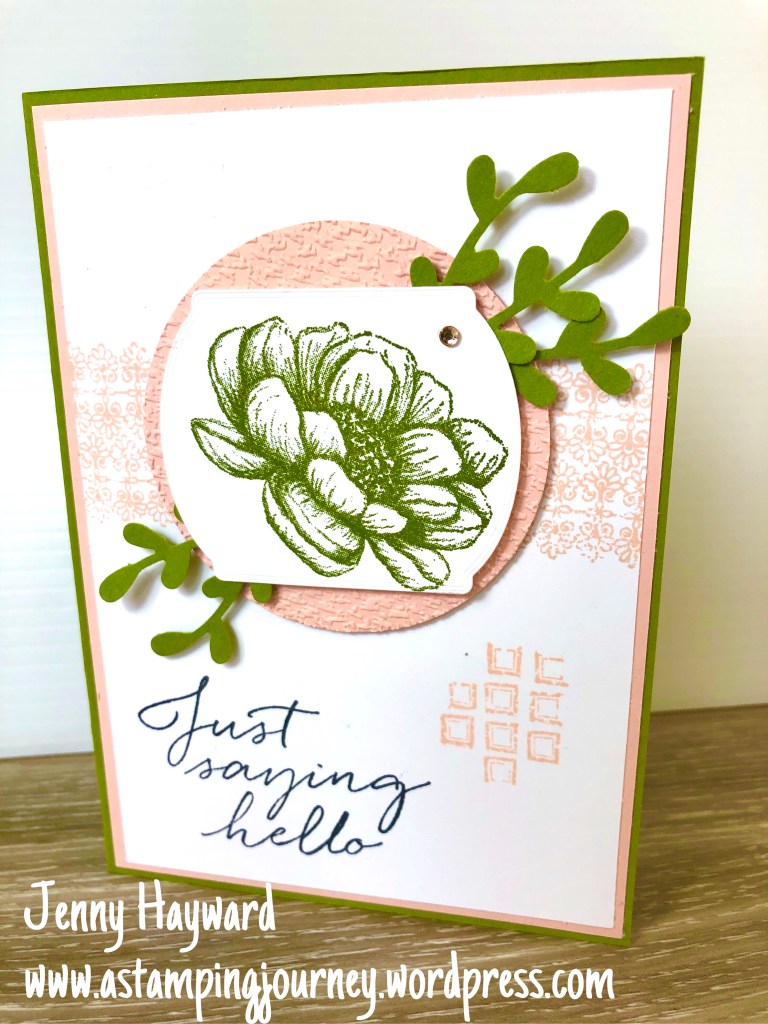
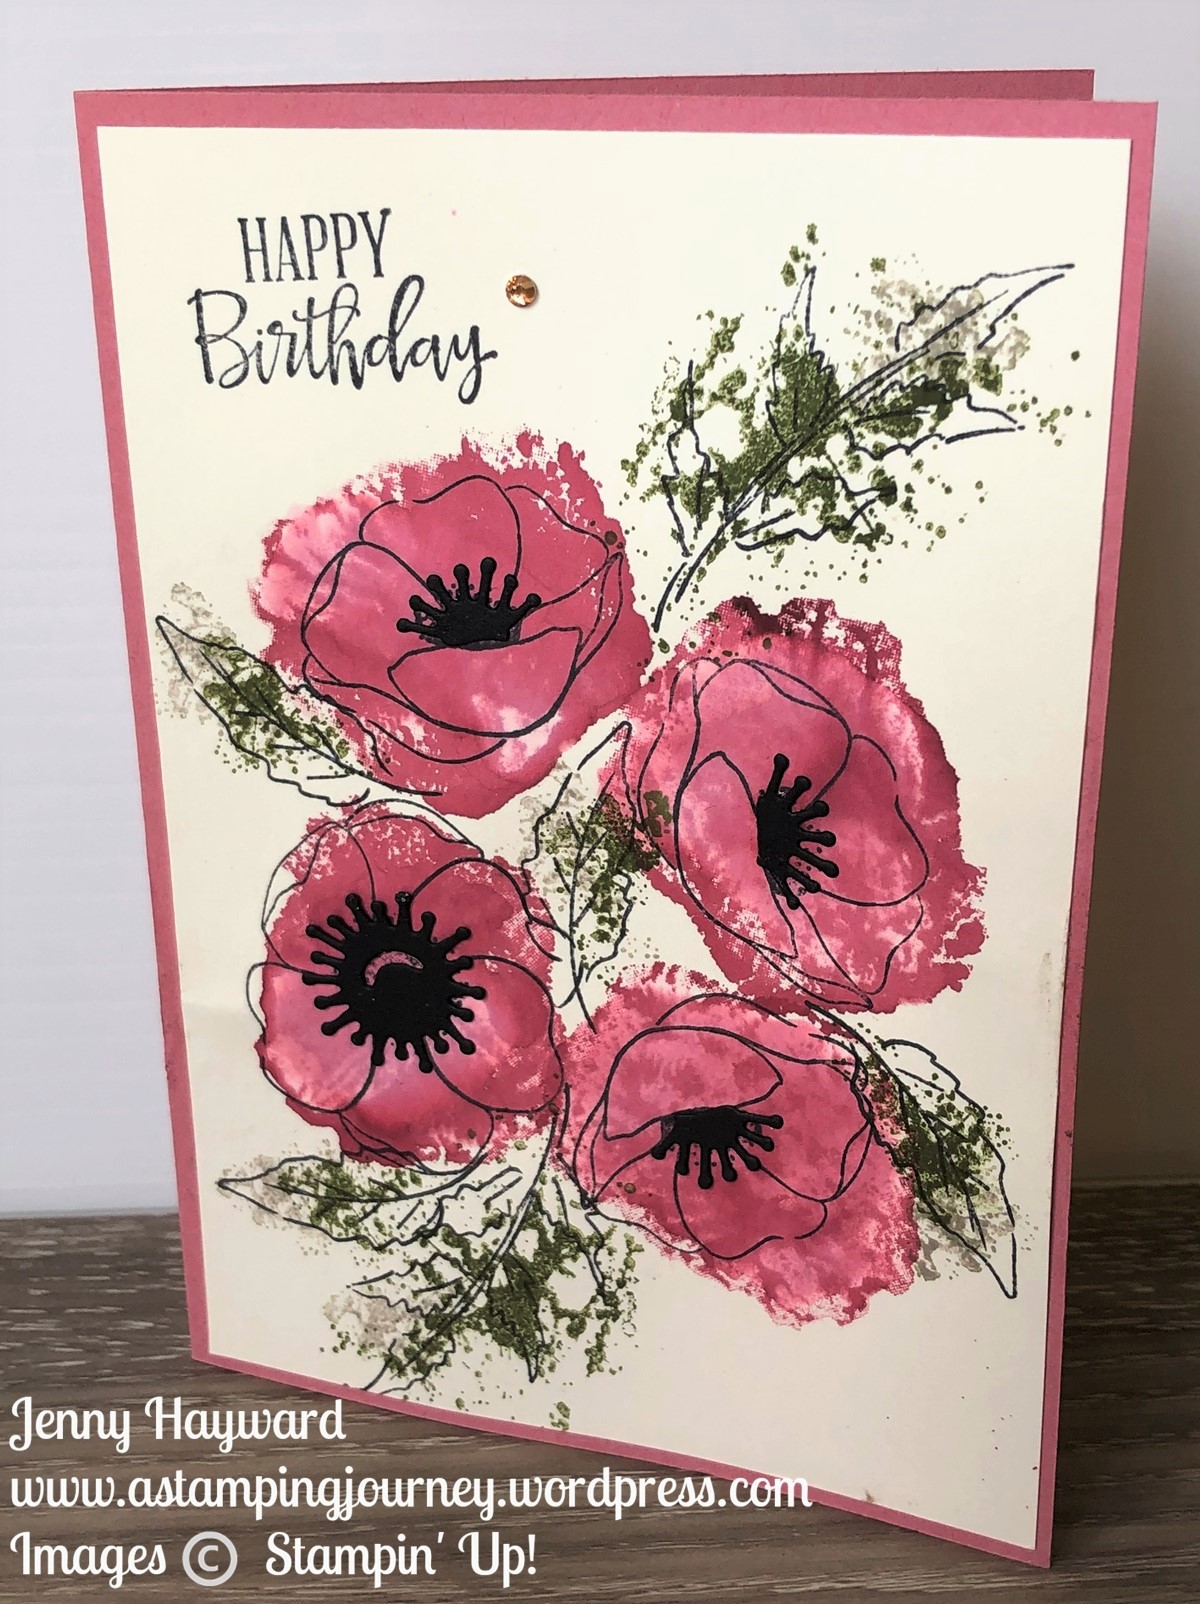
I am loving the gorgeous new Quite Curvy Bundle of products we have available this week. I have been creating lots. Today I wanted to share not one but 2 projects with them.

The layouts are the same but one is a Christmas card and then I created another as a Birthday card just changing it a little. Today’s video will show you how to create them with a few tips on how to use these new products.

Check the video below.

On these cards I have used the new Classic Christmas paper in the Crumb Cake prints. There are some great prints in this pack in Crumb Cake, Shaded Spruce and Cherry Cobbler. I have neglected the Scalloped Lace Trim but it is so soft and adds that elegant touch to your cards.

The Crumb Cake card was embossed with the Subtles Embossing Folder to add a little extra texture. The bow and the bird were coloured with Stampin’ Blends.

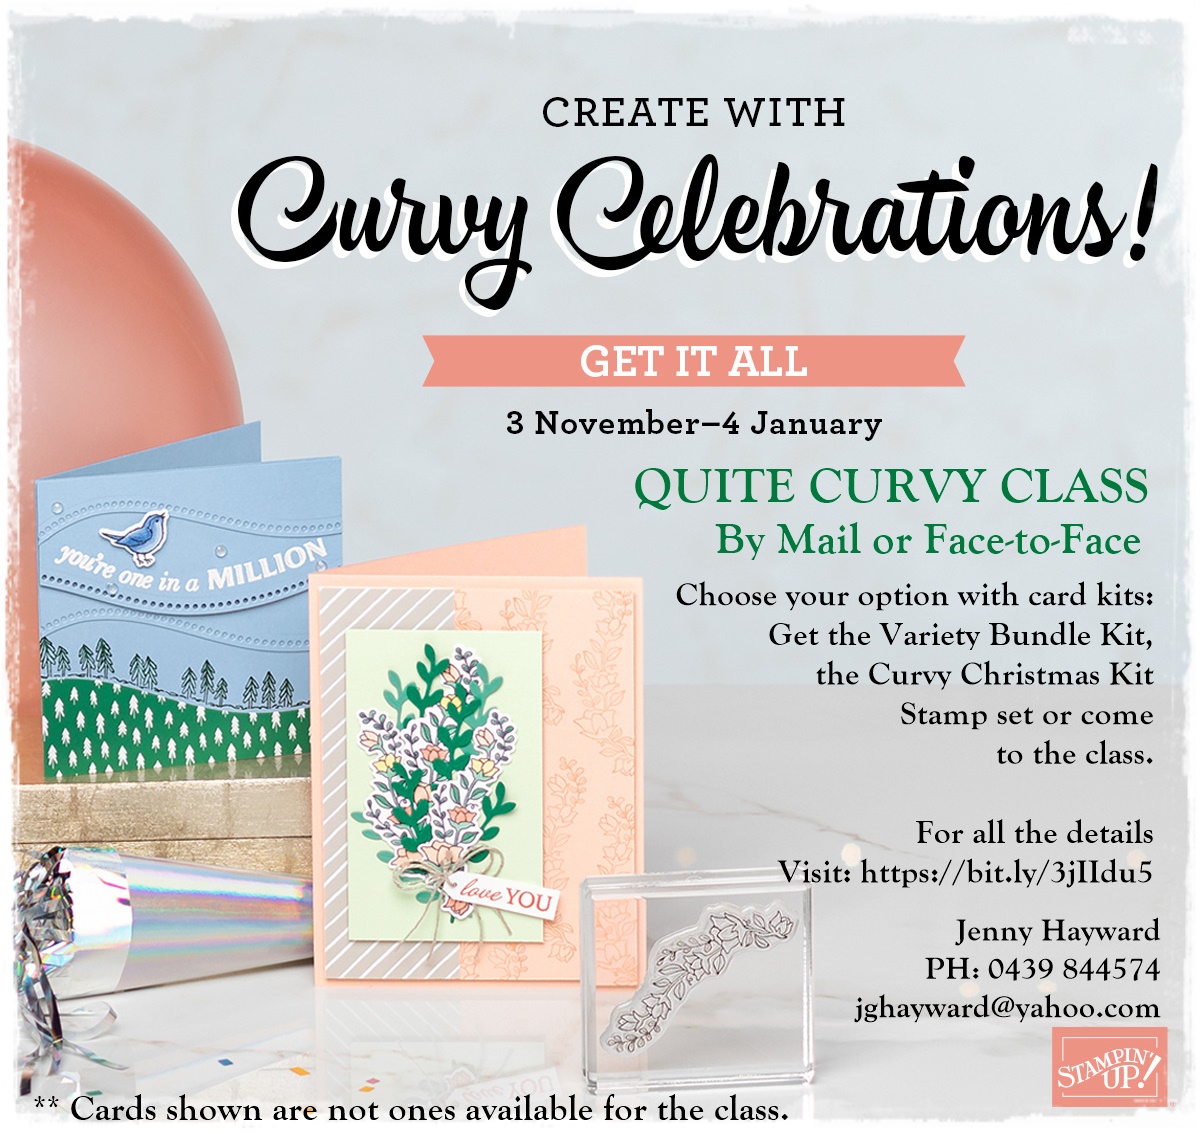
Are you loving the Curvy Celebrations Bundle of Products? They are available to order now in my store -> HERE.

If ordering online please use the Host Code – RCDPWPWK Or contact me directly to order at jghayward@yahoo.com

Be sure to check out my class details too. View that -> HERE. (Australian residents only at this stage).

Be sure to check the video out and subscribe over on my Youtube channel so you can keep updated when I post a video.

Happy Curvy Creating.

Jenny

cards, Catalogues, Stampin' Up!, Techniques, Videos

BUTTERFLY WATERCOLOUR WASH + VIDEO!

Today’s card uses a fun watercolouring technique.  I call it a watercolour wash.  It’s a great way of colouring your images freely without worrying about staying in the lines.  That’s so cool if you are not one for neat, “in the lines” colouring.

I have used the stamp set Positive Thoughts for this card.

You can check out the video below to see some tips in creating it.

Positive Thoughts is such a beautiful stamp set.  I particularly love the sentiments in it.

I hope you give this idea a go. Try it with different stamp sets.

Thanks for visiting me,

Jenny

cards, Catalogues, Stampin' Up!, Techniques, Videos

TASTEFUL TOUCHES EMBOSSED FEATHERS + VIDEO!

Today’s project is using the Tasteful Touches stamp set.  I love heat embossing and thought those feathers would look lovely in shiny silver.

Stampin' Up! Tasteful Touches Embossed Feathers

I have a video for you showing you how to create it all ready for Friday Flicks.  Check it out.

If you are receiving this blog post via email and the video is not showing then head to the post on my blog and you can view it there directly.  It is now on Youtube too so you can see it there.  (Be sure to subscribe if you haven’t already subscribed so you don’t miss out on any videos).

If you are in Australia and would like this gorgeous Tasteful Touches Bundle or any of the other wonderful products you can grab it now in store -> HERE.  Or contact me and I will take care of it for you.

Have a great day,

Jenny

cards, Catalogues, Techniques, Videos

LIFE IS BEAUTIFUL – DOUBLE LAYER CARD + VIDEO!

This card is one we made in class recently.  I wanted to share this video with you today to show you how to create it.

It is with the sweet Life Is Beautiful Stamp set and is using the Double Layer Technique.  That is using 2 layers of card mat that you stamp on and layer together.  The card was inspired by one I saw on Pinterest using the Sheltering Tree set.  It didn’t have a watermark and I couldn’t tell you who created it.  I changed it up a bit for this card though.

I found that it helped using the Stamparatus to stamp this to be sure to get a crisp stamping. It made it easy to re-stamp if I needed to.

I have the video below to see how you can create this card.


The Life is Beautiful stamp set has such lovely sentiments.

In Australia? Grab it in my store now -> HERE.

Please use the Host Code: TAWWBMRC

Or contact me directly and I can take care of your order.  Thank you so much for ordering. 🙂

Happy Stamping,

Jenny

Catalogues, Stampin' Up!, Videos

GET & GO AND NEW MACHINES!

So many exciting things happening at the moment.  Phew! My head is in a spin.  I have to stop by though and tell you the first 2 very exciting news points!

  1. GET & GO for September … and
  2. The New Diecut and Emboss Machine is here!

GET & GO STARTER KIT!

When you join Stampin’ Up! in September you will get even more!

Receive 2 stamp sets (The Queen Anne’s Lace and the So Much Love stamp set valued at $65 for the two), a pack of Rhinestones AND card kits to create 16 cards.  They are ready for you to make cards to send to friends or get some friends together and create them with you.  (Instructions will be included).

What do you do?? Pay $169, Get $235 of products of your choice. You are well on your way then to stamp and share – and get your discount with every order later.

What are you waiting for?? Ask me for more information or go and check “9 reasons why you would want to join” on my page -> HERE

You are not signing up for life but after you join you can enjoy a minimum 20% discount on all your future purchases for as long as you stay.

Ready to join right now? Head straight to my website -> HERE

I love each and every one of my team members and I look forward to welcoming you to my JEN’s INK team.

THE STAMPIN’ CUT AND EMBOSS MACHINE IS HERE!

We have been waiting a while for this new machine to arrive.  The standard one is now available to order.  I have been giving it a run the last few weeks … and it is SO smooth to turn.  Check the Youtube video -> HERE.

How do you buy this machine??

There are 2 ways.

1) Full Price is $209.  Shipping on this would be $10.45.  You can order this through my store now -> HERE

2) Save $40!  As part of joining the Stampin’ Up! family you can order this in your Starter Kit.  Pay only $169 and no shipping (another saving).  Plus you choose up to $235 of products so you can add some dies or other products.

Email me at jghayward@yahoo.com if you have any questions or I can call you and we can chat.

Have a great day. 🙂

Jenny

cards, Tutorials, Videos

WHALE DONE FUN FOLD + VIDEO!

I have had lots of fun with the Whale Done stamp set lately.  It’s just so cute!

One of the cards I have made is a fun fold. I’m not really sure what the fold is called.  I have a few names – Perhaps a reverse Gatefold? A ‘W’ fold.  What would you call it?  Let me know in the comments.

Whale Done Fun Fold

Whale Done Fun Fold card _ closed

I have a video for you with the Measurements further below so don’t miss them.  I will post it here but it is also on my Youtube channel.

Hey, have you subscribed to my Youtube channel yet?? – Head over -> HERE and subscribe so you don’t miss out on any videos – and be sure to click on the bell to get the notifications. 🙂

WHALE DONE FUN FOLD

MEASUREMENTS

Granny Apple Green Base card –

21cm x 14.8cm  Score the card at 5.5cm, 8cm, 13cm and 15.5cm. 

8 1/2″ x 5 1/2″  Score the card at 1 5/8″, 3 1/4″, 5 1/4″, 6 7/8″.

Pretty Peacock card 10.8cm x 7cm   2 3/4″ x 4 1/4″

Whisper White card (outside piece) 10.4cm x 6.6cm    4″ x 2 1/2″

                                (inside piece)  14.4cm x 4.6cm   5 1/4″ x 1 3/4″ 

 Designer Series Paper 14.4cm x 5.1cm @2    5 1/4″ x 1 1/2″ 

Have fun creating the card.

If you are in Australia and need this Whale Done bundle to your collection.  Head -> HERE.  Or you can contact me directly.

Grab the cute Whale of A Time paper while you are at it.  

Whale Done stamp set and punch

Don’t forget.  Last days for Bonus Days.  

Happy Stamping,

Jenny

cards, Catalogues, Stampin' Up!, Videos

RAINBOW GLIMMER BLOSSOMS + A VIDEO!

I have been playing with the so sparkly Rainbow Glimmer Paper.  It is just gorgeous.  I love the colours in it.

I created a card using it with the Many Layered Blossoms Dies.  I wondered how the diecut flowers would turn out when using the Glimmer Paper.  Let me just show you. 

I really hope you can see the sparkle in these cards.  The photo just doesn’t do them justice.

I put together a video.  I share a few tips in the video so be sure to check it out.

Have you subscribed to my Youtube channel yet?  Be sure to do that too. Click -> HERE to go straight to Youtube.

The Blossoms in Bloom Bundle are one of my favourites from the catalogue.  They are so pretty.

You can find them in my store -> HERE.

You can see the gorgeous Rainbow Glimmer Paper -> HERE. 

In Australia?  If you don’t have a current demonstrator I would love to help you place your order either online or contact me to order directly for you.

Ordering Online? Please use the Host Code: 3MDURVQZ

Thanks for shopping with me.  Remember this month you receive a $9 Bonus Day Voucher with each $90 order.  

Happy Shopping,

Jenny

cards, Catalogues, Stampin' Up!, Videos

TASTEFUL TOUCHES BUNDLE CARD + FRIDAY FLICKS VIDEO!

I have a card for you today with the new Tasteful Touches Bundle. You can see this bundle on p124 of the 2020 Stampin’ Up! Annual Catalogue.

I even have a video as I start the Friday Flicks series. Watch out for these. Most Friday’s I will bring you a new video as I am able to. They will also be on my Youtube channel too.

Here is today’s card for you.

The colours are Old Olive and Petal Pink. I was thinking earlier how I never liked Petal Pink when it first came out. Now I am using it A LOT!

You can watch me make it in the video below. (If you receive the blog posts by email then head to my blog to view the video in the post).

Measurements for the card are:

Old Olive: 14.8cm x 21cm scored at 10.5cm (5 1/2” x 8 1/2” scored at 4 1/4”)

Petal Pink: 14.4cm x 10.1cm (5 3/8” x 4 1/8”)

Whisper White: 14cm x 9.7cm (5 1/4” x 4”)

***

Please drop a comment if you would like to know more.

Love the Tasteful Touches Bundle? Order it in my store now -> HERE

Please use the Host Code: YQQGTXQR

OR

Why not choose this as your Free bundle when you join my team. Or you could choose any of the other great bundles as your Free choice. It’s great value. 🙂

Find out more -> HERE or email me at jghayward@yahoo.com

Have a happy day,

Jenny

cards, Catalogues, Stampin' Up!, Videos

ORNATE GARDEN AND BEST DRESSED TOGETHER FOR A FAST ACTION CARD!

I was playing around just recently to put this card together.  I decided to film a video creating it to show the process I go through sometimes in creating a card. So not to bore you too much I sped the video up – with my lovely daughter’s technical skills. I have still much to learn in this area.  😉

When I make a card there is often a lot of deliberation and shifting things and uncertainty until it comes together.  I’m sure you find that too.

For this card I had a plan.  I always sketch the plan out first for a card.  I had already stamped and coloured the perfume bottle from the Dressed To Impress stamp set.  That was left over from another project.  I wanted to use some of the new Ornate Garden Suite that I had.

I have used the Ornate Borders Dies and the Ornate Layers Dies.  The paper is from the Dressed To Impress Designer Series Paper.  I also used the Ornate Floral 3D Embossing Folder.

So check the quick video out.

Do you like these super quick videos?  Would you like to see more of them?  I will see what my editor can do. 🙂

Here is the finished card for you.

Have a great day,

Jenny

The Ornate Garden Suite is now available in store now -> HERE. 


cards, Catalogues, Techniques, Videos

WATERCOLOURED PAINTED POPPIES!

I want to share this card with you today.  I made it at our team Shoebox Swap last week.  I will show you the other cards we made later but thought I would show you this one today as I recreated it and filmed a video to show you how it was made.  Hope you like it.

It’s using the Painted Poppies set and is a fun card – although a little messy.  This card was shared to me by Deborah in our Inky Fingers Team.


Just a quick overview of how to make the card but be sure to watch the video (and you can subscribe to my channel on Youtube to catch new updates.  It’s early days but I am working on it!) 🙂

  1. Use your clear block and press the ink pad on to the block to get some ink.  Use the Aquapainter to spread the ink around and make it a little watery.
  2. Press the Painted Poppies “splodge” stamp on to the clear block to pick up some ink.  Press it on to your card.  I used Very Vanilla.  You could use Thick Whisper White, Shimmery White or Watercolor card.  Repeat this 3 more times over the card in a “circular” pattern.  Use the Aquapainter to spread the ink and also add some more ink from the block if you need to.
  3. Allow to dry then stamp the flower outlines over the “splodges”.  Stamp the leaves in black over the card.
  4. Use the large “splatter” stamp and ink it up in Mossy Meadow ink.  Stamp off first on scrap paper then stamp over the larger leaves.  Use the smaller “splatter” to stamp over the smaller leaves.  Clean the stamp, ink up the stamp in Gray Granite then stamp off first on to scrap paper. Stamp on the small leaves.
  5. Diecut flower centres add them to the card and stamp the sentiment.  Adhere the card to the card base.

Hope you have some messy fun with this card.

Have a great day,

Jenny