I’m making up some little Thank You Cards to send out to my lovely customers when they order. For the cards recently I have been using some “left-over” bits.
This one I was playing around with the Sunflower Embossing Folder. I fussy cut one of the sunflowers. I was going to add it to a previous card and then it didn’t work out. But not to waste it. I add it to this little Mini Card.
I had a small scrap piece of the Florals in Bloom Paper and trimmed it down for the front of the card. The sentiment from Simply Said set was stamped on some Lemon Lolly card.
I will share some more of these Mini Thank You cards very soon.
Happy Crafting,
Jenny
If you need some crafting supplies I would love to help you get them. You can shop in my store -> HERE. OR Contact me directly.
I have been meaning to show some more cards with the Sunflower Embossing Folder. I shared a number of the cards in my recent video but it might be good to see them close up.
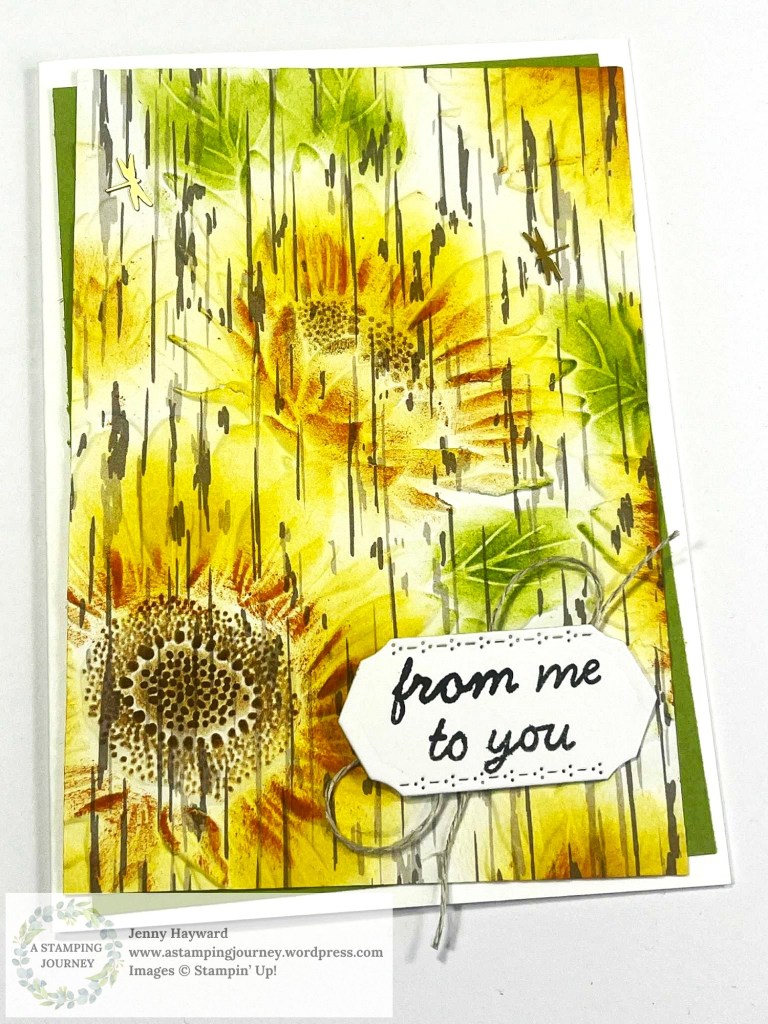
This one is more a distressed looking card.
I embossed with the folder on a piece of the “wood” look pattern from the Nests of Winter Paper pack. You could use any similar print.
Then you can add your colouring. This one I used the Ink Pads and Blending Brushes then assembled it on the card base with a piece of Old Olive card off-set a little. I think curling up the edges of the embossed piece might have given a more distressed look.
I have had so much fun with this Embossing Folder. I hope to get back to you again soon with some more card projects soon.
If you missed it you can see the video of 5+ Ways with the Sunflower Embossing Folder -> HERE.
Happy Crafting,
Jenny
If you need supplies for your cardmaking I would love to help you get them. You can head to my store -> HERE OR Contact me directly.
I have been playing a lot with the Sunflower 3D Embossing Folder and experimenting with the Two-Tone cardstock. So I put them together.
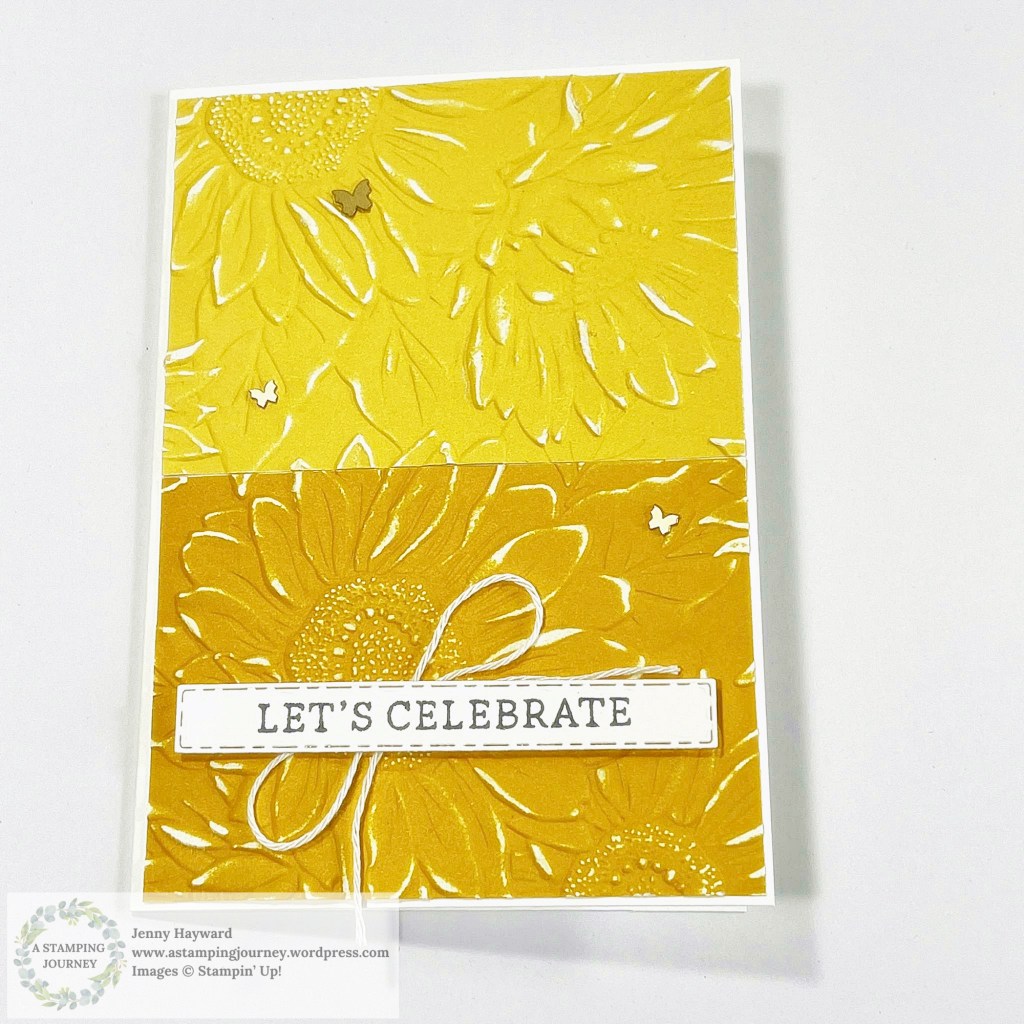
Here are 2 cards that I created. Some nice sunshine-y yellow to brighten your day.
For this one below I cut a piece of the Daffodil Delight Two-Tone Cardstock just slightly smaller than the front of the card. Then I cut the piece in half and flipped one half. I put the pieces together in the Embossing Folder and embossed them. I lightly sanded the embossed cardstock to reveal the white. I adhered them to the front of a white Card Base and added a simple sentiment.
We made this card recently in my local class playing with the Two-Tone Cardstock. If you are a Wollongong local I would love you to join in our classes each month. Contact me to find out more about them.
On this one below I cut a piece of the Two-Tone Daffodil Delight and embossed that. I lightly sanded the piece and added it to a white card Base. The sentiment heat embossed in white on black card and the Granny Apple Green leaf gives a ‘POP’ to the card.
You could do this in many other colours too. Hope you get to try it out.
Happy Crafting,
Jenny
If you are in Australia and “need” some supplies I would love to help you out. You can stop by my store -> HERE OR Contact me directly.
This week’s video I am featuring the Stampin’ Up! Sunflower Embossing Folder with more than 5 Different Techniques with this folder. If you don’t have this folder you can use another one with similar detail with flowers or leaves.
The Techniques I feature are:
Distressing
Colouring
Ink Wipe
Double Embossing
Plain Embossing
White Ink Swipe (This one is my favourite)
You can follow along with the video here below Or it is now on my Youtube Channel. Save it for later so you can come back and try them later. I would love to know what your favourite Technique is.
If you head to Youtube I would love it if you Subscribe to my Channel. I share videos each month with Fun Folds and Techniques.
Have a great day,
Jenny
If you are in Australia and need supplies I would love to help you get them. You can stop by my store -> HERE OR Contact me directly.
The details in the Sunflower 3D Embossing Folder is amazing! I have had a lot of fun with this folder lately. And I can’t wait to show you more with what I have created with it. But today I am sharing this one with you.
When you don’t feel like colouring the whole embossed piece you can diecut a circle or other shape and colour that small area. And don’t forget to colour with the blue around the flowers. It helps them POP more.
I embossed a piece of white card with the Sunflower Embossing Folder then I diecut a circle in another piece of white card. Then embossed the card. It is better to diecut the shape first. If you do that after you have embossed the card it can flatten the detail.
I used the Daubers and inks to colour this one. And used the Balmy Blue Light Stampin’ Blend for the surrounds.
I heat embossed the sentiment on black card. This helps it POP more too. The sentiment is from the Simply Said Stamp Set.
Have you tried the Sunflower Embossing Folder? It is a large one but there are lots of different Sunflower shapes over it and you can pick the area you like depending on your project.
The Embossing Folder measures 6″ x 8-1/2″ (15.2 x 21.6 cm). I said it was a large one!
Hope you get to create with it. I will bring you more with it soon.
We will be creating with this folder in class this week. If you are a Wollongong local I would love you to join in my classes. They are lots of fun and I can share lots of tips and and techniques that are sometimes a little tricky to share through a blog post.
Jenny
If you are in Australia and need supplies I would love to help you get them. If you have any questions don’t hesitate to ask too. I love helping my crafty friends.
You can head to my store -> HERE OR Contact me directly.