cards, Catalogues, Stampin' Up!

ECLECTIC HAPPY BIRTHDAY!

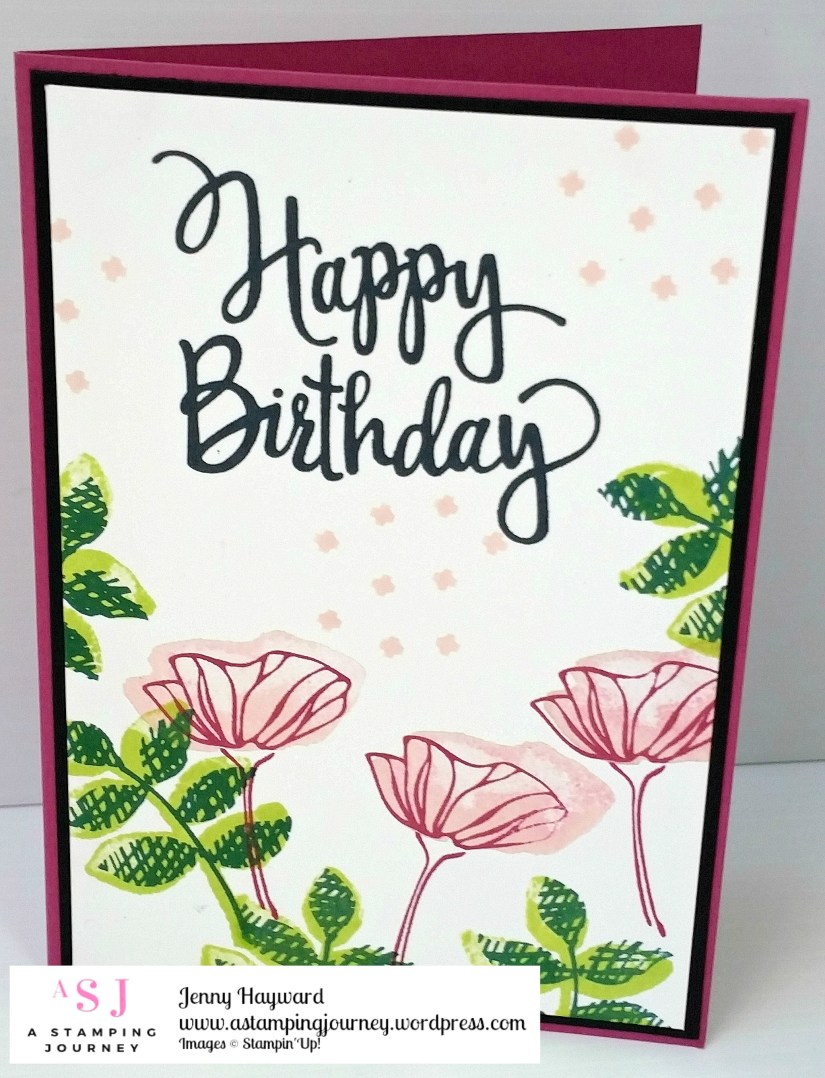
This card I am sharing today was my first play with the Oh! So Eclectic set last week.  I finally get to share it with you.

I have used Stylized Birthday with it for the sentiment.  I really don’t use this sentiment enough. It’s a great size without being overwhelming and I love the font.

I love this Oh So! Eclectic set too as you can stamp with the first stamp, overstamp it with the next one and if it is not lined up properly it doesn’t matter.  That’s the style.  🙂

The detailed flowers were first stamped with Berry Burst and then the solid image with Powder Pink.  Isn’t the washed out look nice?

The leaves are stamped with Lemon Lime Twist for the solid leaf and then Emerald Envy for the “hatched” leaf pattern.  I added some of the little “crossed” pattern in Powder Pink as a background filler.

It’s a very quick card to make a number of Birthday cards in a hurry.

Thanks for looking.  I will be back with some more cards with this set.

Jenny

3D projects, cards, Techniques, Tutorials

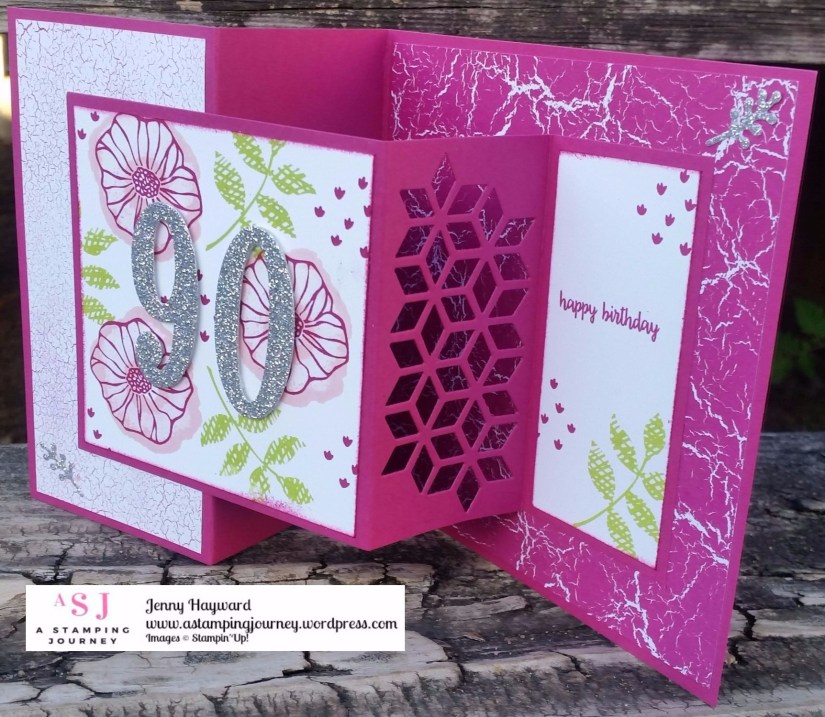
A 90TH OH SO ECLECTIC Z-FOLD!

It is my Mother-in-Law’s 90th birthday today.  We had a small family get together yesterday.  I thought I would show you the card I made for her.  She had put in a request for it to be in Berry Burst, her new favourite colour. The pressure was on as she expected a grand creation!   I hope it made the grade.  There were lots of Oohs! and WOW! so I think I might have made the grade. 🙂
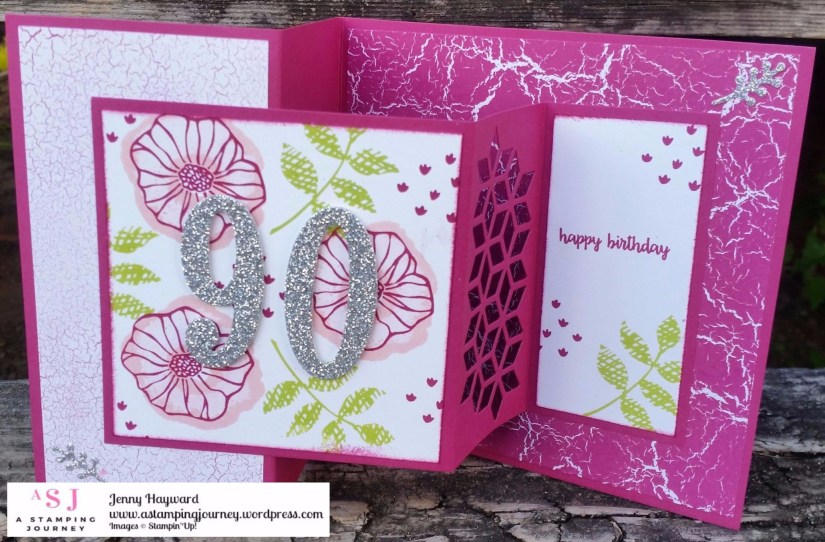
I think this is my new favourite stamp set – Oh! So Eclectic!  I have made quite a few creations with this recently which I will get to show you soon.  The sentiment is from Happy Birthday Gorgeous.

This card took me about 1/2 hour to create as I have had so much going on this week. It’s the fun Square Z-fold Cards which I have made a standard one recently.  (See that HERE).  I will share all the instructions further below.

I wasn’t sure if diecutting the diamond pattern in the side would make it too flimsy but I thought I would try it.  It worked fine and gives it a little more WOW!  The Designer Series Paper is the Color Theory Paper Stack.

SQUARE Z-FOLD CARD

Original Z-fold card is from Amanda Bates HERE.  I have slightly different measurements so thought I would share them with you.  These are in Metric.  If you are wanting Imperial measurements then rather than me converting them and ending up with lots of “sixteenth” measurements, then head to Amanda’s blog post in that link and follow those directions.

There are 2 pieces to this card.

1. Card Base:

Cut card 14.8cm x 29.7cm.  Score on the long side at 7.4cm and 14.8cm.

Designer Series Paper:

Front Panel: 7cm x 14.4cm             Back Panel:  14.4cm x 14.4cm 


2. Inner Card:

Cut card 10.5cm x 21cm.  Score on the long side at 5.2cm and 10.5cm.

Whisper White Card:

Front: 10.1cm x 10.1cm         Back: 4.8cm x 10.1cm


To Assemble your Card

1. Take your Inner Card piece and cut the Diamond pattern from the Eclectic Layers Thinlits set on your middle panel.

2. Stamp your Whisper White card pieces as you like.  I have used the Oh! So Eclectic stamp set.  Adhere these to the Inner Card piece.

3. Adhere your Designer Series Paper Pieces to the Card base.

4. Take your Inner card piece and on the front panel section (left hand end), place adhesive on ONLY HALF of the panel at the back.  Place that in position on your card base.  ** I used the Multipurpose Liquid Adhesive as this gives you a little time to wiggle the piece around in place if need be.

5. Then on the  Right Hand end of the Inner card piece, place adhesive at the back. Carefully fold up the card on the score lines as it should fold. Close the card and allow the piece to fall in to place where it should sit.  Once in position press firmly to adhere. 

Hope this is easy to follow.  Please ask if you have any further questions.

Thanks for stopping by,

Jenny

Catalogues, Stampin' Up!

MORE VALUE, MORE PRODUCTS, MORE CREATIVITY!

It’s the first of July which brings some exciting news from Stampin’ Up!.  Did you want more?? Check these out!

Bonus Days was HUGE last year so it’s back again.

For every $90 you spend during July. You get a Bonus Voucher of $9 to redeem in August on any of your orders that month.  How cool!  

I am sure there are a few items on your wish list to get to $90 – and the bonus is you get a discount next month! 🙂


———————————

I am always talking about the great value when you join Stampin’ Up!.  In July it is even better!

So what is it??  Pay $169 and get $235 of products, PLUS you will also receive an Essentials Gift Pack FREE which includes a stamp set from the upcoming Holiday Catalogue. This is an additional value of $121.  HOW AMAZING!!  Check it out!

ALL THIS FREE!!!

So for $169 you get $187 of FREE Products – and you don’t pay shipping on all that either!  

I would love to welcome you to my team whether you want to join for your own discount or build a business and share with others.  Ask me for more information or Head to my website HERE and join straight away.  You don’t have anything to lose but so much to gain.  If you want to know more then head to my Page HERE for ’10 Reasons why you would want to join’. 

SO imagine what you can create with all these extra Free products??  Lots more value there.  If you are still undecided then just go and do it, You can stop anytime.

Have fun,

Jenny


cards, Challenges, Stampin' Up!

GOING FOR THE ANGLE WITH DESIGNER SERIES PAPER! WHAT ARE YOUR THOUGHTS??

I have been trying to mix things up a bit with my creating lately.  I think I am a little bored with the standard layering of card – on mat – on base, which it seems I do a lot.  I saw an idea on Pinterest to angle the Designer Series Paper.  So I thought I would have a try at it. The card I CASED you can see HERE.

I will show you my card BUT I am not greatly happy with it.  I think the angle is not right, or maybe the Designer Series Paper is too busy, or maybe it’s just the colours??? So I am going to put it out here anyway to show you and maybe you can tell me what you think.  It’s good to show you too that sometimes we all struggle with putting our cards together. 🙂

Here is the card anyway.

I really think I need to angle the paper more.  I kept adding to the card to see if it would help but I had to stop.

I have used the Delightful Daisy DSP. I cut the Happy Birthday Thinlits twice, once in Daffodil Delight and another in Tranquil Tide and offset them slightly.  I thought it was plain so I stamped some flowers from the Happy Birthday Gorgeous set and then added some bling.  I also added a doily underneath the white card to see if that helps BUT …

I think I will try this idea again shortly.  I will show you later how I get on but I appreciate your comments.

Thanks for stopping by and visiting me for the good, the bad and the ugly.  🙂

Jenny

cards, Catalogues, Classes, Stampin' Up!

A BERRY HAPPY BIRTHDAY!

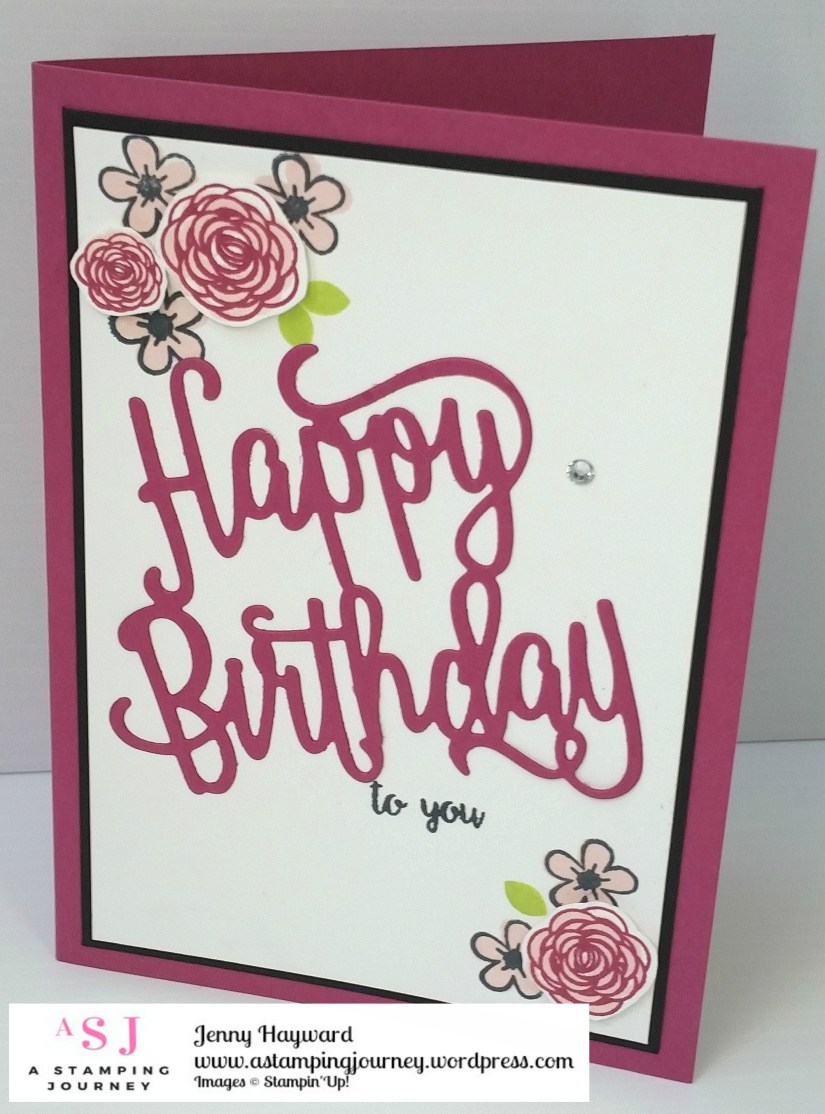
I thought I would show you one of the cards we made at Card Class last week.  I have been playing with the Happy Birthday Thinlits and Happy Birthday Gorgeous.

This card was CASED from Mary’s blog HERE.  I just didn’t add the DSP layer and kept it a little simpler.

I am loving the new Incolors.  I have used Berry Burst, Powder Pink and Lemon Lime Twist.

Thanks for visiting,

Jenny

3D projects, cards, Stampin' Up!, Workshops

MINI NOTE CARDS WITH HIGH TIDE!

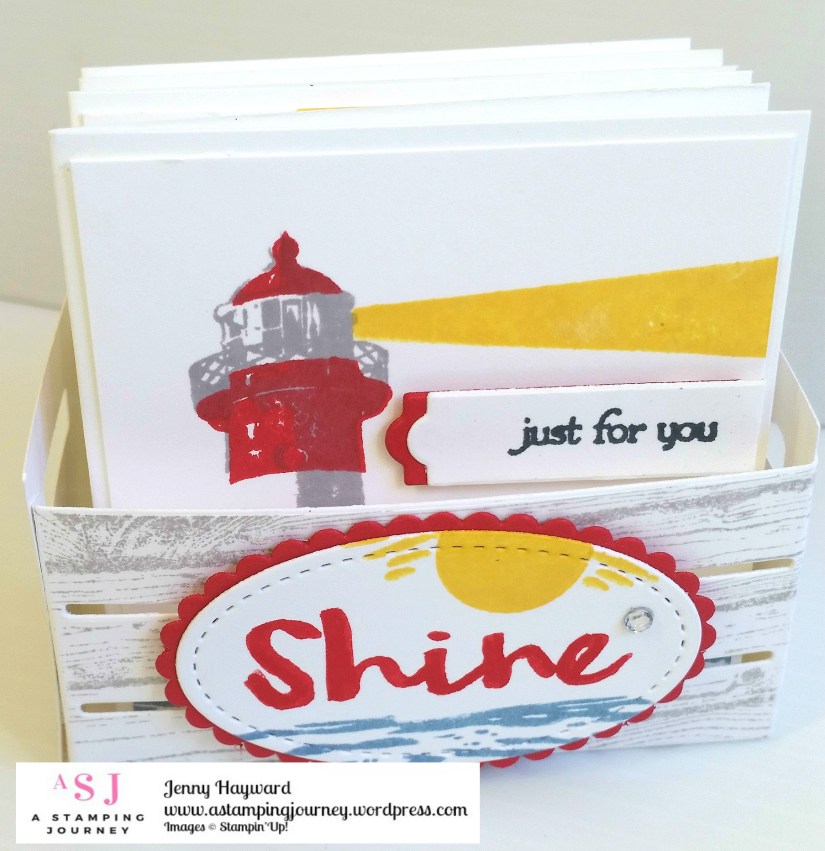
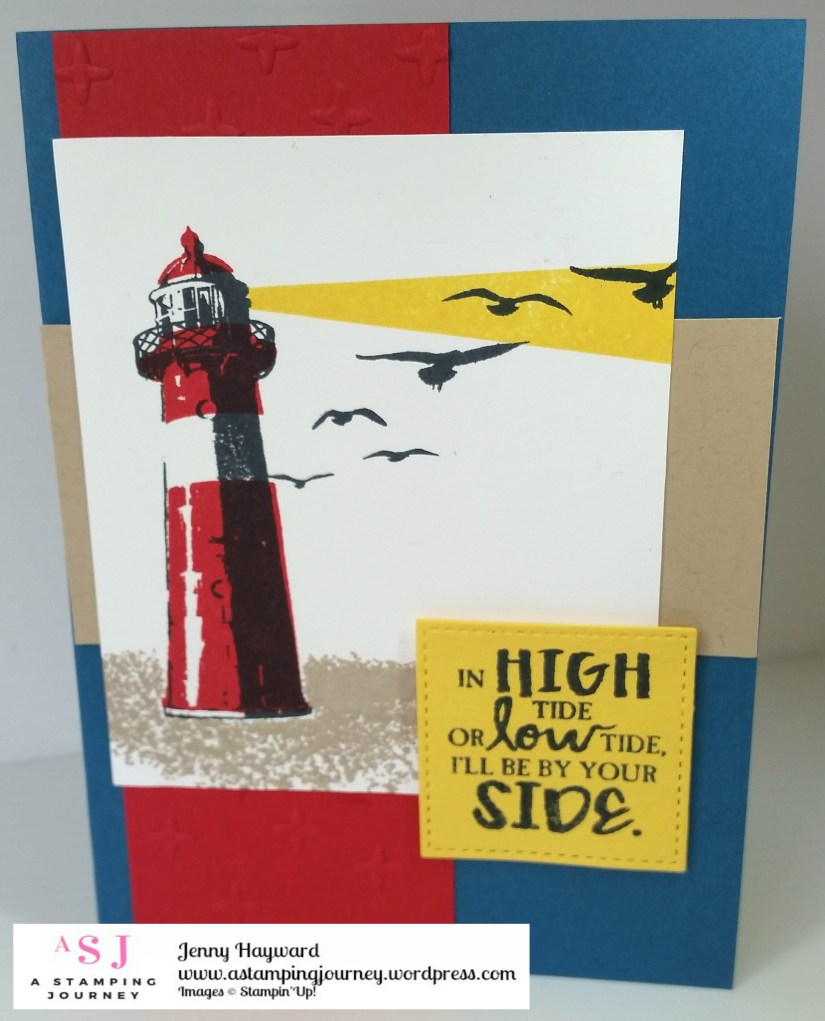
I held a workshop last week and the Host asked to use the High Tide set.  As a Thank You to her I made up a little notecard set and put them all together in a box made with the Wood Crate Framelits.  Here they are for you to see.

For the sentiment on the crate I went over the “shine” word with the markers and stamped on white card.  I did have to go over it a little with the markers when I stamped it to get a clear impression.

Here are the cards for you to see each one.  The cards measure 7.5cm x 7.5cm (3″x3″).  I made them all different.  The set is so versatile and so many combinations you can create.  I hadn’t played with this set that much until I made these.

This is the Make and Take card we made.  This is Cased from Julie Davison HERE.

I think I need to use this set  more.  I have so much to play with at the moment. Just not enough time 🙂

Thanks for visiting me.

Don’t forget if you don’t want to miss any projects  I am sharing on my blog here be sure to subscribe.  Click on the box in the right hand column to get my updates sent straight to your inbox.

I will be back again soon,

Jenny

3D projects, cards, Catalogues, Personal Ramblings, Stampin' Up!

A SPECIAL CARD IN A BOX!

I know we’re in the midst of the all the excitement with the new catalogue but I just have to share this project.  I know it is using retired products now but I thought you might still like to see it.

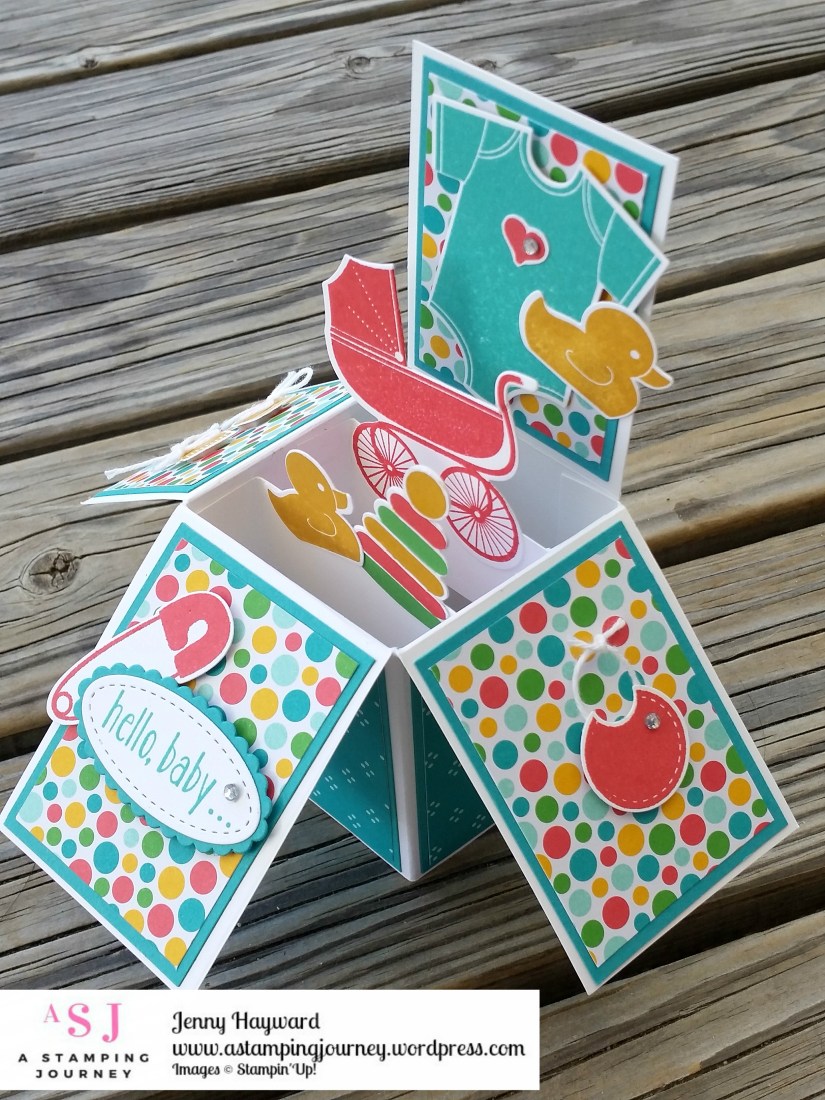
A couple of weeks ago a friend of mine asked me to make a special baby card for her new grandchild.  At that time she didn’t know what the gender was and requested it to be Teal Green in colour with splashes of red. I knew the family as well so I wanted it to be pretty special.  I recreated a card in a box that I made some time ago.  You can see that original project HERE. That card in a box has been repinned 3.3K times on Pinterest so I thought it might just be “good enough”. 🙂

The only paper I had to match the Bermuda Bay card was this retired paper.  I can’t even remember the name of it.  I just found a few scraps of it in my retired paper box. Lucky!!!

I dug out my ‘Something For Baby’ set too from my retired box.  That was lucky too as I don’t have any new baby stamps as yet.

So enough of the chatter.  Here it is.

I used Watermelon Wonder which matched. (Grabbed that out of the retired box too!).

I realised I didn’t get a photo of the left side flap.  That had little booties in Crushed Curry and I tied teeny, tiny bows in White Baker’s Twine.  The sentiment is from ‘Baby Bear’ – yes! That is current! I probably could have used that but Baby Bear was a bit big for the box.

Well it was very well received and I can tell you that baby Phoebe arrived safely last week.  She is very gorgeous and they were all delighted and fascinated in the card.  It can be displayed on the shelf in the nursery for some time to come.

Thanks for indulging me.  Back to current products in next post.

Jenny

Catalogues, Product Share, Stampin' Up!

LIKE THE NEW INCOLORS? WHY NOT GRAB A SHARE IN THE RIBBON!

Have you seen the gorgeous new Ribbon on page 198/199 of the catalogue?  So many different types and colours this year.
 
Yet a whole roll can be too much. Why not grab a share! 
 
I have a share running for the 2017 Incolor Finely Woven Ribbon.  I am loving the new colours and having matching ribbon for your projects just takes it to the next level.

For the price of a roll of ribbon you get 1.8m of each colour of Fresh Fig, Berry Burst, Powder Pink, Tranquil Tide and Lemon Lime Twist.  

Total is $12.85 includes Shipping and Handling. Free postage to send it on to you. Australian residents only.  

Why not grab a share – or 2.  Let me know ASAP.

Jenny
cards, Cards by Mail

CARD CLASS THIS WEEK!

Card Class is on this Friday for my local people BUT you can grab the class by mail too.

Here are the details.


Come along this Friday for Card Class.  We will make 3 very different cards that I think you will love.

Friday 23rd June at 10am or 7pm at my studio in East Corrimal.

Cost $15  BYO: adhesives and scissors.

Please RSVP by Wed. 21st.

Hope to see you then.

CAN’T MAKE IT??  Grab the class by Mail.

Cost: $15 + postage.  Australian residents only.

Includes all materials and instructions.  I can’t include stamped images but you can substitute the stamps or order them separately.

Contact me to order your Class by Mail Kit.

cards, Catalogues, Stampin' Up!

COLORFUL SEASONS CARD SET!

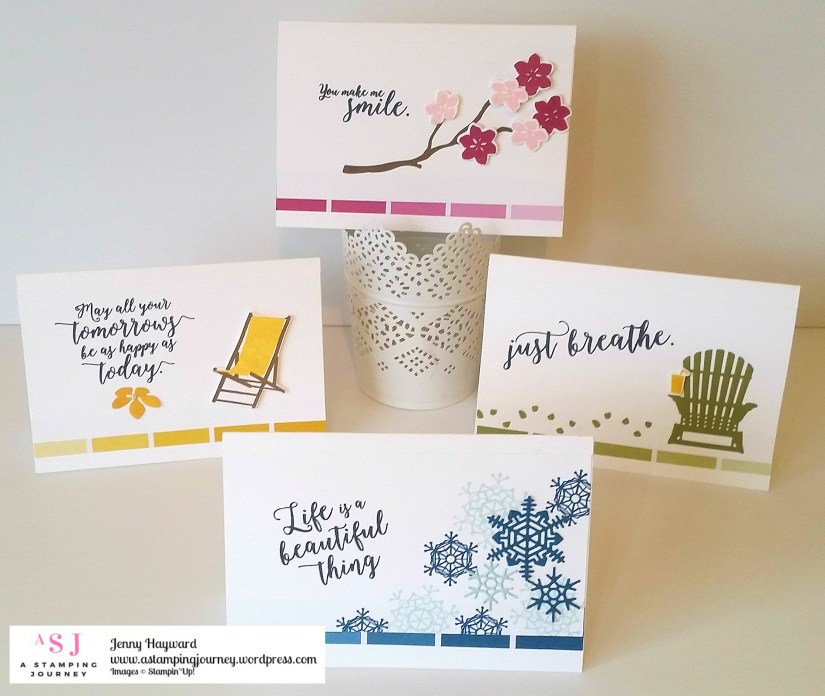
I made this set of cards a couple of weeks ago when I was playing around with the Colorful Seasons Bundle.  Now I can share them with you.

I made one in each colour of the Color Theory Paper Stack, so Dapper Denim, Old Olive, Crushed Curry and Berry Burst.  I was a little unsure how to use the Paint Strip pattern in the Paper Stack. I went with just a strip of it along the bottom edge of the white card mat before adhering to the Thick Whisper White card base. It’s a bit hard to tell but I cut the chair out in Crushed Curry and raised it up with Dimensionals and on the Dapper Denim one there are 2 die-cut snowflakes.

I love each of the sayings in this stamp set.  I think this card set would be nice to give to someone to encourage them along.  I should go and make a little card box to give them in.  Or, you can just give one to 4 different people to encourage them along.  I think there are many people who could use a little pick-me-up. 🙂

Thanks for looking,

Hope your weekend is going great.

Jenny