cards, Challenges, Stampin' Up!

DUSTING OFF THE DAHLIA FOR COLOUR INKSPIRATIONS CHALLENGE #04!

I had a little play yesterday.  I was supposed to do so many other things but really …….  🙂  I wanted to have a try at the new Colour challenge at Colour INKspirations.  I wasn’t sure if I would get a chance later this week and I missed last week.  This is the colours for this week.

colour-inkspiration04

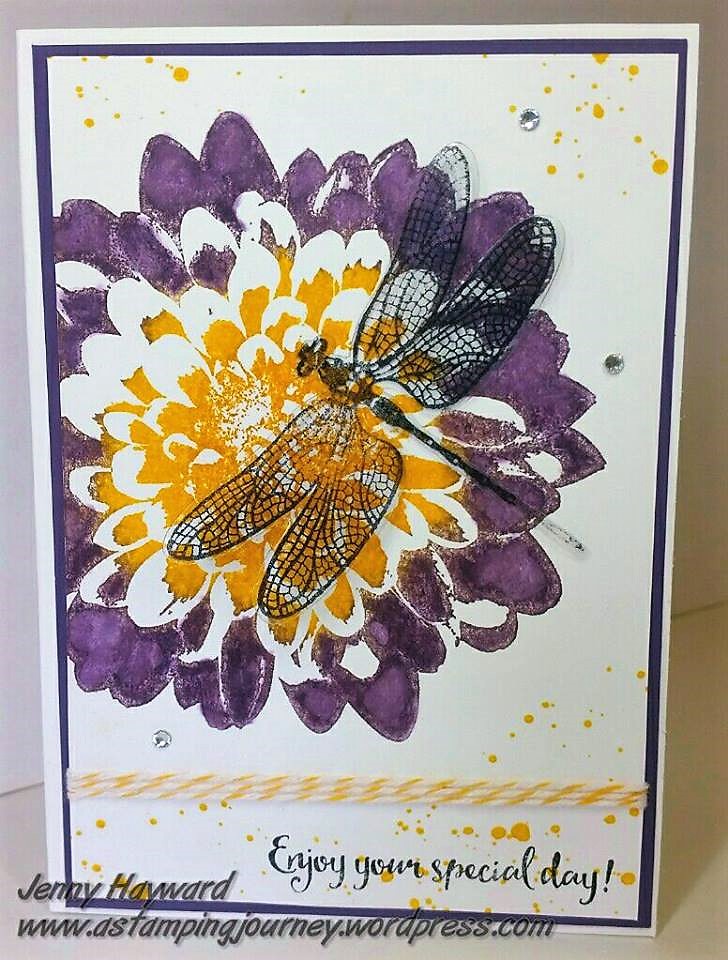
I had been contemplating these colours all weekend and really wasn’t sure what to do with them.  I haven’t used Elegant Eggplant in YEARS!!  It was one of my “go-to” colours a long time ago. So I dusted that off and then looked at my stamp shelf to see what I could use.  The Definitely Dahlia stamp was one I hadn’t used in ages either.   After looking through Pinterest for a few minutes.  (Really only a few minutes.  You have to control yourself there!).  I was inspired to create a multi coloured flower.  So here is my resulting card.  I am still not sure of it but here it is!
definitely-dahlia-for-colour-inkspirations-04

TO RECREATE THIS.

The Dahlia – For the ‘Definitely Dahlia’ stamp I first inked it with the Crushed Curry, then sponged some Delightful Dijon in the centre.  The idea then was to sponge the Elegant Eggplant on the edges.  When I first did this and stamped the Dahlia the purple went a brown colour.  That was not what I wanted!  So after cleaning the stamp I repeated with the Crushed Curry and Delightful Dijon, then with a tissue I wiped off some of the Crushed Curry on the edges.  Then with a sponge I went over the edges with the Elegant Eggplant.

After stamping it, some of the colour was a bit faint to what I would have liked (it’s an old inkpad) so I went over the image with the Elegant Eggplant Marker to touch it up.  I then went over it with the Aquapainter just to smooth it over.

The Dragonfly – The patterned Dragonfly from ‘Dragonfly Dreams’ set was stamped with Black Stazon onto clear Acetate and then cut using the  Detailed Dragonfly Thinlits.  I adhered that on to the card with Glue Dots.

To Finish –  Stamp over some “dots” from ‘Gorgeous Grunge’ with the Crushed Curry.  I tied around some Crushed Curry Baker’s Twine a few times around the card.  The sentiment is from the ‘Dragonfly Dreams’ set.  The card is layered on to the Elegant Eggplant card mat and then on to a Thick Whisper White card base.  Always bling to finish with the Rhinestones right. 🙂

So what are your thoughts?? Certainly not as good as some of the stunning cards entered for this challenge BUT you just have to have a go.  Check out the amazing cards and you can join in yourself if you like.  Head over HERE to join on Facebook.

Get your Dragonfly Dreams Bundle or the Definitely Dahlia at my store HERE now. 

Jenny
cards, Catalogues, Techniques

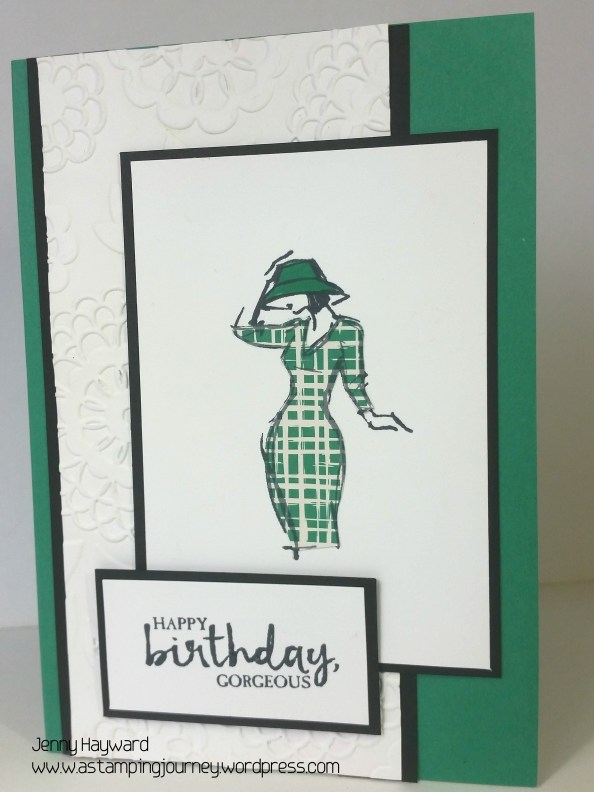
EMERALD ENVY PAPER PIECING FOR BEAUTIFUL YOU LADY!

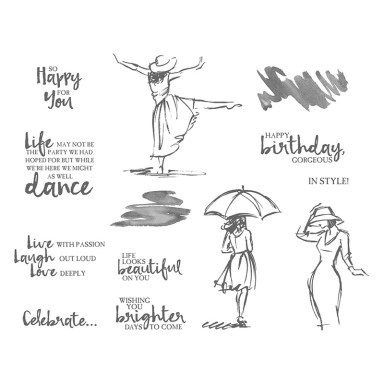
If you don’t like colouring too much here is a quick way to add colour. Try Paper Piecing. You can use this idea for any outline stamps.  I have done this with the Beautiful You set.

emerald-envy-lady

I CASED this card from a Demonstrator friend on a group I am on.

For the Paper Piecing technique:

Stamp your image in black onto Whisper White card.  Ink it and stamp it again onto patterned paper.  For this one I used the Emerald Envy pattern in the Playful Palette DSP stack.  Then cut your image from the patterned paper one cutting just on the outside of the black line.  Adhere this image onto your other stamped image on the White card.

To assemble the card:

On a piece of Whisper White card emboss it with the Lovely Lace Embossing Folder. Layer that on to some black card. (TIP: If you like to save on your cardstock you can just add strips of black behind the white.  That’s what I did!!). 😉  Adhere this to your Emerald Envy Card base.

Mat the stamped piece with the lady on to black card and adhere on to your card base. Stamp your sentiment onto a White card rectangle and mat this onto a black card rectangle.

There are so many ways you can use the Beautiful You set.  I hope I have inspired you.  I am sure there will be lots more to share with you later.  Next week I will be focusing on the ‘Lift Me Up’ Bundle so stop by.

Have a great weekend.  I have some serious house sorting to do.  The whole house is getting decluttered, including my craft room and studio.  So if I don’t return next week send out the search and rescue teams. 🙂

Jenny

beautiful-you

Order your ‘Beautiful You’ set in my store HERE.  for Clear Mount $49 AUS Wood mount $68. Don’t forget with Sale-A-Bration, pick up your free choice with your $90 order.

cards, Catalogues, Techniques, Tutorials

CHANGING THE DRESS LINE OF THE BEAUTIFUL YOU LADY!

I have been sharing lots of projects with the ‘Beautiful You’ set this past week.  When I first started seeing ideas with this set on Pinterest I noticed that some of the dresses were different.  I was curious and went investigating further. I thought I would share with you today how it can be done so you can create more with this set.

masking-dress-for-beautiful-you

I have put together a tutorial for you.

CHANGING THE DRESS LINE.

1. You can do either of two things. a) draw over the top part of the lady with the Black Stampin’ Write Marker or what I have done b) Place the stamp on the table top facing up. Mask the skirt area with a Post It note or piece of scrap paper. Leaving the stamp on the table ink up the stamp with the Black StazOn inkpad.  I have used StazOn as you will be watercolouring the image.

2. Stamp the image onto Thick Whisper White, Shimmery White card or Watercolor Paper as you will be watercolouring it.

3. With the Black Marker draw a skirt line that you would like.  If you prefer use a pencil and then go back over it with the Marker. You could create any style, short or long.

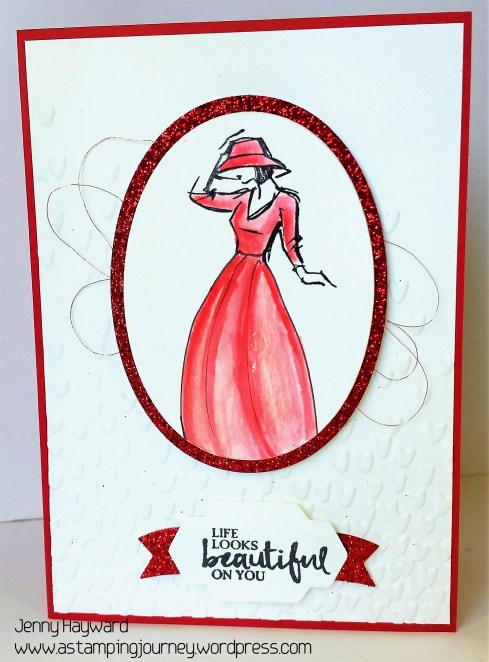
4. To Watercolour this I used the Real Red Watercolor Pencil, colour along the lines of the dress and the hat.  Using the Aquapainter blend over the colour.  You can build up the colour as you desire by going over the area but allow it to dry a little before adding more colour.

Assemble your card as you like.

beautiful-you_red-lady

To create this card I cut the image with the Layering Oval Framelits cutting a larger one with the Red Glimmer Paper. The sentiment was stamped in black and cut with a Framelit from the Stylish Stems.  Using the Duet Banner Punch I cut a banner from the Red Glimmer Paper and cut it down in the centre to adhere behind the sentiment.

To finish I looped around some Copper Thread and raised that off some Whisper White mat which had been embossed with the Falling Petals Embossing Folder.  Base card is Real Red.

Hope that was helpful for you.  You can use this idea to change different stamps. Go and experiment.

Jenny

Catalogues, Sale-A-Bration, Stampin' Up!

NEW SALE-A-BRATION OFFERINGS FOR YOU!

new-release-sab-copy

Have you loved Sale-A-Bration so far?  Getting those free products when you place your order.  That’s always exciting to get something free isn’t it??

Well today Stampin’ Up! have released 3 new products for you to choose from.  As if it wasn’t hard enough!

Here they are for you.

Reverse Words

reverse-words

Make a Medallion

medallion

Glimmer Paper

glimmer-paper

I just love the new sparkly Glimmer Paper. The Glimmer Paper comes in Bermuda Bay, Mint Macaron and Sweet Sugarplum.  There are 12 6″x6″ pieces.  (4 of each colour).  Just gorgeous!  Add that to your list. 🙂

Just a reminder as to how you can get these – for Free mind you!

Place a minimum $90 order and you can pick one of these or any other of the choices.  It’s really that easy.  And it is so easy to get to $90!

You can order directly from me by emailing me or Shop at my Online Store HERE. Please use the Host Code this week: S7PNC7CT

Thanks for shopping with me.

Have a great day.

Jenny


3D projects, cards, Stampin' Up!, Tutorials

BEAUTIFUL YOU MATCHBOX AND MINI CARDS!

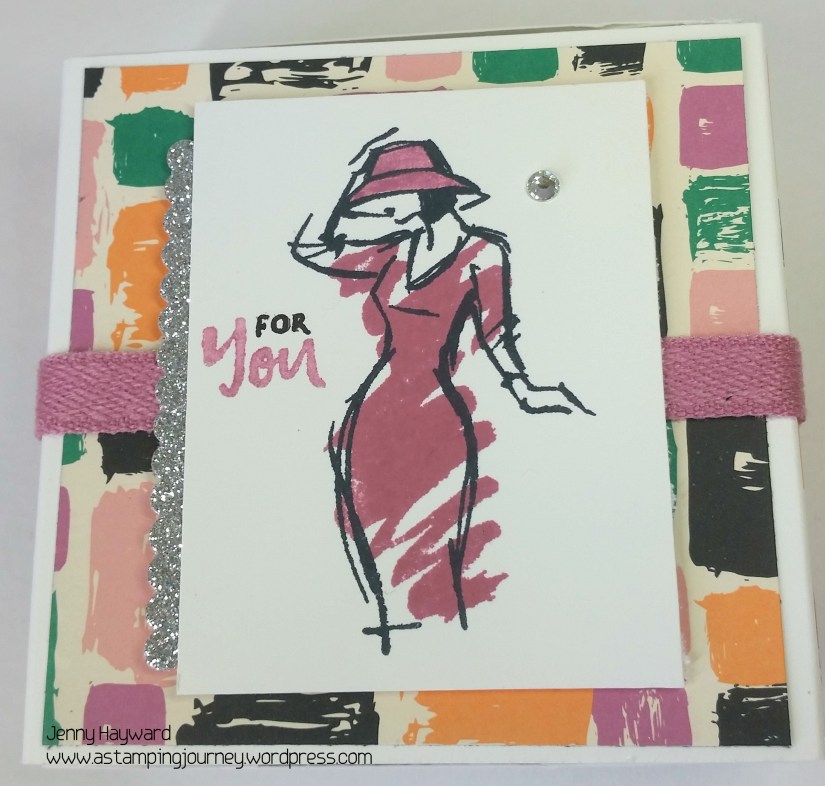
Continuing on my ‘Beautiful You’ projects this week. I have a cute little Matchbox and mini cards to show you. The sentiments in this set can make great “pick me up” type cards to give to a friend. I have the tutorial for you below so you can make your own.

matchbox-box

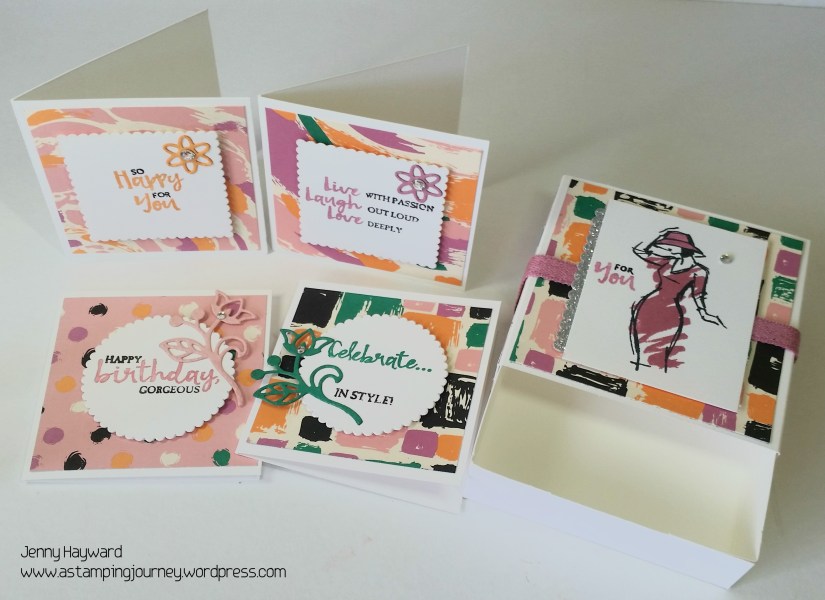
A little drawer slides out to hold the Mini cards. I am sure you could fill it with some chocolates or maybe teabags even.

matchbox-_-open

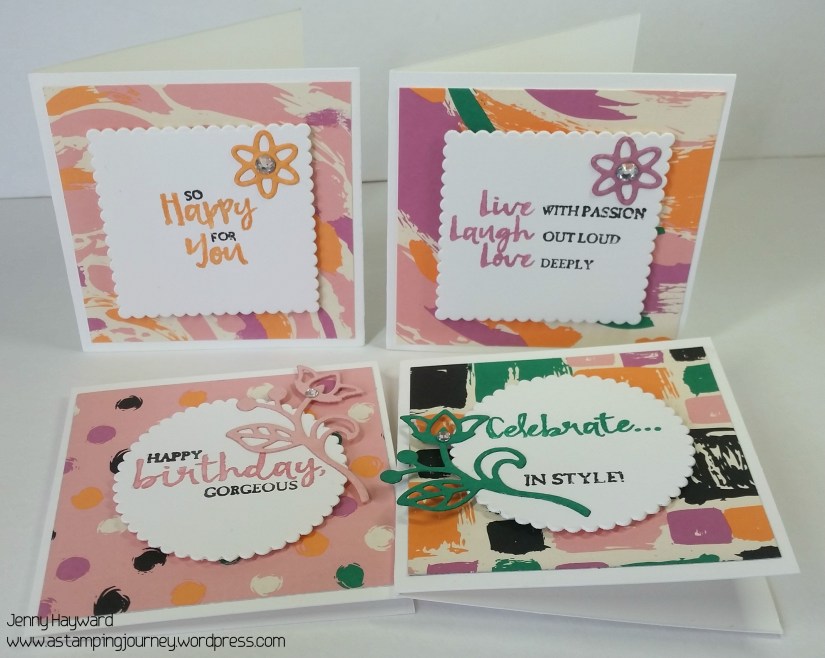
There are 4 mini cards.

box-and-mini-cards

mini-cards

I have used the ‘Playful Pallette’ DSP pack. This is a great way to use up those little scraps of patterned paper you have around. I inked the sentiments with the Markers. They were then cut out with the Layering Squares and Layering Circles Framelits. To decorate my mini cards I used the ‘Flourish Thinlits’

Do you want to make your own?  Here is the tutorial in Metric and Imperial. Give it a try.

MATCHBOX MINI CARD BOX

METRIC

BOX

Cut cardstock 13.5 cm x 13.5cm.  Score at 2.5cm and 11cm.  Turn 90’ and score at 2.5cm and 11cm.

Cut up on tabs on opposite sides and assemble to form a box.

BOX SLEEVE

Cut card 24.5cm x 8.6cm.  Score on the long side at 5.6cm, 8.2cm 17cm and 19.6cm. Fold on score lines.  Place adhesive on the inside of one end.  Wrap around box and seal the ends to fit.

Decorate as you like.

IMPERIAL (you might like to check these measurements in scrap card first!).

BOX

Cut cardstock 5 3/8” x 5 3/8”.  Score at 1” and 4 ¾”. Turn 90’ and score at 1” and 4 ¾”.

Cut up on tabs on opposite sides and assemble to form a box.

BOX SLEEVE

Cut card 3 ½” x 9 ¾”.  Score on the long side at 2 ¼”, 3 3/8”, 6 7/8” and 7 7/8”. Fold on score lines. Place adhesive on the inside of one end.  Wrap around box and seal the ends to fit.

Decorate as you like.

Thanks for looking

Jenny

cards, Catalogues, Stampin' Up!

TRIO OF LADIES!

Another card for you today with ‘Beautiful You’.  For this one we have 3 colourful ladies.

trio-of-ladies

I stamped 3 ladies in black on to Whisper White card and cut them out with one of the Square Stitched Shapes Framelits.  The great thing with this stamp set is that if you don’t feel like colouring them they have the “scribbly” image that you can stamp over them.  So easy! I coloured their hats with the matching markers so in Melon Mambo, Bermuda Bay and Pumpkin Pie.

On a White card mat I stamped the sentiment. This is from ‘Work of Art’. This card piece was then embossed with the Stars Framelits. I placed the card in the folder to just above the sentiment though when I embossed it so it is not embossed over the sentiment. This was then adhered to a Bermuda Bay card base.  The 3 ladies were raised up off the card with Dimensionals. Each lady needed some bling with a Rhinestone to finish. 🙂

Hope you like my ladies?

Have you got this lovely Beautiful You set yet? It is “so beautiful” 😉  There are some really lovely words in the set.  Great for little “pick me up” cards. You can see and order it in my store HERE. 

Wood Mount is $68 AUS  Clear Mount $48 AUS

beautiful-you

Don’t forget with Sale-A-Bration if you order over $90 you can pick a Free item from the Sale-A-Bration choices. 

Jenny

cards, Catalogues, Classes, Stampin' Up!

BEAUTIFUL YOU IN THE MOONLIGHT!

Last Saturday I held a ‘Beautiful You’ class showing lots of techniques that could be used with the very versatile set.  It was very well received I think.  I was busy last week playing a lot with this set to create some samples.  I thought I would share some of the projects this week.

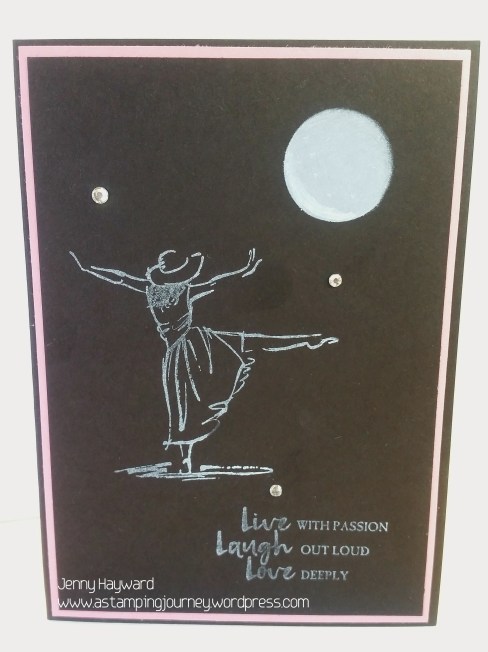
I was inspired by a card I saw on Pinterest stamping it on black card so I really wanted to give it a go.  Here is the card.

beautiful-you-moonlight

It is stamped with the White Craft Ink Pad.  I thought I might have had to heat emboss it in White but I think it turned out crisp enough.  For the moon, I punched out a circle from a Post It Note with the 2″ circle punch and laid the negative on the card in position and sponged ink over the punched circle. I then added a few highlights with the Blender Pen and ink.

The black card was adhered to Sweet Sugarplum and then to a Black card base.  I added some Rhinestones to finish it off.  I thought I would just keep it simple.

I will be back with some more cards with this great set later in the week.

Jenny x

3D projects, cards, Stampin' Up!

SEALED WITH LOVE FOR VALENTINE’S DAY!

It’s Valentine’s Day!  In Australia we don’t celebrate Valentine’s Day in a big way.  I gave my family a chocolate treat each but they don’t care for the wrapping really!!!  So I don’t go all out.  I have had these little note cards to show you for a while though so what better day than today. 🙂

This is another project we made at Stampin’ Up! Onstage last November.  I hadn’t finished them at the time so I only just got them together before Christmas.

sealed-with-love-notes

This is using the Sealed with Love Bundle on p 14-15 of the Occasions Catalogue.  I thought they were cute in that they used the Sending Love Designer Series Paper for the card bases.  They are tiny about 7cm square (around 3″). I just haven’t got them handy to check right now but you could make them any size. Cut a strip of the paper and fold it in half.  Then add a piece of white card inside for your message. I will have to remember this idea for other little notecards.

They use the Love Notes Framelits Dies to embellish them with the heart, the arrow and the mini envelope. The envelope is cut from vellum, the wooden embellishment is from the Sending Love Embellishment pack and some twine and Rhinestones finish it off.

Sweet little notes to send to anyone to let them know they are loved.  I think we all need that not just on Valentine’s Day.  I hope you are feeling loved. xx

you-are-loved

Jenny

cards, Catalogues, Classes, Stampin' Up!

A DIFFERENT WAY WITH FALLING PETALS!

Another project from my Catalogue Review last week.  I thought this needed it’s own post. 🙂

At my classes I show the cards and give everyone the same materials but I am happy for them to use their own creativity.  I always learn so much when they do too.  I thought I would share this idea with you.  It’s pretty clever – and a pretty card too.

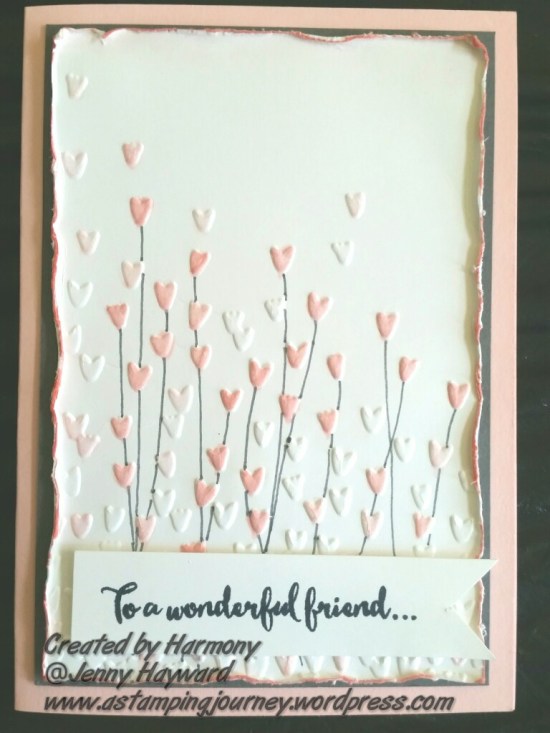
This was made by my lovely friend Harmony who is very creative.  I love watching her work.  This is what she created with some of the card she was given – and she used the Falling Petals Embossing in a totally different way.  Check it out.

2017-02-09-08-01-40_wm

Harmony embossed the white card with the Embossing Folder.  Then with the fine tip end of the Black Marker she drew lines down from some of the petals.  I think they look like hearts a lot of them.  This created little heart petals.  Then with the Aquapainter (I didn’t have the blender pen available at the time) she very lightly coloured some of the petals with the Blushing Bride ink.  It is regular Whisper White card so you don’t want to press too heavily with the colouring using the Aquapainter.  Then she sponged the edge of the card and distressed it slightly. The sentiment is from Dragonfly Dreams.

Isn’t this so pretty?  What a great idea!  I have to try this myself sometime.  I forgot to take a photo of the other card she made.  Completely different again!

Thanks for visiting.  If you want to give her some comment love I will be sure to pass it on. 🙂

Jenny

3D projects, cards, Catalogues, Classes, Stampin' Up!

OCCASIONS AND SALE-A-BRATION SAMPLER!

Last post I shared some of the creative fun from my Catalogue Reviews held last weekend. I forgot to share one more project.  So I guess this gets it’s own little post.

With all the busyness leading up to last weekend with creating I was starting to run out of time.  So I decided to use this frame I had sitting around for a while and make little samplers of some of the products.  It is only simple but was a good way of showing them. Here it is for you to see.

occasions-and-sab-2017-sampler

I included a sample of some of the papers and the dies and then embellished them. It worked well I think???  The pieces are adhered in each box with glue dots so I can easily remove them and use them on cards.  Then I can replace them with products from later catalogues.  It’s a simple way of showing off some of the products.

What do you think??

Thanks for visiting. I have lots of samples to share that I made for my launch so I will get to share those soon.

For those on the East Coast of Australia, keep cool.  The weather is heat wave conditions at the moment.  I have lost count of how many days in a row it has been now.  It’s a bit hard to be creative in this heat I will say.

Jenny