Stampin' Up!, Weekly Deals

STAMPIN’ UP! UPDATES!!

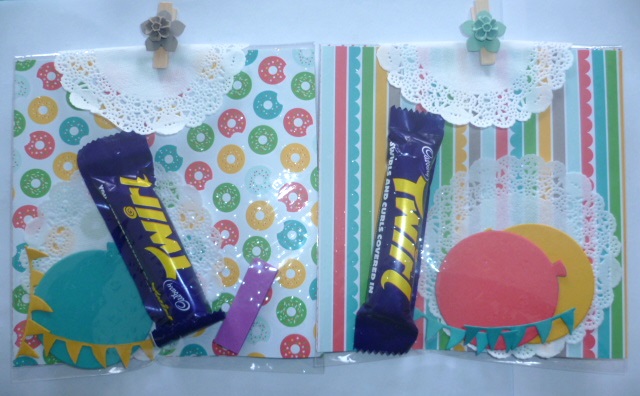
Yes, I know I was going to show you my Make and Takes from my Launch in the next post.  Sorry about that.  Just a little commercial break here.  🙂  I have some important Stampin’ Up! Updates for you.

This week’s Weekly Deals!  You will love these.  Great punches and what about those gorgeous coloured inkpads??? Both favourite colours of mine and for $8.63! ‘And Many More’ Stamp set is very versatile and $35.25.

Email me or add a comment if you would like to order any of these great specials or for any Stampin’ Up! products for that matter and I will get back to you ASAP.

Jun 17

—————————————————–

Join in June

Less than 2 weeks to go! If your Wish List from the new Catalogue is HUGE.  Yesss! Then why not Join the Stampin’ Up! family.  What’s the deal?? Pay $169, Get $235 of Products PLUS 2 (Yes 2) additional stamp sets for FREE in June!!!!!  What amazing value is this!! I have already welcomed a couple of new people to my team this month and they are excited let me tell you.  2 extra free stamp sets to any value in the already fantastic value Starter Kit!  

So if you have been thinking (and thinking some more) then get on to it now.  I would love to welcome you to my fast growing little team.  You can be from anywhere in Australia.  Find out more information on my Blog page HERE.  You can join anytime from my Business page HERE.  If you still have some questions then email me and I will get back to you.

————————————————–

Speaking of my Website, have you visited there lately?? It has just had a fresh overhaul and is so much easier to find information.  Stop on by.  You can find some cute new projects, and all my class details Plus you can view the catalogues and Shop 24/7.

Visit by website HERE.

DBWS new screen

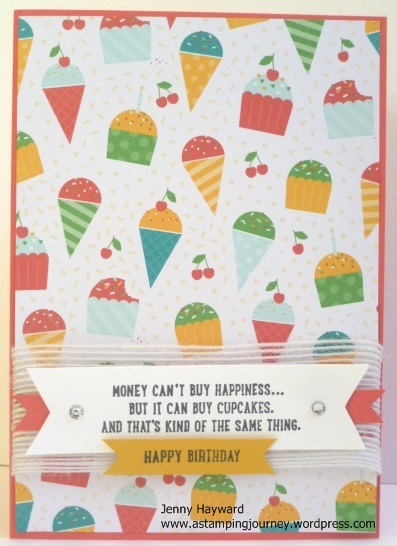
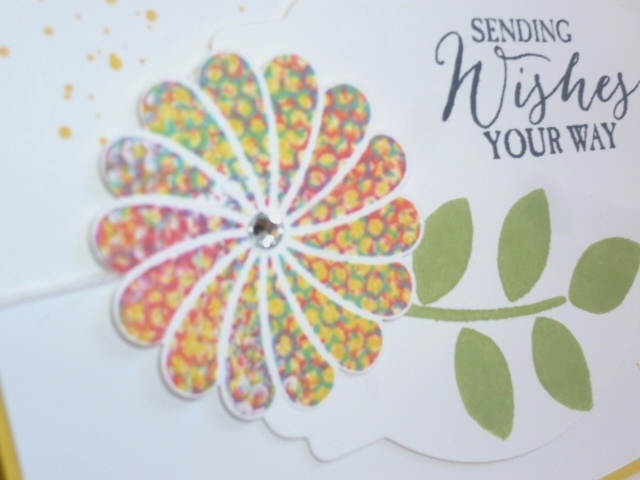
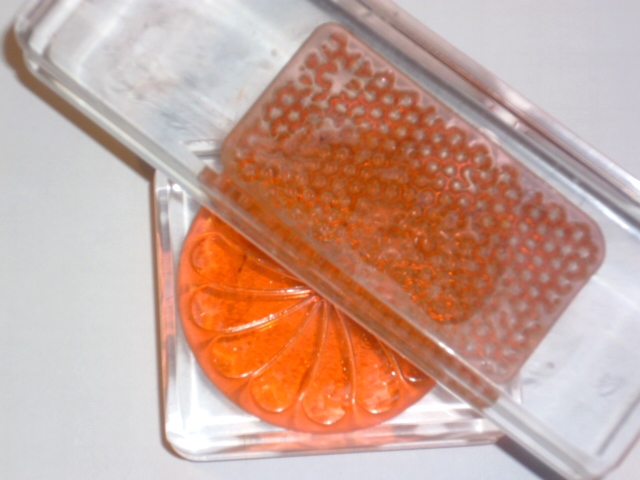
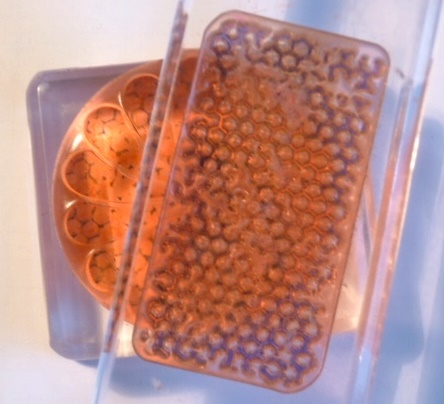
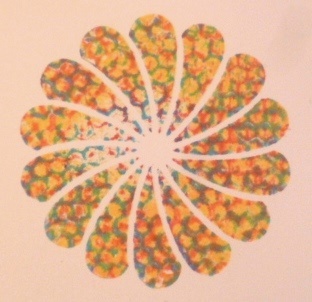
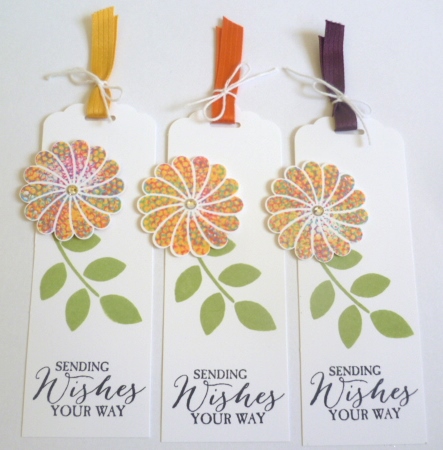
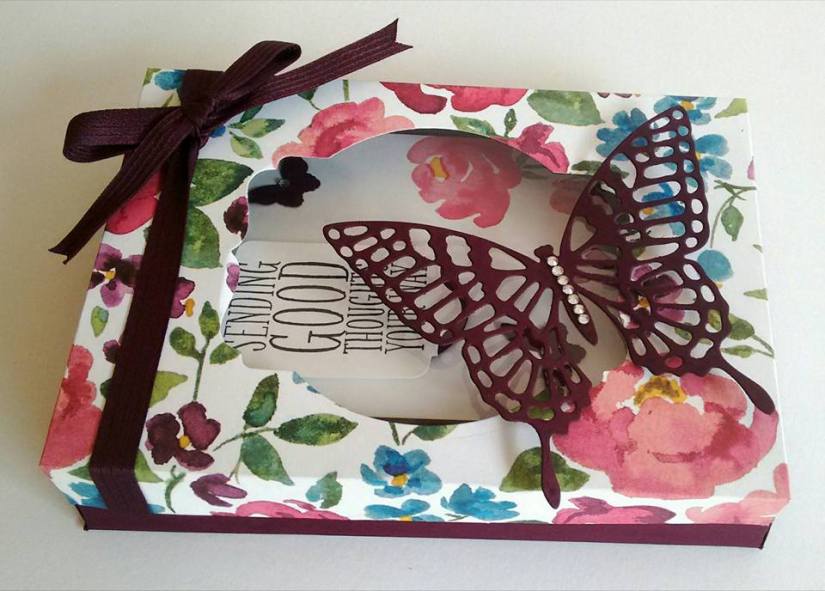
Here is one sweet new project that has been added.  This is with a new set ‘Birthday Blossoms’. Imagine this in other colour combinations.

Gallery_BeautifulBday_DBWS_6.2015_NA_SP_EU

—————————————————————————

Thanks for stopping by.  We will be back with our regular programming next post.   Have a super, wonderful day where you are.  🙂

Classes, Stampin' Up!, Uncategorized

CATALOGUE LAUNCH REVIEW!

I thought I would share some of the things from my launch on the weekend.  It was such a fun time and I am sorry if you couldn’t make it. 🙂

Firstly, I have to show you my butterfly wall.  It is a bit hard to photograph.  The lighting is not the best.  It is a bit overcast today when I took these photos.

P1160845

I will show you some close-ups. I have used the Butterflies Thinlets and the cute new Incolor Blossom Accents.

P1160830

P1160832

P1160848

These are some of the treat bags I made for my lovely guests.  Sorry I didn’t take photos of all the flower colours.  These were last minute things as my order didn’t arrive until the 11th hour. The glue was still drying when the first guests arrived 🙂

I used the large Cello bags. I added some of the sheets from the ‘Cherry on Top’ DSP stacks and added a doily.  I cut some Balloons and banners with the Balloon Framelits and added a chocolate treat and some post-it notes.

P1160822

It is hard to tell in the photo but I ran the bag through the Big Shot with the Boho Chic Embossing Folder.

P1160866

Here is a close-up of the pegs for the bags.  I punched out a flower with the Petite Petals Punch and adhered a flower onto it with the Multipurpose Liquid Glue.  This was then adhered to a little peg.  It was a simple, cute idea.  I got the idea from a lovely friend of mine 🙂

P1160877

I thought I would share the Colour Comparison chart for the new Incolors.  It’s a good way to see how they fit in with other current colours.  (Once again sorry about the lighting!  I really have to do something about this). 🙂

P1160833

Next post I will show you the Make and Takes we did.  I think that is enough photos for one day. 🙂

Jenny x

cards, Product Share, Stampin' Up!

2015 STAMPIN’ UP! CATALOGUE PRODUCT SHARES!

Do you like some of that lovely ribbon in that catalogue??  Of course, it is so lush.  But I know it can be hard to get through a whole roll of that ribbon.  So I have put together a Product Share so you can enjoy a taster.  Here are the details.  Message/comment to take part.  This is for only Australian residents.

RIBBON  p158-159

Dotted Lace Trim –  This is such gorgeous soft lace.

1.15m of each colour: Cucumber Crush, Delightful Dijon, Mint Macaron, Tip Top Taupe, Watermelon Wonder                                                         $13.80

lace ribbon

Metallic Thread – great for those little swirls to embellish your projects.

11.4 metres each of Silver and Gold Metallic Thread               $2.75

metallic thread

Thick Baker’s Twine

3.4 metres of each colour: Bermuda Bay, Calypso Coral, Cherry Cobbler, Smoky Slate, Very Vanilla.                                                                              $8.20

thick baker's twine


TOTAL TO JOIN ALL 3                                                              $24.75

JOIN ALL 3 AND SAVE 10%                              PAY ONLY $22.40


DESIGNER SERIES PAPER (DSP)  p142-143

12 – 6”x6” squares of each of the following DSP (total of 60 squares)

Everyday Chic, Bohemian, English Garden,  Merry Moments, Timeless Elegance.                                                                                                                 $25.00

bohemian                        timeless elegance


So, let me know ASAP to take part 🙂

cards

SPRINKLES AND CHERRY ON TOP!

Don’t you love that title!!! What else can I say really.  I have had some fun making up some cute projects with the ‘Sprinkles of Life’ stamp set and the ‘Cherry on Top’ Paper Stack.  These are the first ones I made the other day and thought I would share them with you.

This first one I just layered some of the ‘Cherry on Top’ DSP onto a Watermelon Wonder Card base.  The images are so cute you really don’t need much more.  Although I did deliberate a lot with this…. and I really am not too sure about it, but anyway first play!!  I added some of the White Jute ribbon and then stamped one of the greetings from the ‘Sprinkles of Life’ set and flagged the ends on the white card. The “Happy Birthday” I cut with the Bitty Banners Framelits.  It looked a bit bare so I added a little banner of Watermelon Wonder card under the white banner.  A little bling to finish.  OK, still not sure …..Thoughts???

P1160801

For this card I used a different pattern in the ‘Cherry On Top’ DSP stack.

P1160804

I stamped the greeting in black onto a piece of Whisper White Cardstock which I had punched the top with the Scallop Tag Topper punch.  Then I stamped the cone in Tip Top Taupe.  The ice-creams were stamped separately on scrap card. I will tell you how I coloured the ice-creams.  I stuck the ice-cream stamp on the block with the image facing down on the block (so upside down). I inked up the stamp in Watermelon Wonder and stamped it off first gently onto scrap paper and then on to white card. So it was a little lighter in colour. Then I cleaned the stamp, put it on the block the correct way and stamped it over the already stamped image.  I then did the same with the Cucumber Crush colour.  Then punched them both out with the Tree Builder punch. I was blog hopping the other day and came across this idea and now I can’t remember who it was sorry but how clever!!!

To finish the card I added a bow from the Watermelon Wonder Dotted Lace Trim. This is such gorgeous soft lace.  It is hard to see but I added a little sparkle with the 2-way Glue pen and Dazzling Diamonds to the bottom of the ice-creams.

This Sprinkles Of Life set is so cute AND the great thing is that $3 from every set sold will be donated to Ronald McDonald House.  How awesome!!! Here is the set.

Sprinkles of life

I know you will just want to get this set – not just because it is cute but because it is for such an awesome cause.  Stay tuned for more details on how you can support Ronald McDonald House.

Enjoy your day wherever you may be,

Jenny

3D projects, Stampin' Up!

BOHEMIAN TOTE!!

I have been playing around with the new Bohemian Designer Series Paper (DSP).  I really like the colours and the funky patterns.  Totes are all the go at the moment and I wanted to create a new Tote.  It is not a particularly new design using 2 sheets of the DSP but I thought I would change it up a bit.  Plus I added a little tab to hang your gift card off. I hope you like this one 🙂

P1160789       P1160791


P1160795

Would you like to make one?  Here are the instructions in metric and imperial.

BOHEMIAN TOTE

2 Sheets of 12×12 Designer Series Paper (DSP) I have used the Bohemian DSP

Handles: 2 pieces of 20.5cm x 8cm (8” x 3 1/8”) co-ordinating cardstock

1 piece of 28cm x 8cm (11” x 3 1/8”) co-ordinating cardstock

Card Tab on Handle:   2cm x 10cm (¾” x 4”) co-ordinating cardstock

Inside Base:   4.8cm x 20.2cm (1 7/8” x 8”) co-ordinating cardstock

  1. On each piece of DSP score your sheets at 5cm (2”) on each side. Fold on each of the score lines.
  2. Cut up on the small score lines at the bottom of each piece of DSP.

P1160761


  1. Add adhesive to the 2 small bottom tabs on one sheet of the DSP on the outside. Adhere this to the inside of the long bottom tab.
  2. Place this assembled piece on to the second piece of DSP which has the right side facing down.

P1160763


  1. Add adhesive to the bottom small tabs on the second DSP sheet and assemble on to the bottom of the first piece. Add adhesive to the long side tabs on the inside of the second sheet of DSP. Adhere this to the first piece.  Add adhesive to the long bottom tab of the second sheet of DSP and fold up on to the first piece.  So it is like wrapping the second sheet onto the first sheet. (The piece at the bottom would be the front of the bag so just check to see what print you want showing).
  2. On the 28cm x 8cm (11”x 3 1/8”) piece for the handle, place adhesive at each end of the handle ON THE UNDERSIDE. Adhere on the outside of the bag near the top.
  3. Take one end of this handle piece and adhere to the top of the bag on the outside of the bag. Adhere the other end to the other side of the bag on the outside of the bag.

P1160765

  1. Take one piece of your 20.5cmx8cm (8”x 3 1/8”) cardstock and place adhesive on the back of this piece. Line up the top edge of the piece with the top edge of your bag positioning it over the handle piece. And adhere on to the front of the bag.  Repeat with the other piece adhering this to the back of your back.  NOTE: If you wish to add brads to your bag for decoration ADD THESE FIRST.  (Just so you don’t see the back of them inside the bag).

P1160766

  1. Fold on the score lines of the small card tab and unfold.  Add adhesive to the ends (on the side facing up). Fold over the piece again and adhere this piece to the front of your bag.

P1160796


  1. Add your piece of cardstock base to the inside of the card. This provides some extra strength.

Decorate the bag as you like.

——————-

Card to hang on the front measures 20cm x 7.5cm. Score at 10cm.

7 ½” x 3”. Score at 3 ¾”

P1160798

For my card I used the Boho Chic Embossing Folder on the front of the Bermuda bag card.  The Happy Birthday is from ‘Amazing Birthday’. I stamped it first onto Whisper White Cardstock in Blackberry Bliss and then again twice on scrap card with Bermuda Bay and Delightful Dijon.  I cut 2 of the “HAPPY’s” out of each colour and adhered them over the top of the Blackberry Bliss greeting. The Whisper White piece was matted on to Delightful Dijon and the whole piece was raised up with dimensionals.  I wrapped around some Bermuda Bay Baker’s Twine and added a silver button that I had sewed with white sewing thread.  This complemented the silver buttons on the bag.


I hope you like this version of the Tote Bag.  It’s a good size for those larger gifts.  Enjoy making them.

Have a happy weekend.  I hope it’s a crafty one for you.  It’s a long weekend here so I hope there is some time to create this weekend.

Jenny


Catalogues, Stampin' Up!

THE 2015 STAMPIN’ UP! CATALOGUE IS HERE!

The excitement has been building over the last few weeks and there has been lots of sneak peeks shown on so many blogs and social media.  The wait is over!  The 2015 Stampin’ Up! Catalogue is now available.

2015_AnnualCatalog_en-AU

I will add the link in the right hand column but you can head over HERE now and see the Catalogue Online.  Whoo Hoo! Grab your cuppa and some paper so you can start making your wish list.  If you are someone who likes to have their own copy of the catalogue and you haven’t got one yet, then ASK ME FOR ONE!!! (Australian residents only!).  I will drop one in the post for you.

I am not going to ramble on today because I know you have important things to do – like read a catalogue!!!  🙂  But I will say that FOR TODAY ONLY ALL 3 CATALOGUES ARE AVAILABLE TO ORDER FROM – the 2014-15 Stampin’ Up! Catalogue, the Occasions Catalogue and the new 2015-16 Stampin’ Up Catalogue.

I am placing an order tonight so if you know what you want already and planning to order online (by 8pm) (HERE) then please use the Hostess Code:     2FBF4JF9

Join in June

Some exciting news though too before you go.  If your wish list is loooooong!!!!! Believe me I think it will be.  Then Join Stampin’ Up! during June and receive 2 additonal stamp set for FREE! Exciting!

Pay $169= $235 of products + 2 extra stamps set + Pay no shipping!  You do the Maths 🙂

Ask me for more information or you can join Online HERE now! It doesn’t matter where you live in Australia. I welcome you to my team. 🙂

Now on to “Operation Wish List” 🙂

Jenny

cards, Catalogues, Classes

A DAZZLING DRAGONFLY!

This card was the surprise card at my Stamp A Stack yesterday.  If you didn’t come you missed out!!! 😉  I thought I would show you today though.

P1160737-1

This is using a new stamp set called ‘Awesomely Artistic’. The card was inspired by a card on Pinterest by Julia Quinn.  I changed the colours and cut the banners with the Banners Framelits. The little greeting frame is cut with the Project Life Cards and Labels Framelits. I don’t do a lot of Project Life BUT I have found these little framelits great for greetings. The “Wish Big” greeting is from ‘A Dozen Thoughts’ stamp  set.

Of course a dragonfly has to have a little sparkle. I added some Dazzling Diamonds to the wings.

P1160738

I think this set has to be my most favourite set in the new catalogue.  I think you are going to love it so write it down on your wish list now.  Only a few days to go now until the new catalogue is out. Exciting!!!!!!!!!!!!!!!  🙂

Stampin' Up!, swaps, Techniques

FAUX SHAVING CREAM FLOWER!!

I have always been fascinated in the Shaving Cream technique but I haven’t got around to trying it. I think it is the mess!  The shaving cream and reinkers and ….. Just too hard!  SO, when I came across THIS technique on Splitcoaststampers a few weeks ago when I was looking for a different technique for a class, I thought I could really try this one.  Here is the card I made.

P1160643

The layout for the card was INSPIRED from Deb Currier from artfeltcreations.com.  I changed a few things around and I created the Shaving Cream flower.  I loved the effect.  Here is a close-up. (OK a little blurry!)

P1160646

I don’t usually share a tutorial for the Technique Classes I do but this technique is so cool I just wanted to share this with you my lovely readers. Of course, you can read about it at the Splitcoaststampers link above too.  It is a bit like the Kissing technique if you have tried that.

SHAVING CREAM TECHNIQUE

1. Choose 3 co-ordinating ink colours. I have used Daffodil Delight, Tempting Turquoise and Melon Mambo.  I found the darker colours didn’t blend well and just looked messy 🙂

You will also need 2 stamps: One solid image stamp and one patterned stamp.  I have used the flower from ‘Crazy About You’ and the honeycomb pattern from ‘Butterfly Basics’.

2.  Ink up your solid image stamp with the lightest colour. Don’t stamp it on your card yet.

3. Ink up your patterned stamp with one of the other ink colours. Press it on to your solid image stamp and give it a slight twist.  Clean your patterned stamp and ink again in the same colour.  Press on to your solid stamp on the other part of your stamp and give a little twist.  See the photo below.

P1160660

4. Clean your stamp again and ink your patterned stamp with the other ink colour.  Turn your solid image stamp 1/4 turn.  Then press your inked patterned stamp on to the stamp and give a little twist. Clean your stamp.  Ink it again in the same colour and stamp on the other part of your solid image stamp and give a twist.

P1160663

5. Now give your solid image stamp a little huff to re-moisten the stamp and then press on to your piece of card.

P1160667

It gives a really cool effect.  Don’t you think???

I really loved the effect so I made some tags up using this technique for our team swaps last week.

P1160671

Here is a close-up.

P1160727

So why not give this technique a try.  It is so cool and each time will work out different.

Have a happy, stampy weekend 🙂

Jenny

3D projects, cards, Tutorials

PAINTED BLOOMS BOXED SET!

There is only one week left of the current Stampin’ Up! Catalogue and the Occasions Catalogue.  I know there are lots of sneak peeks around of the new Catalogue but today I want to share a special project with you.  The Painted Blooms Designer Series Paper in the Occasions Catalogue is just so gorgeous and it saddens me that I haven’t used enough of it yet.  I had this idea in my head last week and just had to get this idea working before the week was out.

Firstly, I made the cards.  In the pack of Painted Blooms DSP there is a sheet with a gorgeous flower garden scene.  What could you really do with a sheet like this??? It just seems too nice to cut into it.  I saw this idea on Patty Bennett’s blog to cut the sheet equally and make a card set.  So I did just that!!  Here are my cards.

P1160748

Laying out all the cards like this you can see the lovely image.  It does seem such a shame to cut it up but it does make a gorgeous card set.  I changed the sentiments on my cards to the ones Patty had on her blog.  The bases for the cards were either Blackberry Bliss, Pool Party, Wild Wasabi or Rose Red.  I used ‘Perfect Pennnants’ for the sentiments in the top row.  If you have a look under the sentiment, I punched out a circle using the 1 3/8″ circle punch, cut it in half and adhered that under the sentiment to layer it..  The sentiments for the cards in the bottom row were from ‘Wetlands’ set.  I cut this out with the smallest banner die in the Banner Framelits set and I hand cut a narrow banner to adhere under that.

Now after making this card set I needed something nice to put them in.  I wanted a window gift box. I came across this idea from Chiaki on Stampingpro.  I used the Dressup Card Box listed HERE on the instruction Sheets.  I did change the measurements. (It took a little fiddling!). The Australian card bases are larger in size than the US and the envelopes I had were larger too (mine weren’t Stampin’ Up! ones – shh!). I will tell you my measurements shortly but here is the finished box.

box

ABOUT THE BOX

The lid for the box was made using another sheet in the pack of Painted Blooms DSP.  On the bottom of the box inside I adhered a matching piece of that DSP to line the box. I didn’t take a picture of that.  The Blackberry Bliss Satin ribbon is not wrapped around the whole box.  I wrapped a piece over the lid and tucked the ends just inside the lid.  That means the receiver won’t have to undo the ribbon each time they open the box.  I tied a bow with the ribbon and attached that to the top.

I cut a window in the lid – BEFORE ASSEMBLING – with the Deco Labels Framelits.  The width is a little wider than the Big Shot so I had to fold up one side and lay it over the framelit.  I adhered a piece of Window Sheet inside the box lid.  That just finishes it off.  I cut a large butterfly using the Butterfly Dies and adhered that straight on to the acetate.  A little bling never goes astray to finish off a project 🙂

Now for the actual box measurements.  I will give you the measurements I used. For those with Imperial measurements you can follow Chiaki’s tutorial.  I am sure those measurements will be fine.

THE BOX (Metric)

BOX BASE

Cut card 19cm x 24cm.  Score on each side at 3.2cm.  Cut up opposite tabs on both ends and adhere.

BOX LID

Cut card 21.5cm x 16.5cm.  Score at each side at 1.9cm.  Cut up opposite tabs on both ends.  Cut your window before adhering together.

Hope you like this project??  Thanks for stopping by,

Jenny