3D projects, Tutorials

TEA BAG HOLDERS FOR A CAUSE!!

I can finally share this project I have been working on the last 2 weeks.  They are all now sent off and reached their destination.  On a Facebook group I am on the call went out for help for a Fundraiser.  I offered to make some little gifts for the goodie bags they would have.  Then the realisation hit – What was I going to do?? I needed 65!!!  After a little pondering I decided to make some little Tea Bag Holders.  I had an abundance of teabags – and lots of retired paper. 🙂

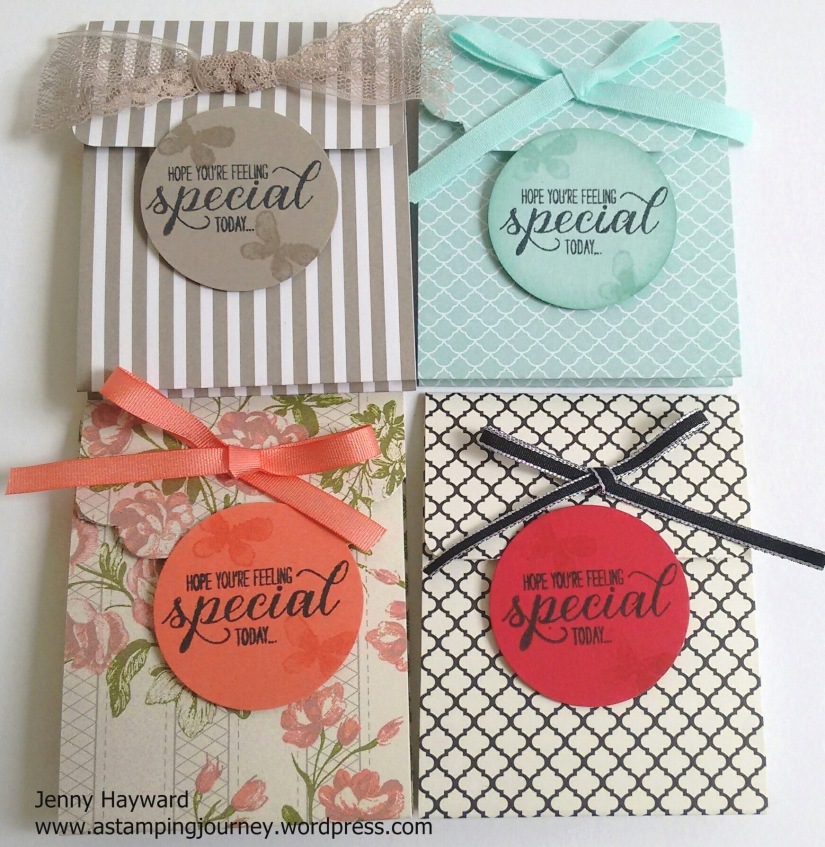
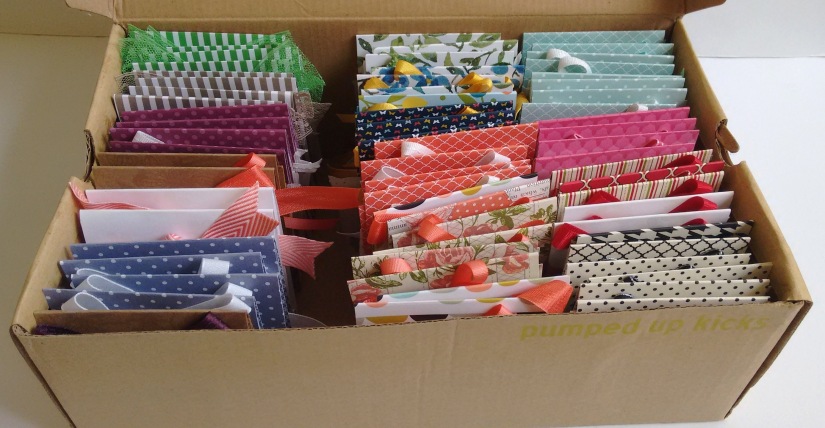
Here is just a sample of some of them.
four

I used the set ‘Garden in Bloom’ for the little labels on the front.  I thought it was very appropriate for such an event.

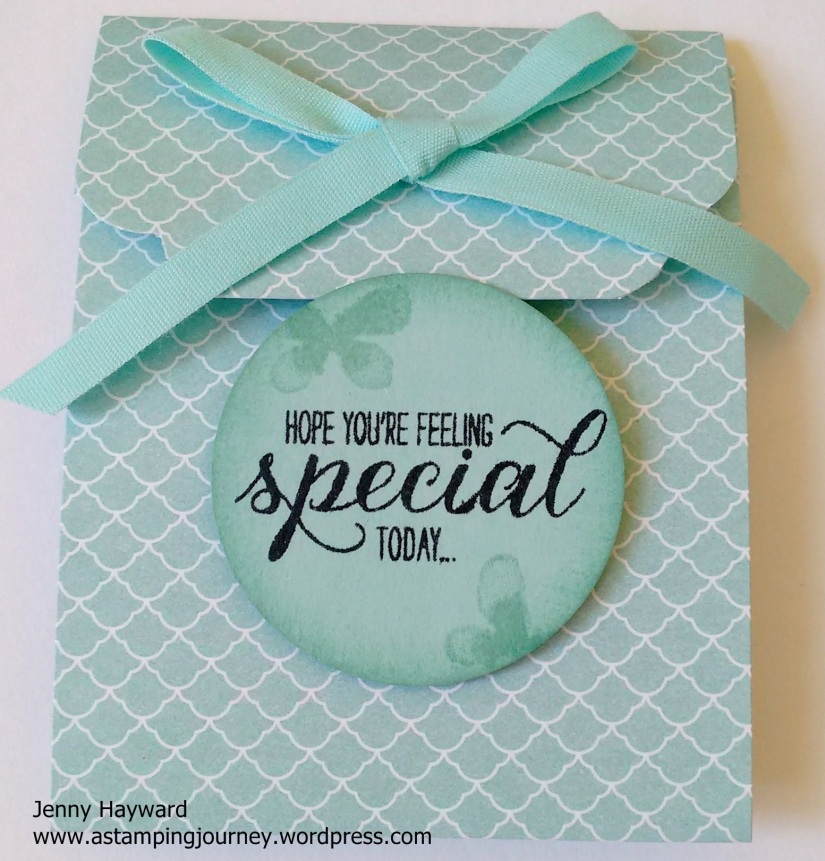
Here is just one of them. I will share the ‘how to’ further below.
closed

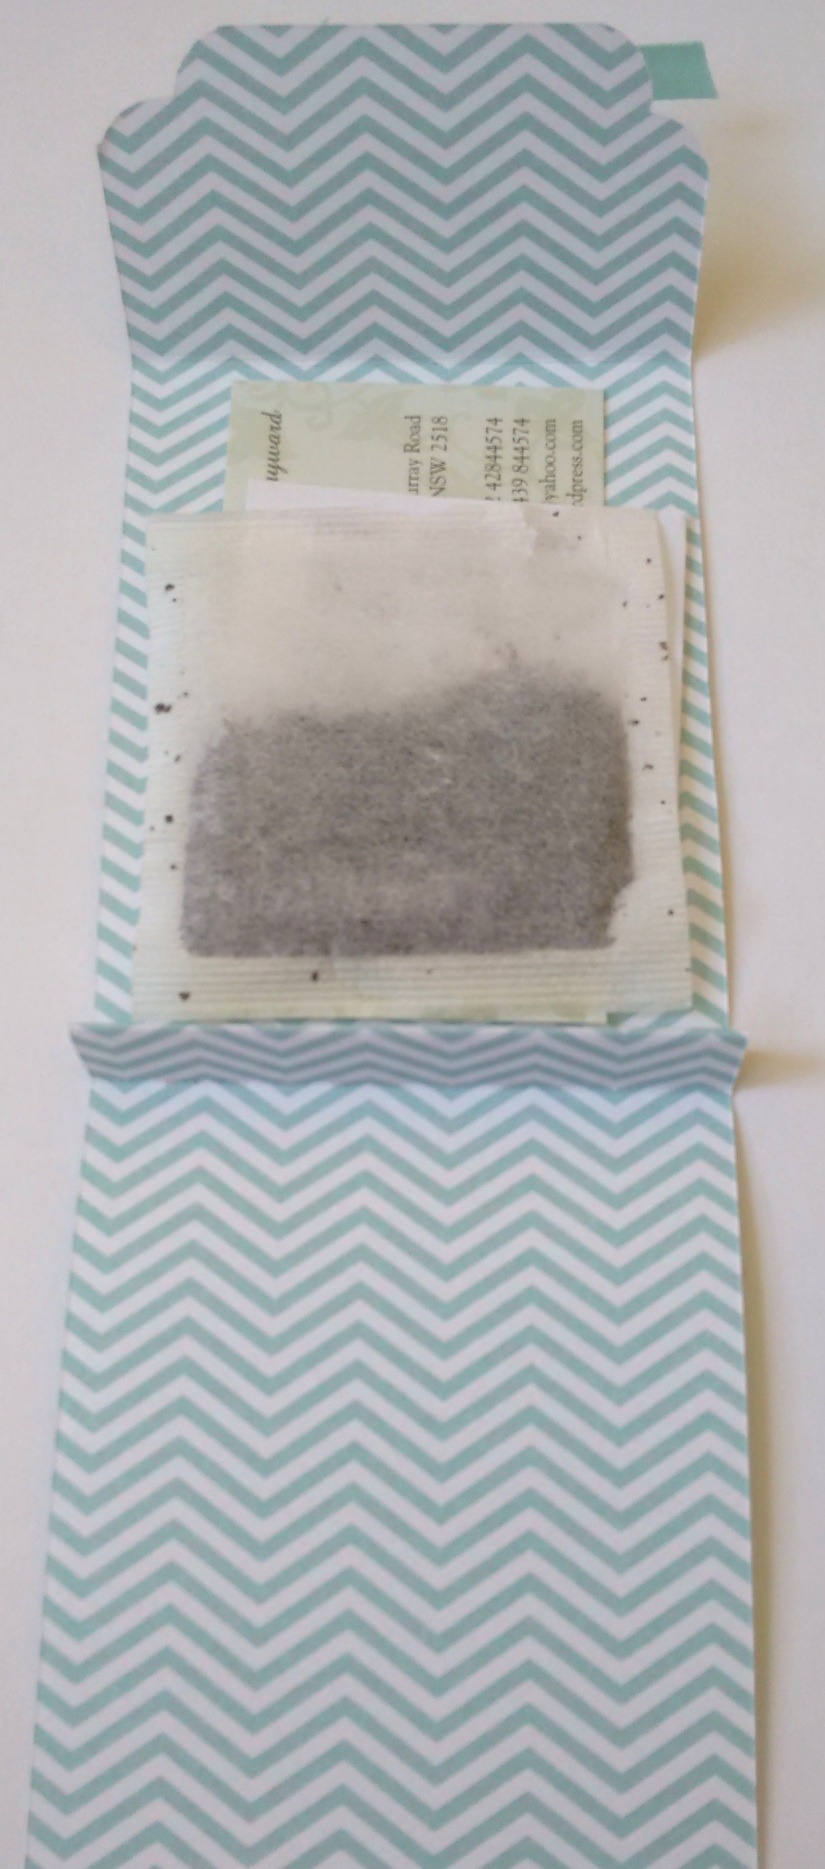
Opened out I could fit a tea bag, a cute tea verse (see below) and my business card.
IMG_20150928_100753384

Here is the verse I put inside.  I found this on Pinterest.

“When  your  day  seems  topsy  turvy,

And as stormy  as  can  be.

There  is  nothing  quite as  tranquil,

As a nice hot  cup  of tea.”

**

So here they are all 65 of them packed and ready to go.
box

So here are the details if you would like to make your own.  There are a few different versions around the internet but these were inspired by a Convention swap I received some years ago.  I adjusted the size so I could fit my business card in and just made them a little differently.  I could get 4 to a 12″x 12″ sheet of Designer Series Paper.

TEA BAG HOLDER

Cut your paper to 7.5 cm x 25 cm     (3″ x 9 7/8″)

Score your paper at 9 cm, 10.2 cm, 11.5 cm and 21 cm.    (3 1/2″, 4″, 4 1/2″ and 8 1/4″).

Fold on your score lines creating a “W” shape. (I hope that makes sense??).  The end with the narrowest scored piece is the front flap. Corner punch the corners on this flap.  I used the new Curvy Corner Trio Punch for most of them or else I used the regular Corner punch.  Add a bow to the front flap.

Stamp your greeting and punch out with the 1 3/4″ Circle Punch.  Add Dimensionals on the back just on the lower section.  Add to the front of your holder.  You can tuck the flap under the top of the punched circle to hold it together.

I hope you like these.  They are very quick to make once you get going.

Thanks for stopping by,

Jenny
cards, Catalogues, Christmas, Classes

DELICATE ORNAMENTS ON BERRIES AND BOUGHS!

I was playing around with some left-over Stamp A Stack kits the other week.  I just made a quick card up with one of the kits left.  I thought you might like to see it.

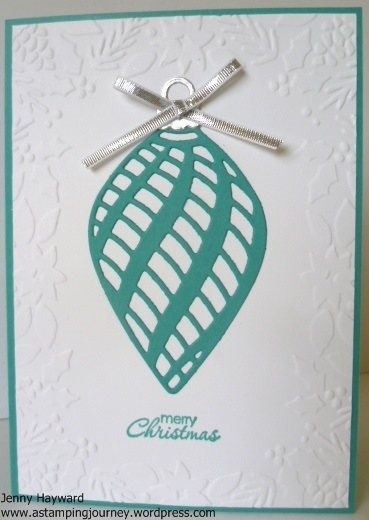
P1170418

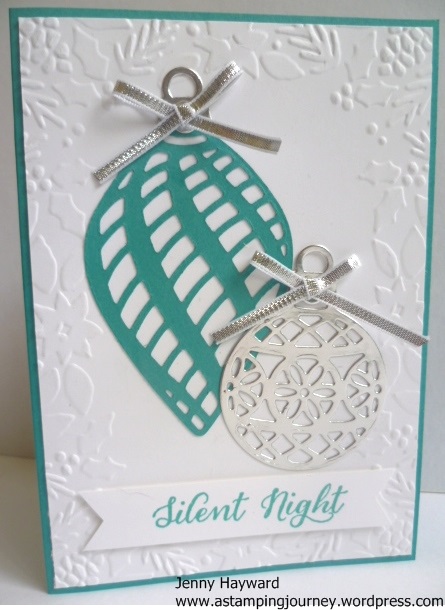
The card base and the large ornament is in Bermuda Bay. I embossed the white card with the ‘Boughs and Berries’ Embossing Folder. On this card I added another ornament from the ‘Delicate Ornaments’ Thinlets cut from the Silver Foil Sheets to give a little sparkle.  The greeting is from the ‘Wonderland’ stamp set. A little Silver Ribbon finishes it off.

Thanks for visiting today.  I hope you have a wonderful day,

Jenny

cards, Personal Ramblings

DOGGIE THANKS!!

Just a quick one today.  A few of you who know me or who follow me on Facebook know that a few weeks ago my gorgeous dog was attacked in a brutal dog attack.  It was pretty distressing and I am not going to go in to the details again here.  I still shudder thinking about it and I get all teary.  I wanted to show you the cards I made for some wonderful neighbours who helped me out on the day in so many ways.  They were just so wonderful.  I have to say it is one way to get to know the neighbours 😉

These were just simple little cards measuring 10cmx10cm (4″x4″).  I wanted to say THANKS for their help.

P1170323

I have used Lost Lagoon and Hello Honey for the colours.  I used the ‘Work of Art’ stamp set.  The little paw prints are from the retired set ‘D is for Dog’.  That is one retired stamp set that I have kept. I thought it was a cute little touch.  I stamped the inside of the card with some paw prints too.  After all it was from Scooby and I.  One I added Gold sequins and the other I added Rhinestones.

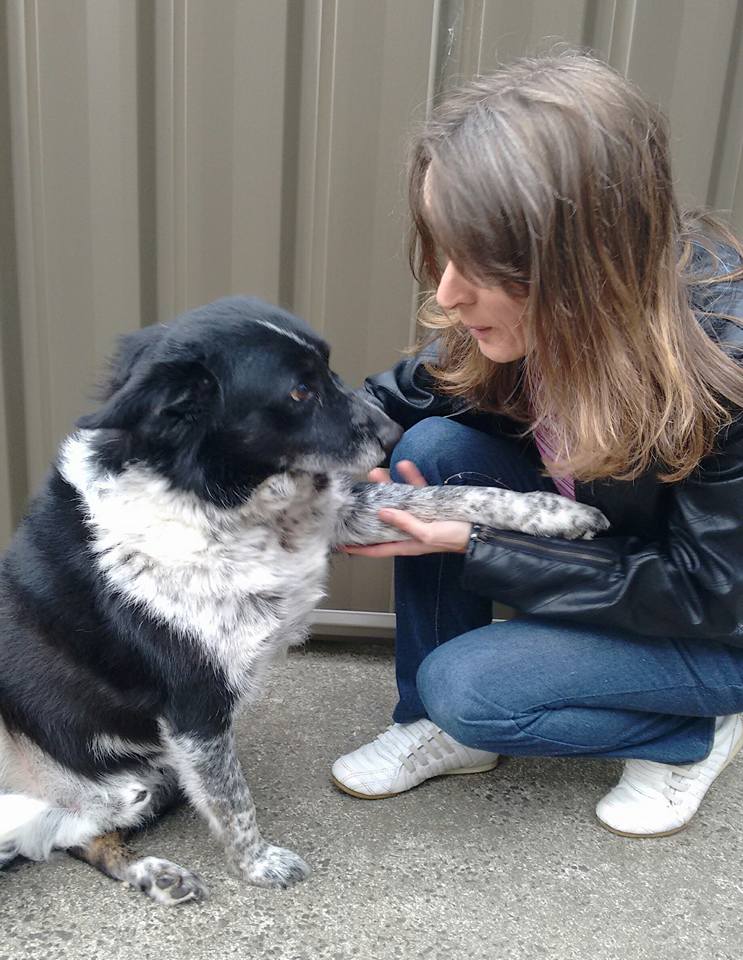
Thankfully I can say that Scooby has made a full recovery after a little stay at the Vet and lots of extra TLC.  He doesn’t seem too troubled by his experience thankfully. Here is my gorgeous boy. I wanted to spare you the gruesome photos.  This is a cute photo of him taken a few months ago.

Sccoby and I

Thanks for stopping by and allowing me to share my little story today.

Have a wonderful day wherever you may be.

Jenny 

cards, Catalogues

JINGLE ALL THE WAY FOR CHRISTMAS!

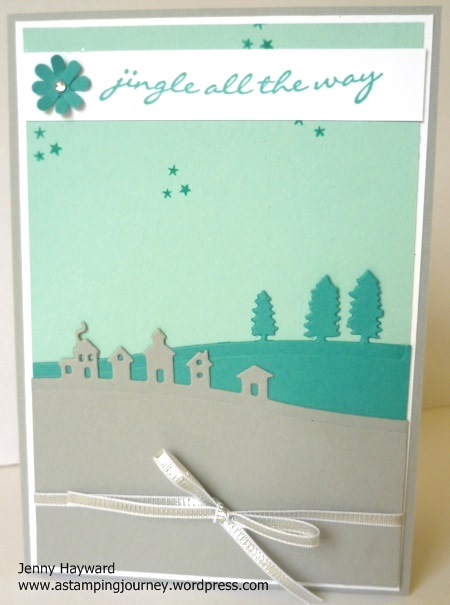
When I received my preorder of Holiday Catalogue goodies a month or 2 ago this was the first card I made.  I went searching on Pinterest for some inspiration.  This card was almost CASED from shawnstamps.com.  I have just discovered his blog.  I like his style.  Take a minute to pop on over and check out his clever creations.

Anyway, back to the card.  I liked the colours he used and the way he used the ‘Sleigh Ride’ Edgelits Dies. I teamed my card with the ‘Jingle All the Way’ set.

P1170193

I have used Pool Party, Bermuda Bay and Smoky Slate.  The card base is Smoky Slate.  I added some Silver Ribbon on my card and stamped some stars from the ‘jingle All the Way’ set in Bermuda Bay in the sky. The greeting was stamped on some scrap white card.  I really should have flagged the end.  I had stuck it down by the time I realised.  I did try and lift it but……. Best to leave it alone I think.  The little embellishment was made with the Festive Flower Punch.  I had just received that punch and was playing around with it.  It was sitting on my desk so I just grabbed it and made it.   Not sure whether it was meant to be a flower or a snowflake.  Anyway,  it filled the spot.  I added a Rhinestone to the centre.  It looks OK.  What do you think???

You can get the stamp set and the Edgelits Dies as a Bundle and save 15%.  Gotta love that!   Wood – $59.50 AUS   Clear – $51.75 AUS.

Here is the stamp set.  It has a quite a few cute little images with 4 greetings.

jingle

Have a good week.  I am in the middle of a big project.  I might share it later.

Until next time.

Jenny

Catalogues, Product Share, Stampin' Up!

RIBBON SHARE FROM THE HOLIDAY CATALOGUE!!

Have you seen the gorgeous ribbons and trims in the Holiday Catalogue?? So lush! 🙂  I know it is hard to get through a whole roll of one type so I have put together a Ribbon Share for you to have a little taster.  Check the details below.  This is for Australian Residents only. (sorry folks!).  Let me know if you want to join in and we can fix up the details.

You can join in one lot or more.  You can take more than one share yourself.  It works out quite cheaply.

HOLIDAY RIBBON SHARE

CORDING TRIM                    Gold  –  5.7m   for $2.30              Silver – 5.7m for $2.30

gold cord          silver cord


POM POM TRIM                   $2.75 for 1.15m

pom pom


STRIPED RIBBON            $3.70 for 1.15m of Real Red and 1.15m of Garden Green

striped ribbon


GOLD AND WHITE GLITTER RIBBON              $4.60 for 1.15m

gold and white


VERY VANILLA STRIPED RIBBON                   $3.70  for 2.30m

very vanilla


RAZZLEBERRY COTTON RIBBON                  $2.70 for 2.2m

razzleberry


Do you like???? Let me know ASAP if you want to join any of the shares.

Jenny


cards, Catalogues, Punch Art, Stampin' Up!, Tutorials

A DIFFERENT FLOWER WITH THE FESTIVE FLOWER PUNCH!

I made this card a few weeks ago but only had a chance to show you now.  When I received my Festive Flower Punch I had to have a play and create a different flower than the traditional one. That’s what you do right??? 🙂  I made a card up with the flower.  Since making this flower I have seen some great variations on Pinterest. I have to say I do like those ones a lot so I will have to make those too.  Here is my card and I will give you the details of the flower.  You might remember the small flower that you could make with the wing of the 2-step bird punch?? Well this is it’s big brother 🙂

P1170407

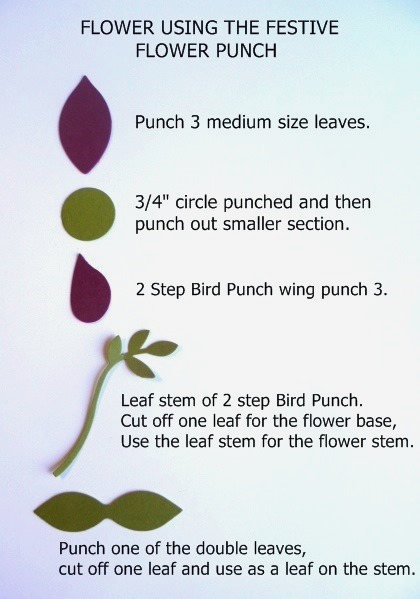
I have a chart below to show you how I created the flower so I won’t say too much about that.  For each of the pieces I sponged them with ink.  I have used Rich Razzleberry for the flowers and Old Olive for the stems.   See the pearl accent?? I was trying to work out what to add.  I added a Metal Rimmed Pearl but the silver didn’t go right so I created my own.  I punched a circle from the Gold Foil Sheets using the smaller circle from the Owl Punch.  I adhered a pearl to the centre and added the both with a glue dot onto a small bow from Whisper White Baker’s Twine.  I really liked this addition.  The greeting is from ‘Birthday Blossoms’ and I punched one corner with the new Curvy Corner Trio Punch.

Here is a chart to create your own flowers.

P1170321

So this punch is very versatile.  Not just for your Poinsettia flowers.  I can’t wait to make some other versions.

Here is the punch if you haven’t noticed it.  The punch can be found on P 31 of the catalogue and is $31.00 AUS.

festive flower punch

Thanks for stopping by.  I hope you have a super awesome weekend and you have time to create. I have my Holiday Catalogue Launch tomorrow so I am looking forward to sharing some fun projects using these great products from the Catalogue.

Jenny

Catalogues, Christmas, Classes, Stampin' Up!

HOLIDAY CATALOGUE OPEN HOUSE!!

If you are a Wollongong local come along to my Holiday Catalogue Open House.  You can see and play with lots of products from the Holiday Catalogue.  It’s time to get started on those Christmas cards if you haven’t already done so. Come and see what is new.  Here are the details.

HOLIDAY CATALOGUE OPEN HOUSE!

WHEN:  Saturday 19th September at 2pm.
Stop by for a short time or stay the whole time.  

COST: $10 which includes 2 Make and Takes (Check them out below),

Giveaways, Lucky Door Prize, Yummy Afternoon Tea and …

pick up the Holiday Catalogue if you haven’t already received one.

PLEASE RSVP by Thursday 17th.  Book early as places are limited and booking up already.

See you there. 🙂

Blog Hops, cards, Catalogues, Christmas, Stampin' Up!

ESAD HOLIDAY CATALOGUE BLOG HOP!!

ESAD Blog Hop Header Holiday 2015

Thanks for joining us today for another ESAD Blog Hop.  This time we are focusing on some of the awesome products in the new Holiday Catalogue.  You might have just come from Kelly’s Blog or you might be starting here. Either way you can take the Hop around in a circle.

There is so much to love in this catalogue so it was hard to choose but I decided on picking the first stamp set that made my wish list.  (Maybe because that was near the front – I don’t know.  It is all so good!).

Firstly, I need to tell you about what ESAD is about.

ESAD Info Holiday 2015

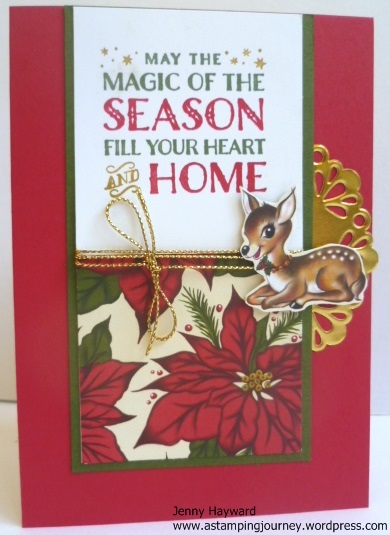
OK.  Now I am looking at the ‘Home For Christmas’ product suite on  page 8-9 of the catalogue.  I love the vintage feel of these products.  Sorry lots of photos but I think you will rather quickly look at photos than lots of information when you are hurrying on your hop. 🙂

P1170376

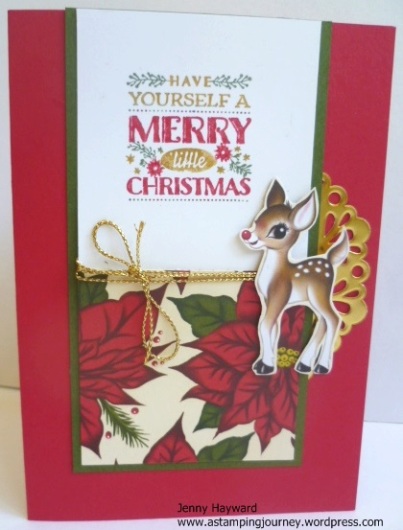
I have used the markers to colour the sentiments from the ‘Cozy Christmas’ stamp set.  The sweet deers are from the ‘Home for Christmas’ Designer Series Paper that I have fussy cut out.  So cute! The beautiful poinsettia paper is from the same ‘Home For Christmas’ pack.  You don’t need much more to this.  I have added some Gold Cord and Gold Doily.  Here is a close-up of the cards.

P1170379

P1170377

So I had to then make a bag using the Curvy Keepsake Framelits to make a cute set.

P1170385

P1170388

P1170394

I hope you like these.  Thanks for stopping by. Now get hopping to the next stop on the Blog Hop. You will now go to Libby’s blog HERE.

If you get lost then here are all the blogs to join in.

1. Libby Dyson

2. Paula Reid

3. Keryn Campbell

4. Carly Middleton

5. Rachael Lewsley

6. Narelle Fasulo

7. Emily Campbell

8. Emma Palonek

9. Jo Weedon

10. Rebecca Scurr

11. Andrea Buckland

12. Rochelle Blok

13. Kathryn Ruddick

14. Monique Fielder

15. Bernie Collins

16. Liv Ingle

17. Sally Williams

18. Ria Kaire

19. Delys Cram

20. Jessica Williams

21. Lou Kitzelman

22. Barbara Williams

23. Kelly Kent

24. Jenny Hayward

cards, Christmas

STAMPIN’ UP! HOME FOR CHRISTMAS PLAYTIME!

As demonstrators we could order from the Holiday Catalogue weeks ago.  When I received my preoder I didn’t know what to play with first.  Do I stamp or punch or do I cut??? Such a dilemma. After I had a little play I made up a card using the Home For Christmas product suite.  This was one of the first cards I made.  I will be honest I am not completely happy with it.  Not sure why but maybe you can help me out there.  I shared it on my Facebook page a few weeks ago and realised I hadn’t shared it here. So for your viewing pleasure – or not! here is the card. 🙂

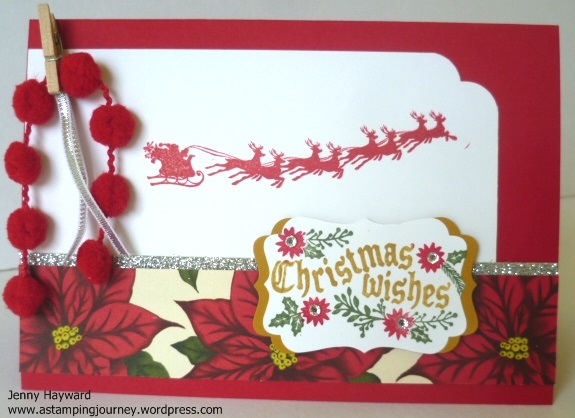
P1170191

I loosely based the layout of the card on Freshly Made Sketches #142

FMS Final 142-001

I do love the new Curvy Corner Trio Punch I have used here.  I used markers for the greeting and punched it out using the Decorative Label Punch. A little sparkle with the Silver Glimmer Paper and Rhinestones and finished off with some Real Red Pom Pom Trim and Silver Ribbon.

I am showcasing this suite in the ESAD Blog Hop TOMORROW (Sunday) so head back here at 6.30pm AEST.  We are all focusing on the great products in the Holiday Catalogue.  I do hope you can join us.

Jenny

Uncategorized

CHRISTMAS STAMP A STACK!!

Christmas Stamp A Stack is on THIS FRIDAY!!! Are you coming?? If you are local to Wollongong I hope you can come on by.  Stamp A Stacks are a great way to make a large number of cards in a short space of time.  Not to mention the fun we have along the way!!  If you can’t make it, then you can order the cards kits to make them at home.  See the details below.

Here are the details for the Stamp A Stack.

This Friday 11th September 10am or 7.30pm – Christmas Stamp A Stack. 
COST: $15     BYO: Scissors and Adhesives.     RSVP: Wednesday 9th.

Do you want to see  the cards we are making this week? We are using some of the great new products in the Holiday Catalogue.

P1170374

Here they are close-up.

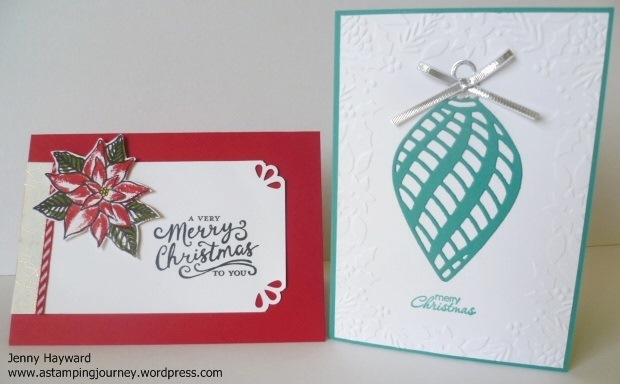
This one uses the ‘Boughs and Berries’ Embossing Folder and the ‘Delicate Ornament Thinlets.

P1170365

This card uses the set ‘Reason for the Season’ and the Curvy Corner Trio Punch.  It is such a cool punch!

P1170366

Now if you can’t make it then get the ‘Class at Home’ Kits.  This includes all the card and embellishments included to make the cards BUT it doesn’t include the stamped images. You can order the stamps separately OR substitute other stamps.  Cost for the Kits (to make the 6 cards) is $15.

Let me know ASAP if you would like to join us OR if you would like the ‘Class at Home Kit’ option.

Jenny