3D projects, cards, Christmas

STAMPING WEEKEND PROJECTS!

A couple of weekends ago we had another fun stamping weekend.  These are great opportunities to get lots of stamping done PLUS lots of laughs!!! I thought I would show you some of the projects I made. I think these will be over a couple of posts so be prepared. 🙂 I realised that I hadn’t shown you all the projects from the last one so I might have to get back to that later.  For now, here is some of my creativity from the weekend.

One of my main goals for the weekend was to make some projects to sell at a few upcoming vendor fairs I am doing.  I started off making some bottle tags. These are great for the Christmas period as Wine is a popular gift to give.  Why not hang a tag off your wine gift!

P1170706

These ones are using the ‘Wondrous Wreath’ stamp set and Framelits.

P1170703

These ones I have used the ‘Cozy Christmas’ stamp set and the gorgeous ‘Home for Christmas’ paper.

These took a while but they were fun to make.  I found a few different versions and tutorials for these when I went looking.  It all depends on how you want to decorate them or whether you want them longer to fold up the card to make a pocket to tuck a treat in as well.  For mine the card measures 20cm x 6.5cm (8″ x 2 1/2″).  Score your card at 6.5 cm (2 1/2″).  I punched out the circle using the 1 3/8″ circle punch.

I have to say these were the only projects I got made for the Vendor Fairs.  I got a little distracted with some other fun stamping projects. 🙂

After making these tags I had lots of circles punched out.  What is one to do??? Not waste them now!  I used a lot of them on a card.  I had some idea in my head but wasn’t sure how it would turn out. Check it out though.

P1170668

I laid the circles out on a piece of Whisper White for the card mat.  When I was happy with the arrangement I glued them down and then ran the piece through the Big Shot with the Stars Embossing Folder.  Then I used markers on the greeting from ‘Cozy Christmas’ and cut it out using the ‘Tags and Labels’ Framelits and layered this onto a Gold Foil tag.  I wrapped around some Gold ribbon and then layered it all on to an Old Olive card mat and then a Real Red card base.

Next post I will show you some more Christmas projects I made.

Stop by again soon,

Jenny
cards, Techniques

SLEIGH RIDE DIORAMA CARD!

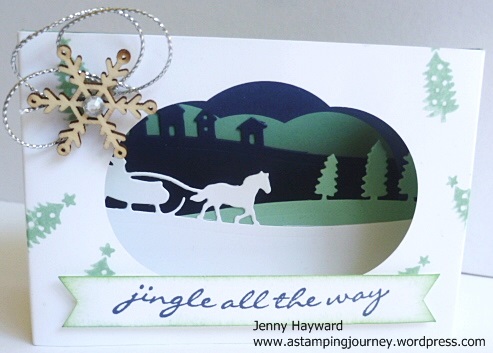
In a previous post I showed you the swaps I received from last week’s team meeting.  I thought I would show you the project we all made.  Vanessa showed us how to make this.  It is so cute! It is a Diorama card using the Sleigh Ride Edgelits and the ‘Jingle All the Way’ stamp set.

P1170665

This is only small.  I should have take a side view photo perhaps.  It is box-like and inside you have different layers creating the scene. I have used Pool Party and Night of Navy.  I finished it off with a Snowflake Element and some Silver cord.  I can’t share the exact dimensions as Vanessa has used this in a class and it was kind of her to share it with us.   I have found one on Splitcoaststampers Here which is very similar so you can make your own.

Thanks for visiting.

Enjoy your day,

Jenny 🙂

Stampin' Up!, Weekly Deals

WEEKLY DEALS FOR OCTOBER 28!

Each week Stampin’ Up! promote some super specials saving you 15%.  Everyone loves a saving! This week’s specials are no exception.

Here they are for this week.

Oct 28

Have you got the Stars Framelits yet for your Christmas cards??  I think you will need them – and you save 15%!

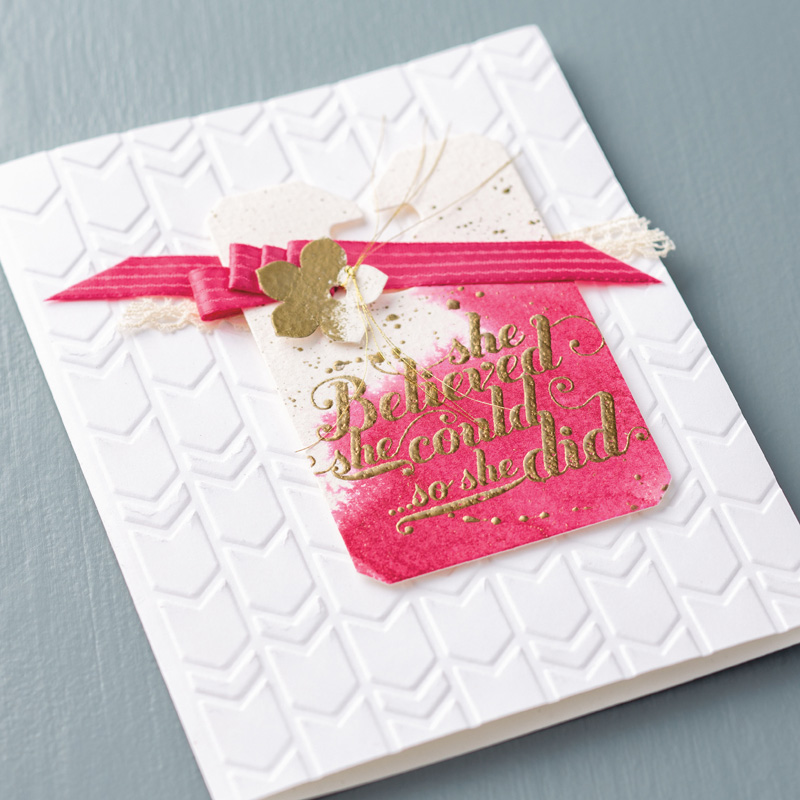
I have looked at the ‘Feel Goods’ Stamp set a few times and this week you can save 15% on this. When I was checking out these deals I came across this gorgeous card on the online store. I thought I just have to share it with you.

believed she could

Isn’t this sweet with the gold embossing and sponging. I just love the strong, intense pink on this too.  I think I will just have to replicate this!!!

Now if you want any of these great Weekly Deals then just let me know.  If you need to order anything else too then you can order them direction or at my online store HERE. 

Have a super, awesome day. 🙂

Jenny

3D projects, cards, Christmas, swaps

TEAM CHRISTMAS SWAPS!

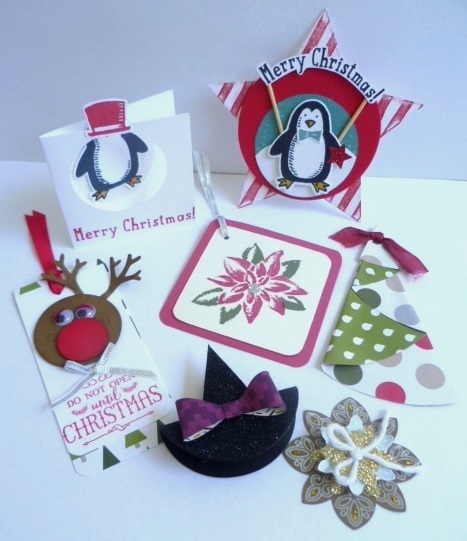
I thought I would show you the swaps I received from last week’s team meeting.  There are some really cute ones here.  I think Tags were very common 🙂  They are great to use as tags or add them to cards.

P1170689

Sorry for the lighting.  Sigh! Must do something about this BUT you can get the idea anyway.

Now the cute little penguin card in the back does have a head.  Sorry about the photo.  The penguin is stamped on the inside of the card and a circle window is punched on the front with the hat on the front.  It is so cute.  I love all these ideas. Thank you to all the clever demonstrators in the Inky Fingers Team.  Nice to share ideas.

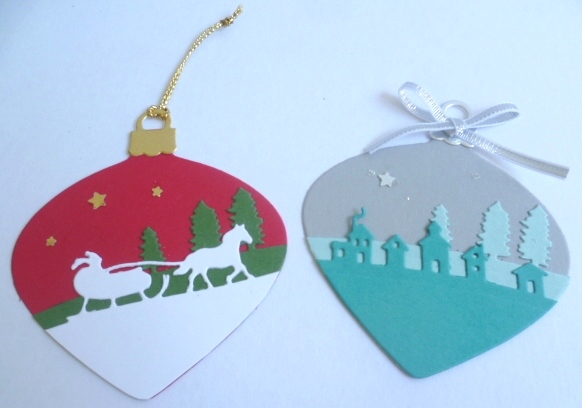
I will show you my swaps.  Once again – tags! Now that wasn’t the theme but funny how it works out.

P1170686

I CASED the red one from Pinterest and made up the other in Smoky Slate, Pool Party and Bermuda Bay.  These use the ‘Sleigh Ride’ Edgelits.  For the red one I punched out stars from Gold Foil using the Star Border punch.  The Smoky Slate one I have punched out one star in Silver Foil. Then I added some Dazzling Details for a sparkle but you really can’t see that well sorry.

I better get going. Our internet is being switched off soon to transfer it over to the new NBN network.  Hopefully it is not too long offline.  I think my kids are going to die!!!!! 😉

Thanks for visiting.

Jenny

cards

COLOURED CHRISTMAS CUTIES!

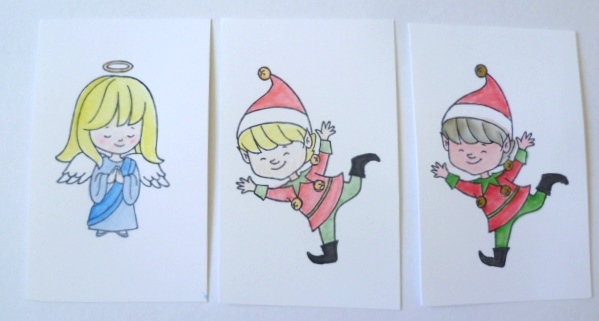
I shared my cute angel card a few posts back.  If you missed that you can head to that post HERE. The day I made that one I coloured a few images from this ‘Christmas Cuties’ stamp set.  I was in the mood for colouring!  I am not a colourer usually (is that even a word??) but sometimes it’s relaxing just colouring away. That must be why colouring books are such the rage now. Anyway, back to these cards. Firstly I will show you the images as I coloured each one with a different medium.  Then I will show you the cards.

P1170427

The angel (the one shared in a previous post) is coloured with watercolour pencils.  The middle elf is coloured with watercoloured pencils.  The next elf is coloured with the aquapainter and inkpads.(Don’t look too closely at the colouring!). As you can see though you end up with a different intensity of colour.  I will show you the finished cards now and I will show you one coloured with the Stampin’ Write markers too.

The watercoloured pencil elf.

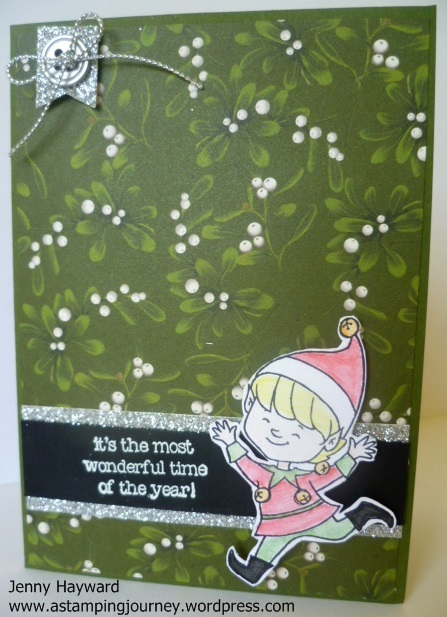
P1170557

The base card is Mossy Meadow and I have adhered a piece of ‘Home for Christmas’ DSP to the base.  The rest of the card was made up of “bits” left lying on my table. The greeting I decided not to use on a previous project. I had heat embossed it in White Embossing Powder.  I added some Silver Glimmer Paper behind it.  Then I raised up my little elf on this.  It was a bit plain at the top so I punched out a scrap of Silver Glimmer Paper with the little Banner punch.  I added a silver metal button and some silver cord.  I kinda liked this cute card. 🙂

The next one coloured with the Aquapainter and inkpads.

P1170559

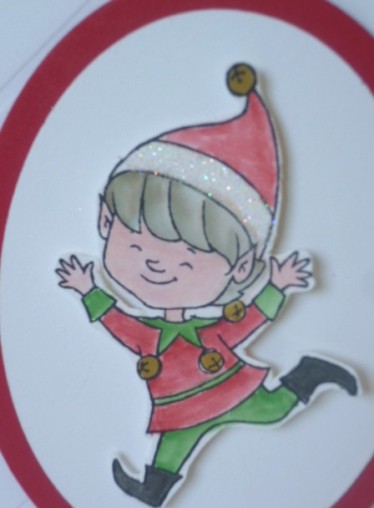
I embossed a piece of white card with the Stylish Stripes Embossing Folder and added this to a Real Red Card base. Then I simply layered a red and a white oval and raised up my little elf with dimensionals.  The greeting is cut from silver foil sheets from the ‘Christmas Greetings’ Thinlets. What a happy chappy he is!  I thought I would add a little dazzle and add some Dazzling Diamonds to his hat.

P1170561

Now I will show you another card I made a bit earlier than these cards.  This card was made for a recent Stamp A Stack and was inspired by one on Pinterest.  On this elf I coloured him with the Markers. The colour is a bit more intense.

P1170439

That’s all for my little Christmas cuties.  Check out these cute images. They are available for $40 wood or $30 clear mount.  You can order them directly through me or at my store HERE.

cuties

Thanks for visiting today.  I hope you can have some fun colouring soon too.

Stop by and visit again soon,

Jenny

cards, Classes, Stampin' Up!

GET YOUR CHRISTMAS CARDS HAPPENING!!

Here are the details for this week’s Christmas Stamp A Stack.  If you are in the Wollongong area do join us.  It is a fun time. I would love to see more people along to my classes 🙂

WHEN: Friday 23rd October at 10am or 7.30pm

COST: $20 for 6 cards (2 each of 3 designs)

BYO: Scissors and Adhesives

PLEASE RSVP BY WEDNESDAY 21ST BY EMAILING ME OR LEAVING A COMMENT.

These are the cards we will make. I think you will love them!

SAS

I look forward to seeing you.

Jenny

Catalogues, Christmas, Stampin' Up!

POINSETTIA SPARKLE!

Today’s card I want to share is using the great bundle ‘Reason For The Season’ stamp set and Festive Flower Builder Punch.  I love how this card came together.

P1170552

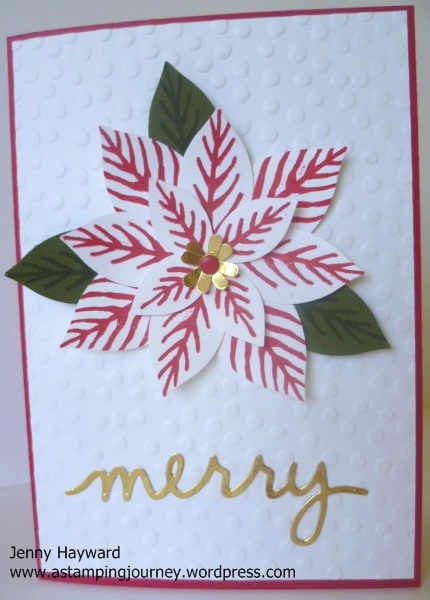
The base card is Real Red.  That seems to be the colour card I have used most with these recent Christmas cards!  I embossed some Whisper White cardstock with the Decorative Dots Embossing Folder.  The flower is so easy to put together.  Stamp out all your petals and leaves, I have used Real Red on Whisper White and Mossy Meadow ink on the cardstock.  I punched out a circle with the 1 3/8″ circle punch in scrap white card and built up the flower on this.  I have used the Multipurpose adhesive to adhere it all together. The centre is punched out with Gold Foil and I added a Real Red Brights Candy Dot to the centre.  The “merry” cut from Gold Foil is from the Christmas Greetings Thinlets.

I would really recommend this Bundle.  You can find it on p31 of the Holiday Catalogue.  In Australia it is $57.75. Save 15% as a Bundle. Gotta love that!  You can order this through my Online Store HERE or by phoning/emailing me.

Here are these great products.

reason for season                    festive flower punch

Thanks for stopping by today.

Jenny

3D projects, Stampin' Up!, Tutorials

THANK YOU TREAT HOLDERS!

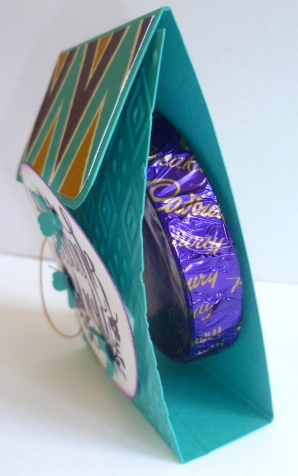
A few posts back I showed you some cute tea bag holders I made.  You can see that post HERE. Based on these holders I made up some little Thank You Treat Holders for some special people this week.  Here is one of them to show you.

P1170515

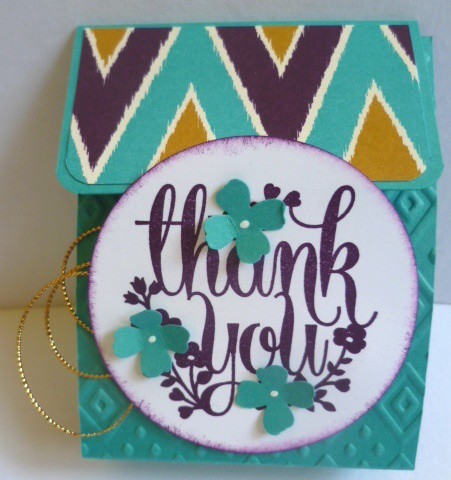
I have used the ‘Bohemian Designer Series Paper’ on the front flap.  I embossed the front panel with the ‘Boho Chic’ Embossing Folder. The greeting is from the Hostess set ‘You’re A Whole Lot of Lovely’.  This was punched out with the 2 1/2″ (6.4cm) Circle Punch.  The flap can be tucked in behind the circle to enclose it.  Some I added a little glue dot underneath the flap to hold it down as some kept popping up.  I added some little flowers punched from the ‘Itty Bitty Accents’ Pack and added little dots for the centres with white gel pen.  I added some loops of Gold Cord behind the circle before I adhered the circle down with dimensionals.

This Treat Holder was the perfect size for a little chocolate treat.  I added a glue dot to the back of the Chocolate to keep it in place.

P1170513

To make them I used the same directions for the Tea Bag Treat Holder that you will find in the above post link except I only scored the card (7 cm x 25cm) at 9cm, 11.5cm and 21cm.  ** If you would like the imperial measurements for these, then check at the above link for the tea bag Holders. Just don’t add the 4″ score line).

These were well received today I think 🙂

Thanks for stopping by,

Jenny

cards, Christmas

CHRISTMAS CUTIES ANGEL!

I wanted to colour the other day.  I haven’t done a lot of colouring especially that Blendabilities aren’t around. I pulled out the ‘Christmas Cuties’ stamp set that is available in the Holiday Catalogue.  There are some really cute images in this set and I played around with different mediums. I will show you these over the next week or so.

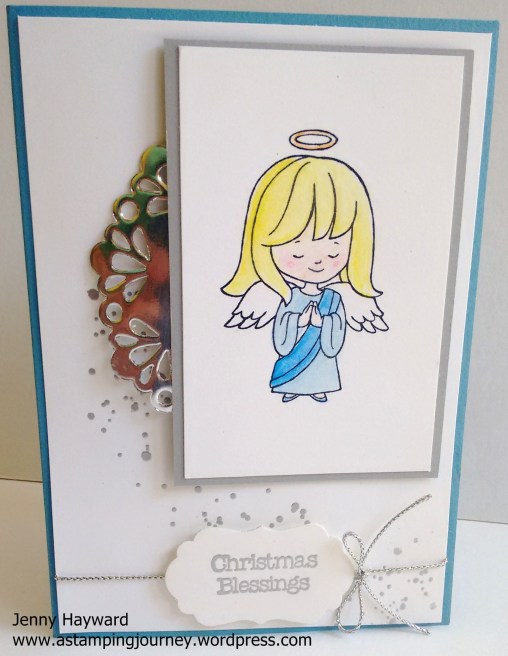
Now I did say I haven’t done a lot of colouring!  I wanted to pull out my watercolour pencils that have sat dormant for so many years.  I hadn’t played with them a lot before that anyway.  SO, here is the end result with them.  I put together this card.  I am not completely happy with the colouring BUT I like the card. The layout is based on the CAS challenges (Colour and Sketch for Clean and Simple cards).  You can find the blog post Here.

IMG_20151005_111721972

Isn’t this angel sweet??  I stamped this on the Thick Whisper White Cardstock and it was then matted on Smoky Slate card. The base card is Marina Mist. The greeting and the “splodges” (from ‘Gorgeous Grunge’) are heat embossed with silver Embossing Powder.  It is hard to tell though.  I finished it off with a silver doily and Silver cord.

There you have it.  A little play with my watercoloured pencils again.

Thanks for visiting,

Jenny

Catalogues, Classes, Stampin' Up!

CLASSY CARDS CLASS WITH THE HOLIDAY CATALOGUE!

Do you live in the Wollongong area?? Why not join us for a ‘Classy Cards Class’.  Here are the details and the fun projects we will be making.

CLASSY CARDS ON FRIDAY OCTOBER 9TH.  10AM or 7.3oPM.

What to Bring: Adhesives and Scissors.
Cost: $20 or Free with a minimum order.

Please reserve your seat by Wednesday 7th October by emailing me or leaving a comment.

Here are the cards.

P1170437

Hope you can join in the fun.

Jenny