cards, Catalogues, Stampin' Up!, Techniques

WEDNESDAY’S WOW! #54 – EXTENDING THE LARGE RECTANGLE STITCHED FRAMELIT!

If you are using the Standard Metric card bases you might be facing a problem. Today for Wednesday’s WOW! #54 I want to solve that problem for you.  I have to say this is not my original idea. I think I saw it on a Facebook group I am on but not sure where or who by now.  Perhaps you haven’t seen it though so I thought I would share it with you.

The metric size card bases are just slightly different to the US size so the largest Rectangle Stitched Framelits doesn’t sit quite right for some people. It’s not evenly spaced around each side when you cut the card mat.  To some that doesn’t matter but you might like the even space.  Here is a solution for you.

EXTENDING THE RECTANGLE STITCHED FRAMELITS

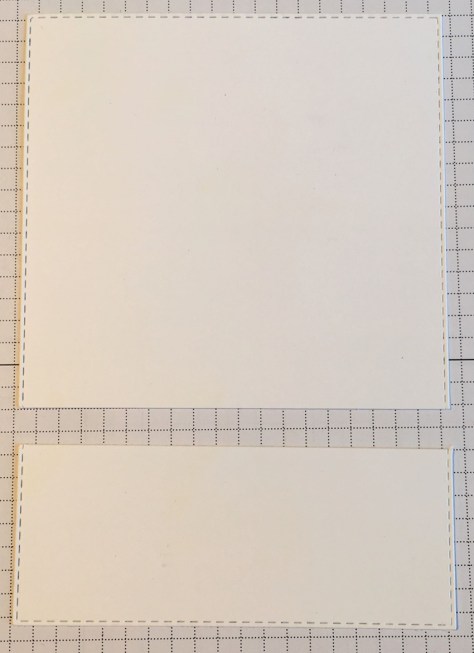
Cut your card with the Largest Rectangle Stitched Framelit.  On your card piece, cut off a section at the bottom.  This could be any amount you like to work with your card design.  I cut this one at about 3 1/2 cm.
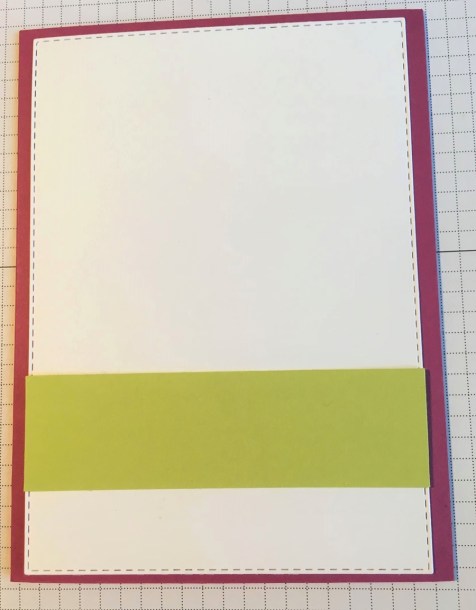
Once you have stamped your piece of card how you like, adhere that to the card base. Add a strip of card (or even wide ribbon) across the join of the card.  The card strip could be where you stamp your sentiment. Nobody would even know there is a gap there. 🙂
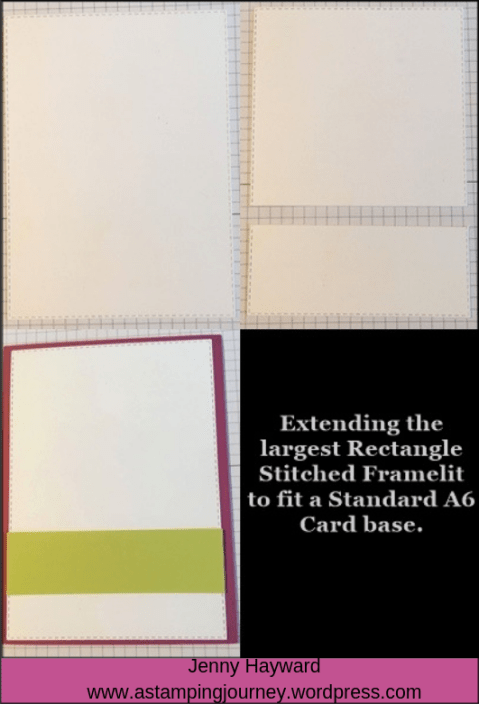
Here is a Pinterest graphic that you can PIN for your later use.
Thanks for stopping today.

Jenny

Catalogues, Stampin' Up!

PUNCHES AND RIBBON ON LOW INVENTORY!

URGENT NEWS!

Stampin’ Up! have just announced low inventory on some products and you need to know about them.  These products have exceeded expectations so supply is very, very low and will be out of stock in weeks.

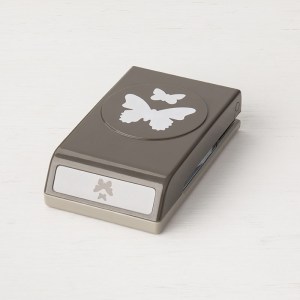
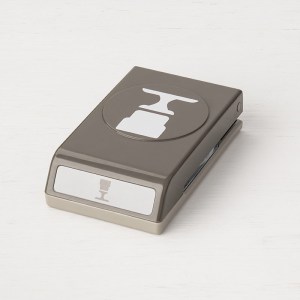
BUTTERFLY DUET PUNCH OR CAKE BUILDER PUNCH

Both these punches have been extremely popular.  There are only supplies for perhaps 2 weeks left.  More are on order but they may not arrive until March.  If you want them now – GRAB THEM NOW!! 

They come as a bundle with the co-ordinating stamp set or individually.

Orders to me directly or Online.  

Order the Butterfly Duet Punch -> HERE    Cake Builder Punch -> HERE.

Please use the Host Code: Q6XB6QR6

ORGANDY RIBBON COMBO PACK

The Sale-A-Bration Organdy Ribbon Combo Pack is in very low supplies.  Everyone loves this ribbon as their free choice.  Such gorgeous colours and such soft ribbon to tie with too.  Unfortunately when this supply is out it is done.  You need this ribbon. So you better get your order in and grab this as your free choice urgently.  This is a free choice with orders over $90.

Place your orders online -> HERE (Host code above) and then you can select your choice.

Thanks for your orders but I can’t stress enough how quick you need to be.  You can order wherever you are in Australia and it will be shipped directly to your door.

Thank You.

Jenny

3D projects, cards, Catalogues, Stampin' Up!

WELL WRITTEN FRAMELITS MAKES QUICK TAGS!

I needed to make some quick tags last week.  There was not a lot of time before I had to get them out in the post.  What to do??? …

I found the Well Written Framelits Dies that I had recently ordered.  Quick tags in minutes with these little beauties.

The white card measures approximately 5cm x 10.5cm (2″x 4″).  I punched the end with the Scallop Tag Topper Punch and added a small strip of the Gingham Gala paper stack.  Using the Framelits I cut the “hooray”in black and the little flower stem in Lemon Lime Twist and a flower in Calypso Coral.  Finished off with a little ribbon from the Organdy Ribbon Combo pack. Very quick and easy to put together.

The Well Written Framelits are very useful.  They are $70 AUS in store -> HERE.

You can use them on their own or team them with the Well Said stamp set as a bundle. $132.25 AUS Grab the bundle in store -> HERE. 

You can make these quick tags for any occasion.  Dress them up more if you like.

Thanks for stopping by,

Jenny

Catalogues, Stampin' Up!

WEDNESDAY’S WOW! #53 – RECTANGLE STITCHED FRAMELITS SIZES!

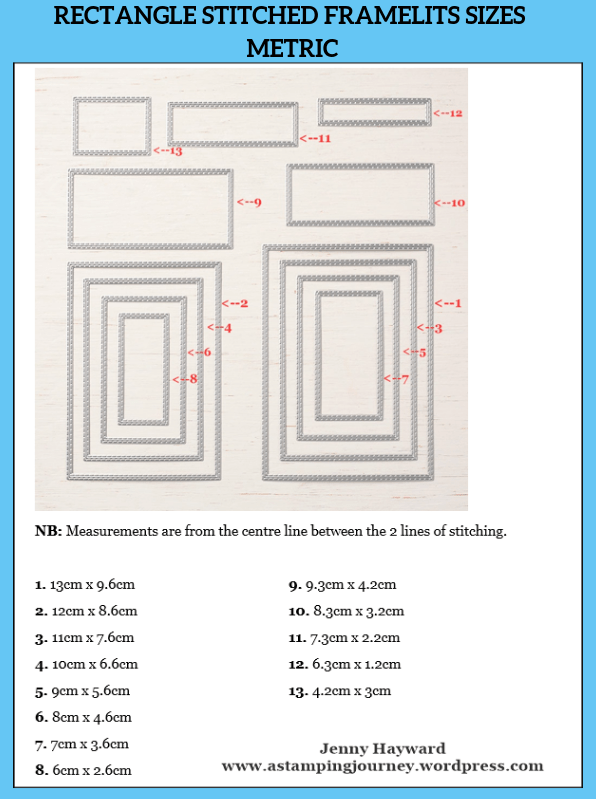
Wednesday’s WOW! #53 – Let’s talk about those cool Rectangle Stitched Framelits.  Have you seen them in the Catalogue? I LOVE them.

I have seen a few posts around with the Imperial measurements so I thought I would work out the Metric sizes for those of you who use metric measurements.  This might help you when you are choosing which Framelits to use and how they might layer together.

Here you go.  I hope it is a ready reference for you.

I have to say it’s a cool pattern with the measurements isn’t it?

I will talk more about ways to use them in later posts but for now I hope this is useful.

You NEED these Framelits in your collection.  I tell you they won’t leave your craft desk.  There are so many uses for them.

For now, grab them in my store -> HERE.  They are $61 Aus  Please use the Host Code: Q6XB6QR6

Thanks for stopping by,

Jenny

3D projects, Catalogues, Classes, Stampin' Up!, Tutorials

GINGHAM TEA BAG TREAT HOLDER!

I had my Summer Sizzler Catalogue Launch on this weekend for the Occasions and Sale-A-Bration Catalogue.  It was a fun time sharing lots of the gorgeous new products and samples with them.

I will share some of the cards I have made over the next couple of weeks.  Today I thought I would share with you the little Treat Holders I made for everyone who came to Thank them for coming.

These cute little Treat Holders are made using the new Gingham Gala Designer Series Paper stack.  The paper is 6″x6″ (15.2cmx15.2cm) and are just the right size for these.  I made them in some of the different colours.  I took a photo of 3 of the different colour ones.  I have also used the lovely Organdy Ribbon that is available as a free choice for Sale-A-Bration. I will tell you how to make them below.

To decorate the front of them I stamped one of the butterfly stamps from Butterfly Gala set using Black Memento ink and these were then coloured with the Stampin’ Blends.  Using the Butterfly punch makes life a lot easier.  No fussy cutting them. 🙂 The sentiment is from the Well Said stamp set.  I stamped the “THANKS” on to Whisper White and punched it out with the Classic Label Punch.  I then could trim off each end. I find this a much easier way of doing it.

To make the Treat Holders

1. Take your 15.2cm x15.2cm (6″x6″) piece of paper.  I have used the Gingham Gala Designer Series Paper stack.

Line the left hand edge of the paper on the 6.7cm (2 5/8″) mark on the Envelope Punch Board.

Punch the paper and score on the score grid of the Punch Board.

2. Turn the paper 90′.  Line up the little score tab on the previous score line.  Punch and score.

Turn the paper another 90′.  Line the tab mark on the score line, punch and score.  Turn again and repeat.

3. Round the corners using the corner rounder on the punch board.  Fold on the score lines. Decide which side you want showing on the outside, place that side facing down when folding.

NB: In the photo below I hadn’t turned it over at this point.

Fold up the bottom tab.  Place adhesive on the 2 outside edges of this tab. I used Snail adhesive.  Fold in one side tab and adhere down. Before folding in the other side tab place adhesive on the inside bottom edge of this tab.  Fold over and adhere down.

Decorate as you like. To add ribbon, punch a hole in the top tab and thread through your ribbon.

This is a great size for a Tea Bag packet, chocolate, Gift card or other treat.

Enjoy.

Jenny


Catalogues, Stampin' Up!

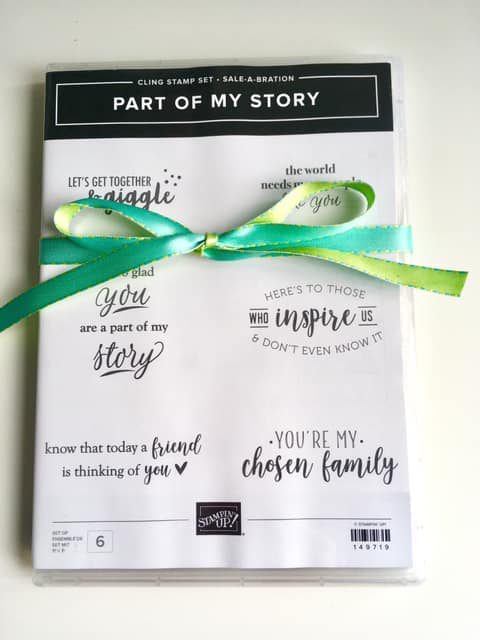
PART OF MY STORY GIVEAWAY!

With my Summer Sizzler Launch on this weekend I have a giveaway – that ends this Monday. 

Go in the draw to win this set “Part of My Story” with some Lovely Lipstick and Grapefruit Grove Foil Sheets.  Every order over $50 receives an entry in the draw. Order in store or by contacting me directly by 7pm Monday 21st.

See below HOW TO ORDER.

Don’t forget it’s Sale-A-Bration time.  With your Orders over $90 you can choose a select product for Free.  Everyone is loving these choices at the moment.

TO ORDER

You can view the PDF for the Occasions and Sale-A-Bration Catalogues online now -> HERE

Contact me or Order products in my store -> HERE  Please use the Host Code FYQHM4CK

Also, orders over $78 qualify for my Free 10 project Tutorial bundle.  I will email the PDF to you after you order.

Thanks for your order and choosing me to be your Stampin’ Up! Demonstrator.  Be sure not to mark your order anonymous so I can send out your Thank you card and small gift.

Jenny

cards, Catalogues, Stampin' Up!, Videos

WEDNESDAY’S WOW! #52 – LOVELY LATTICE 3 WAYS!

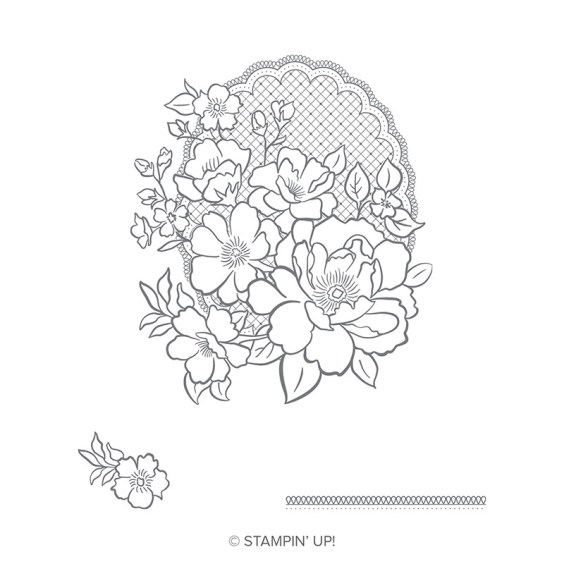
Wednesday’s WOW! #52.  Today I thought we would take a look at this gorgeous stamp, the Lovely Lattice.  This is a Sale-A-Bration choice.  It’s such a beautiful image and so nice to colour but also as I show, you can leave it white.  I know I am not great at colouring in so I like that idea.

Isn’t this pretty?  I have a video below so you can have a closer look.  And had you noticed the little scallop type line image.  I had completely missed this stamp and it would really add extra detail to your cards.  Don’t forget the little single flower image too.  See the video below.


Let’s have a closer look at the cards.

This one above is so pretty coloured with the Stampin’ Blends.  You don’t need too much more with it.  The sentiment is from Healing Hugs from the Annual Catalogue. And,look at the white card – Stitched Rectangle Dies. 🙂

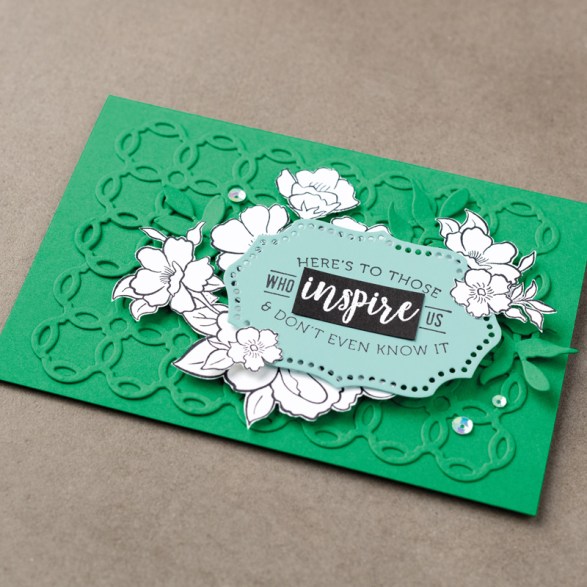
You know what I like about this card above?  I like that it isn’t coloured and looks so striking in white against the green.  On this one the flowers are fussy cut.  The diecut background and sentiment shape are from the Rose Trellis Thinlits Dies in the Occasions Catalogue.

This card above is so pretty coloured in Grapefruit Grove. See, the Scallop line stamp makes a nice background.  The sentiment is from the Well Written Framelits Dies and the Well Said stamp set.

The Lovely Lattice is a free choice for Sale-A-Bration with orders over $90.  This set could be yours. 🙂

Shop in my store now -> HERE.  It’s shipped directly to you anywhere in Australia. Once you have done your order select your Sale-A-Bration set.  These orders will also receive a Tutorial Bundle for 10 different projects FREE!

Please use the Host Code: FYQHM4CK

Thank you for your order.  Please be sure not to mark it anonymous as I can’t send your Thank You card to you.

Jenny


Catalogues, Classes, Stampin' Up!

SUMMER SIZZLER CATALOGUE LAUNCH!

It’s hot out there but there’s a cool new catalogue in town with the 2019 Occasions Catalogue and Sale-A-Bration to boot.

If you are a Wollongong local come along and check it all out.

WHEN: Friday 18th January 7pm and Saturday 19th 2pm.

COST: $10

RSVP: Wednesday 16th.  Be early to reserve your seat. Reply by Saturday 12th and receive a special gift.

Drop me a comment or Email me at jghayward@yahoo.com

Catalogues, Stampin' Up!

WEDNESDAY’S WOW! #51 – TIPS USING THE CLING STAMPS!

Wednesday’s WOW! are back for 2019.  Today we have episode #51.  You might know by now that Cling Stamps have arrived to Stampin’ Up!.  Cling Stamps are super sticky so they don’t fall off. YAY! Because they are super sticky though there are a few tips you might want to know about using them.  I put together a video for you to let you know about them.  Check it below.

I hope the video helps you with them.  Just be sure to ‘gently’ peel them off the block, but isn’t it nice that you can have confidence that they will stay on.

Thanks for visiting.

Jenny


cards, Catalogues, Stampin' Up!, Uncategorized

HELLO CUPCAKE CASE!

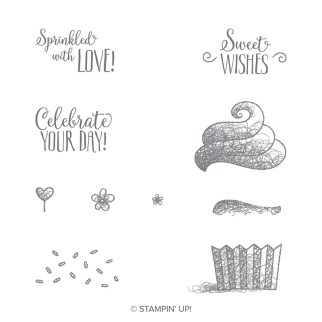
I have been having a little fun with cupcakes lately.  Hello Cupcake from the Sale-A-Bration Catalogue actually.  So I thought I would start to share some projects for you.

If you are not sure where to start with a stamp set, why not CASE (Copy And Share Everything).  The Stampin’ Up! Catalogues are great for inspiration.

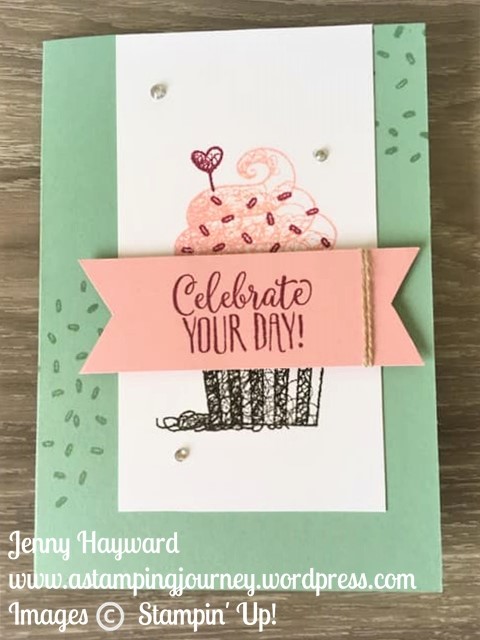
This card is a CASE from p6 of the Sale-A-Bration catalogue.

Base card is Mint Macaron stamped with some sprinkles in Mint Macaron. The Blushing Bride strip is 9cm x 3cm (approximately 3 1/2″x 1 1/4″). On the white card (which is 7.5cm x 12.8cm – Approximately 3″ x 5″), I stamped the cupcake base in Early Espresso.

I positioned the Blushing Bride card strip temporarily above the cupcake base before stamping the Cupcake top.  Then I could stamp the cupcake top in the right place.  I just slid the strip away slightly to stamp. The Cupcake top is stamped in Blushing Bride and the Sprinkles in Berry Burst.  Some Linen Thread was wrapped twice around the strip.  I find it helpful to add a little Snail Adhesive on the back of the strip to hold the Thread in place to wrap it around.

Some more Cupcakes are on their way.

You can pick up your free Hello Cupcake set with your orders over $90 AUS during Sale-A-Bration.  If you are in Australia, Stop by my store to order -> HERE.  Please use the HOST CODE: FYQHM4CK

Thanks for visiting,

Jenny