cards, Catalogues

ANIMAL OUTING “SELFIE” CARDS!

With a new catalogue very soon I don’t often like to share projects with new products quite yet.  You know, there are still so many lovely products that we have in our current catalogue to use.  BUT, well I had to make this card – and share it with you right now.  It’s just such a cute set I couldn’t help myself.

This new set is the Animal Outing set.  So darn cute! And it is nice to see some Aussie animals.  So these animals had to take a selfie. 🙂
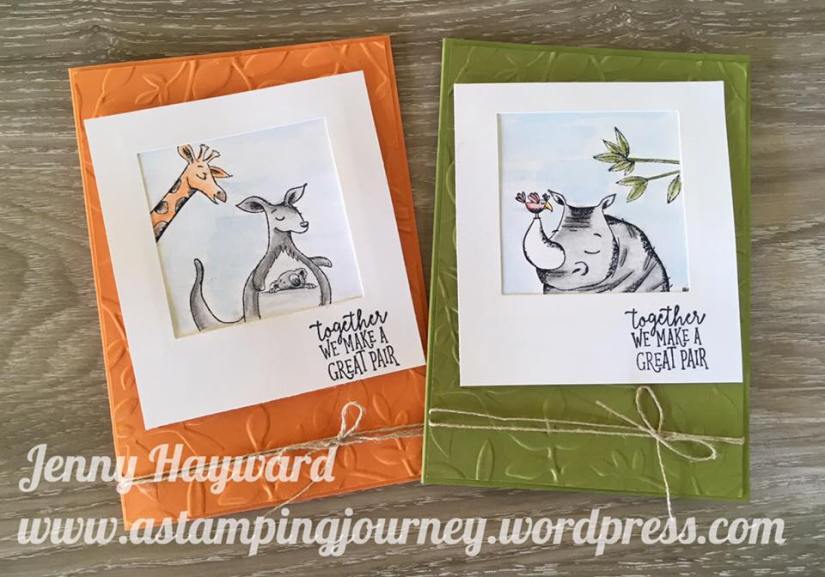
I stamped out the images and then coloured them with the Watercolor Pencils.  For the sky (which I think could have been a little darker on looking at it now),  I lightly brushed over a clear block with the Aquapainter to wet it, then coloured on the block with the Pacific Point pencil.  Then picked up the colour with the Aquapainter and washed over the background. I have to say these were the second images I coloured.  For the first ones I coloured the images then the background with the Pacific Point pencil and lightly and washed over it. I wasn’t happy with how streaky it looked.  So I redid the whole image. For the second time I coloured the sky first before the animals so I didn’t waste all that time … 🙂

Just a tip too when colouring:  Lightly colour your images first with your chosen colour and lightly brush over with the Aquapainter.  Leave it to dry and then go over parts of the image with the pencil adding highlights.  It is much more effective.   Also, Shimmery White card is the best for watercolouring I think.  Watercolor Paper can be used but it is a lot more textured.

From another piece of card (9cm x 10cm) I cut a square from the centre using I think the 3rd largest square Framelits from the Layering Squares Framelits.  I adhered the coloured piece behind it.  On a card mat ( I used Pumpkin Pie on one and Old Olive on the other) I embossed those pieces with the Layering Leaves Embossing Folder.  Tie around some Linen Thread and adhere this to your card base.

OK,  I will get back to some of the awesome current products we have – and they are retiring very soon.

Hope your weekend is going great and you are having time to create.

Jenny

cards, Catalogues, Onstage, Stampin' Up!

STAMPIN’ UP! ONSTAGE SYDNEY!

As you might have heard, the Stampin’ Up! Onstage event was last weekend and I went to Onstage in Sydney. For my interstate and overseas visitors I thought I should first show you the fantastic location that our event was held at.  We have such a beautiful harbour and it was such a lovely Autumn day (well you could have thought it was Summer!).

Under the iconic Sydney Harbour Bridge with the Opera House.  Just happened to catch a ferry in the photo too. 🙂

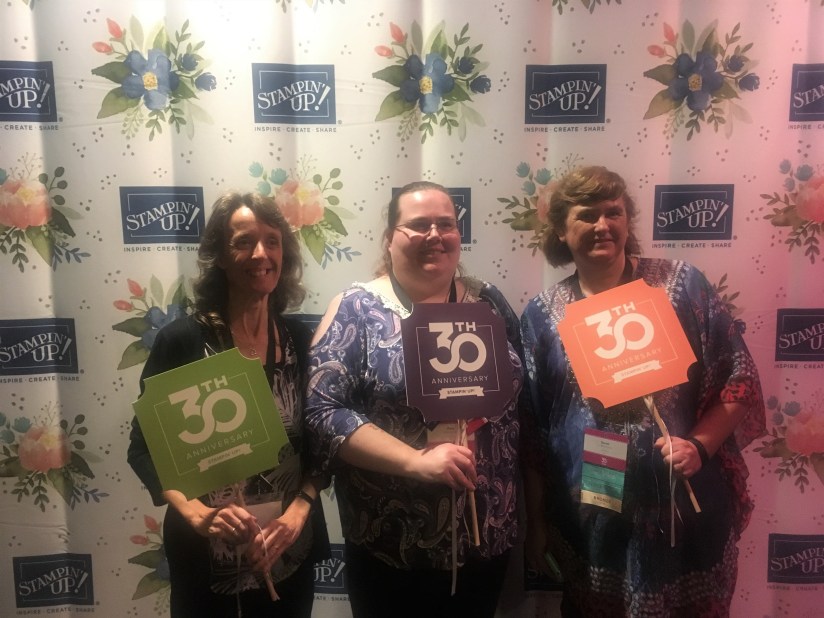
This year Stampin’ Up! celebrate their 30th Anniversary.  Of course with a birthday there must be cupcakes. Yummy!

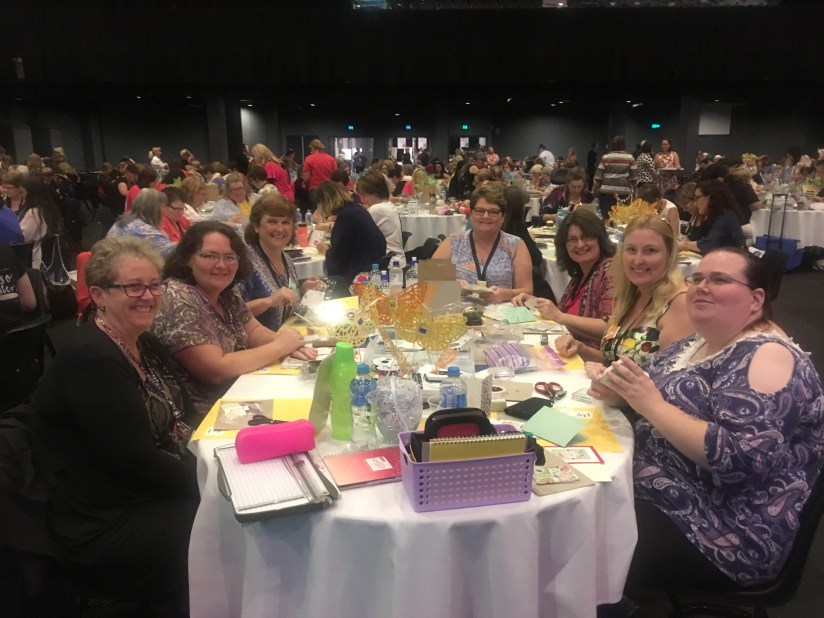
There was some creating  at the event of course.  This was our table.

It was great to have 2 of my JEN’s INK team members at Sydney with me.  I hope more can come next time.

We had Sara (CEO of Stampin’ Up!) with us in Sydney which was lovely and there were a number of fantastic presenters.  (I wish I was that clever!).  Lots of new ideas to think on.

Throughout the day there were a number of Video recordings shown.  This one with Sara and her mum Shelli was quite entertaining as they showed a number of projects with new products.  With the lighting it was hard to catch good photos of the projects they made.  (sorry about that.  Maybe it had something to do with a new phone too. 😉 )

I showed you my swap card using the Petal Palette bundle in the previous post. This is it below if you missed it.  I have just managed to take photos of all the swaps I received in return.  I will sort them and show you them in a later post.

I will show you this though. I call them my Onstage Survival Kits. They had a teabag, chocolate and post-it notes. It had a little tag using the Petal Palette set. These were for a few of my stamping buddies.

I will be back again soon so stop by and visit.  If you went to Onstage drop me a comment and tell me which one you went to.

Jenny

cards, Catalogues, Onstage, Stampin' Up!, swaps, Techniques, Tutorials

WEDNESDAY’S WOW! #21- BABY WIPE PETAL PALETTE SWAP CARD FOR ONSTAGE!

I will tell you more about Onstage shortly but I thought since it is Wednesday.  It is time for Wednesday’s WOW! #21.

This card was my swap for Onstage in Sydney.  I thought I would share this with you today and show you how I created it.

This is made with the Baby Wipe Technique.  I had wanted to try this technique for some time and was reminded about it recently.

Here is how to create your own.

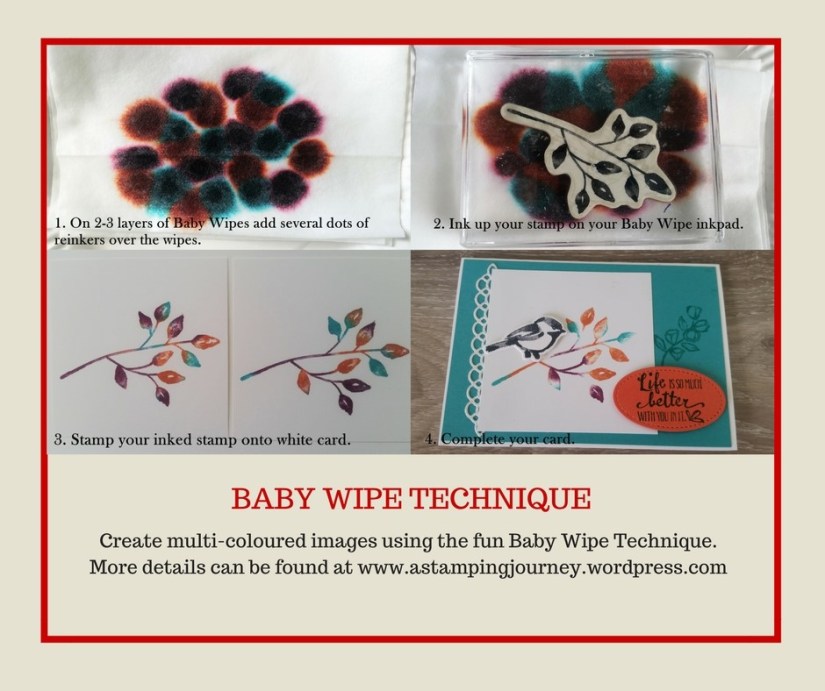
Below is a graphic for you to PIN but below is more details on how to do it.

1. Fold 2-3 Baby Wipes in half and lay them on a plate.  A smooth plastic plate is best.  I ended up using a couple of paper plates together as that is all I had suitable.  Be sure to have a couple though as the ink leaks through.  The paper plates are ok for a small number of inkings.  Add dots of your first colour of reinker over different spots on the wipes.  Then add your 2nd colour and lastly your 3rd colour.  I think 3 colours are enough.  The colours I used are Bermuda Bay, Tangerine Tango and Rich Razzleberry.

2. Ink up your stamp as you would normally on an inkpad.

3. Stamp your inked stamp onto your card.  If you are stamping multiple of images then clean your stamp and ink your stamp again between each one. Your Baby Wipe Inkpad should last quite a number of stampings.  I think I got 15-20 from the one inked wipe.

4. Complete your card as you like.

To finish my card.

Adhere the Bermuda Bay card mat to a Thick Whisper White card base. Cut the circular Border Thinlit from the Petals and More Thinlits from Dazzling Diamonds Glimmer Paper and adhere down the left hand side of the Bermuda Bay Card.  Adhere your stamped white card you had created with the Baby Wipe Technique on to the card.  On the right hand side stamp the flower image from the Petal Palette set in Bermuda Bay ink.  

Stamp the bird in black on scrap white card and cut it out with the matching Framelit from the set.  Stamp the sentiment on to Tangerine Tango card and cut with the Oval from the Stitched Shapes Framelits.   Raise both the bird and the sentiment off the card with Dimensionals.

—

Have you tried the Baby Wipe Technique before?? I am keen to try it again.  Each time you stamp it works out differently so give it a go if you haven’t.

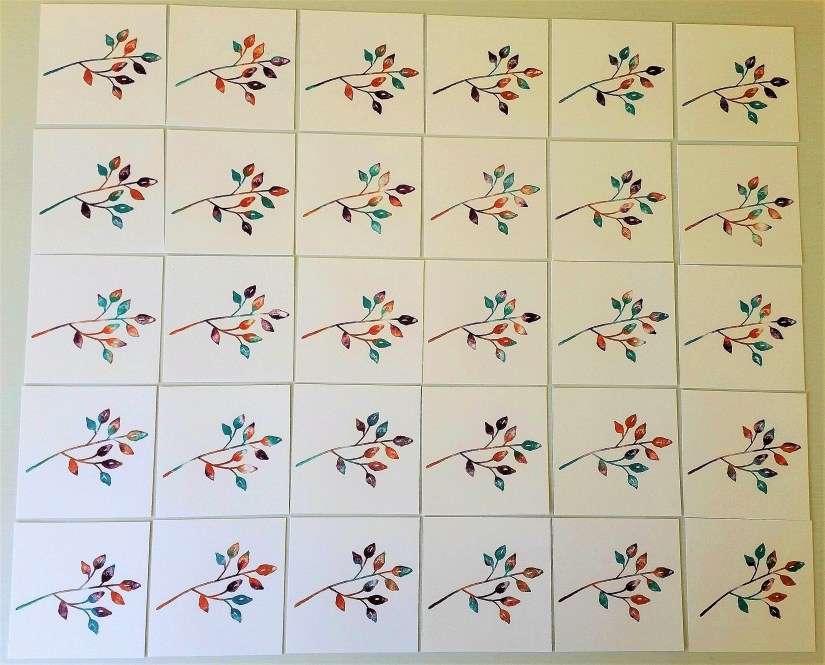
Just to show you how different they can be.  Here is all the stamped pieces when they were done.  I inked the leaf in different positions on the wipe at times to get the variations.

(Not the best lighting but it might show you). 🙂

Have a great day,

Jenny

cards, Catalogues, Stampin' Up!

THE STAMPIN’ UP! RETIRED LIST IS OUT TODAY! WHAT WILL BE LEAVING US??

In one way today is a sad day.  We say Good-Bye to some much loved products.  BUT this is just to freshen things up and make room for some gorgeous new products.

All the items are listed below.  NOW PLEASE, if you like any of these don’t sit and think about it.  They won’t hang around so you need to grab them NOW!

View the Retired List for the Annual Catalogue -> AC Retired List-SP

View the Retired List for the Occasions Catalogue -> OCC Retired List-SP

You can order online -> HERE. (Australian Residents only) **Please use the HOST CODE: 2W62VU32   

OR

Contact me Directly to order.       

NB: You will note all the inkpads listed.  The Inkpads have been redesigned which is why they are listed.  

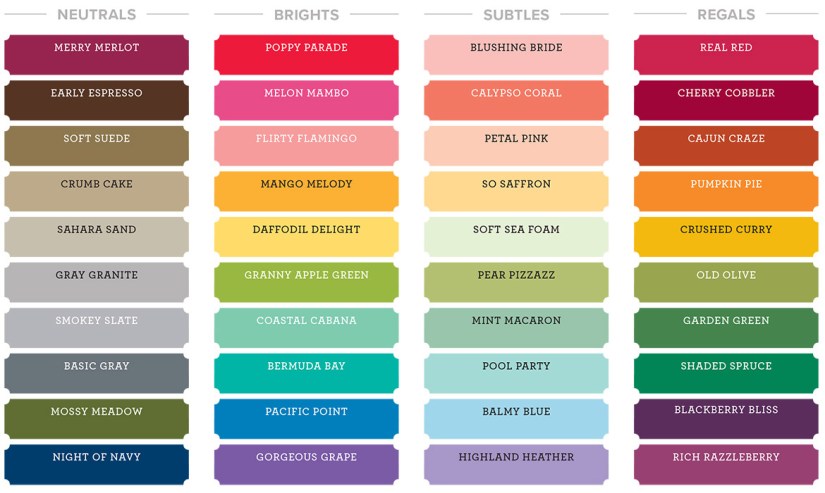
There are some colours though that will be retiring in the Colour Revamp.  This is to freshen the colour collections.  I will bring more information about the Colour Revamp shortly but for now.  Let’s see the new Colour Collections.  These don’t include the Incolors.  

Aren’t they  nice??

For now though go and check the retired list.  They are only While Stocks Last. Hurry! 🙂


cards, Catalogues, Stampin' Up!

RAZZLEBERRY PETAL PALETTE!

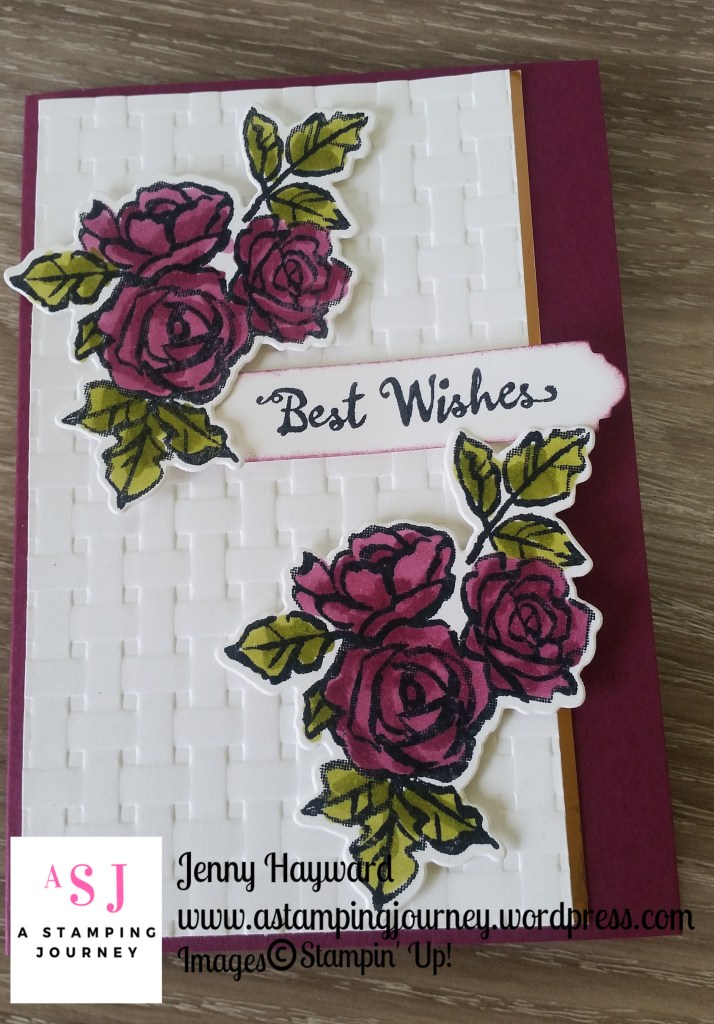
I have only recently got the Petal Palette stamps and the Petals and More Thinlits.  I have had time to play with them this past week.  I thought I would start showing you some of the cards I have made.

This card today is actually the last card I made.  I loved it so much I couldn’t wait to show you. 🙂

I stamped the flowers with Memento then coloured them with the Rich Razzleberry and the Old Olive Stampin’  Blends.  I cut them with the matching dies.  (no fussy cutting required!!!).  I had planned to use them on a card I saw but was running out of time that day.  In the night I was thinking about the card.  You do that don’t you. 😉  This card came to me so I made it the next day as soon as I had time.

The White card is embossed with the Basket Weave Embossing Folder. While that was available during Sale-A-Bration it will be in the next catalogue.  Under the White card I added a strip of the Copper Foil sheet and adhered them straight to the Rich Razzleberry Card base.  The sentiment was stamped and cut with the matching die in the Thinlits set and sponged lightly with ink around the edge.  I played around with the positioning of the flowers and sentiment.  I think that took the longest!!  Once I worked out something I was happy with I raised up the flowers with Dimensionals as well as the sentiment.

I hope you like it.

I will be back soon with some more cards with this bundle.  I must say it is a gorgeous one and I am glad I have finally got to play with it.

Jenny

cards, Catalogues, Tutorials

WEDNESDAY’S WOW! #20 – USING A SKETCH!

Do you get stuck making a card thinking how will I put this card together?  Well today I thought I might give you a few tips for Wednesday’s WOW! #20.  

When I get stuck creating a card firstly I have a look through my stamps to find one I might want to stamp with.  With a new catalogue and new products that’s often easy.  Once I choose the stamp set I then turn to card sketches to help me.  I think it’s hard when you just look at blank card and have no idea what to do with it.  Today I thought I would go through a few previous cards I have made and go through the card sketches.  Full details can be found on the blog post which I will add the link.

BUT WHICH CARD SKETCH?

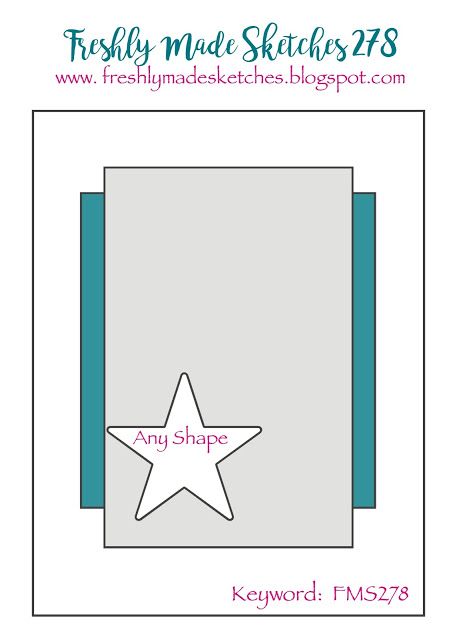
I get a few emails from different Sketch blogs.  My favourite is Freshly Made Sketches but I also follow Clean and Simple Stamping.

I also have a board on Pinterest which I pin Card Sketches too that I come across and the design I like.  You can check out that board HERE.  Follow along if you like to.

I will talk you through a few sketches and how the card resulted.

BRIGHTLY LIT

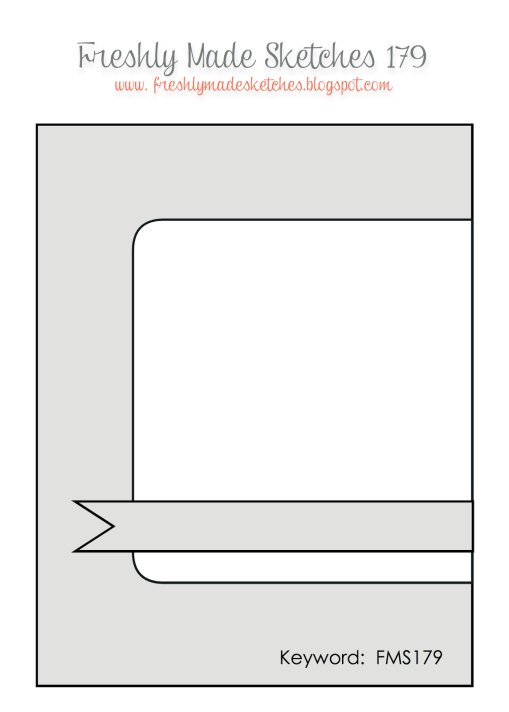
This was a new set at the time and as I was not sure what to do with it so I looked up a few sketches.

When choosing a sketch I look at the stamps in the set and then look at some sketches to see if some of the images in the set would work with the elements in the sketch.

The layer underneath could be paper or card.  I chose paper for mine.

The rectangle shape is where you can stamp your images in the space.

The Star shape can be any shape.  The thing with sketches is that it doesn’t have to be the exact shape or even the same position.  I slid it across and used it for the sentiment.

You can see the post for this card -> HERE.


SITTING HERE

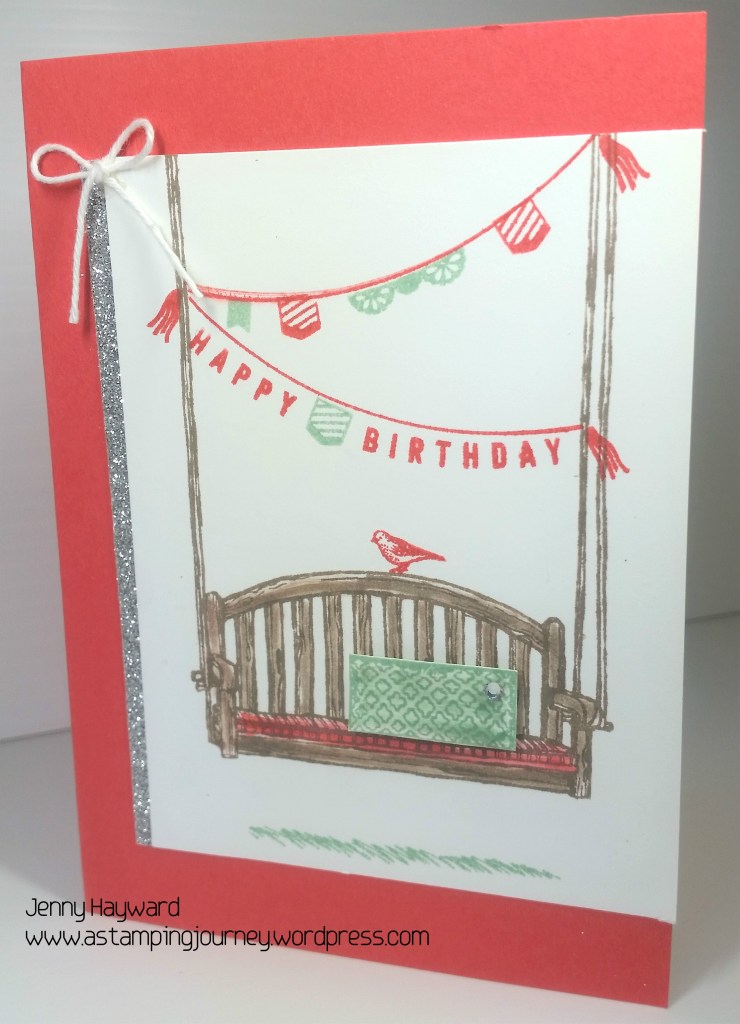
I loosely based this card on the above sketch.  The sentiment banner I slid to the top and stamped the sentiment directly on the card.  I added a few elements to this card that wasn’t on the sketch like the Glimmer paper strip and the bow.

You can see the full post for this card -> HERE.

A COLOURED BUTTERFLY

I like simple style sketches.  This was an easy sketch to follow and I think is a little different by having your stamped piece off-set on  your card.  For this I used some Designer Series Paper.  Once again the star shape can be any shape.  I had been playing with colouring this butterfly so this worked here.  I added an additional card mat being the Gold Foil to lift the paper.  The sentiment could be stamped directly on the piece but I stamped it separately and raised it off the card.

You can see the full post -> HERE.

SUNBURST

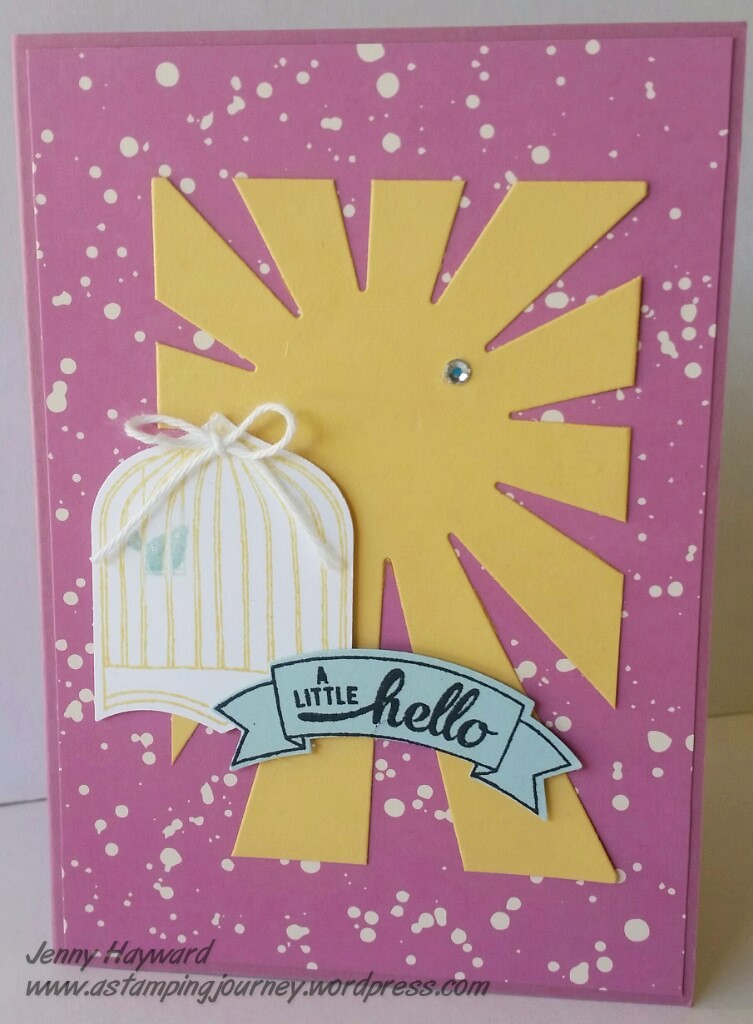
This card I particularly wanted to show you that elements on the sketch can take any shape.  Don’t be scared to change the shape or even move elements.  The sketches are spring-boards to ideas to start your card.

For this card the larger square was a piece of Designer Series Paper. It could be card though.  For the tag shape I created a trimmed down starburst using the Starburst Thinlits.  I slid down the extra elements a little lower to make them fit better.

You can see the full card post -> HERE.

CAROUSEL BIRTHDAY

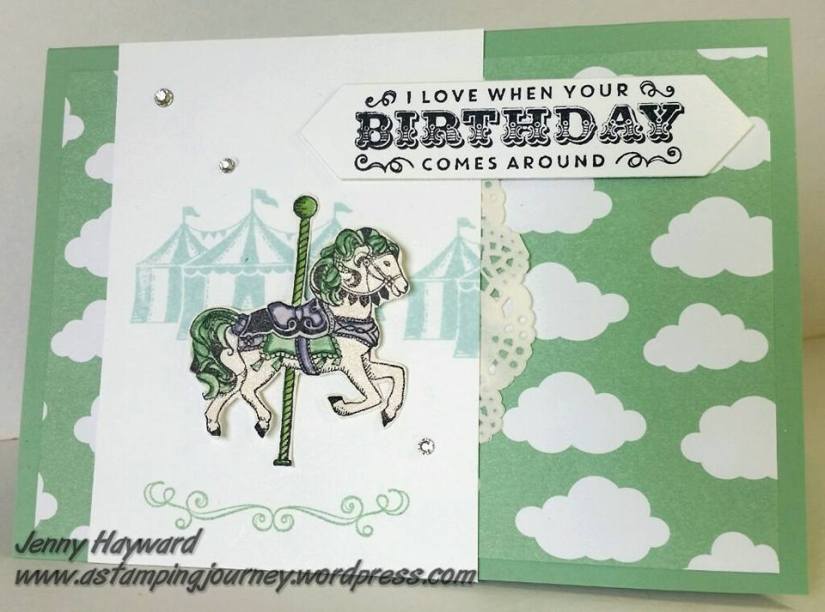
A different sketch blog site other than Freshly Made Sketches is this one, http://www.ilovecardsketches.com.  This site is not available any more but I had the sketch on my Pinterest board to use. The sketch has several layers which I used with Designer Series Paper with the larger rectangle.  The vertical strip worked for the stamped image in this case.  The sentiment banner was placed up in the top right.  If you were to use this sketch then you might want to slide a few of these elements around and that works too.  It’s about playing around with them.

You can see the full post -> HERE.

———–

Is this helpful to you??  I hope so.  Why not drop a comment to let me know or you can click “like post” which is at the end of the post.  

If you want to see more sketches and cards then click on the tag at the bottom for card sketches or sketch challenges and it will take you to other posts.

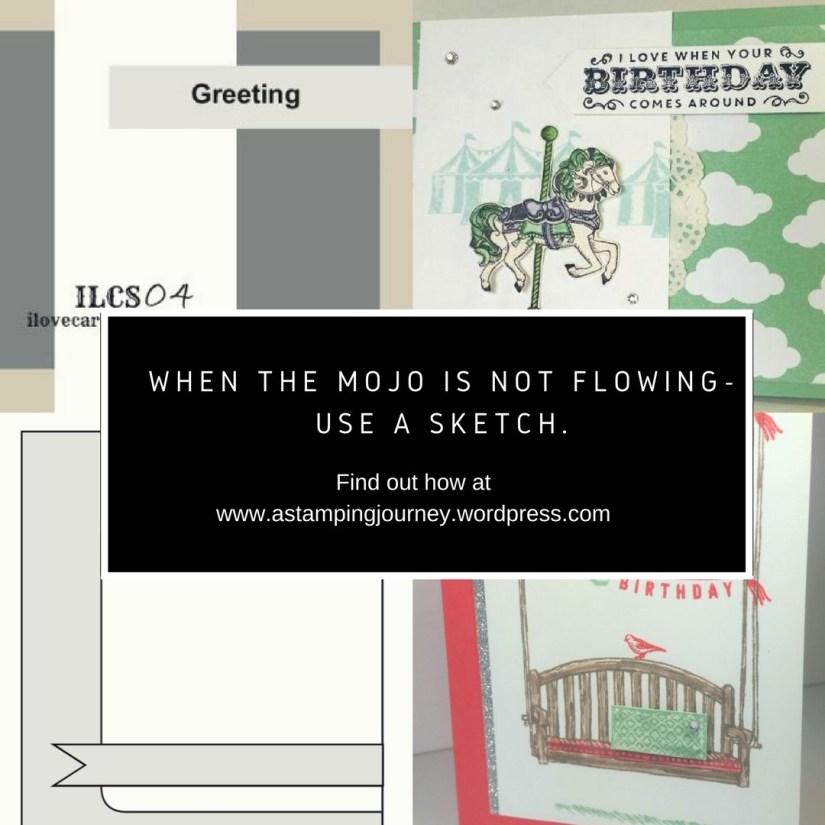
Thanks for getting through all this. I know there was a lot of information but hope it was helpful.  To come back to this post you can PIN the image at the top.

Have a great day,

Jenny

cards, Catalogues, Personal Ramblings

FLORAL THINLITS ENGAGEMENT CARD!

It’s been a busy few months with Sale-A-Bration.  First of all,  Thank you to all my customers for your support and patronage AND to the wonderful new people who have joined my team.  I had 4 new people join the JEN’s INK team over Sale-A-Bration. They know a bargain when they see one.  Welcome to them all.  I love my team whether they are hobby demos loving the discount or striving to build up their business.  BUT, Thank you to you all for visiting my blog.  I would love to talk to you in person and love to say Hello.  I love talking to people about cardmaking and sharing ideas.  It’s always so exciting.  We can all learn from each other.  Thanks for stopping by in your busy day. Don’t be scared to leave a comment now and then. 🙂

Now we move on from Sale-A-Bration and from Easter.  This past week I have been making my swaps for Onstage this coming weekend.  This is such a fun event for Demonstrators held in locations all over the world.  It’s too early for sharing my swaps yet but stay tuned in the next week and I can share them.

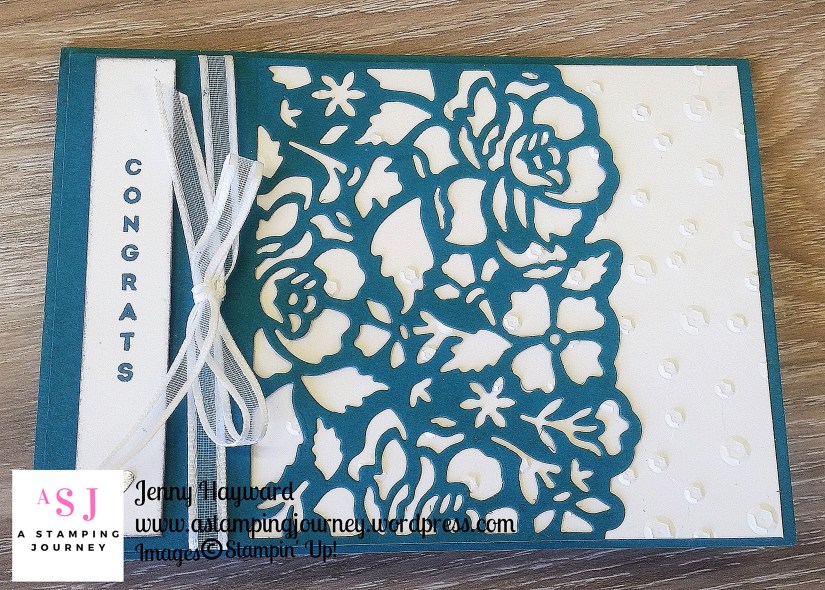
Today’s card I realised I hadn’t shared with you yet.  I made this for my niece who recently got engaged in January.  When I went to check on the photo to share with you today I realised it’s not the best photo.  BUT I have already sent it so I hope it gives you an idea.  This is with her favourite Stampin’  Up! colour Island Indigo.

A Whisper White card mat is embossed with the Scattered Sequins Embossing Folder.  A piece of Island Indigo was cut with the Detailed Floral Thinlits and adhered directly to the white card.  I left a section on the left of the Island Indigo card to allow for the sentiment and the ribbon. The sentiment is from Vertical Greetings which fitted well in the space.  I thought I had added some Rhinestones or Pearls to the sentiment but obviously after the photo was taken. 😉 Some of that gorgeous White Organza Ribbon was wrapped around the card mat before adhering to the Island Indigo base.  It was a very quick card and time was limited but I can report she LOVED it.  So that’s all that matters.

Thanks for stopping by today.  I will be back with more creating very soon,

Jenny  

3D projects, cards, Catalogues

EASTER BASKET AND SLIDER BOX!

With all the excitement of Sale-A-Bration ending I forgot to share these cute treat holders for Easter.  It might be a bit late for this year but maybe you could use these for another occasion or file it away for Easter next year.

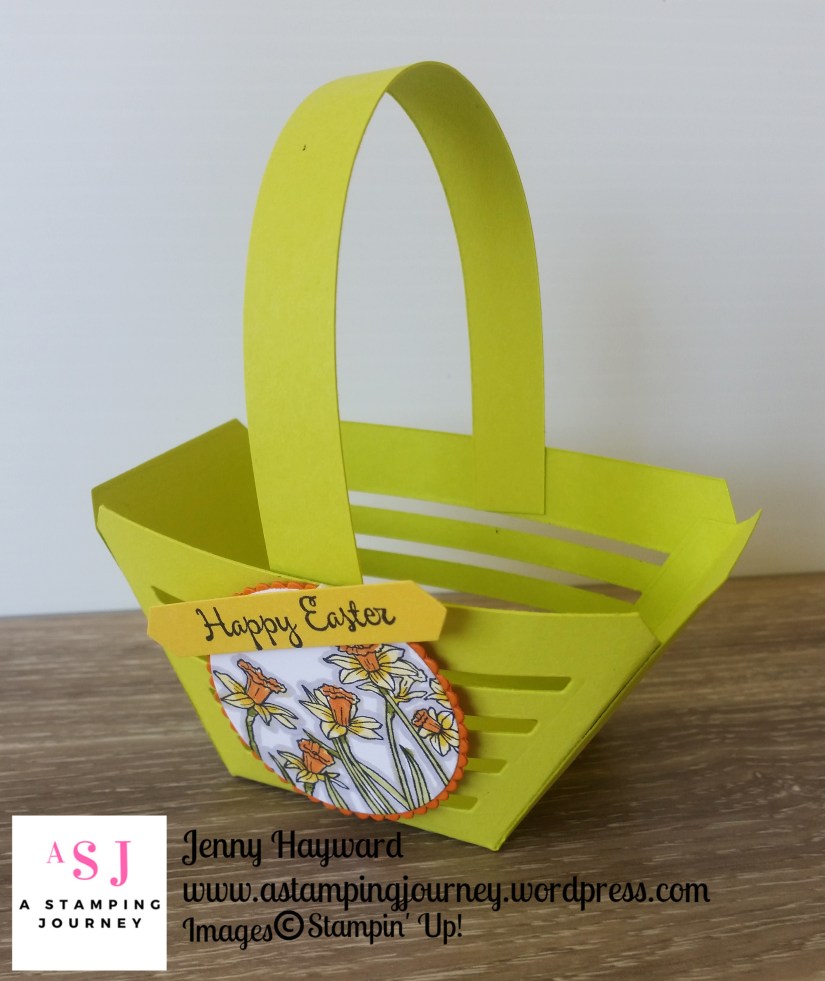
I was looking at Easter treat holders a few weeks ago. I came across THIS cute basket created with the Window Box Thinlits.  I thought I would create one in the funky Lemon Lime Twist colour. What do you think?  I probably should have added some eggs but … you get the idea anyway.

The sweet Daffodil flowers are from the You’re Inspired set and coloured with the Stampin’ Blends.  To make your own mini basket head to the link just above.

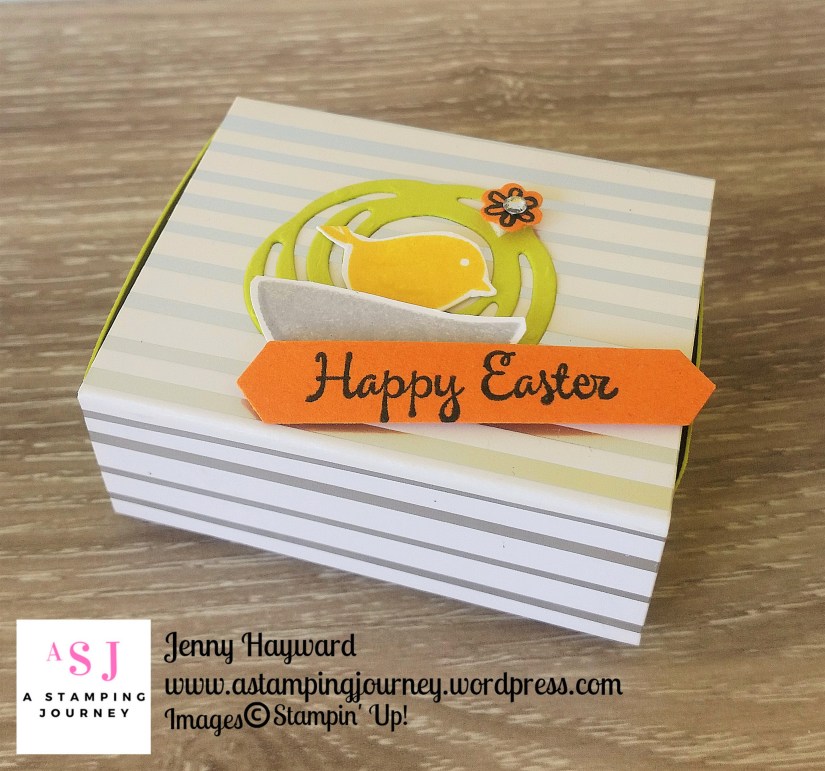
The next little treat holder is a Slider box.  We made a version in class last week.

I don’t have a lot of Easter sets but I thought the stamps from Swirly Bird set would make a cute Easter decoration on it and I added a swirly diecut from the Swirly Scribbles Thinlits. The sentiment is from You’re Inspired.  It is a cute little box that would fit 5 small chocolate eggs in it or another type of small chocolate.  The wrap around is using the Springtime Foils Specialty Designer Series Paper. 

This is the version we made in class.

You can find out how to create your own Slider Box -> HERE.

Have a Happy Easter to you all and God Bless,

Jenny xx


Catalogues, Sale-A-Bration, Stampin' Up!

SALE-A-BRATION ENDS TOMORROW!

IT’S DOWN TO THE LAST DAYS FOR SALE-A-BRATION!

The time when you get free products whether you shop or join is running out. If you want any of these FREE products then grab them NOW! There are some beautiful and fun free choices.

See all the Sale-A-Bration items -> HERE.  Recently added is some select current catalogue products you see below that you can choose for your free items.

HOW DO YOU GET THEM FOR FREE??

With orders over $90 (or $180) you choose one item for Free.   That easy – really!  AND this week it’s double loyalty points**.  

**If you recall my VIS loyalty card.  For every $50 order you receive a little punch out on a card I keep.  When you collect 10 you get free products up to $24.95.  So this week you will get 2 punch outs for every $50 order meaning you will get more free products earlier.

See further below how to order.


BUT $240 OF FREE PRODUCTS WHEN YOU JOIN???

During Sale-A-Bration you will get extra free products when you join the Stampin’ Up! Family. It’s great being with this fun company and getting a discount every time you order. Not to mention all the other perks.

** Order $235 products -> Pay $169.  Pay No Shipping.   PLUS for Sale-A-Bration choose 2 extra stamp sets for Free up to $174.
TOTAL FREE PRODUCTS = $240.

Come and join me on my JEN’s INK team whether you just want the free stuff, you want the discount each time or you want to share stamping with others.  Either way it’s a WIN! 

Want to know more?  Head to my Blog -> HERE to see 10 reasons Why you need to be part of the Stampin’ Up! family.

Join -> HERE online straight away once you have your joining order together.
—————

HOW TO ORDER 

Grab one (or more) of these Free Sale-A-Bration products? (and get double loyalty points).   **ORDERS MUST BE IN BY 8PM SATURDAY 31st.

Order in my store – HERE.  This week’s Host Code: FSX2YS39

OR

Order by emailing me directly. 

Thanks in advance for  your orders.

Jenny


cards, Catalogues, Sale-A-Bration

LOTS OF LAVENDER WISTERIA!

The end of Sale-A-Bration is close now.  Today’s Sale-A-Bration Share is using the Lots of Lavender set.  You know what I like about this set?  You don’t have to colour it if you don’t want to.  It’s a 2-step stamp set.  There is the outline images and then the “fill-in” stamps you can stamp over with.  Of course you can do some gorgeous Lavender cards.  This one is a little different.  Try some Wisteria hanging from a vine.  My card was inspired by one by LeAnn Greff you can see HERE.

Wisteria Wonder is a colour I haven’t used in ages.  I thought it would work well on this.  I stamped the Lavender a few times hanging from the top and by turning the stamp a few times I stamped just some leaves in between.  Then used the Wisteria Wonder ink to fill in the flowers and then Pear Pizzazz for the leaves.

The sentiment is from the Amazing You set also from Sale-A-Bration.  

To finish wrap around some Thick black Baker’s Twine, adhere the piece to a black card mat and adhere them to a Wisteria Wonder card base.

Thanks for stopping by,

Jenny

2 Days left of Sale-A-Bration.  Have you got your free stamps you wanted??  Be sure to get them. 🙂